If you have ever looked at a beaded wedding gown and thought, “Wow, that dress is shimmering like it pays its own taxes,” you are not alone. Beading can turn a beautiful bridal gown into a showstopper. It can add texture, light, movement, and that unmistakable couture feeling that makes people squint politely and say, “Is that custom?”
The good news is that learning how to bead a wedding dress is absolutely possible for a patient sewist. The less-good news is that this is not a five-minute craft sandwiched between laundry and leftovers. Beading takes planning, testing, and the willingness to stitch the same tiny motion enough times to question your life choices. Still, the results can be spectacular.
Whether you are embellishing a plain bridal gown, adding sparkle to sleeves or a bodice, upgrading an heirloom dress, or creating custom details for a gown you made yourself, this guide walks you through the process step by step. We will cover tools, fabric considerations, bead placement, stitching methods, and the common mistakes that make a wedding dress look more “DIY emergency” than “bridal masterpiece.”
Why Beading Works So Well on a Wedding Dress
A wedding dress already has drama built in. Satin glows. Tulle floats. Lace adds texture. Beads take all of that and turn up the volume. They catch light in photos, emphasize design lines, and help the eye travel to the neckline, waist, sleeves, back, or train. In other words, beading is not just decoration. It is visual strategy wearing a veil.
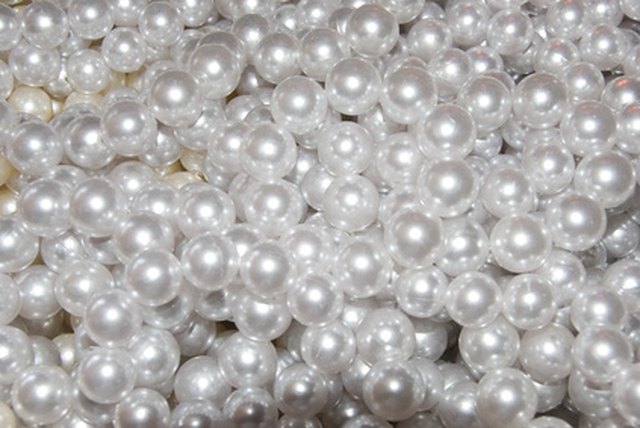
Done well, beadwork can make a simple gown feel luxurious or make a detailed gown feel even more intentional. Pearls create softness and a classic finish. Seed beads can outline lace and embroidery. Bugle beads add shimmer and direction. Sequins bring shine. A few scattered crystals can make a dress sparkle without turning the bride into a disco ball in ivory.
Before You Start: Decide What Kind of Beading Project This Is
Not all bridal beading projects are the same. Before you thread a single needle, identify which category your project falls into:
1. Adding beads to a plain wedding dress
This is often the easiest route because you can control the design from the start. A clean satin or crepe gown can handle beaded straps, a neckline border, a waistband, or a lightly embellished bodice.
2. Enhancing an already embellished gown
This requires more restraint. You are not reinventing the dress; you are extending or refining what is already there. Match the existing bead color, size, finish, and spacing as closely as possible, or the new work will stand out in all the wrong ways.
3. Beading lace, tulle, or illusion areas
This is gorgeous but trickier. Delicate fabrics can stretch, snag, or pucker if you do not stabilize them first. The beads should look like they belong on the fabric, not like they are staging a hostile takeover.
4. Creating detachable beaded appliqués
If you are nervous about stitching directly onto the gown, this is a smart option. You can build motifs separately, then hand-sew them onto the dress after they are complete. It is basically the bridal version of editing before you hit publish.
Best Fabrics and Areas for Beading
Some parts of a wedding dress welcome beads with open arms. Others tolerate them like an annoyed cat.
Good candidates for beadwork include bodices, waistlines, cuffs, straps, illusion backs, upper sleeves, lace overlays, and trains with enough structure to support extra weight. Areas that need caution include very soft chiffon, ultra-stretchy panels, and sections that must remain fluid and weightless.
If your dress is made from satin, lace, organza, tulle, crepe, or a layered bridal fabric, you can usually bead it successfully with the right stabilizing method. The key is to match the weight and amount of embellishment to the fabric. Tiny beads on delicate tulle can look dreamy. Heavy all-over beading on whisper-thin fabric can look dreamy for about six minutes, then start sagging.
Supplies You Need to Bead a Wedding Dress
- Fine beading needles
- Strong thread in a matching or invisible shade
- Seed beads, pearls, crystals, bugle beads, or sequins
- Small embroidery scissors
- Fabric marker or water-soluble marking tool
- Stabilizer, interfacing, or a suitable backing for delicate areas
- Embroidery hoop or frame for some sections, especially tulle or net
- Tweezers, bead tray, and patience in industrial quantities
Small seed beads are usually the easiest place to start because they are light, versatile, and easier to control than chunky embellishments. Pearls are ideal for classic bridal looks. Sequins and crystals work well when you want more flash. A fine beading needle matters because it passes through tiny bead holes more easily and helps keep the fabric from getting roughed up.
Plan the Design Before You Sew
This is the step people skip right before they wonder why their bodice looks mysteriously uneven.
Start by deciding where the eye should go. Do you want the dress to sparkle most at the neckline? Should the waistline feel defined? Do you want beaded motifs to trail down the skirt or concentrate at the cuffs and back buttons? Choose one or two focal zones rather than trying to bead every square inch.
Next, sketch the design or pin reference points directly on the dress form. You can also trace or transfer your pattern using a light source and a fabric-safe marking tool. If the fabric is sheer, a water-soluble stabilizer or transfer method can help you place the design accurately without guessing.
Most important of all, make a sample. Use the same fabric or a close scrap, test your thread and bead choice, and stitch a few inches of the exact design. This tells you whether the beads are too heavy, the spacing is too tight, the thread shows, or the fabric puckers. Swatching may not be glamorous, but neither is removing 200 tiny pearls at midnight.
How to Bead a Wedding Dress Step by Step
Step 1: Prep the dress
Steam or press the gown properly first so you are working on a smooth surface. Lay it on a large clean sheet, towel, or padded worktable. This protects the fabric and catches runaway beads. If you are working on a constructed gown, support the section you are beading so the weight of the rest of the dress does not distort it while you stitch.
Step 2: Mark the beading area
Transfer your design lightly. Mark center fronts, seam lines, motif points, and symmetrical zones. Bridal beading looks best when it feels intentional, and symmetry matters more than your eyeballs think it does after hour three.
Step 3: Stabilize the fabric
If you are beading tulle, illusion mesh, stretchy fabric, or any area prone to distortion, add stabilizer or interfacing as needed. In some cases, a temporary backing works well. In others, a more supportive foundation is the better choice. The goal is to keep the fabric from stretching or rippling as you stitch.
Step 4: Thread the needle and anchor neatly
Use a manageable thread length. Too short is annoying. Too long becomes a tiny, vengeful snake. Anchor your thread discreetly, ideally in a seam allowance, under lace, or within an area that will be covered by additional stitches.
Step 5: Start with the simplest stitch
For single beads, bring the needle up through the fabric, add one bead, and go back down close to where the bead exits. This works well for scattered pearls or crystals.
For lines of seed beads, a beaded backstitch is a classic method. String a small group of beads, lay them in place, stitch down at the end of the group, then come back up through the fabric and pass through the beads again to secure the line. This creates a more stable result than loosely tacking each little section and hoping for the best.
For sequins, you can place a sequin flat, add a small seed bead on top, then stitch back down through the center. That little top bead helps hold the sequin in place and adds dimension. It is simple, elegant, and just dramatic enough to feel bridal.
Step 6: Work in small sections
Bead two to four inches, then stop and check the fabric from the right side. Does it still drape nicely? Is the spacing even? Is one side getting heavier than the other? Bridal embellishment is much easier to correct in miniature than in a full beaded catastrophe.
Step 7: Secure every section well
Do not rely on one heroic knot to save the day. Secure thread between sections so that if one area gets snagged, the entire motif does not unravel like a dramatic subplot. This is especially important for wedding dresses, which have a lot to survive: fittings, steaming, photos, hugs, dancing, chairs, bouquets, and at least one guest who means well but does not respect beadwork.
How to Bead Specific Parts of a Wedding Dress
Beading the bodice
The bodice is the most popular place for beading because it frames the face and photographs beautifully. Outline lace motifs, highlight the neckline, or create dense embellishment at the center front that fades outward for a couture look.
Beading illusion tulle or mesh
Use light beads and stabilize carefully. A hoop or frame can help keep the fabric taut while you work. Avoid oversized embellishments that pull the mesh down and make the area droop.
Beading straps and sleeves
These areas look elegant with narrow lines of pearls or clustered crystals, but keep comfort in mind. Anything too scratchy, sharp, or bulky can become irritating during a long day.
Beading the waist or belt area
This is a great place for a concentrated design because the dress already has structure there. A beaded waistband can define shape without overloading the skirt.
Beading the hem or train
A little goes a long way. Beads at the hem can add movement and sparkle, but too much weight can change how the skirt hangs. If you want serious shine at the lower half of the dress, consider scattering motifs upward rather than loading the very edge.
Common Mistakes to Avoid
- Skipping the test swatch: This is the fastest route to puckering, sagging, or disappointment.
- Using beads that are too heavy: The dress should still move like a dress, not a weighted blanket.
- Ignoring fabric support: Delicate bridal fabrics often need stabilizer or a backing method.
- Beading too densely in stress points: Underarms, side seams, and high-friction areas need moderation.
- Forgetting symmetry: Measure both sides. Then measure again. Then distrust your confidence and check once more.
- Leaving long unsecured thread paths: One snag should not destroy an entire motif.
An Optional Shortcut: Tambour or Machine-Applied Beaded Trim
If you want a couture-style finish and already know your way around specialty techniques, tambour beading can be much faster than traditional hand beading. It uses a hook on taut fabric to anchor pre-strung beads and is especially useful on netting or tulle. It takes practice, though, so this is not the moment for wild confidence and no rehearsal.
Another option is applying pre-strung beads or trims with a beading foot on a sewing machine or serger. This works best for edges, veils, overskirts, or accessories rather than intricate motif work on a fitted bodice. Think elegant shortcut, not magic wand.
What It Really Feels Like to Bead a Wedding Dress
There is a practical side to beading a wedding dress, and then there is the emotional side, which is somehow not discussed enough. The emotional side begins right around the moment you realize the work is slower than expected, your beads are smaller than you remembered, and your neck has developed opinions. But once you settle into the rhythm, the process becomes surprisingly absorbing.
Most people expect wedding dress beading to feel purely technical, but it often becomes deeply personal. You are not just attaching beads to fabric. You are making tiny decisions that affect how the gown catches light, how it moves in photos, and how it feels on one of the biggest days of someone’s life. That gives the work an almost ceremonial quality. Even a simple line of pearls on a neckline can feel meaningful when you know it is the detail that will frame the bride’s face in every close-up photo.
Many sewists also discover that beading changes the way they look at the dress itself. A plain bodice starts to reveal possibilities. A seam becomes a design line. A lace motif becomes a map. You begin noticing where the eye naturally lands and where a small cluster of shine would balance the composition. In a way, beading teaches you to see the dress not just as clothing, but as architecture with sparkle.
There are also the funny realities. Beads roll. Sequins disappear and then reappear attached to your elbow. You will absolutely find one pearl in a place that makes no sense. At some point you may mutter “who designed this nonsense” at your own sketch. This is normal. In fact, it is practically part of the curriculum.
The most encouraging experience, though, is seeing how quickly your confidence grows. The first few stitches can feel awkward and precious. You worry about every hole in the fabric and every tiny shift in spacing. Then, after a while, your hands learn the motion. Your eye gets sharper. Your tension improves. The design starts to build, and suddenly the section that felt intimidating now feels manageable. That transformation is one of the best parts of the entire process.
Beading a wedding dress can also teach restraint, which is not nearly as glamorous as sparkle but is just as important. Many beautiful bridal gowns are not covered from neckline to hem. Instead, they use embellishment strategically: a softly outlined lace motif, a whisper of pearl detail on illusion sleeves, a concentrated moment of shimmer at the waist, a few hand-finished touches at the back. Often the most elegant result comes from stopping one idea earlier than you first planned.
And then comes the final reward: stepping back and seeing the completed work as a whole. The gown catches the light differently. The details feel intentional. The dress has personality now, not just decoration. That is the magic of bridal beading. It is slow, yes. It can be fussy, absolutely. But it turns fabric into memory, and that is worth a few sore shoulders and one very suspicious bead stuck in the carpet.
Conclusion
Learning how to bead a wedding dress is part sewing skill, part design instinct, and part patience marathon. Start with a plan, test everything on a swatch, stabilize where needed, and build the embellishment slowly. Choose beads that suit the gown instead of overpowering it, secure your stitching carefully, and keep checking drape as you go.
The best beaded wedding dresses are not necessarily the ones with the most sparkle. They are the ones where the beading feels like it belongs there, enhancing the shape, fabric, and personality of the gown. So take your time, trust the process, and remember: couture-looking results are usually made one tiny bead at a time.