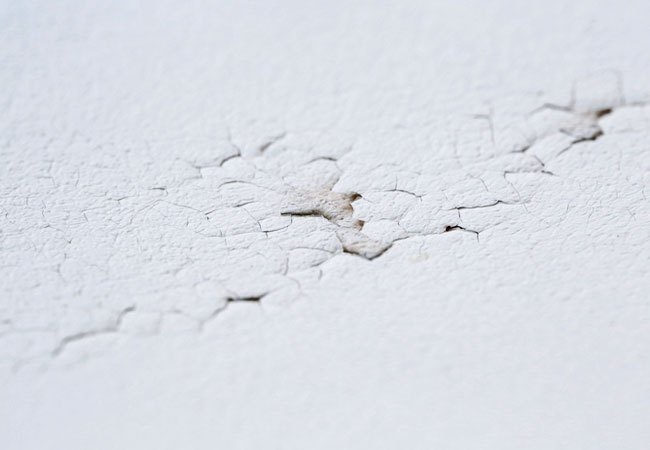
You are relaxing on the couch, staring thoughtfully at the ceilingperhaps because your phone battery finally diedwhen you notice it: a crack. Yesterday, the ceiling was just a ceiling. Today, it looks like your house may be trying to send you a message in Morse code.
The good news is that many ceiling cracks are cosmetic. Drywall joints move, plaster ages, lumber expands and contracts, and houses settle slightly over time. The less comforting news is that some ceiling cracks can accompany water intrusion, framing movement, foundation problems, or structural damage.
The trick is not to panic at every hairline fracture. Instead, look at the crack’s width, shape, location, age, and whether anything else is happening around it. A tiny stable crack along a drywall seam is a very different situation from a widening crack beneath a sagging ceiling.
This guide explains what different types of ceiling cracks may mean, when you can reasonably tackle a repair yourself, when to call a professional, and how to keep a cosmetic crack from making an encore appearance six months after you proudly painted over it.
Why Do Ceiling Cracks Happen?
Ceilings are not completely motionless surfaces. The framing behind them reacts to temperature, humidity, loads, settling, and seasonal changes. Drywall and plaster respond to that movement in different ways.
Common causes of cracks in the ceiling include:
- Normal building settlement and aging
- Drywall joint or tape failure
- Seasonal expansion and contraction of wood framing
- Roof truss uplift
- Poor drywall or plaster installation
- Water leaks from plumbing, roofs, bathrooms, or HVAC equipment
- Loose or deteriorating plaster
- Excessive loads on framing
- Structural movement or foundation settlement
Finding a crack therefore does not automatically tell you the cause. Think of it as a clue rather than a diagnosis.
What Different Ceiling Cracks Can Mean
1. Tiny Hairline Cracks
A thin crack that looks almost like a pencil line is often relatively harmless, particularly if it has remained the same size for years.
Hairline cracks can develop as materials shrink, expand, or settle. In plaster ceilings, fine cracking is especially common because traditional plaster is rigid and does not happily accommodate movement. A little movement behind it can produce visible cracking even when the building itself remains structurally sound.
Small surface cracks can also develop when joint compound or plaster was applied too thickly and shrank while drying.
What should you do? Photograph the crack and check it periodically. If it remains narrow and unchanged with no sagging, staining, or other symptoms, a cosmetic repair may be all that is required.
2. Straight Cracks Along Drywall Seams
If a crack travels in a suspiciously straight line, your house probably has not discovered geometry as a hobby. You may simply be looking at a drywall joint.
Drywall sheets meet along framing members, and those joints are normally reinforced with tape and joint compound. Movement, poor bonding, insufficient compound, loose drywall, or installation problems can eventually make the seam visible.
A recurring straight crack deserves more attention than simply rubbing spackle into it. If the drywall moves when gently pressed, it may need to be secured to framing before the joint is retaped and finished.
3. Cracks Where the Ceiling Meets an Interior Wall
A gap that appears where an interior wall meets the ceilingespecially one that changes with the seasonsmay be related to roof truss uplift.
Roof trusses can respond to differences in temperature and moisture between their upper and lower portions. In some houses, this makes the truss arch slightly upward during part of the year. Because ceiling drywall is attached to the framing, movement can create separation at the wall-to-ceiling joint.
A clue is seasonality. The crack may become more noticeable during colder months and shrink or nearly disappear later.
Repeatedly filling such a gap without addressing the movement tends to produce the home-repair equivalent of the movie Groundhog Day: patch, paint, wait, crack, repeat.
4. Spiderweb or Map-Like Cracking
A network of fine cracks can occur in plaster, joint compound, or finish coatings. Shrinkage, aging, poor application, or incompatibility between layers can all contribute.
When the cracks are purely superficial and the ceiling is flat and firmly attached, refinishing may solve the appearance problem. However, widespread cracking combined with loose plaster is a different matter because sections of old plaster can detach from the lath behind them.
5. A Crack With Brown or Yellow Staining
Cracks accompanied by discoloration deserve a moisture investigation before anyone opens a bucket of joint compound.
The source might be a leaking roof, plumbing pipe, upstairs bathroom, condensate line, flashing problem, or another source of water intrusion. Wet drywall can soften, swell, sag, and lose strength. Moisture can also create conditions that support mold growth.
Fix the leak first. Patching the ceiling while water is still arriving is basically giving the leak a fresh canvas.
6. Wide, Jagged, or Rapidly Growing Cracks
A wider crack is more concerning when it develops suddenly, keeps increasing in size, extends from the ceiling into a wall, or appears alongside other changes in the building.
Look for additional warning signs such as:
- Sagging or bowing ceilings
- New cracks in several rooms
- Doors that suddenly stick
- Windows becoming difficult to open
- Sloping or uneven floors
- Gaps around trim or cabinets
- Visible foundation or masonry cracking
- Noticeable movement following remodeling
One symptom alone does not prove that you have a structural problem. Several appearing together, however, justify professional evaluation.
7. Cracks in a Sagging Ceiling
This is the combination to take seriously.
Sagging may result from water-damaged materials, loose plaster, overloaded or damaged framing, improper structural alterations, or weakened supports. If a ceiling is visibly bowed, separating, or dropping, avoid treating the issue as a simple drywall repair.
A structural engineer or appropriately qualified building professional can determine whether framing is involved. If water is clearly responsible, you may also need a roofer, plumber, or water-damage specialist.
How to Evaluate a Ceiling Crack Before Repairing It
Before grabbing a putty knife, spend a few minutes playing detective.
Measure and Document It
Take clear photographs and place a ruler or measuring tape beside the crack. Record the date. Check it again periodically.
This simple habit can tell you whether the crack is stable or actively changing. Human memory is surprisingly unreliable at remembering whether a crack was 1/16 inch wider three months ago.
Look Above the Ceiling
If accessible and safe, inspect the attic or floor above the affected area. Look for plumbing, roof penetrations, damp insulation, water stains, damaged framing, or heavy objects that may correspond to the crack.
Do not walk between attic joists unless a proper walking surface is provided. Drywall is remarkably bad at supporting humans.
Check the Rest of the House
A single minor ceiling crack is less suspicious than a crack accompanied by multiple new signs of movement. Walk through the home and check walls, floors, doors, windows, basement or crawlspace areas, and visible foundation surfaces.
Watch for Moisture
Discoloration, soft drywall, peeling paint, damp odors, or a crack that changes after heavy rain can point toward water intrusion.
The priority is always to stop and dry the water source before cosmetic work begins.
When Should You Call a Professional?
Professional evaluation is a good idea when:
- The ceiling is sagging, bowing, or separating.
- A crack is noticeably widening.
- Several major cracks appeared suddenly.
- Cracking follows removal or modification of a wall.
- The house recently experienced flooding, storm damage, impact, or significant foundation work.
- The crack continues from the ceiling down a wall.
- Floors have developed noticeable slopes or dips.
- Doors and windows suddenly became badly misaligned.
- You suspect damaged structural framing.
A structural engineer can provide an independent assessment when the underlying cause may involve load-bearing framing or foundation movement. A drywall contractor is appropriate when the structure is sound but the ceiling finish requires substantial repair.
How to Repair a Minor Drywall Ceiling Crack
Once you are reasonably confident the crack is cosmetic and its underlying cause has been addressed, a small drywall crack can often become a DIY project.
Step 1: Protect the Room
Move furniture away from the work area and cover floors and remaining furniture. Ceiling repairs have an impressive ability to distribute dust across objects that seemed physically impossible to reach.
Wear eye protection and a suitable dust mask. Use a stable ladder or platform rather than performing circus tricks from the arm of a sofa.
Step 2: Remove Loose Material
Carefully scrape away loose paint, damaged joint compound, or failing drywall tape. If the crack lies along a failed seam, simply filling the visible opening may not provide a durable repair.
Step 3: Check for Movement
Gently press around the crack. Drywall that moves noticeably may need additional screws into sound framing before finishing begins.
Step 4: Reinforce the Crack
For cracks requiring more than a tiny cosmetic fill, reinforcing the repair with drywall tape can help resist future cracking. Paper joint tape and fiberglass products are commonly used for drywall finishing and repairs, depending on the repair method and compound.
Apply the appropriate joint compound, embed or cover the reinforcement according to its installation method, and feather the compound outward rather than building a narrow mountain directly over the crack.
Step 5: Apply Thin Finish Coats
Several thin coats generally produce a smoother result than one heroic blob of compound. Allow each coat to dry as required before applying the next.
Feather each successive coat farther beyond the repair so the transition becomes difficult to see.
Step 6: Sand, Prime, and Paint
Sand gently until the repaired surface blends with the surrounding ceiling. Remove the dust, apply primer, and repaint.
Do not skip primer. Joint compound absorbs paint differently from an already painted ceiling, and an unprimed patch can remain visible even when your sanding deserves a trophy.
What About Cracked Plaster Ceilings?
Older plaster ceilings require a slightly different mindset. Traditional plaster may be attached to wood lath using plaster “keys” formed behind the lath. As the building ages, those keys or their supporting materials can deteriorate.
A stable hairline plaster crack can sometimes be opened slightly, filled with an appropriate repair material, reinforced when necessary, and refinished.
Loose plaster is more complicated. If the surface sounds hollow, moves when gently pressed, bulges, or appears detached, simply filling the visible crack does not reconnect the plaster to its substrate.
Historic plaster can often be stabilized rather than completely removed, but preservation-oriented repairs may require specialized techniques and skilled professionals.
A Special Warning for Older Textured Ceilings
Before scraping, drilling, sanding, or demolishing an older textured ceiling, consider when the material was installed.
Some older ceiling textures, patching compounds, and related products contained asbestos. You cannot reliably determine whether a material contains asbestos merely by looking at it.
If the age and history of the ceiling make asbestos plausible, have the material evaluated appropriately before disturbing it. Turning a small ceiling crack into an airborne-dust project without checking first can create a much larger problem than the crack itself.
How to Keep Ceiling Cracks From Returning
The prettiest repair in America will eventually fail if the underlying cause remains active.
Control Water
Repair roof and plumbing leaks promptly. Manage bathroom and kitchen humidity, maintain ventilation, and address condensation. Wet building materials should be dried quickly, and persistent moisture problems should be investigated.
Repair Loose Drywall Before Finishing
If a panel moves, reinforce its attachment before taping and coating. Joint compound is a finishing material, not a substitute for proper mechanical support.
Recognize Seasonal Movement
If a ceiling-to-wall separation repeatedly changes throughout the year, investigate framing movement such as truss uplift instead of endlessly filling the opening.
Avoid Overloading Areas Above the Ceiling
Attics and upper floors are designed around specific structural loads. Turning an attic into an unofficial warehouse for tile boxes, old appliances, gym equipment, and everything you have refused to throw away since 1998 may add stresses the framing was never intended to carry.
Monitor Instead of Guessing
A dated photograph every few months can be more useful than repeatedly staring at the crack and wondering whether it has developed ambitions.
Ceiling Cracks: A Quick Decision Guide
| What You See | Possible Explanation | What to Do |
|---|---|---|
| Stable hairline crack | Minor settling, shrinkage, or finish movement | Monitor and repair cosmetically if desired |
| Straight crack along a drywall seam | Joint or tape failure, panel movement | Check attachment, retape, and refinish |
| Seasonal wall-ceiling gap | Possible truss uplift | Investigate framing movement before repeated patching |
| Crack with staining | Possible roof or plumbing leak | Find and fix moisture source first |
| Loose or bulging plaster | Plaster detaching from substrate | Have deteriorated areas properly stabilized |
| Wide crack with sagging | Possible water or structural problem | Seek prompt professional evaluation |
| Growing cracks plus sticking doors or uneven floors | Possible building movement | Consider structural assessment |
Conclusion: Read the Ceiling Before You Repair It
Cracks in the ceiling range from boring cosmetic annoyances to useful warning signs. The important part is resisting the temptation to diagnose the entire house from one line in the paint.
First determine whether the crack is stable or growing. Check for moisture, sagging, loose materials, nearby framing movement, and other changes around the home. A small, stable drywall seam crack can often be repaired with proper reinforcement, joint compound, sanding, primer, and paint. A stained, widening, or sagging ceiling deserves investigation before any cosmetic work begins.
And remember the golden rule of crack repair: fix the reason it cracked before fixing the thing you can see. Otherwise, the ceiling may eventually offer its review of your workmanship by drawing the exact same line again.
Experience-Based Lessons: What Homeowners Commonly Discover After Finding Ceiling Cracks
One of the most common experiences with ceiling cracks starts with unnecessary alarm. A homeowner notices a thin line, searches for “ceiling crack foundation failure,” and within ten minutes is mentally pricing a new house. After measuring the crack, checking the attic, and looking around the rest of the property, the evidence often turns out to be much less dramatic: an old drywall seam, a minor plaster crack, or normal seasonal movement.
The lesson is that context changes everything. A narrow crack that has looked identical for five years is not behaving like a crack that appeared yesterday and doubled in width over a month. Taking pictures and measurements immediately makes future decisions much easier.
Another familiar experience involves repairing the symptom too quickly. Imagine a straight crack across a bedroom ceiling. The homeowner fills it with spackle, sands it beautifully, and proudly repaints. Three months later, the crack returns through the new paint like an extremely rude autograph.
On closer inspection, the drywall panel moves slightly when pressed. The real issue was not a shortage of filler; the panel needed to be properly secured and the damaged joint reinforced. Once movement was addressed, a taped and feathered repair had a much better chance of surviving.
Water-related cracks tell another useful story. A homeowner may notice a brownish ring with a crack running through it and assume the ceiling simply needs paint. Painting may temporarily hide the stain, but if a roof flashing problem or leaking bathroom connection remains above it, discoloration eventually returns. Sometimes the drywall begins to soften or sag as well.
The practical lesson is straightforward: water wins every argument with paint. Stop the leak, determine the extent of damage, dry the area, replace materials that cannot be salvaged, and only then restore the finish.
Older plaster creates its own surprises. Homeowners sometimes assume that every crack means the plaster must be demolished and replaced with drywall. In reality, much historic plaster can be repaired or stabilized. The important distinction is whether it remains firmly attached. A solid surface with a hairline crack is one repair problem; a large ceiling area that flexes or sounds detached is another entirely.
Seasonal cracks are especially good teachers because they force homeowners to think about movement rather than appearances. A ceiling-to-wall gap that opens every winter and becomes smaller during warmer months may keep defeating ordinary filler because the building components are still moving. The correct solution may involve accommodating or correcting that movement rather than finding an increasingly expensive tube of caulk.
Finally, experienced homeowners learn when not to DIY. A cosmetic patch is one thing. A sagging ceiling, rapid cracking after structural remodeling, or multiple cracks appearing alongside uneven floors deserves a different approach. Paying for a qualified assessment can be cheaper than repeatedly repairing finishes while the underlying problem gets worse.
The most useful habit is therefore surprisingly simple: observe first, repair second. Measure the crack. Photograph it. Look above it. Look around the house. Check for water. Consider whether anything recently changed. Once you know what the ceiling is reacting to, the repair becomes far less mysteriousand considerably less likely to come back.
Note: This article provides general home-maintenance information rather than a structural diagnosis. Conditions vary by building; potentially unstable ceilings, significant water damage, or suspected structural movement should be evaluated by an appropriately qualified professional.