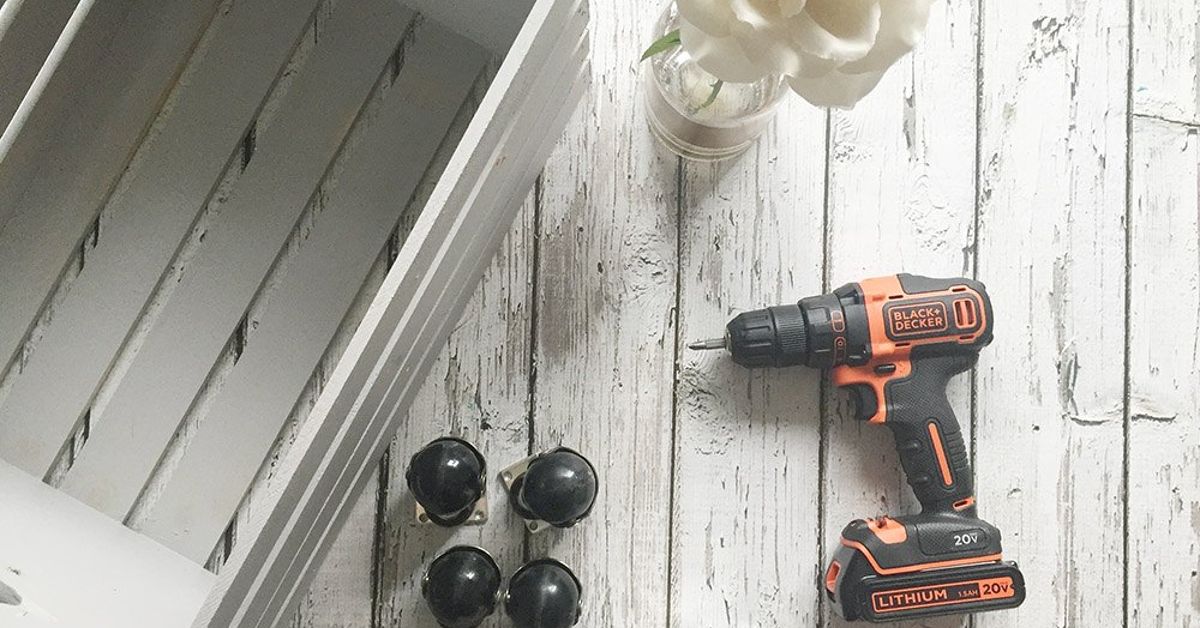
A wooden crate rolling storage ottoman is the kind of DIY project that earns its keep. It hides clutter, gives tired feet somewhere comfortable to land, provides an extra surface when needed, and rolls out of the way without requiring a minor furniture-moving expedition.
The basic construction is straightforward: reinforce a wooden crate, add a solid base for the caster wheels, make an upholstered plywood lid, and finish the wood to complement your room. However, a few details separate a useful piece of furniture from a wobbly box wearing a cushion. The crate must be strong enough for its intended purpose, the casters need secure mounting points, and the lid should fit without sliding, binding, or slamming shut.
This guide explains how to create a wooden crate rolling storage ottoman with practical materials, beginner-friendly techniques, and enough customization options to keep the finished project from looking like it escaped from the produce department.
Why Build a Wooden Crate Storage Ottoman?
A storage ottoman can function as a footrest, movable organizer, low side table, or occasional seat when it has been properly reinforced. Using a premade wooden crate eliminates much of the box-building process, while a padded lid turns the open container into functional furniture. Adding casters makes the storage accessible even when the ottoman is tucked beside a sofa, under a console, or near the end of a bed.
The project is also highly customizable. A dark stain can create a traditional appearance, white paint works well in cottage-style rooms, and a clear finish preserves the casual look of natural wood. Upholstery fabric can introduce color, pattern, and texture without requiring advanced sewing skills.
Plan the Ottoman Before Cutting Anything
Select a Strong Wooden Crate
Choose a solid-wood crate with square corners, firmly attached slats, and no major cracks. Set it on a level surface and press gently on opposite corners. A small amount of movement may be corrected with reinforcement, but a crate that twists dramatically or has split corner posts should remain a decorative container rather than begin a new career in furniture.
Keep in mind that a craft or produce-style crate is not automatically rated for seating. If adults may sit on the finished ottoman, reinforce the structure thoroughly and test it conservatively. When the crate remains flexible after reinforcement, use the project as a footrest and storage unit instead of a chair.
Calculate the Finished Height
Measure the height of the crate, then add the height of the casters, plywood lid, foam, and batting. A footrest should generally feel comfortable beside the chair or sofa it will accompany. Those individual layers may seem small, but together they can transform a modest crate into an ottoman tall enough to make your knees file a complaint.
Choose a Removable or Hinged Lid
A removable lid is the easiest option. Two wooden cleats attached underneath fit inside the crate opening and prevent the cushion from sliding sideways. The entire lid can then be lifted away when you need full access to the compartment.
A hinged lid looks more like traditional storage furniture, but it requires a suitable lid support. The U.S. Consumer Product Safety Commission has warned about injuries and entrapment hazards associated with free-falling storage-chest lids. In homes with children, avoid automatic latches, use hardware designed to keep the lid from dropping, and do not allow the compartment to become an airtight enclosed space.
Tools and Materials
Materials
- One sturdy wooden crate
- One 1/2-inch or 3/4-inch plywood panel for the lid
- One plywood bottom panel or four hardwood caster-mounting blocks
- Four plate-mount swivel casters, preferably with at least two brakes
- Wood glue and appropriately sized wood screws
- Two wooden cleats, or hinges and a lid-support mechanism
- One- to three-inch upholstery foam
- Polyester batting
- Durable upholstery or home décor fabric
- Upholstery staples
- Paint or wood stain and a compatible protective topcoat
- Optional handles, stencils, trim, or interior dividers
Tools
- Tape measure, carpenter’s square, and pencil
- Circular saw or jigsaw
- Drill/driver and drill bits
- Clamps
- Sander or sanding block
- Staple gun
- Utility knife or electric carving knife for cutting foam
- Scissors
- Safety glasses, hearing protection, and suitable respiratory protection
Clamp materials before cutting or drilling, keep tool guards in place, and wear eye protection when using power tools or staple guns. Wood chips and wayward staples are remarkably unimpressed by optimism.
How To Create A Wooden Crate Rolling Storage Ottoman
Step 1: Inspect and Reinforce the Crate
Turn the crate upside down and inspect every connection. Tighten loose fasteners and replace any damaged slats. Predrill before adding screws near the edges of soft wood to reduce the risk of splitting.
If the bottom consists of thin slats, attach a plywood panel across the entire underside. The panel distributes pressure across the crate and gives the caster screws a substantial mounting surface. Another option is to glue and screw hardwood blocks into the four lower corners, although a full panel generally provides more consistent support.
Use wood glue where solid wooden surfaces meet, but do not depend on glue alone for structural reinforcement. Screws hold the parts together while the adhesive cures and help the assembly resist movement during regular use.
Step 2: Cut the Caster Base
Measure the outside dimensions of the crate bottom and cut the plywood base accordingly. You can make the panel flush with the crate or recess it slightly to hide the plywood edge.
Dry-fit the panel and confirm that it sits flat. Apply wood glue to the supporting surfaces, clamp the panel in place, and secure it with screws driven into the crate’s corner posts or other solid framing. Avoid placing important screws only through thin slats.
Step 3: Cut the Plywood Lid
Measure the top of the crate in several places because inexpensive crates are not always perfectly square. Cut the lid so it is flush with the outside edges or has a small, even overhang. A slight overhang makes a removable lid easier to lift, but a large one creates an excellent target for shins.
Round the plywood corners with a jigsaw if desired. Sand every edge until it feels smooth. Sharp plywood corners can eventually wear through foam, batting, and fabric, so this small preparation step improves both appearance and durability.
Step 4: Sand and Finish the Wood
Sand the crate in the direction of the grain. Begin with a medium grit on rough surfaces and progress to a finer grit for the final pass. Vacuum or wipe away all sanding dust before applying stain or paint.
Crate wood is often soft and porous, which can cause uneven stain absorption. Test the color on the underside first and consider using a compatible prestain conditioner. Apply the finish according to the manufacturer’s directions and allow it to dry completely before installing the upholstery or wheels. A protective topcoat can help the wood withstand handling, spills, and repeated contact with shoes.
Step 5: Install the Casters
Plate-mount casters work well for this project because their broad mounting plates distribute force across the reinforced base. Select wheels whose combined rated capacity comfortably exceeds the total expected weight of the ottoman, its contents, and any person who may use it.
Soft-tread wheels are generally more suitable for finished flooring, while larger wheels travel more easily across rug edges. Locking casters keep the ottoman from rolling when someone places both feet on one side. At least two locking wheels are helpful; four provide even greater control.
Position the caster plates equal distances from the corners and mark every screw hole. Drill pilot holes, then install screws that are long enough to hold securely but not so long that their tips enter the storage compartment. Set the crate upright and check that all four wheels contact the floor.
Step 6: Prepare the Foam and Batting
Place the plywood lid on the upholstery foam and trace around it. Cut the foam to match the board, keeping the cutting blade as vertical as possible. A utility knife works for thinner foam, while an electric carving knife can make cleaner cuts through thicker material.
Use a foam-compatible spray adhesive to keep the cushion from shifting on the plywood. Follow the product instructions and work in a well-ventilated area.
Place batting over the foam and wrap it around the edges of the board. Batting softens the profile, rounds the corners, and conceals minor imperfections in the foam. Keep the layers underneath the plywood relatively thin; excessive batting on the underside can prevent the lid from fitting closely against the crate.
Step 7: Upholster the Lid
Spread the upholstery fabric face down on a clean surface. Place the cushion assembly on top with the foam facing the fabric. Leave enough material around every edge to wrap underneath the plywood and provide a generous stapling margin.
Insert one staple at the center of each side. Pull the fabric snug without overstretching it. Continue stapling from the centers toward the corners, alternating between opposite sides to maintain even tension.
Stop several inches before each corner. Fold the excess fabric into a neat pleat, compare the fold with the opposite corner, and staple it securely. Trim only material that creates unnecessary bulk. When the fabric has stripes, checks, or another obvious pattern, inspect the top frequently to make sure the design remains straight.
A piece of cambric or lightweight fabric can be stapled over the raw edges on the underside for a more professional finish. Keep all areas needed for cleats, hinges, or lid-support hardware accessible.
Step 8: Secure the Lid
For a removable lid, place the cushion on the crate and trace the inside opening onto the underside. Position two wooden cleats just inside those lines, leaving a little clearance. Glue and screw the cleats to the plywood. When the lid is replaced, the cleats should enter the opening and prevent sideways movement without binding.
For a hinged lid, position the hinges before drilling and verify that the screws enter solid wood. Install a lid support that is appropriate for the dimensions and weight of the upholstered top. Open and close the lid several times while checking for fabric rubbing, exposed pinch points, loose screws, or sudden movement.
Step 9: Test the Ottoman
Roll the ottoman across every flooring surface on which it will be used. Engage the caster brakes and apply pressure to the top from different directions. Add stored items gradually and watch for cracking, flexing, loose fasteners, or distorted caster plates.
When the ottoman is intended for occasional seating, test the reinforced structure cautiously before normal use. A visible bend or alarming creak is not the furniture expressing personality. It is asking for additional support.
Customization Ideas
Create a Reversible Lid
Add a shallow wooden tray to one side of a removable lid while keeping the other side upholstered. The cushion serves as a footrest, and the tray side creates a stable surface for books, drinks, or snacks. Make sure the tray hardware cannot press through the upholstery when the cushion side is facing upward.
Add Handles
Rope handles complement coastal and farmhouse décor, while black metal pulls create an industrial appearance. Mount handles only where the crate has enough solid wood to support them, and avoid hardware that protrudes into walkways.
Divide the Storage Compartment
A removable plywood divider can separate blankets from books, toys from art supplies, or remote controls from the place where remote controls mysteriously disappear. Cover the divider edges with felt to prevent rattling and scratches.
Choose Practical Fabric
Use tightly woven upholstery fabric for better durability. Performance fabric or easy-clean synthetic material is useful in homes with pets or children. Medium-tone patterns are especially forgiving because they conceal minor wear, crumbs, and the occasional evidence of a snack-related incident.
Common Problems and Solutions
The Lid Moves Sideways
Adjust or enlarge the cleats underneath a removable lid. Thin felt or cork attached to the cleat edges can create a quieter, more secure fit.
The Ottoman Wobbles
Confirm that the plywood base is flat and every caster plate sits flush. Tighten the hardware evenly. Do not use washers or shims to conceal a cracked crate, warped panel, or poorly attached reinforcement block.
The Fabric Looks Wrinkled
Remove several nearby staples, pull the fabric diagonally toward the closest corner, and restaple it gradually. Adjusting a small section usually produces better results than pulling one entire side tighter.
The Wheels Mark the Floor
Replace hard wheels with soft-tread casters that have an appropriate load rating. Clean the wheels regularly because trapped grit can scratch flooring even when the wheel material itself is gentle.
Real-World Experience: Lessons From Building a Crate Ottoman
The first lesson is that the crate should not be treated as a finished furniture frame. When the project is turned upside down, it often becomes clear that the bottom slats provide very little material for caster screws. Installing a full plywood bottom may not be the most photogenic step, but it can make the entire piece feel more stable. It also spreads forces across the crate instead of asking a handful of short screws to perform heroic acts of engineering.
The second lesson involves finished height. Casters seem small in the package, and foam looks as though it will compress into almost nothing. Once the casters, base, plywood, foam, batting, and fabric are stacked together, the ottoman may be several inches taller than expected. Before assembly, place the crate beside its intended chair and temporarily stack the proposed materials on top. This quick test can prevent the creation of a footrest that raises your knees into the general neighborhood of your ears.
Upholstery provides the most visible learning experience. Pulling fabric harder does not necessarily make it smoother. Excessive tension can bend stripes, distort printed patterns, and compress one side of the foam more than the other. The better technique is slow and symmetrical: place center staples first, alternate between opposite sides, and work outward a few inches at a time.
Corners deserve patience. It helps to fold two opposite corners before permanently stapling either one. A single corner may look perfect by itself but appear completely different from its partner. Comparing the folds first creates a more balanced result and reduces the number of staples that must later be removed.
Batting is another area where more is not always better. A thick, fluffy layer looks inviting above the plywood, but bulky material wrapped underneath can interfere with the lid, cleats, hinges, or support hardware. Concentrating the softness on the top and outer edge produces a comfortable cushion while preserving a flatter working surface underneath.
Quality casters also make a noticeable difference. A poorly made wheel may rattle, resist swiveling, or mark the floor. Smooth, appropriately rated casters make the finished project feel like movable furniture rather than a crate that happens to have wheels. Brakes are worth adding because an unlocked ottoman can slide when pressure is placed near one edge. That surprise may be entertaining once, but it is not a feature anyone requests twice.
Finishing the wooden crate before attaching the hardware saves time and frustration. Sanding around wheels, fabric, and hinges is unnecessarily difficult, and stain has a remarkable ability to reach the one piece of upholstery that was supposed to remain spotless. Applying the finish first also makes it easier to coat the bottom and interior edges.
The final lesson is to design for the people who will actually use the ottoman. A removable lid may be perfect for adults storing blankets. A hinged top may be more convenient in a family room, but it demands properly selected support hardware. In a child’s room, rounded corners, ventilation, non-latching access, and protection against a falling lid matter more than decorative distressing or vintage-style lettering.
The best wooden crate rolling storage ottoman does not try to impersonate every piece of furniture in the house. It provides convenient storage, comfortable foot support, easy mobility, and perhaps occasional seating when the structure has been reinforced and tested for that purpose. Build honestly around the strength of the materials, and let the upholstery supply the drama.
Conclusion
Learning how to create a wooden crate rolling storage ottoman is mostly a matter of making thoughtful construction choices. Reinforce the crate, give the casters a solid mounting surface, smooth the plywood edges, apply upholstery with even tension, and treat lid safety seriously.
Begin with a simple design featuring a strengthened crate, locking casters, and a removable padded lid. Handles, hinges, dividers, stencils, and reversible trays can be added when they serve a useful purpose. The finished piece should roll smoothly, store everyday clutter, and look intentionalthree admirable achievements for an object that began life as a wooden box.
Research note: This article synthesizes practical information from U.S. home-improvement, woodworking, upholstery, finishing, safety, and DIY resources, including Lowe’s, The Home Depot, This Old House, Rockler, Kreg Tool, Minwax, Rust-Oleum, Sailrite, The Spruce, the U.S. Consumer Product Safety Commission, OSHA, Canary Street Crafts, Arts & Classy, Creatively Beth, and The Craft Patch.
Note: Wooden crates, fasteners, caster wheels, and lid-support hardware vary in strength. Verify the specifications of the actual materials used before treating the finished ottoman as seating or placing it in a child’s room.