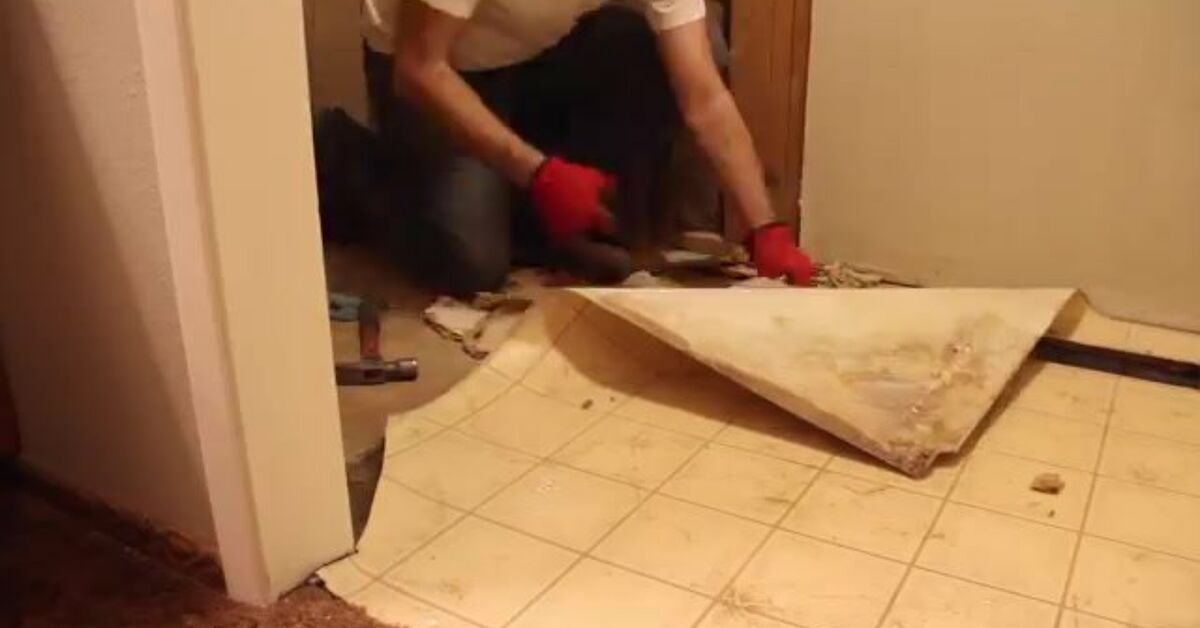
An old bathroom floor has a special talent for looking harmless while hiding loose tiles, questionable adhesive, water-stained plywood, and at least one screw installed by someone who apparently owned a hammer but not a plan. Fortunately, remodeling an old bathroom floor is a realistic DIY project when you approach it as a systemnot merely as a mission to cover the ugly stuff.
This guide explains how to remove old flooring safely, inspect and repair the subfloor, choose a moisture-resistant floor covering, install tile or vinyl correctly, and reset the toilet without creating tomorrow’s mysterious ceiling stain. The work requires patience, accurate measurements, and respect for curing times, but the finished floor can dramatically improve the bathroom’s appearance, durability, and value.
Decide Whether the Bathroom Floor Really Needs Replacement
Discolored grout alone may only require cleaning or regrouting. A full bathroom floor remodel becomes more sensible when tiles are cracked or loose, vinyl is curling, the floor feels soft, persistent odors remain after cleaning, or water stains appear around the toilet, bathtub, or vanity.
Pay attention to movement. A floor that flexes, squeaks, or dips may have loose fasteners, insufficient support, or moisture-damaged sheathing. Installing beautiful new tile over a weak structure is like placing a fancy hat on a wobbly table: attractive, but the central problem remains.
Choose the Best DIY Bathroom Flooring
Porcelain or Ceramic Tile
Porcelain and ceramic tile are popular because they resist water, clean easily, and come in almost every style imaginable. Porcelain is generally denser and less porous, while ceramic is often easier for beginners to cut. Select products specifically rated for floors and favor a textured or matte surface for better traction.
Remember that tile and grout are not, by themselves, a complete waterproofing system. Water protection depends on the entire assembly, including the substrate, membrane, seams, perimeter joints, and plumbing penetrations.
Sheet Vinyl and Luxury Vinyl
Sheet vinyl is inexpensive, comfortable underfoot, and especially useful in small bathrooms because it can cover the room with few or no seams. Luxury vinyl tile or plank is also approachable for DIY installation, but the product must be approved for bathrooms. Every seam, perimeter gap, and plumbing cutout must follow the manufacturer’s instructions.
Vinyl is thinner than tile, which reduces problems at doors and transitions. However, it reveals bumps, holes, and old adhesive underneath, so surface preparation must be extremely smooth.
Natural Stone and Other Materials
Natural stone can look magnificent, but it is heavier, harder to cut, and often requires sealing. Some stone installations demand a stiffer floor than ordinary ceramic tile. Waterproof laminate may work in certain bathrooms, but standing water can still enter joints and damage the core. Traditional hardwood, standard laminate, and carpet are risky choices for a frequently wet bathroom.
Plan the Floor Height Before Demolition
Add the thickness of every proposed layer: repair plywood, mortar, backer board or membrane, setting mortar, and finished tile. Compare that total with the hallway floor, door clearance, vanity height, radiator clearance, and toilet flange position.
A toilet flange should generally finish on top of, or approximately even with, the completed floor according to the flange manufacturer’s approved configuration. If the new assembly raises the floor, you may need an appropriate flange spacer or extension. Do not solve a large height difference by stacking wax rings and hoping plumbing physics is feeling generous.
Measure the room’s length and width, subtract permanent areas that will not receive flooring, and add approximately 10 percent for straight layouts. Complicated patterns, diagonal layouts, or unusually shaped rooms may require 15 percent or more for cuts and breakage.
Tools and Materials
Your exact shopping list depends on the flooring, but a tile remodel commonly requires:
- Safety glasses, gloves, hearing protection, knee pads, and a suitable dust mask or respirator
- Utility knife, pry bar, floor scraper, hammer, and cold chisel
- Tape measure, straightedge, square, level, and chalk line
- Drill or driver and approved backer-board fasteners
- Floor patch or leveling product compatible with the substrate
- Cement backer board or an uncoupling membrane
- Waterproofing membrane, seam tape, or accessories specified by the selected system
- Correct mortar, notched trowel, mixing paddle, buckets, spacers, and sponges
- Manual tile cutter or wet saw
- Grout, grout float, flexible sealant, and a new toilet seal
Buy compatible products from one installation system when possible. Mortar, primer, membrane, grout, and sealant are not interchangeable simply because their buckets have similarly confident labels.
Step 1: Check for Renovation Hazards
Before scraping, sanding, cutting, or breaking an old floor, consider the age of the house and the materials present. Older resilient flooring, backing, and black adhesive may contain asbestos. You cannot reliably identify asbestos by appearance. If suspicious material will be disturbed, stop and have it evaluated by a properly trained professional.
Painted baseboards or trim in a home built before 1978 may also produce lead-contaminated dust. Use lead-safe work practices and comply with local disposal rules. Control dust with plastic barriers, close or cover nearby air returns, ventilate appropriately, and keep children and pets out of the work area.
Shut off the toilet supply and any plumbing that must be disconnected. If electrical heating or wiring is involved, turn off the applicable circuit and verify that power is off. Permits may be required when plumbing, wiring, or structural framing is changed.
Step 2: Remove Fixtures and Old Flooring
Remove movable items, baseboards, and floor-mounted accessories. If the vanity sits on top of the flooring, decide whether removing it will produce a cleaner installation. A vanity that is built in or especially heavy can sometimes remain, but flooring should not trap a floating vinyl installation beneath fixed cabinets.
To remove the toilet, shut off the water, flush, sponge out the remaining water, disconnect the supply line, and remove the mounting nuts. Lift the toilet straight up and place it on a protected surface. Seal the drain opening with a proper test plug or another secure cover that cannot fall into the pipe.
Work from an exposed edge when removing vinyl. For tile, break a controlled section and remove material in small areas. Broken ceramic is extremely sharp, so wear eye protection, sturdy gloves, long sleeves, and closed-toe footwear. Avoid cutting blindly into the floor, where plumbing, electrical cable, or radiant-heating components may be waiting.
Step 3: Inspect and Repair the Subfloor
Once the old floor is gone, inspect around the toilet flange, bathtub edge, shower entrance, supply penetrations, and vanity plumbing. Dark staining does not always mean active decay, but soft, swollen, delaminated, or crumbling wood must be addressed.
Find and repair the leak before rebuilding. Replacing damaged plywood while ignoring a leaking toilet seal merely gives the leak a fresh snack.
Remove severely damaged panels back to the centers of joists or add solid blocking so every replacement edge has support. Match the required structural panel type and thickness, orient it correctly, and fasten it according to local code and the installation-system requirements. Particleboard is generally unsuitable beneath bathroom tile.
Tighten loose subflooring to the joists where appropriate, but confirm the location of pipes and cables first. Tile requires a sufficiently rigid structure; cement board does not compensate for undersized joists or a flexible subfloor. Natural stone normally demands even greater stiffness. Consult local requirements or a qualified professional if the framing feels springy or has been cut for plumbing.
Step 4: Make the Surface Flat, Clean, and Dry
A tile surface needs to be flat, although it does not necessarily need to be perfectly level. Use a long straightedge to locate humps and low spots. Remove protruding fasteners, scrape away adhesive residue, and use a compatible patching or leveling product where needed.
Large-format tile is particularly unforgiving. Even a modest hump can create lippage, where one tile edge sits higher than its neighbor. Correcting the floor now is far easier than trying to perform tiny miracles with extra mortar later.
Vacuum thoroughly and remove dust, oil, wax, soap, and loose debris. Follow the patch manufacturer’s instructions regarding primer, allowable thickness, temperature, drying time, and compatible substrates.
Step 5: Install the Underlayment and Water Protection
Cement Backer Board
On an approved wood subfloor, cement backer board is typically embedded in a supporting bed of specified mortar and fastened with corrosion-resistant backer-board screws or approved nails. The mortar fills voids; the fasteners secure the panels.
Stagger panel joints so four corners do not meet, keep backer-board seams offset from subfloor seams, and maintain the manufacturer’s required perimeter and panel gaps. Tape the joints with alkali-resistant mesh tape and the specified mortar. Do not use ordinary drywall tape.
Uncoupling and Waterproofing Membranes
An uncoupling membrane helps isolate tile from limited substrate movement. Certain membrane systems can also create a water-resistant or waterproof assembly when their seams, perimeter connections, and penetrations are sealed with approved components.
Use the mortar type required for both the substrate and membrane. Waterproofing details vary by manufacturer, so do not combine random tapes, sealants, and liquid coatings. Pay special attention around the toilet flange, bathtub, shower curb, doorway, and wall-to-floor transitions.
Step 6: Dry-Lay the Tile
Find reference lines rather than assuming the walls are square. Dry-lay several rows with spacers and evaluate the cuts at visible edges, the doorway, tub, and vanity. Shift the layout to avoid narrow tile slivers.
In many bathrooms, a visually balanced doorway and tub edge matter more than placing one grout joint at the mathematical center. Mix tiles from several boxes during layout so minor shade variations appear intentional.
Undercut wooden door casing where appropriate so the tile can slide underneath. Leave the required movement gap around walls, pipes, cabinets, and other fixed surfaces. Those gaps should not be packed solid with mortar or grout.
Step 7: Set the Tile
Mix mortar exactly as directed, including water quantity, mixing time, resting or slaking time, and remixing. Adding extra water because the mortar feels stubborn weakens the mixture and changes its performance.
Spread only as much mortar as you can cover before it develops a dry skin. Key a thin layer into the substrate with the flat side of the trowel, then comb straight, consistent ridges with the notched side. Press tiles across the ridges to collapse them. Periodically lift a tile and confirm adequate mortar contact, especially near corners and edges.
Large-format tile often benefits from back-buttering and a mortar specifically designed for that tile size. Clean mortar out of grout joints while it is fresh. Constantly check alignment and surface flatness, but avoid disturbing tile that has already begun to set.
Cut perimeter pieces with a tile cutter or wet saw and use an appropriate hole saw for circular penetrations. Never force a tile tightly against a pipe. Follow the mortar manufacturer’s curing time before walking on or grouting the installation.
Step 8: Grout and Seal Movement Joints
Remove spacers and loose mortar from the joints. Mix grout according to its instructions, pack it firmly with a rubber float, and pull the float diagonally across the joints. Clean with a dampnot drippingsponge. Too much wash water can weaken cementitious grout and produce uneven color.
Do not fill perimeter movement gaps or changes of plane with rigid grout. Use a compatible flexible sealant where the tile meets walls, tubs, cabinets, pipes, or other materials. Seal grout only if the selected grout manufacturer requires or recommends it.
Protect the floor during the complete curing period. “Dry to the touch” does not necessarily mean ready for shoes, bathwater, cleaners, or a toilet being wrestled into position.
Step 9: Reinstall the Toilet and Finish the Room
Confirm that the toilet flange is sound, firmly anchored, and at the correct height for the finished floor. Repair or extend it with an approved component if necessary. Install new closet bolts and a new wax or manufacturer-approved wax-free seal; a compressed wax ring should not be reused.
Lower the toilet evenly over the bolts without twisting aggressively. Tighten the nuts gradually from side to side. Porcelain can crack if the fasteners are overtightened. Reconnect the supply, restore the water, flush repeatedly, and check every connection for leaks.
Install transitions and baseboards without pinning a floating floor. Apply flexible sealant where required, trim the door if necessary, and allow all materials to cure before exposing the floor to routine bathroom moisture.
A Faster Alternative: Installing Bathroom Vinyl Flooring
If tile feels too ambitious, sheet vinyl or bathroom-approved luxury vinyl may provide a simpler route. The subfloor must still be solid, flat, smooth, clean, and dry. Patch holes and seams carefully because defects can telegraph through thin flooring.
Acclimate the material if instructed, create a paper template for sheet vinyl, and test the fit before applying adhesive. For click-lock products, maintain the specified expansion space and stagger end joints according to the installation guide. Follow all rules for fixed cabinets, transitions, perimeter sealing, and maximum room dimensions.
Never assume that “waterproof plank” makes the entire room waterproof. Water can travel through perimeter gaps or plumbing openings and reach the subfloor even when the planks themselves do not absorb it.
Common DIY Bathroom Floor Mistakes
- Covering rot, mold, loose flooring, or an active leak
- Disturbing suspicious old flooring before checking for asbestos
- Using wall tile on the floor or choosing a dangerously slick finish
- Installing tile over a flexible or inadequately supported subfloor
- Skipping mortar beneath cement backer board
- Using incompatible mortar, membrane, grout, and sealant products
- Starting tile without testing the layout and edge cuts
- Grouting perimeter movement gaps
- Walking on mortar or grout before the specified curing time
- Resetting the toilet on a damaged or improperly positioned flange
Experience-Based Lessons From Old Bathroom Floor Remodels
The most useful lesson from real-world bathroom renovations is that demolition changes the plan. A homeowner may expect to spend Saturday removing beige tile and Sunday installing fashionable hexagons. Then the toilet comes out, revealing swollen plywood and a flange that moves like a loose steering wheel. That discovery is frustrating, but it is also valuable. Finding damage before the new floor goes down prevents a much more expensive repair later.
A representative small-bathroom project illustrates the point. The original vinyl looked dated but reasonably flat. Once it was removed, a faint stain near the toilet turned out to be a soft area extending several inches beyond the flange. The successful approach was to stop, repair the slow leak, replace the damaged section with properly supported subflooring, and correct the flange assembly. The schedule grew by a day, but the finished bathroom no longer smelled damp or flexed underfoot.
Another frequent experience concerns layout. Beginners often begin with a full tile against the longest wall because it appears efficient. Halfway across the room, they discover that the opposite wall requires a strip barely wider than a pencil. Dry-laying two crossing rows usually takes less than an hour and can prevent this problem. Moving the layout by half a tile often produces balanced cuts and makes the entire installation look more professional.
Mortar management is another quiet dividing line between an enjoyable project and a bucket-shaped disaster. Mixing an entire bag seems productive until the installer realizes that cutting around a toilet flange takes longer than expected. By then, the mortar is stiffening while everyone negotiates with the wet saw. Smaller batches give a DIYer enough time to maintain clean joints, verify coverage, and correct alignment.
Floor height also surprises many remodelers. Tile, mortar, and underlayment can raise the surface enough to interfere with the door or leave the toilet flange too low. Experienced planning means building a small sample stack before purchasing everything. That simple mock-up reveals the finished thickness and helps identify whether a transition, door adjustment, or flange extension will be needed.
Finally, successful remodels include a pause before fixtures return. The room looks finished when the grout is clean, which makes waiting feel unnecessarily cruel. However, cure times are part of the installation, not optional suggestions. Giving mortar, grout, and sealant the required time protects weeks of work. Patience is not the glamorous part of remodeling, but neither is removing a toilet twice.
Conclusion
Learning how to remodel an old bathroom floor DIY is mostly about disciplined preparation. The visible flooring may receive the compliments, but the subfloor repair, waterproofing details, movement gaps, flange height, and curing time determine whether the remodel lasts.
Inspect before covering, repair moisture problems at their source, use compatible materials, and follow the written instructions for every installation system. When structural damage, hazardous material, complicated plumbing, or extensive mold appears, bring in a qualified professional. Knowing when to pause is a DIY skill toojust one that comes without a cordless tool.