There is a fine line between a thoughtfully decorated garden and a yard that looks as if a novelty store sneezed on it. Mushroom garden decor happily lives on the charming side of that lineprovided you give it a little room to breathe.
With their rounded caps, storybook shapes, and woodland associations, decorative mushrooms can soften a formal flower bed, brighten a shady corner, or turn an ordinary container garden into a tiny enchanted scene. The trend also fits naturally with cottagecore, fairy-garden, retro, and nature-inspired styles. Better Homes & Gardens has linked the popularity of mushroom motifs to 1970s nostalgia and the cheerful feeling these shapes create, while HGTV emphasizes that whimsical gardens succeed through small moments of surprise rather than a complete landscape overhaul. Country Living’s coverage of 2026 “nostalgia gardening” points to the same appetite for layered, lived-in outdoor spaces that reconnect people with simpler memories.
The best part is that this is one garden upgrade that does not require a truckload of mulch, a landscaping crew, or a dramatic conversation with your bank account. A single mushroom stake can make a difference. A cluster of three can create a focal point. A painted pot-and-saucer project can deliver a whole fairy village before lunch.
Why Mushroom Garden Decor Feels So Delightfully at Home Outdoors
Mushrooms already belong to the visual language of forests. Their silhouettes suggest damp moss, fallen logs, secret pathways, and the possibility that a tiny door may open in a tree trunk when nobody is watching. Decorative versions borrow that natural familiarity, then add color and personality.
They are also wonderfully flexible. Red caps with white dots create an obvious fairy-tale effect. Muted stone mushrooms look calm and sculptural. Rusted metal mushrooms suit rustic or industrial landscapes. Bright ceramic pieces can wake up a patio container, while stained-glass or solar-lit versions add sparkle after sunset. Better Homes & Gardens has highlighted mushroom garden pokes, clay pieces, stained-glass accents, birdhouses, and rain-chain designs, showing how easily the motif moves from purely decorative to practical.
A Small Accent Can Change the Mood
You do not need to theme the entire yard around fungi. In fact, restraint usually makes whimsical garden decor more effective. One mushroom partially hidden beneath hostas can feel like a discovery. Twelve identical mushrooms lined up beside the driveway can feel like they are reporting for duty.
Garden Design recommends using larger art as a focal point and smaller sculptures as intimate surprises among flowers. Fine Gardening similarly notes that decorative objects add focal points, contrast, and personality, but that a little art often goes a long way. That principle is perfect for mushroom decorations: let one oversized piece anchor a scene, or tuck several smaller pieces where visitors encounter them gradually.
Choose the Right Mushroom Decor for Your Garden Style
Concrete and Cast-Stone Mushrooms
Concrete mushrooms have visual weight, which helps them feel established rather than temporary. They work especially well in traditional beds, shade gardens, gravel gardens, and woodland-inspired landscapes. Their neutral color lets foliage do the talking, and natural weathering can make them look even more at home over time.
Use one medium or large concrete mushroom near a bend in a path, beside a bench, or at the edge of a fern bed. Concrete is durable, but painted exterior surfaces still wear gradually, so choose exterior-rated finishes and expect occasional touch-ups. Garden Design notes that concrete and limestone weather over time, while Better Homes & Gardens recommends outdoor acrylic paint for decorative concrete accents.
Resin Mushrooms
Resin is the practical comedian of the group: lightweight, affordable, colorful, and usually easy to move. It is a good option for renters, balconies, container gardens, and seasonal displays. Look for pieces labeled for outdoor use, with UV-resistant color and a broad or stake-style base.
Because resin is light, secure taller pieces in windy locations. A hidden landscape pin, a deeper stake, or a bed of gravel around the base can prevent your cheerful toadstool from beginning an unauthorized migration into the neighbor’s yard.
Metal Mushroom Stakes
Metal stakes are ideal when you want height without bulk. They rise above low groundcovers, sway gently among ornamental grasses, and cast interesting shadows. Powder-coated or rust-resistant finishes generally require less maintenance than unfinished steel, while intentionally weathered metal develops a rustic patina.
Repeat the metal finish elsewhereperhaps in a trellis, edging, lantern, or planterto make the mushrooms look integrated. Garden Design recommends echoing colors and shapes to create rhythm, while Family Handyman notes that warm colors such as red, orange, and yellow stand out strongly against green planting.
Ceramic and Terracotta Mushrooms
Ceramic pieces offer the richest color and often the most handcrafted character. They look particularly good in protected patios, porch planters, and small courtyard gardens. In freezing climates, bring delicate or porous pieces indoors for winter unless the maker specifically rates them for freeze-thaw conditions.
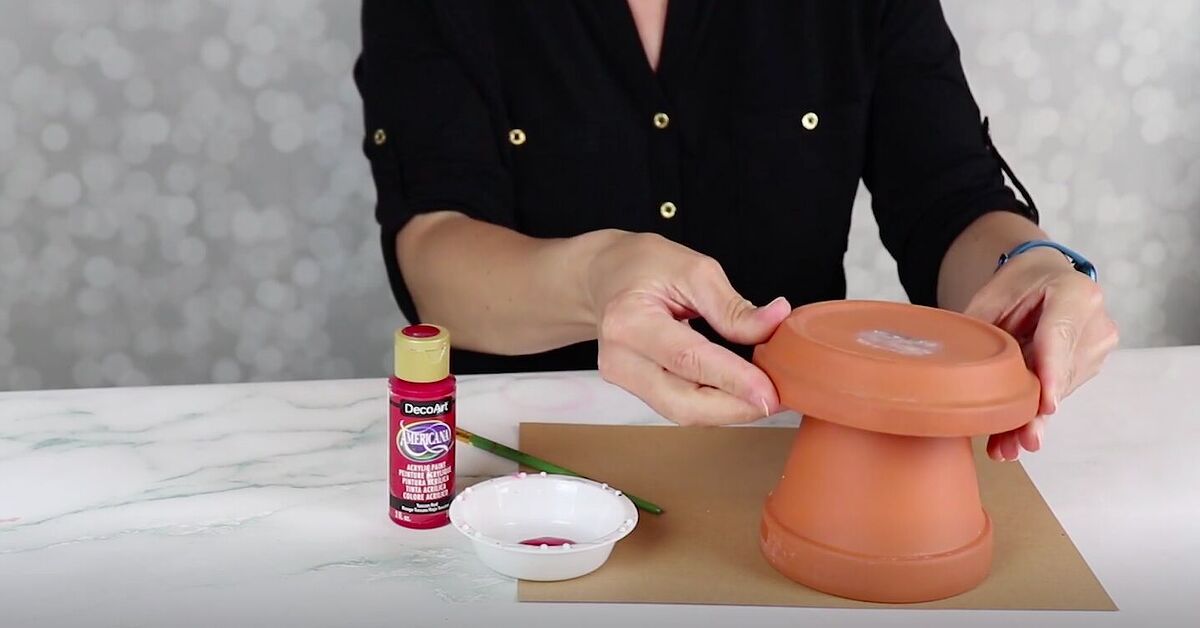
Terracotta is also the easiest material for a DIY mushroom project. An inverted flowerpot becomes the stem, and an inverted saucer becomes the cap. Suddenly, the humble pot that once held a basil plant has a second career in fantasy architecture.
Solar Mushroom Lights
Solar mushroom lights can define a path, illuminate a planter, or create a soft glow beneath a tree. Use them as accents rather than runway markers. A few pools of warm light feel magical; a perfectly straight double row may make your garden look prepared for aircraft.
Position the solar panel where it receives sufficient daylight, even if the decorative cap itself sits near partial shade. Landscape lighting is most attractive when it helps reveal paths, plants, and gathering areas instead of competing with them.
Where to Place Mushroom Garden Decor
1. Hide a Cluster at the Edge of a Shade Garden
Ferns, hostas, heucheras, mossy rocks, and low groundcovers create a believable woodland setting. Choose mushrooms in three different heights and place them close enough to read as a group. Allow foliage to overlap the bases so the display looks planted, not parked.
2. Mark a Turn in a Garden Path
A decoration at a bend encourages visitors to keep moving. Place one larger mushroom just beyond the turn, where it is partly visible from the approach. Garden art works especially well when it frames a view, rewards curiosity, or draws the eye toward the next garden room. Houzz also recommends judging sculpture from the places where people will actually see it, including windows, seating areas, and entries.
3. Build a Miniature Container Scene
A wide bowl, old wheelbarrow, raised planter, or weathered crate can hold a complete miniature landscape. Add low-growing plants, pebbled paths, a tiny door, and one or two mushrooms. Better Homes & Gardens recommends twigs, moss, and small-scale plants for fairy gardens; The Spruce and Houzz both show how discarded containers and household objects can become budget-friendly garden art.
4. Create a Color Echo
Match a cap color to nearby blooms, foliage, cushions, or painted furniture. A deep-red mushroom can repeat coleus leaves; mustard yellow can connect with black-eyed Susans; lavender can coordinate with salvia or a painted bistro set. Lowe’s also recommends weather-resistant paint as a budget-friendly way to coordinate patio furniture and accessories. Repetition makes a playful object feel intentional.
5. Add One Functional Mushroom
A mushroom-shaped birdhouse, rain chain, stool, planter, or light contributes more than good looks. Functional decor is particularly valuable in compact gardens because every object earns its space. Just make sure a birdhouse is designed for actual birdswith appropriate ventilation, drainage, cleanout access, and species-suitable dimensionsrather than assuming every cute ornament is wildlife-ready.
6. Use Scale to Keep the Scene Balanced
A tiny ornament disappears in a broad lawn, while a giant red toadstool can overpower a narrow townhouse bed. Test size before buying by placing a cardboard box or bucket in the proposed location. Garden Design specifically recommends using a box as a temporary stand-in to judge whether sculpture is proportional to the yard.
A Quick DIY Terracotta Mushroom Garden Decor Project
This simple project captures the spirit of the original quick mushroom-decoration idea: transform basic garden supplies into a bright outdoor accent with minimal construction.
Materials
- One terracotta flowerpot
- One terracotta saucer wider than the pot base
- Exterior-rated primer suitable for masonry or terracotta
- Exterior craft or acrylic paint
- Paintbrushes or outdoor-rated spray paint
- Exterior construction adhesive suitable for porous materials
- Clear exterior sealer compatible with the paint
- Gloves, eye protection, and a protected work surface
Step 1: Clean and Dry the Pieces
Brush away dust and rinse the pot and saucer if needed. Let them dry completely. Paint and adhesive perform better on clean surfaces, and trapped moisture can encourage peeling.
Step 2: Prime Before Painting
Apply an exterior-rated primer, especially if you want bright, even color. Terracotta is porous and can drink paint like it has just crossed a desert. Primer reduces absorption and creates a more consistent finish.
Step 3: Paint the Stem and Cap
Turn the flowerpot upside down and paint it cream, tan, pale green, or any color that suits your garden. Paint the outside of the saucer red, orange, yellow, blue, or a restrained earthy tone. Add dots with a round sponge dauber, bottle cap, or brush handle.
Step 4: Seal the Finish
Once the paint cures according to the manufacturer’s directions, apply a compatible exterior sealer. Exterior paint is typically water-resistant rather than permanently waterproof, and every finish wears with sun, rain, abrasion, and temperature changes.
Step 5: Assemble and Place
Center the saucer upside down on the inverted pot and bond the pieces with exterior adhesive. Follow the adhesive label for surface compatibility, curing time, temperature, and ventilation. Place the finished mushroom on level soil, gravel, or a paver. For extra stability, partially nest the pot into mulch or use a hidden stake system.
Easy Variations
- Paint several mushrooms in graduated sizes for a family grouping.
- Use muted clay, cream, and sage for a modern woodland look.
- Add glow-in-the-dark dots for a subtle evening surprise.
- Stencil leaves, stars, bees, or tiny windows on the cap.
- Turn a shallow bowl into a cap for a broader, more sculptural shape.
How to Keep Mushroom Yard Art Looking Good
Outdoor decor lives a harder life than indoor decor. It gets baked, soaked, splattered, frozen, climbed by squirrels, and occasionally investigated by a dog with strong artistic opinions.
Clean Gently
Use a soft brush or cloth with mild soap and water. Avoid harsh abrasives on painted resin, glazed ceramic, and sealed concrete. Check crevices where soil, algae, or insects accumulate.
Inspect the Base
At least a few times each season, check stakes, adhesive joints, and bases. Re-seat pieces loosened by wind or saturated soil. Keep decor away from mower paths, string trimmers, and areas where it can become a tripping hazard.
Rotate or Store Delicate Pieces
Strong sun fades many finishes. Rotating a movable piece can reduce uneven fading. Bring fragile ceramic, thin resin, glass, and solar items into a shed or garage during severe storms or hard freezes. This Old House likewise recommends sheltering or storing vulnerable outdoor decorations during severe weather and anchoring lightweight pieces securely.
Do Not Confuse Decor with Real Mushrooms
Decorative mushrooms are for looking at, not nibbling. Real mushrooms may appear nearby after wet weather, and identification can be difficult. Better Homes & Gardens advises removing lawn mushrooms by hand when necessary to keep them away from children and pets. Treat every unidentified wild mushroom as potentially unsafe to eat.
Practical Experiences: What Makes a Mushroom Display Work in Real Life
The most successful mushroom garden displays tend to begin modestly. A homeowner places one bright mushroom beneath a large-leaf plant, notices how it catches the eye from the kitchen window, and then adds two smaller companions. That gradual approach is useful because garden decor looks very different in a store, where it sits at eye level under flattering lights, than it does outdoors among mulch, stems, shadows, and rapidly expanding foliage.
One common lesson is that placement matters more than price. A five-dollar resin mushroom partly hidden beside a path can create a stronger moment than an expensive sculpture dropped in the middle of an empty lawn. The hidden piece gives visitors the pleasure of discovery. It also changes through the season: spring foliage frames it loosely, summer growth makes it secretive, and autumn leaves turn it into part of a woodland scene.
Another lesson is that groups need variation. Three identical mushrooms can look mass-produced unless their heights, angles, or surroundings differ. A more natural arrangement uses one tall piece, one medium piece, and one small piece, with the caps turned slightly away from one another. Nesting the bases into plants or mulch also helps. The goal is not to make fake mushrooms look scientifically real; the goal is to make them feel comfortably settled.
Color often requires experimentation. Bright red and white is wonderfully nostalgic, but it can dominate a calm garden. In a bed filled with pink, silver, and blue plants, a dusty lavender or cream mushroom may feel more connected. In a children’s garden, however, saturated color is part of the fun. The best palette is the one that supports the mood already present rather than demanding that every nearby flower change clothes.
Weather teaches the least charming but most valuable lessons. Lightweight decor should be secured before the first strong wind. Painted terracotta needs time to cure, and a sealer is not a magic force field. Water can enter through an unsealed underside, then contribute to flaking or freeze damage. Raising a piece slightly on gravel or a paver improves drainage and makes cleaning easier. Small maintenance decisions are what allow inexpensive DIY decor to survive beyond one season.
It also helps to view the arrangement from several places: the patio chair, the back door, the kitchen sink, and the sidewalk. A mushroom that looks perfectly placed from two feet away may be invisible from where people actually spend time. Conversely, a piece that feels oversized during installation may become just right when viewed across the yard.
Finally, the best experience comes from allowing the display to evolve. Move a mushroom when plants fill in. Repaint it after two summers. Add a tiny solar light for fall evenings. Pair it with a thrifted watering can or a miniature door. Whimsy should feel playful, and play is allowed to change its mind. A garden is never a finished room; it is a living stage set, and mushroom decor is one of its easiest scene-stealers.
Final Thoughts
Mushroom garden decor succeeds because it combines a familiar natural shape with just enough fantasy. It can be rustic, modern, colorful, subtle, functional, or gloriously silly. The trick is to choose weather-appropriate materials, respect the scale of the landscape, and place each piece where it creates discovery rather than clutter.
Start with one mushroom beneath a favorite plant or beside a path. Then stand back. If the garden seems to smile, you have done it right.