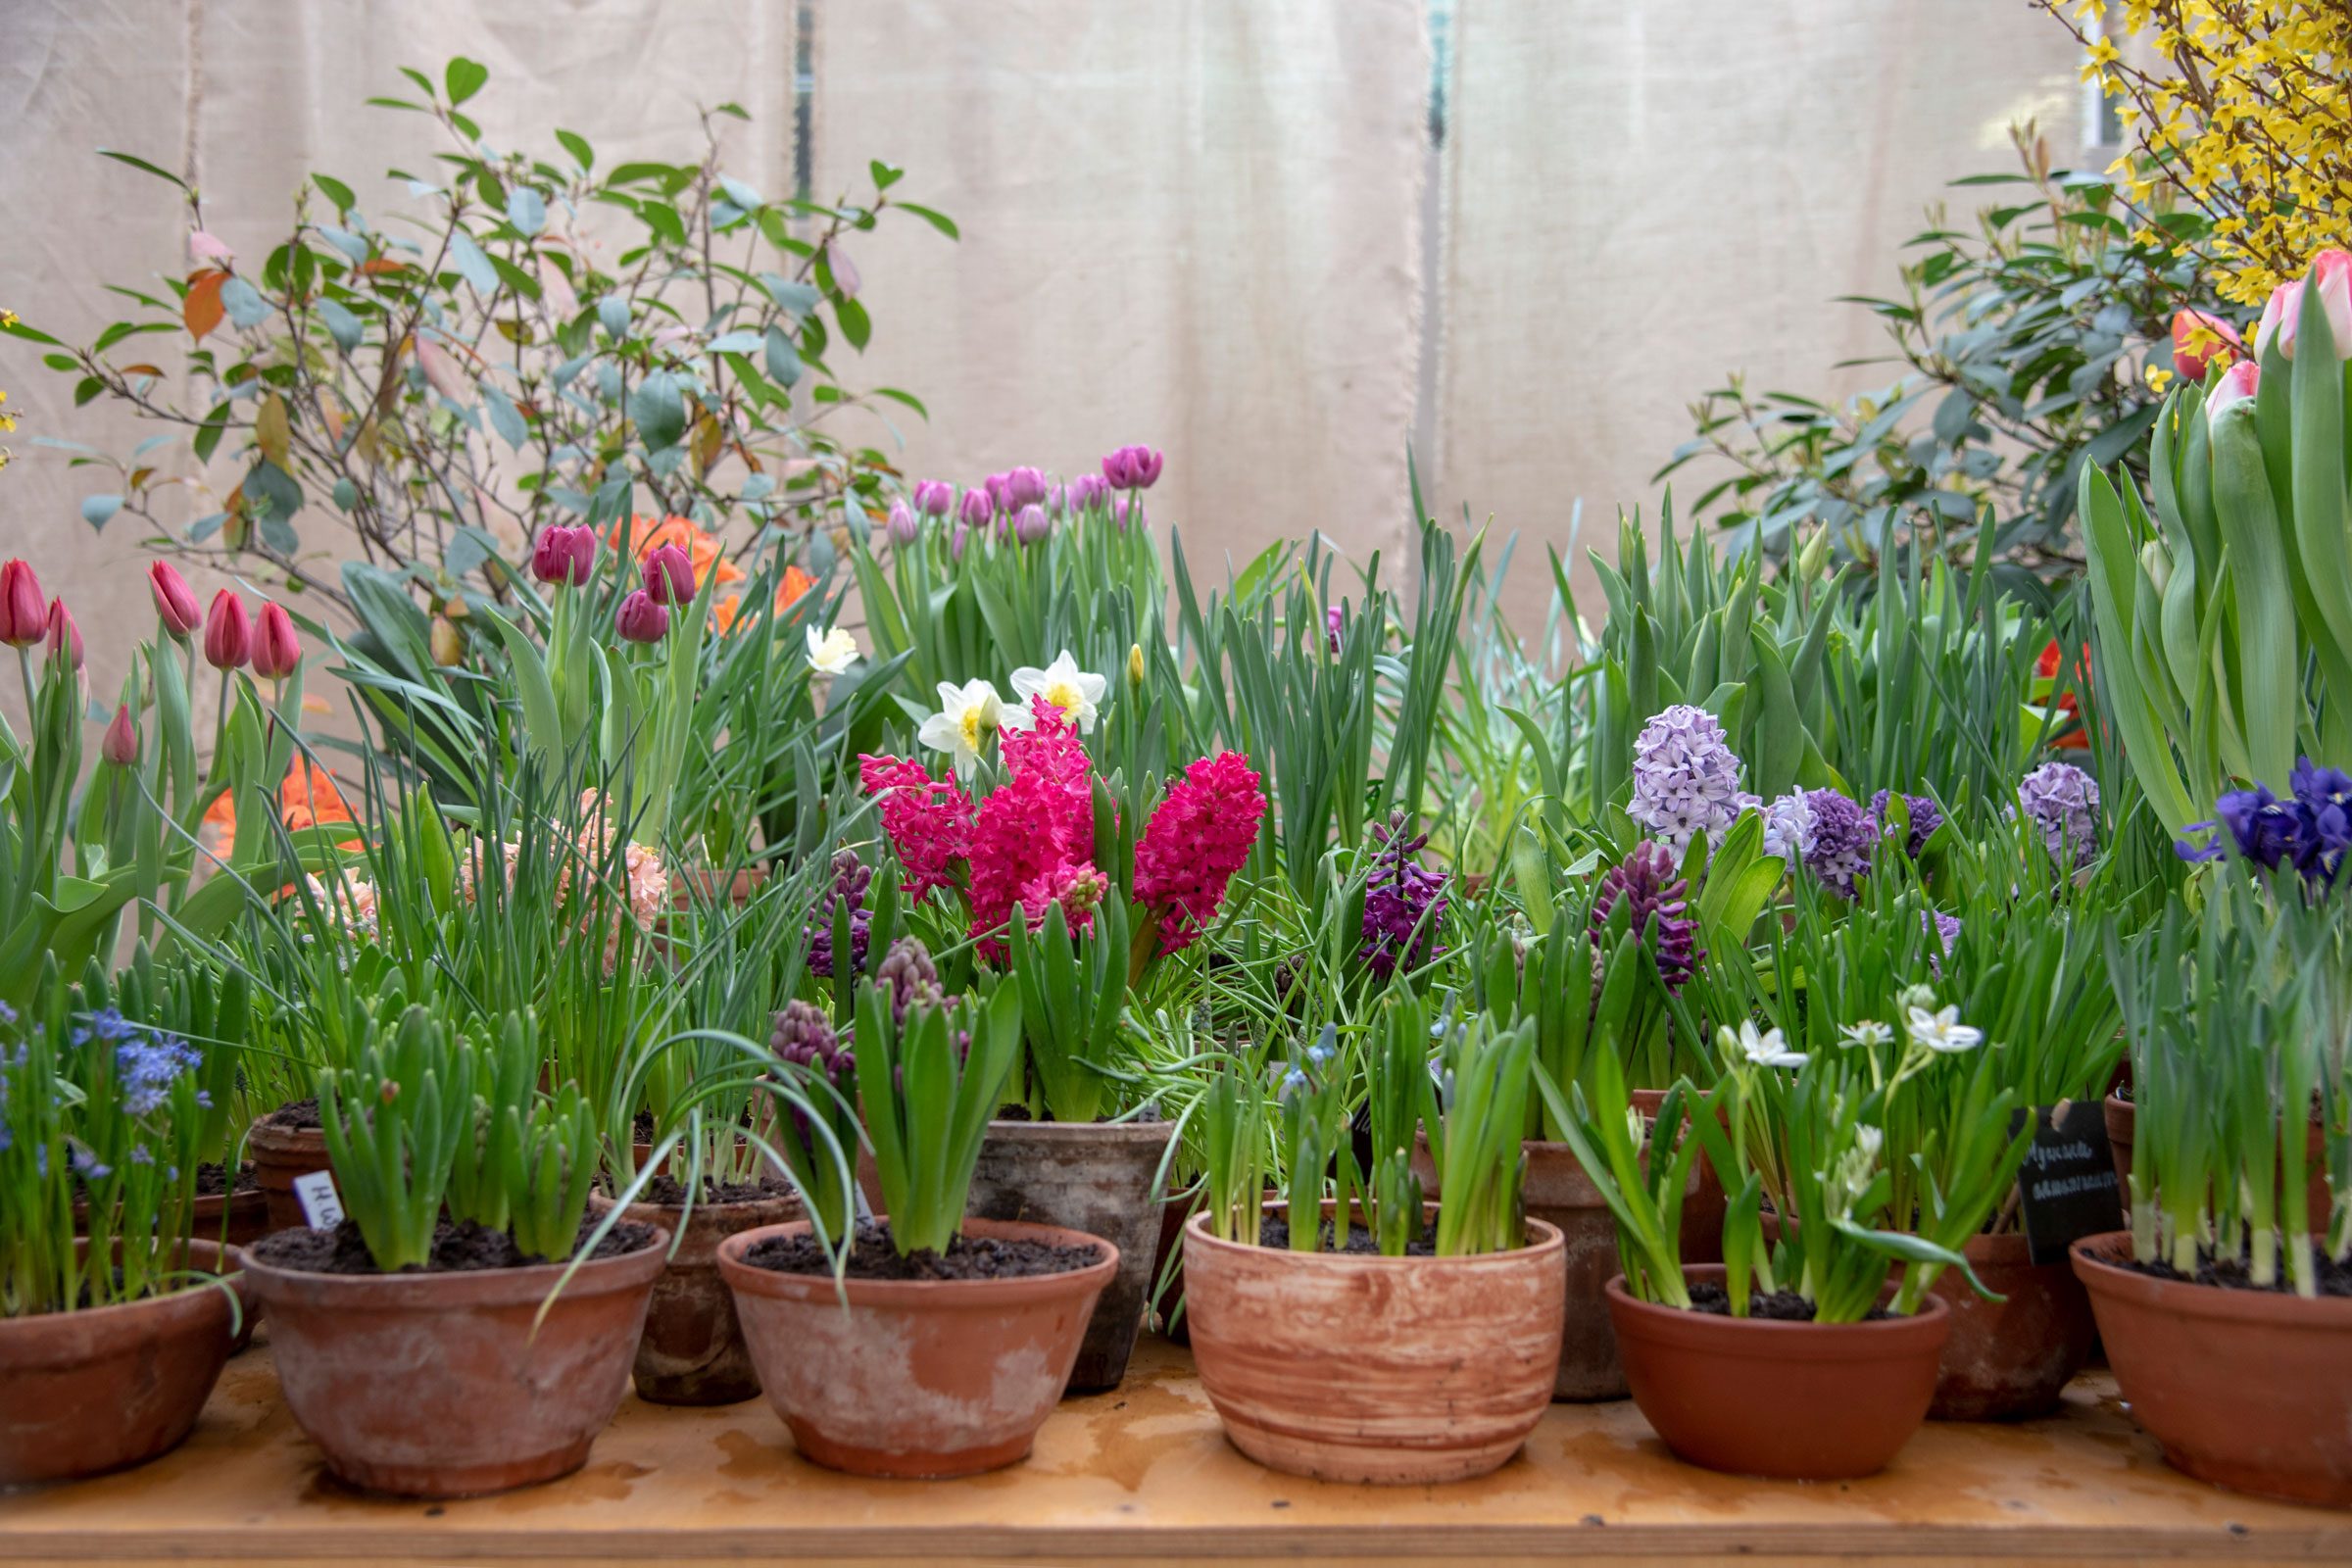
Planting bulbs in pots is one of the easiest ways to make spring feel like it arrived with a brass band. You tuck a few odd-looking bulbs into soil in fall, ignore them for a while, and thensurpriseyour porch, balcony, patio, or kitchen window suddenly looks like it hired a floral designer. Tulips, daffodils, crocus, hyacinths, grape hyacinths, and alliums can turn an ordinary container into a tiny parade of color.
The best part? You do not need a sprawling garden, a fancy greenhouse, or a degree in plant wizardry. A good container, fresh potting mix, healthy bulbs, and a little timing can do most of the heavy lifting. Still, bulbs are not “drop them anywhere and hope” plants. They have preferences. They want drainage, depth, chill time, and the right kind of aftercare. Treat them well, and they will reward you. Treat them badly, and they may sulk underground like dramatic little onions.
This guide explains what to know about planting bulbs in pots, from choosing the right container to layering bulbs for a longer bloom show. Whether you are decorating a front step, brightening a small balcony, or forcing bulbs indoors for winter blooms, these practical tips will help you grow healthier, happier flowers in containers.
Why Plant Bulbs in Pots?
Planting bulbs in containers gives gardeners a level of control that in-ground planting does not always offer. You can move pots where the blooms look best, protect bulbs from soggy garden beds, create dense displays, and experiment with color combinations without rearranging the entire landscape.
Bulbs in pots are especially useful for small-space gardeners. Apartment balconies, townhome patios, rented homes, and compact yards can all support container bulbs. A pot of daffodils by the door says “spring is here” much more cheerfully than a welcome mat that has seen too many muddy shoes.
Containers also make it easier to manage soil quality. Many spring-flowering bulbs dislike heavy, poorly drained soil because sitting in water can lead to rot. In pots, you can use a light, well-draining potting mix and avoid the clay-soil drama entirely.
Choose the Right Bulbs for Containers
Most spring-flowering bulbs can grow well in pots, but some are more container-friendly than others. Shorter varieties usually perform better because they are less likely to flop in wind or rain. Dwarf daffodils, compact tulips, crocus, hyacinths, grape hyacinths, snowdrops, and smaller alliums are excellent choices.
Best Spring Bulbs for Pots
Daffodils: Reliable, cheerful, and less tempting to many pests than tulips. Dwarf varieties such as miniature narcissus are ideal for small containers.
Tulips: Bold and colorful, but often treated as annuals in pots because they may not rebloom strongly the next year. They are still worth it. Tulips are basically the fireworks of spring containers.
Crocus: Small, early, and delightful. Crocus bulbs work beautifully near the top layer of a container and are among the first signs that winter is finally packing its bags.
Hyacinths: Famous for fragrance. A pot of hyacinths near a doorway can perfume the air so well that guests may suspect you sprayed something expensive.
Grape hyacinths: Easygoing, compact, and perfect for filling gaps between larger bulbs.
Alliums: Great for structure and late-spring drama. Choose smaller varieties for pots unless your container is large and stable.
Pick a Container With Excellent Drainage
The number one rule for planting bulbs in pots is simple: drainage is not optional. A container must have drainage holes at the bottom. Bulbs store energy in fleshy tissue, and if they sit in soggy soil for too long, they can rot before they ever get the chance to bloom.
Choose a pot deep enough to hold soil beneath the bulbs, the bulbs themselves, and enough soil above them. For many spring bulbs, a container that is at least 8 to 12 inches deep works well. Larger containers provide more room for roots and better insulation during cold weather. In colder climates, wider and deeper pots are often safer because small containers freeze more quickly.
Materials matter, too. Terra-cotta pots look charming but dry out faster and can crack in freezing weather. Plastic, fiberglass, resin, and glazed ceramic containers hold moisture longer and may handle winter conditions better. If you use ceramic, make sure it is frost-resistant if it will stay outdoors.
Use Fresh, Well-Draining Potting Mix
Do not fill bulb containers with heavy garden soil. Garden soil can compact in pots, limiting oxygen around the roots and causing poor drainage. Instead, use a high-quality potting mix designed for containers. A good mix holds some moisture while allowing excess water to escape.
Fresh potting mix is best, especially when planting bulbs that will spend months in the container. Reused soil may carry disease problems or have fewer nutrients. If you do reuse potting mix, refresh it with compost or a slow-release bulb fertilizer, and avoid soil from pots where plants struggled with disease.
For outdoor containers, skip the old myth about adding a layer of gravel to the bottom for drainage. What bulbs need most is a pot with real drainage holes and a consistent potting mix that does not become a swamp. Gravel may make the pot heavier, but it does not magically rescue poor drainage.
Know When to Plant Bulbs in Pots
For spring blooms, plant hardy spring-flowering bulbs in fall. The exact timing depends on your climate, but the goal is to plant after temperatures cool and before the potting mix freezes solid. Bulbs need time to grow roots before winter settles in.
In colder regions, fall planting often happens from September through November. In warmer climates, gardeners may need to pre-chill certain bulbs, especially tulips and hyacinths, because these bulbs require a cold period to trigger proper bloom development. If you live where winters are mild, buy pre-chilled bulbs or chill them in the refrigerator according to supplier instructions. Keep bulbs away from apples and other ripening fruit, which can release ethylene gas and damage developing flowers.
Summer-flowering bulbs are different. Dahlias, gladiolus, caladiums, cannas, and many tender bulbs or tubers are generally planted in spring after the danger of frost has passed. In cold areas, these tender plants may need to be lifted and stored before winter.
How Deep Should You Plant Bulbs in Pots?
Planting depth depends on the bulb type and size. A common rule is to plant bulbs about two to three times as deep as the height of the bulb. Large bulbs such as tulips and daffodils usually go deeper than small bulbs such as crocus or grape hyacinths.
In containers, spacing can be tighter than in garden beds because the goal is often a full, showy display. Bulbs should be close, but not touching each other or the sides of the pot. Think cozy theater seating, not a packed elevator.
Basic Planting Steps
Start by adding several inches of potting mix to the bottom of the container. Place the largest bulbs first, with the pointed end facing up and the root end facing down. Cover with potting mix until the next planting level is reached. Add smaller bulbs above if you are layering. Finish with soil, water thoroughly, and label the pot with the bulb varieties and planting date.
Labeling sounds boring until spring arrives and you find yourself staring at six identical pots asking, “Are you tulips or daffodils?” Future you will appreciate the tiny tag.
Try the “Bulb Lasagna” Method
Bulb lasagna is a layering method that creates a longer-lasting container display. No noodles are involved, which is disappointing at dinner but excellent for gardening.
The idea is to plant bulbs in layers according to size and bloom time. Large, later-blooming bulbs go in the deepest layer. Medium bulbs go above them. Small, early-blooming bulbs go near the top. As spring arrives, different flowers emerge in waves.
Example Bulb Lasagna Combination
For a large pot, place daffodils or tulips in the bottom layer. Add potting mix, then plant hyacinths or smaller tulips in the middle layer. Add more mix, then tuck crocus or grape hyacinths near the top. The result is a container that starts with early color and continues blooming for weeks.
For the best effect, choose bulbs with compatible colors and staggered bloom times. A mix of purple crocus, yellow daffodils, and deep pink tulips can look lively without turning the pot into a floral traffic jam.
Watering Bulbs in Containers
After planting, water the pot thoroughly so the potting mix settles around the bulbs. During winter, the mix should stay slightly moist but never waterlogged. Outdoor pots may receive enough moisture from rain or snow, but covered porches and balconies can stay surprisingly dry.
Check containers occasionally during dry spells. If the potting mix is dry several inches down, water lightly. Once growth appears in spring, increase watering as needed. Actively growing bulbs use more moisture, especially in sunny or windy locations.
Good watering is a balancing act. Too little moisture can weaken root growth. Too much can rot the bulbs. The sweet spot is evenly moist, not soggy.
How to Overwinter Bulbs in Pots
Overwintering is one of the biggest differences between planting bulbs in pots and planting them in the ground. In garden beds, soil insulates bulbs. In containers, the roots and bulbs are more exposed to freezing and thawing.
In cold climates, move planted pots to a protected location such as an unheated garage, shed, cold frame, or sheltered wall. The bulbs should stay cold, but extreme freeze-thaw cycles should be reduced. Do not bring hardy spring bulbs into a warm room too early unless you are intentionally forcing them indoors.
If pots remain outdoors, choose large containers and group them together for extra protection. You can also surround pots with leaves, straw, or mulch. The goal is not to keep bulbs warm like tropical vacationers; it is to keep them cold and stable enough to complete their winter rest.
Forcing Bulbs Indoors
Forcing bulbs means encouraging them to bloom indoors earlier than they would outdoors. Tulips, daffodils, crocus, hyacinths, and grape hyacinths are popular choices. Most hardy spring bulbs need a chilling period before they can bloom properly.
To force bulbs, pot them in a container with drainage, water well, and keep them in a cold location for the required chilling period. A refrigerator, unheated garage, or cold basement may work if temperatures stay consistently cool but not brutally frozen. Once shoots appear and the chilling period is complete, move the pot to a cool, bright room. Avoid placing it directly beside a heater, unless you want flowers that bloom fast and collapse like they just ran a marathon.
Indoor forced bulbs often do not rebloom well in later years because they use so much stored energy. After flowering, you can compost them, or try planting hardy types outdoors after the foliage yellows. Daffodils are more likely than tulips to recover over time.
Sunlight Needs for Potted Bulbs
Most spring bulbs prefer full sun to part sun while they are actively growing. In early spring, deciduous trees may not have leafed out yet, so areas that become shady later in the season can still work for bulbs.
Place outdoor containers where they receive bright light once growth begins. Indoors, put forced bulbs near a cool, sunny window. Rotate the pot every few days if stems lean toward the light. This keeps the display more balanced and prevents the “all flowers bowing to one side” look.
Fertilizing Bulbs in Pots
Bulbs already contain stored energy, which is why they can bloom so impressively from such humble packaging. However, fertilizer can support root growth and future performance, especially if you plan to keep the bulbs after flowering.
Mix a bulb fertilizer into the potting mix at planting according to label directions. Avoid overfertilizing, especially with high-nitrogen products, because too much nitrogen can encourage leafy growth at the expense of flowers. If the bulbs are being grown as a one-season display, fertilizer is helpful but not worth obsessing over.
What to Do After Bulbs Bloom
Once flowers fade, remove the spent blooms so the plant does not waste energy making seed. Leave the foliage in place until it yellows naturally. The leaves are solar panels, feeding the bulb for next year. Cutting them off too early is like unplugging your phone at 7 percent and expecting it to last all day.
If you treated the container as a seasonal display, you can compost the bulbs after bloom and replant the pot with annuals. If you want to save hardy bulbs, keep watering lightly while the leaves remain green. After the foliage dies back, move the pot to a dry, protected place or transplant the bulbs into the garden.
Tulips in pots often decline after the first year, while daffodils, grape hyacinths, and some small bulbs may return more reliably. Results vary by climate, variety, and care.
Common Mistakes When Planting Bulbs in Pots
Using Pots Without Drainage
This is the fastest route to bulb heartbreak. Decorative cachepots are fine only if the actual planting pot inside has drainage holes and excess water can be emptied.
Planting Too Shallow
Bulbs planted too shallowly may be less protected from temperature swings and may not anchor well. Follow package directions when available.
Letting Pots Dry Out Completely
Bulbs do not need constant watering during dormancy, but bone-dry potting mix can damage developing roots. Check pots occasionally.
Skipping the Cold Period
Many spring bulbs need chilling to bloom. Without enough cold exposure, you may get leaves but few or no flowers.
Choosing Tall Bulbs for Tiny Pots
Tall tulips in a lightweight container can tip over. Match bulb height to pot size, or use heavier containers for dramatic varieties.
Design Ideas for Beautiful Bulb Containers
For a clean, modern look, plant one variety in a single color. A pot packed with white hyacinths or red tulips can look elegant and intentional. For a cottage-garden feel, mix several bulbs with different shapes and bloom times.
You can also top-dress pots with pansies, violas, creeping Jenny, or ornamental kale after bulbs are planted. The bulbs will grow up through the annuals in spring, creating a lush, layered effect. Just be careful not to damage emerging shoots when adding companion plants.
For front steps, use matching containers on both sides of the door. For patios, group pots of different heights. For balconies, choose compact bulbs and lightweight containers that fit safely within weight limits.
Experience-Based Tips for Planting Bulbs in Pots
After planting bulbs in pots for several seasons, one lesson becomes very clear: containers reward preparation. The prettiest spring pots are usually not the result of luck. They come from small decisions made months earlier, when the weather is cool, the bulbs look boring, and spring feels very far away.
One practical experience is to plant more bulbs than you think you need. In a garden bed, bulbs can be spaced generously because the surrounding plants help fill the scene. In a pot, empty gaps are much more obvious. A sparse container of three tulips can look a little lonely, like they arrived early to a party no one else attended. A fuller planting creates that lush catalog-photo effect. The bulbs should not be crushed together, but they can sit closer than they would in the ground.
Another useful habit is to plan bloom height. Put taller bulbs in the center or back of the container and shorter bulbs around the front edge. If the pot will be viewed from all sides, plant tall bulbs in the center and small bulbs around them. This simple arrangement makes the container look designed instead of accidental.
It also helps to take notes. Write down the bulb names, planting date, and bloom time. Photos are even better. When spring arrives, photograph the container at peak bloom. Later, you can compare what worked and what looked slightly ridiculous. Maybe the orange tulips clashed with the pink hyacinths. Maybe the crocus bloomed beautifully but disappeared before the tulips woke up. Gardening memory is unreliable; a quick note saves you from repeating the same mistakes with confidence.
Watering is another area where experience matters. Many beginners plant bulbs, water once, and forget the pot until spring. That can work in rainy climates, but covered porches, balconies, and garage-stored pots may dry out. A monthly check during winter can prevent disappointment. The potting mix does not need to be wet, but it should not turn into dust.
Finally, do not panic if growth appears uneven. Bulbs rarely emerge like synchronized swimmers. Crocus may pop up first, daffodils may follow, and tulips may take their sweet time. As long as the bulbs were healthy and the pot has been kept properly chilled and lightly moist, the show usually comes together. Part of the fun of planting bulbs in pots is that spring arrives in chapters, not all at once.
The biggest experience-based tip is simple: start with easy bulbs. Daffodils, crocus, grape hyacinths, and hyacinths are forgiving choices for beginners. Once you understand how your climate, containers, and watering habits work, experiment with tulips, alliums, and layered bulb lasagna designs. Container bulb gardening is wonderfully addictive. One pot becomes three. Three become eight. Before long, your porch looks like it is auditioning for a botanical magazine, and honestly, there are worse problems to have.
Conclusion
Planting bulbs in pots is a simple, satisfying way to bring seasonal color to porches, balconies, patios, windowsills, and small gardens. The keys are choosing healthy bulbs, using containers with drainage, planting at the right depth, providing enough cold exposure for spring-flowering bulbs, and keeping the potting mix lightly moist rather than soggy.
For beginners, start with reliable bulbs such as daffodils, crocus, grape hyacinths, and hyacinths. For a bigger show, try layering bulbs in a large container so different flowers bloom in waves. With a little fall planning, you can enjoy a spring display that looks far more complicated than it actually was. That is the quiet magic of bulbs: they let you look like a gardening genius while they do most of the work underground.