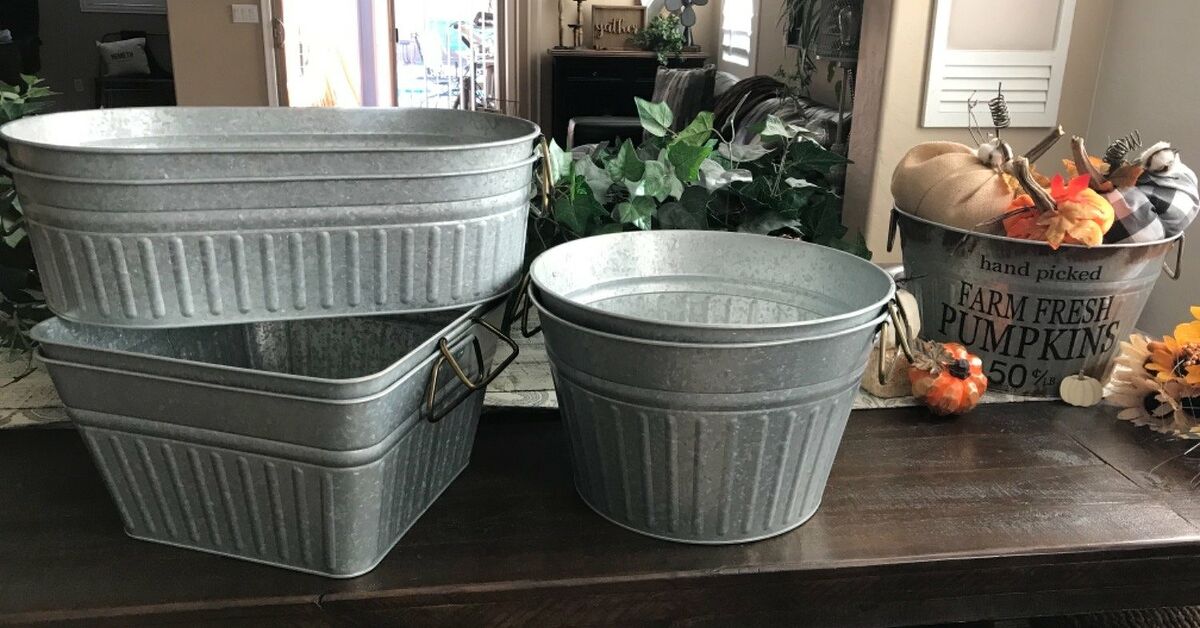
A plain galvanized bucket is a lot like plain toast: useful, dependable, and begging for a glow-up. On its own, it has that cool farmhouse-industrial charm. But with a little paint, texture, stenciling, greenery, ribbon, or distressing, it can become porch decor, tabletop storage, a centerpiece, a planter sleeve, or the star of a seasonal display. That is the magic of a galvanized bucket makeover. It is affordable, beginner-friendly, and oddly satisfying in the way that alphabetizing spices is satisfying. Maybe more.
If you have ever spotted a silver pail at a thrift store, craft shop, or tucked under someone’s front bench and thought, “That could be cute, but right now it looks like it is waiting for livestock,” this guide is for you. Below, you will learn how to decorate a galvanized bucket step by step, what supplies work best, how to avoid paint that peels like a sunburned vacation memory, and how to style your finished piece so it looks intentional instead of accidental.
Why a Galvanized Bucket Makeover Works So Well
Galvanized metal has a built-in rustic personality. It already feels vintage, practical, and a little country without trying too hard. That makes it one of the easiest materials to decorate for cottage, farmhouse, shabby chic, industrial, patriotic, holiday, and garden styles. A bucket can hold faux stems in spring, lemonade bottles in summer, mums in fall, and pine branches in winter. That is not decor. That is overachieving.
It also helps that galvanized buckets are widely available in different sizes. Small ones work as centerpieces, utensil holders, desk organizers, or party favors. Medium and large buckets can become porch planters, drink tubs, gift baskets, toy storage, or seasonal displays. Because the form is simple, almost any makeover technique stands out beautifully against it.
Before You Start: Know Your Surface
The biggest mistake in a galvanized bucket makeover is treating galvanized metal like unfinished wood. It is not. Galvanized metal has a zinc-coated surface that can resist adhesion if you skip proper prep. Translation: if you rush in with the wrong paint and a prayer, your beautiful makeover may peel, chip, or flake when you least need drama.
For the best results, start with a bucket that is clean and dry. Wash away grease, dust, stickers, and residue with mild soap and water, then let it dry fully. If the surface is glossy or slick, lightly scuff it with fine-grit sandpaper or a sanding sponge. You are not trying to sand it into another dimension. You just want to dull the finish enough to help primer and paint grip better.
If there is rust, scrub away loose corrosion first. If your bucket will live outdoors, choose products intended for metal and exterior exposure. If you are decorating a bucket to hold real plants, plan for drainage or use a plastic nursery pot inside the bucket rather than filling the metal container directly with soil.
Supplies for a Stylish Galvanized Bucket Makeover
Basic Prep Supplies
- Mild dish soap and water
- Clean microfiber cloths
- Fine-grit sandpaper or sanding sponge
- Metal-friendly primer
- Painter’s tape
Decorating Supplies
- Spray paint or acrylic craft paint suitable for metal or primed surfaces
- Foam brush or small paintbrushes
- Stencils, stamps, or vinyl lettering
- Ribbon, twine, jute rope, or fabric strips
- Decoupage paper, napkins, or printed labels
- Sealer or topcoat if appropriate for your finish
- Optional embellishments such as wood tags, faux florals, beads, or handles
The exact supply list depends on your style. A modern makeover might need matte black spray paint and a simple label. A farmhouse version might call for chalky white paint, distressing, and jute twine. A patriotic bucket may need navy paint, white stars, and a very confident attitude.
How to Decorate a Galvanized Bucket: Step-by-Step
1. Clean It Like You Mean It
Start by washing the bucket thoroughly. Remove all dust, oil, price stickers, and grime. Even a thin film of residue can cause adhesion problems later. Dry it well, then inspect the surface. If it still looks shiny enough to reflect your life choices, move to the next step.
2. Scuff the Surface
Lightly sand the outside where you plan to decorate. Focus on the spots where paint or decoupage will go. Wipe off sanding dust with a clean cloth. This small step makes a big difference. It is the DIY equivalent of stretching before a workout: easy to skip, unwise to ignore.
3. Prime First
Apply a bonding or galvanized-metal-friendly primer in light, even coats. Let it dry according to product directions. Primer creates the bridge between a slick metal surface and the decorative finish you actually want to show off. If you are using spray primer, work in a well-ventilated area and keep the can moving to avoid drips.
4. Paint the Base Coat
Once the primer is dry, add your base color. White, cream, sage, black, navy, blush, charcoal, and muted blue all work beautifully on galvanized buckets. For a cottage look, choose soft tones and a slightly imperfect hand-painted finish. For a modern look, go bold and clean with matte black, forest green, or deep blue. Two thin coats usually look better than one heavy coat.
5. Add Decorative Detail
This is where your galvanized bucket makeover gets its personality. Try one of these easy options:
- Stencil a word or monogram: Great for labels like “Blooms,” “Herbs,” “Utensils,” or a family initial.
- Dry brush a second color: This adds dimension and makes the bucket feel aged or layered.
- Wrap the handle or rim: Use ribbon, leather strips, twine, or fabric for texture.
- Decoupage a panel: Apply floral paper, seed packet art, vintage labels, or botanical prints.
- Add stripes or blocks of color: Painter’s tape helps create crisp lines.
- Use metallic highlights: A little gold, bronze, or copper can make a simple bucket look custom.
6. Distress It Only If It Suits the Style
Distressing is not mandatory. Not every bucket dreams of becoming an antique. But if you want a weathered farmhouse finish, lightly sand raised edges and handle areas after the paint dries. This reveals bits of metal or the underlayer and makes the piece feel timeworn. Keep it subtle. You are going for charmingly aged, not “survived a tractor parade.”
7. Seal and Style
If your bucket will be handled often or used outside in a protected area, finish with an appropriate clear topcoat. Then style it with something that suits the makeover: faux lavender, rolled towels, kitchen utensils, mini pumpkins, wrapped gifts, pine branches, or party napkins. A bucket without styling is like a picture frame without a picture. Technically fine. Emotionally incomplete.
Best Design Ideas for a Galvanized Bucket Makeover
Farmhouse Flower Bucket
Paint the bucket soft white or dusty blue, stencil the word “Flowers,” then lightly distress the edges. Fill it with faux eucalyptus, cotton stems, or seasonal blooms. This works beautifully on mantels, kitchen islands, entry tables, and porches.
Herb Garden Bucket
Use smaller buckets and label each one with basil, thyme, rosemary, or mint. Tuck nursery pots inside so watering is easier. Line them on a windowsill, shelf, or deck rail for a practical and decorative garden display.
Patriotic Porch Bucket
Paint the lower portion navy, stencil white stars, and tie a red ribbon around the handle. Add mini flags, pinwheels, or white flowers for a Fourth of July display that feels cheerful without looking like a parade exploded on your porch.
Holiday Evergreen Bucket
Leave part of the galvanized finish visible, add a plaid bow, and fill the bucket with pine clippings, magnolia leaves, faux berries, and twinkle lights. This is the kind of arrangement that makes your entryway feel like it knows how to bake pies from scratch.
Industrial Modern Organizer
Paint the bucket matte black or deep charcoal and add a minimal white label. Use it in a home office for supplies, in the bathroom for rolled washcloths, or in the mudroom for gloves and hats. Clean lines plus useful storage is always a winning combination.
Garden Party Drink Tub
Keep the bucket mostly metallic, then embellish it with painted stars, a hand-lettered phrase, or rope handles. Fill it with ice and bottled drinks for outdoor gatherings. It feels casual, charming, and just a little bit like you host better parties than you actually do.
Common Mistakes to Avoid
Skipping Primer
This is the classic error. Galvanized metal needs the right prep if you want your makeover to last. Going straight to paint may look fine on day one and betray you by week three.
Using the Wrong Paint Type
Some traditional oil-based products do not play nicely with galvanized metal. Use paint systems designed for metal, galvanized surfaces, or properly primed slick surfaces. Read the label before you commit to a finish.
Overdecorating the Bucket
Yes, the ribbon is cute. Yes, the stencil is cute. Yes, the wood tag is cute. But all three plus lace plus beads plus five silk peonies plus a giant bow can turn a simple makeover into a craft-store hostage situation. Pick one main style direction and let it breathe.
Ignoring the Bucket’s Use
If the bucket will hold plants, plan for drainage. If it will sit outdoors, use finishes that can tolerate moisture and temperature shifts. If it will store utensils or towels, keep the embellishments secure and practical. Pretty matters, but function matters too.
How to Style Your Finished Bucket at Home
A decorated galvanized bucket looks best when it has a purpose. On a dining table, try a floral arrangement with varying stem heights. On a kitchen counter, use it for wooden spoons or rolled tea towels. On a porch, cluster multiple buckets at different heights with lanterns or planters. In a bathroom, fill one with toilet paper rolls or eucalyptus stems. In a child’s room, use a painted bucket for books, blocks, or toy cars. The bucket becomes more interesting when it feels integrated into the space instead of dropped there as a last-minute afterthought.
Grouping also helps. A single bucket can be lovely, but three buckets in graduated sizes create visual rhythm. Pair one with wood crates, old books, woven baskets, or ceramic pots for a layered look. Mix textures so the galvanized metal does not have to carry the whole style show by itself.
Final Thoughts on a Galvanized Bucket Makeover
The best part of learning how to decorate a galvanized bucket is that there is very little risk and a lot of creative payoff. You do not need advanced tools, expensive materials, or a reality-show craft room with twelve labeled drawers and perfect lighting. You need a bucket, a plan, and the willingness to sand before you start pretending you are finished.
Whether you want a rustic planter, a seasonal centerpiece, a modern organizer, or a porch accent that looks far more expensive than it was, a galvanized bucket makeover delivers charm fast. Start simple, keep the design intentional, and remember that even a humble metal pail can become something polished, personal, and surprisingly stylish.
Real-Life Experiences and Lessons From Decorating Galvanized Buckets
One of the most useful things people discover during a galvanized bucket makeover is that the first idea is not always the best idea, but it often leads to the better one. A lot of DIYers begin with a strong vision: maybe a distressed farmhouse bucket with a giant bow, maybe a sleek matte-black planter, maybe a cheerful floral centerpiece. Then the actual bucket shows up with dents, ridges, odd handles, or a shinier finish than expected. That is when creativity gets practical. Instead of forcing the original plan, experienced decorators work with the bucket’s personality. A dent becomes “vintage character.” A seam becomes the perfect place to stop a stripe. An uneven rim suddenly looks fantastic with loosely arranged stems. In other words, the bucket usually wins the argument, and honestly, it has decent instincts.
Another common experience is learning that subtle changes often look the most expensive. Many beginners think a makeover needs a lot of layers to feel finished. Then they paint one bucket soft sage, add a small cream label, wrap the handle in jute, and realize it looks better than the version that included stenciled vines, faux pearls, and enough ribbon to decorate a small parade float. Galvanized metal already has texture and visual interest, so it does not need to be smothered. A little contrast goes a long way.
People also tend to discover their favorite styling trick by accident. A bucket meant for flowers becomes a kitchen utensil holder. One made for a porch display ends up in the bathroom holding rolled hand towels. A holiday bucket gets emptied in January and refilled with eucalyptus for spring. That flexibility is part of the appeal. Once you decorate one bucket successfully, you start seeing them everywhere and assigning them jobs they never knew they wanted.
There is also usually one small failure that teaches the biggest lesson. Maybe the paint scratched because the surface was not scuffed enough. Maybe the stencil bled because the brush was too wet. Maybe a planter setup got messy because there were no drainage holes or no inner pot. These are not disasters. They are the price of becoming the person who now casually says things like, “Oh, on galvanized metal, I always prep first.” That sentence alone sounds like growth.
Perhaps the best experience of all is how quickly a bucket makeover can change a space. A porch corner that looked forgotten suddenly feels styled. A plain table looks intentional with a simple centerpiece. A shelf gains warmth with one painted container and a few stems. The makeover is small, but the effect can be surprisingly big. That is why galvanized bucket decor remains so popular: it is approachable, adaptable, affordable, and weirdly addictive. Finish one bucket, and there is a very real chance you will start eyeing every metal pail, tub, and container in a ten-mile radius like your next masterpiece.