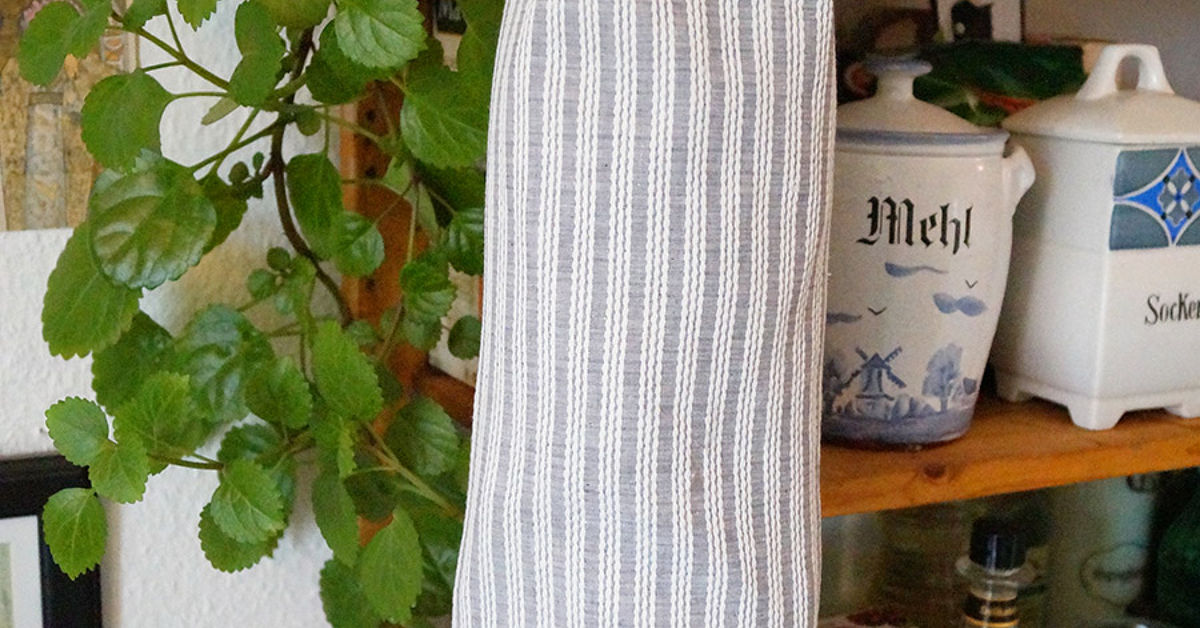
There are two kinds of kitchens in this world: the ones with a neat little place for plastic grocery bags, and the ones where a cabinet door opens and twenty bags leap out like they have been waiting years for freedom. If your reusable bag pile, grocery sacks, produce bags, or small trash liners have started forming their own civilization under the sink, sewing a bag dispenser is the charming, practical, and surprisingly satisfying solution.
A fabric bag dispenser is a simple hanging sleeve that stores bags from the top and lets you pull one out from the bottom. It is part sewing project, part home organization hack, and part tiny act of rebellion against kitchen clutter. Best of all, it is beginner-friendly. You do not need couture-level skills, a fancy sewing studio, or a dramatic measuring tape around your neck. A basic sewing machine, a rectangle of fabric, elastic, ribbon, and a little patience will do the job beautifully.
This guide walks you through how to sew a bag dispenser from start to finish, including fabric choices, measurements, construction tips, customization ideas, troubleshooting, and real-life lessons learned from making these handy kitchen organizers. Whether you want a plastic bag holder for your pantry, laundry room, mudroom, RV, craft space, or pet station, this project is useful, washable, giftable, and cute enough to make your junk drawer feel mildly embarrassed.
What Is a Bag Dispenser?
A bag dispenser is a fabric storage sleeve designed to hold lightweight bags in one tidy place. Most homemade versions have an opening at the top for stuffing bags in and an elasticized opening at the bottom for pulling bags out one at a time. It usually hangs from a loop, ribbon, or fabric tab on a hook, cabinet knob, pantry rail, or wall peg.
The classic version is shaped like a soft tube. It looks a little like a cheerful fabric sausage, but with better manners. The top stays open enough for quick refilling, while the bottom opening is gathered with elastic so the bags do not tumble out in a plastic avalanche. This makes it ideal for storing grocery bags, small trash bags, pet cleanup bags, reusable produce bags, or fabric scraps you plan to reuse.
Why Sew a Bag Dispenser Instead of Buying One?
You can buy a bag dispenser, of course. You can also buy pre-chopped onions, but sometimes doing it yourself is more satisfying and less likely to make you question your life choices. Sewing your own bag dispenser gives you control over size, fabric, color, durability, and style.
For home organization, a handmade bag dispenser solves a common problem: bags are useful, but they multiply in dark cabinets when nobody is watching. Keeping them contained makes your kitchen cleaner and your routine smoother. Instead of rummaging under the sink while muttering at a mountain of crinkly chaos, you can simply pull one bag from the bottom and move on with your day like a highly organized adult.
From a sustainability angle, a dispenser encourages reuse. Plastic bags should not usually go into regular curbside recycling because they can tangle in sorting equipment, but clean and dry plastic film can often be returned through store drop-off programs where accepted. A dispenser helps you reuse what you already have before responsibly recycling extras. It is not a magic wand for the planet, but it is a practical step toward less waste and better habits.
Best Fabrics for Sewing a Bag Dispenser
The best fabric for a bag dispenser is medium-weight cotton, quilting cotton, canvas, duck cloth, linen blend, or any washable fabric with enough body to hold its shape. Quilting cotton is the most beginner-friendly choice because it is easy to cut, press, sew, and personalize. A fat quarter often works well for a smaller dispenser, while a larger fabric rectangle creates a roomier version for busy households.
Good Fabric Choices
Quilting cotton: Lightweight, easy to sew, and available in endless prints. Perfect for beginners and gift projects.
Cotton canvas: More structured and durable, especially useful for laundry rooms, garages, or high-use kitchens.
Linen blend: Stylish and breathable, though it may wrinkle more. Great for farmhouse, minimalist, or natural decor.
Upcycled fabric: Old curtains, pillowcases, tablecloths, or clean cotton shirts can become excellent dispensers. Just avoid fabric that is too stretchy, slippery, or fragile.
If the fabric is very thin, add lightweight fusible interfacing to give it more structure. If it is very thick, skip bulky double folds where possible and use a sturdy needle. The goal is a dispenser that hangs nicely, washes well, and does not collapse like a sad pancake.
Supplies You Need
For a standard DIY plastic bag dispenser, gather the following supplies:
- One fabric rectangle, approximately 18 inches by 22 inches
- One piece of 1/4-inch elastic, about 8 to 10 inches long
- One ribbon, twill tape, or fabric loop, about 8 to 12 inches long
- Matching thread
- Sewing machine
- Iron and ironing board
- Fabric scissors or rotary cutter
- Pins or sewing clips
- Safety pin or bodkin for threading elastic
- Measuring tape or quilting ruler
These measurements are flexible. If you want a slimmer dispenser, use a smaller rectangle. If your family produces grocery bags at Olympic speed, make it longer and wider. For most homes, 18 by 22 inches is a sweet spot: roomy enough to be useful, small enough to hang neatly.
Before You Start: Prewash and Press
Prewashing fabric is not glamorous, but neither is watching your finished project shrink into a doll-sized tube after its first trip through the laundry. Wash and dry the fabric the way you plan to care for the finished dispenser. Then press it flat.
Pressing matters. It gives your seams cleaner edges, makes casing folds easier, and prevents the project from looking like it was assembled during a minor earthquake. A hot iron is one of the secret weapons of good sewing. The machine gets the applause, but the iron does half the work.
How to Sew a Bag Dispenser Step by Step
Step 1: Cut the Fabric
Cut one rectangle of fabric measuring about 18 inches wide by 22 inches tall. If your fabric has a directional print, such as chickens, flowers, lemons, or tiny cats wearing suspicious expressions, make sure the design will face the correct direction when the dispenser hangs.
The 18-inch side will become the width around the tube, and the 22-inch side will become the height. You can adjust this depending on where you want to hang it. A pantry dispenser may be longer, while an RV or apartment version may be shorter.
Step 2: Finish the Short Ends
Place the fabric wrong side up. At the top short edge, fold the fabric down 1/4 inch and press. Fold again about 3/4 inch to 1 inch and press. Stitch close to the inner folded edge to create a clean hem or casing. Repeat on the bottom short edge.
The bottom casing is where the elastic will go. The top can be left as a simple finished opening or made into a casing as well if you want to add elastic or a drawstring. For a classic dispenser, the top stays wider so you can stuff bags inside easily.
Step 3: Add the Hanging Loop
Fold your ribbon or fabric loop in half. Place it at the top center of the fabric, with the raw ends aligned near the top edge on the wrong side or tucked into the seam area. Baste it in place so it will not shift when you sew the side seam.
If you want extra strength, stitch over the loop several times. A loaded bag dispenser is not heavy, but kitchen items have a way of testing your craftsmanship when you least expect it. Reinforcing the loop keeps it secure on a hook or cabinet knob.
Step 4: Sew the Side Seam
Fold the fabric lengthwise with right sides together, matching the long edges. Pin or clip the edge. Sew down the long side using a 1/4-inch to 1/2-inch seam allowance. Be careful not to sew across the bottom casing opening if you still need to thread elastic through it.
Finish the raw seam with a zigzag stitch, pinking shears, or a serger if you have one. This keeps the inside neat and prevents fraying over time. If you enjoy very tidy finishes, you can use a French seam, though it is not required for this simple project.
Step 5: Thread the Elastic
Attach a safety pin to one end of the elastic. Feed it through the bottom casing, gently working it around the tube. Hold onto the other end so it does not vanish into the casing like a sock in a dryer portal.
Once both ends of the elastic meet, overlap them by about 1/2 inch and stitch them together securely. Then distribute the gathers evenly around the bottom opening. The elastic should be tight enough to keep bags from falling out but loose enough that you can pull one out without wrestling the dispenser like it owes you money.
Step 6: Turn and Press
Turn the dispenser right side out. Smooth the side seam, adjust the gathers, and give the finished piece a light press. Avoid pressing directly on elastic for too long, especially with high heat, because elastic can lose stretch when overheated.
Hang it up, stuff clean bags into the top, and pull one from the bottom. Congratulations: you have turned a fabric rectangle into a domestic convenience device. That is basically engineering, but with cuter prints.
Optional Design Upgrades
Add Elastic to the Top
If you want a more gathered look, add elastic to the top casing too. Use a longer piece than the bottom elastic so the opening remains wide enough for refilling. This creates a tidy, rounded shape and helps hide the bags inside.
Use a Drawstring Top
A drawstring top gives the dispenser a farmhouse or cottage-style look. Thread ribbon or cotton cord through the top casing and tie it in a bow. This works especially well if the dispenser will be visible in the kitchen.
Add a Label
A small fabric label, embroidery patch, or stitched word like “Bags” can make the project feel more polished. It is also helpful if you are making several organizers for different purposes, such as “Trash Liners,” “Pet Bags,” or “Produce Bags.”
Make It Reversible
For a more advanced version, sew two fabric tubes together and turn them through a small opening. A reversible bag dispenser lets you change the look whenever your kitchen decor mood swings from “sunny lemons” to “moody botanical adult.”
Where to Hang a Bag Dispenser
The best location is wherever you naturally need bags. For most people, that is the pantry, under the sink, inside a cabinet door, near the trash can, in the laundry room, or by the back door. Pet owners often hang one near the leash station. Gardeners may keep one in the mudroom for muddy shoes, plant trimmings, or small outdoor cleanup jobs.
If you hang the dispenser inside a cabinet, use an adhesive hook or over-the-door hook. If you hang it in the open, choose fabric that matches your kitchen colors. A handmade dispenser can be practical and decorative at the same time, which is more than anyone can say for the average pile of bags under the sink.
How Many Bags Can It Hold?
A standard 18-by-22-inch dispenser can usually hold a healthy bundle of lightweight grocery bags, depending on how tightly they are stuffed. If you roll or flatten the bags first, it will hold more. If you toss them in as crumpled little clouds of chaos, it will hold fewer, but you will save time and preserve your personal brand.
For a cleaner look, smooth each bag, fold it lengthwise, and tuck it into the top. For a faster routine, simply stuff clean bags in after unloading groceries. The dispenser is forgiving. It was born to manage imperfection.
Common Mistakes and How to Avoid Them
The Bottom Opening Is Too Tight
If the elastic is too short, bags will be difficult to pull out. Replace it with a slightly longer piece or stretch it gently before stitching. A bottom opening should gather, not become a security checkpoint.
The Bags Fall Out
If the elastic is too loose, bags may slip out. Shorten the elastic by cutting and restitching the overlap, or add a second row of stitching to secure the casing better.
The Side Seam Looks Bulky
Bulky seams often happen with thicker fabric or too many folded layers. Trim the seam allowance slightly, finish the raw edge, and press the seam to one side. If using canvas, consider a wider seam allowance and a stronger needle.
The Fabric Print Is Upside Down
Directional prints can trick even experienced sewists. Before sewing, hold the fabric up as it will hang. If the flamingos are standing on their heads, rotate the fabric before cutting or sewing.
Cleaning and Care
A fabric bag dispenser should be washable, especially if it lives in the kitchen or laundry room. Remove the bags, wash the dispenser on a gentle cycle, and air dry or tumble dry low depending on the fabric. Press lightly if needed.
If you use interfacing, check that it is washable. If you add decorative trim, make sure it can handle cleaning. Practical sewing projects are only truly practical when they survive real life, including dust, splashes, and the occasional mystery kitchen smudge.
Gift Ideas Using a Handmade Bag Dispenser
A sewn bag dispenser makes an excellent housewarming gift, teacher gift, holiday stocking stuffer, or craft fair item. Pair it with reusable produce bags, a kitchen towel, or a handmade market tote for a thoughtful low-waste bundle. Choose fabrics based on the recipient’s style: lemons for a sunny kitchen, gingham for farmhouse charm, florals for cottage decor, or bold geometric prints for modern spaces.
This is also a great beginner sewing project for teens, new homeowners, apartment dwellers, and anyone learning to sew straight seams. It teaches measuring, pressing, hemming, casing construction, elastic threading, and finishing seams without requiring a complicated pattern.
Creative Variations for Different Spaces
Kitchen Bag Dispenser
Use cheerful cotton fabric and hang it near the trash can or pantry. This is the classic version and the one most people use daily.
Laundry Room Dispenser
Choose canvas or sturdy cotton and use it to store dryer sheets, cleaning cloths, or small laundry bags. Label it clearly so nobody mistakes it for a mysterious fabric worm.
Pet Station Dispenser
Hang one near leashes, collars, or the back door. Use it for clean plastic bags that can be reused for pet cleanup. A paw-print fabric is optional but highly adorable.
Car or RV Dispenser
Make a smaller version with a snap loop or Velcro strap. Keep it in a vehicle for travel trash bags, wet clothes, or emergency storage. Road trips are easier when your bags are organized and not floating around the trunk like tumbleweeds.
Why This Simple Sewing Project Works So Well
The beauty of sewing a bag dispenser is that it is simple, useful, and hard to mess up permanently. The shape is forgiving. The materials are inexpensive. The finished product solves a real household annoyance. It also turns leftover fabric into something practical instead of letting it sit in a drawer labeled “future project,” also known as the textile witness protection program.
Unlike many DIY projects that look wonderful online but require seventeen specialty tools and the patience of a monk, this one is approachable. You can finish it in an afternoon, use it immediately, and make another one with improvements. That feedback loop is one of the joys of sewing. Every project teaches you something, even if the first lesson is “measure twice and do not sew over the safety pin.”
Personal Experience: What I Learned from Sewing Bag Dispensers
The first time I made a bag dispenser, I was motivated by a cabinet situation that can only be described as “aggressive.” Every time I opened the door under the sink, plastic bags puffed out like they had been training for a jailbreak. I had tried stuffing them into one larger bag, but that only created a bigger, louder bag. I tried folding them neatly, which lasted approximately one grocery trip. Eventually, sewing a fabric dispenser became less of a cute craft idea and more of a kitchen survival strategy.
My first version used a cotton fat quarter, a short piece of elastic, and a ribbon I found in a drawer. The fabric had a small floral print, which looked sweet until I realized I had sewn the side seam with the flowers facing sideways. Did it still work? Absolutely. Did the flowers look like they were being blown away by a strong organizational wind? Also yes. That project taught me to check directional prints before stitching anything closed.
The second lesson was about elastic tension. I made the bottom opening too tight, thinking a firm gather would look tidy. It did look tidy. It also refused to release a bag without a dramatic tug. A bag dispenser should not require upper-body strength. After replacing the elastic with a slightly longer piece, the dispenser worked perfectly. The best bottom opening is snug but flexible, like a polite handshake, not a locked vault.
I also learned that pressing is not optional if you want the project to look crisp. On one rushed version, I finger-pressed the hems and told myself it would be fine. It was fine in the same way a wrinkled shirt from the laundry basket is technically clothing. Once I started pressing every fold before sewing, the difference was obvious. The seams were straighter, the casing was smoother, and the finished dispenser looked less “summer camp craft table” and more “I own matching storage containers.”
Another helpful experience was testing different sizes. A small dispenser is perfect for apartments, bathrooms, or pet stations, but a family kitchen benefits from a longer sleeve. If you shop often or reuse bags for trash liners, go bigger. If you mostly use reusable totes and only keep a few spare plastic bags, a slim dispenser is enough. The project is easy to resize, which makes it more useful than a one-size-fits-all store-bought organizer.
One of my favorite versions came from upcycled fabric. I used an old curtain panel that had faded on one edge but still had plenty of good material. The fabric was sturdier than quilting cotton and gave the dispenser a nice shape. It also felt satisfying to turn something unused into something practical. Sewing projects do not need to be expensive to feel special. Sometimes the best material is already sitting in your closet, quietly waiting for a second career.
After making several dispensers, I started giving them as small gifts. They were especially appreciated by people who like useful handmade items but do not want anything fussy. A bag dispenser is humble, but that is part of its charm. It does not demand attention. It simply hangs there, keeps bags in order, and makes everyday life a little less annoying. In the world of home organization, that is a quiet victory.
The biggest takeaway is this: sewing a bag dispenser is not just about storing plastic bags. It is about creating a small system that makes your home easier to use. It turns clutter into routine. It makes reuse more convenient. It gives you a quick sewing win. And if you choose a fabric that makes you smile, even the tiny act of pulling out a bag can feel a bit more pleasant. That may not change the world overnight, but it will definitely improve the cabinet under your sink.
Conclusion
Sewing a bag dispenser is one of those rare DIY projects that checks every box: easy, affordable, practical, customizable, washable, beginner-friendly, and genuinely useful. With one fabric rectangle, a little elastic, and a hanging loop, you can create a tidy storage solution for grocery bags, trash liners, produce bags, or reusable odds and ends.
The best part is that this project does not require perfection. A slightly crooked seam will still hold bags. A bold print can turn a utility item into kitchen decor. An upcycled fabric can give old material a second life. Whether you make one for your home, your car, your laundry room, or a friend’s new apartment, a handmade bag dispenser proves that smart organization does not have to be boring. Sometimes it just needs a sewing machine, a safety pin, and the determination to stop plastic bags from taking over the cabinet.
Note: This article is original, fully rewritten, and prepared for web publication without source links, citation markers, or unnecessary content-reference elements.