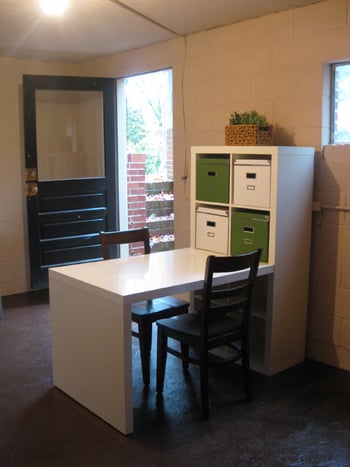
Basements are magical places. They can hold holiday decorations, camping gear, old tax documents, mystery cables, one lonely roller skate, and somehow still have room for the box labeled “miscellaneous” that everyone is too afraid to open. But a basement can also become the most useful storage zone in the houseif you give it a plan instead of letting clutter form its own tiny civilization.
Learning how to add basement storage is not just about buying a dozen plastic bins and congratulating yourself. Good basement organization starts with moisture control, smart shelving, safe walkways, clear labels, and storage zones that make sense for the way your household actually lives. The goal is simple: keep your belongings dry, easy to find, and off the floor, while leaving enough open space to reach utilities, laundry, sump pumps, water heaters, and electrical panels without performing Olympic gymnastics.
Whether your basement is finished, unfinished, tiny, sprawling, dry, slightly moody, or shaped like a contractor’s afterthought, this guide will walk you through practical basement storage ideas that work in real American homes.
Start With the Basement, Not the Bins
Before you install shelves or drag home a cart full of storage containers, study the basement itself. Basements are below grade, which means they are naturally more vulnerable to humidity, leaks, condensation, pests, and temperature swings. A storage plan that ignores those realities is basically a welcome basket for mildew.
Walk through the space with a notepad and look for three things: water, access, and airflow. Check corners, window wells, foundation walls, around pipes, under stairs, near the water heater, and around the sump pump. If you see staining, peeling paint, musty smells, rust, or damp cardboard, solve those issues first. Storage should never hide a water problem; it should help you notice one quickly.
Check humidity before adding storage
A cheap digital hygrometer can tell you whether your basement is storage-ready. In most homes, keeping indoor humidity around 30% to 50% helps reduce mold risk and protects paper, fabric, wood, and metal items. If your basement regularly climbs above 50%, use a properly sized dehumidifier, improve ventilation, fix leaks, and make sure the dryer vents outdoors. Your basement does not need spa-level humidity. Your Christmas ornaments did not ask for a steam room.
Keep important areas accessible
Leave clear paths to mechanical equipment, shutoff valves, floor drains, cleanouts, electrical panels, sump pumps, and HVAC units. Do not build permanent shelves that block inspection or repair access. A beautiful wall of bins is less beautiful when a plumber has to remove half of it at 11 p.m.
Step 1: Declutter Before You Build
The cheapest basement storage system is the one you do not need because you got rid of things first. Start by sorting everything into four categories: keep, donate, sell, and toss. Be honest. If an item is broken, moldy, missing parts, unsafe, or has not been used in years, it probably does not deserve premium basement real estate.
Use a simple rule: if you would not pay to move it to a new house, think twice before storing it. Old paint cans with dried sludge? Gone. Empty appliance boxes for products you no longer own? Farewell. Décor that has not seen daylight since the “live, laugh, love” era? Thank it for its service.
Decluttering first helps you measure accurately, buy the right shelving, and avoid the classic mistake of organizing things you should have discarded. Basement organization works best when the storage system serves the householdnot the other way around.
Step 2: Divide the Basement Into Storage Zones
A basement becomes easier to manage when every category has a home. Instead of stacking everything wherever there is an open patch of concrete, create clear zones based on use and frequency.
Seasonal storage zone
This area is ideal for holiday decorations, winter gear, fans, patio cushions, and occasional party supplies. Place it in a less convenient corner because you only need these items a few times per year. Use clear, lidded plastic bins and label them by season or holiday.
Household overflow zone
This is where bulk paper towels, cleaning supplies, pantry overflow, extra light bulbs, filters, batteries, and backup toiletries can live. Keep frequently used items at eye level. Store heavy items lower to reduce lifting strain.
Sports, hobby, and gear zone
Bikes, camping gear, sports equipment, fishing rods, tools, craft supplies, and luggage all need different storage. Use wall hooks, pegboards, utility racks, cabinets, and open shelving so odd-shaped items do not become a tangled basement spaghetti bowl.
Memory and archive zone
Photos, keepsakes, documents, and family memorabilia require extra protection. Store them in dry, temperature-stable areas, preferably in archival boxes or sealed containers. Avoid placing irreplaceable items directly on concrete floors or against exterior walls.
Step 3: Add Strong Basement Shelving
Shelving is the backbone of most basement storage systems. It gets belongings off the floor, improves airflow, protects against minor water events, and makes the space easier to clean. Freestanding metal or heavy-duty plastic shelving is often the easiest choice for unfinished basements because it is durable, adjustable, and relatively quick to assemble.
For a basic storage wall, place shelving units along the longest open wall. Leave enough room in front so you can pull out bins without bumping into the laundry basket, the furnace, or your own bad decisions. Adjustable shelves are especially useful because basement items rarely come in polite, matching sizes.
Choose the right shelf material
Metal shelving is strong and works well for heavy bins, tools, and household supplies. Plastic shelving resists rust and can be a smart choice in damp areas. Wood shelving can be affordable and attractive, but it should be sealed or elevated in moisture-prone spaces. Avoid placing untreated wood directly on concrete, where it can absorb moisture over time.
Respect weight limits
Every shelving unit has a weight rating. Read it. Believe it. Do not treat a light-duty shelf like a warehouse pallet rack. Store heavy tools, paint, books, and bulk goods on lower shelves. Keep lighter itemsdecorations, linens in sealed bins, and seasonal décorhigher up.
Step 4: Use Clear, Lidded Storage Bins
Cardboard boxes are charming until they meet basement humidity, insects, or a surprise puddle. For most basement storage, clear plastic bins with tight-fitting lids are more practical. They protect against dust, pests, and moisture better than cardboard, and they let you see what is inside without opening every container like a contestant on a very boring game show.
Choose consistent bin sizes when possible. Matching bins stack better, fit shelves more efficiently, and make the basement look calmer. But do not buy bins before sorting your items. Otherwise, you may end up with twenty containers and no actual plan, which is just clutter wearing a uniform.
Label every bin
Label the front and top of each container. The front label helps when bins are on shelves. The top label helps when they are stacked. Use broad categories plus specifics, such as “Christmas lights,” “Camping cooking gear,” “Kids winter boots,” or “Tax records 2021–2024.” A label that says “stuff” is not a label. It is a cry for help.
Use color coding carefully
Color-coded bins can work well for families. For example, orange for Halloween, red and green for Christmas, blue for winter gear, and gray for tools. Just keep the system simple. If you need a spreadsheet to decode the bin colors, the bins have won.
Step 5: Go Vertical With Wall Storage
Basement walls are valuable storage space, especially when floor space is limited. Wall-mounted shelves, pegboards, slatwall panels, utility hooks, and track systems can hold tools, cords, sports gear, folding chairs, ladders, and cleaning equipment.
Pegboards are great for small tools, craft supplies, and frequently used items. Heavy-duty hooks can hold bikes, extension cords, hoses, folding tables, and garden tools. Wall shelves can store lighter bins, paint supplies, or labeled baskets. Always anchor wall systems into studs or masonry using the correct hardware.
Use the space between studs
In unfinished basements, the spaces between wall studs can become shallow storage for small items. Add narrow shelves for paintbrushes, hardware containers, spray bottles, or small tools. This is not the spot for heavy bins, but it is excellent for keeping little things from vanishing into the basement abyss.
Step 6: Make Use of Under-Stair Storage
The area under basement stairs is often wasted, partly because it is awkward and partly because people are suspicious of triangular spaces. But under-stair storage can be incredibly useful. Install shallow shelves, rolling bins, labeled totes, or a small cabinet to store seasonal décor, shoes, pet supplies, extra paper products, or kids’ toys.
If the under-stair area is open, consider adding a curtain, sliding panel, or simple doors to reduce visual clutter. If it is already enclosed, add lighting and shelves so it does not become a dark cave where board games go to retire.
Step 7: Add Cabinets for Finished Basements
If your basement doubles as a family room, guest space, playroom, craft room, gym, or home office, open shelving may not be the look you want. Cabinets, built-ins, and closed storage help hide clutter while keeping the room comfortable and polished.
Built-in cabinets can frame a TV wall, tuck beneath windows, surround a craft station, or create a clean storage wall for games and media. Stock cabinets are a budget-friendly option, while custom cabinetry can solve awkward corners, low ceilings, and odd foundation bump-outs. In finished basements, storage should feel like part of the room, not a garage sale hiding behind a sofa.
Combine open and closed storage
Use closed cabinets for visual clutter and open shelves for attractive or frequently used items. For example, store craft supplies behind doors but display board games in baskets. Keep workout accessories in a cabinet but leave yoga mats in an easy-access cubby. The best basement storage balances function with sanity.
Step 8: Add Overhead Storage Only Where It Makes Sense
Overhead storage can work in basements with enough ceiling height, especially for lightweight seasonal items. Ceiling-mounted racks may hold holiday wreaths, artificial trees, luggage, or camping pads. However, overhead storage is not ideal in low-ceiling basements, near plumbing, under ductwork, or anywhere it creates a head-bumping obstacle course.
Never overload ceiling racks, and always install them according to the manufacturer’s instructions. If you are not confident about anchoring into joists, hire a professional. Gravity has a very strict return policy.
Step 9: Protect Items From Moisture and Pests
Good basement storage is defensive. Keep everything at least a few inches off the floor, even if your basement has never flooded. Use shelving feet, pallets made for storage, or raised platforms for bulky items. Avoid storing fabric, paper, cardboard, leather, photos, and electronics in damp areas.
For extra protection, place moisture-sensitive items in sealed containers with silica gel packets. Use pest-resistant bins for textiles and holiday décor. Vacuum-seal out-of-season clothing only if the items are completely dry first. Storing damp fabric in a sealed bag is how you create a science experiment with sleeves.
What not to store in a basement
Some items simply do not belong in a typical basement unless the space is dry, finished, and climate controlled. Be cautious with important documents, original photos, heirlooms, delicate fabrics, musical instruments, electronics, candles, artwork, and anything irreplaceable. Store flammable liquids, chemicals, and paint according to label instructions and away from ignition sources, children, pets, and heat-producing equipment.
Step 10: Build a Simple Inventory System
The more you store, the more you need a way to find things. A basement inventory does not have to be fancy. Create a spreadsheet, note app list, or printed binder that records each bin number, category, and shelf location. For example: “Bin 12Thanksgiving décorShelf A, top row.”
Numbering shelves can make this even easier. Label shelf units A, B, C, and D. Then label rows from bottom to top. Suddenly, “Where are the extension cords?” becomes “Shelf B, Row 2,” instead of “somewhere near the old suitcase and emotional damage.”
Basement Storage Ideas for Different Types of Spaces
For unfinished basements
Focus on durability and moisture protection. Use metal or plastic shelving, sealed bins, pegboards, hooks, and raised storage. Keep the layout flexible in case you need access to pipes, walls, or utilities. Avoid permanent finishes until any moisture problems are solved.
For finished basements
Use cabinets, benches with hidden storage, built-in media walls, storage ottomans, and attractive baskets. Finished basements should not feel like a warehouse. Hide the practical items and let the room breathe.
For laundry basements
Add shelves above the washer and dryer for detergent, stain removers, dryer sheets, and cleaning supplies. Include a folding surface if space allows. Use labeled baskets for lost socks, cleaning rags, seasonal linens, and laundry overflow. Every laundry basement needs a small “where did this come from?” basket. It is tradition.
For kids’ play basements
Use low cubbies, soft bins, toy cabinets, and picture labels for younger children. Store messy craft supplies higher up and keep daily toys within reach. Rotate toys seasonally to reduce clutter and make old toys feel exciting again.
For hobby and workshop basements
Install pegboard, task lighting, drawer units, labeled hardware organizers, and a sturdy workbench. Store sharp tools securely and keep chemicals or finishes in appropriate containers. A workshop storage zone should make projects easier, not require a search party before every repair.
Common Basement Storage Mistakes to Avoid
One common mistake is storing everything on the floor. Even a dry basement can have plumbing leaks, appliance overflows, or minor seepage. Another mistake is blocking utilities, vents, or access panels. You may not need that shutoff valve today, but future you might need it very quickly.
Buying too many containers is another trap. Storage products can make clutter look neater without solving the clutter itself. Edit first, measure second, buy third. Also avoid mixing too many random bin sizes. A basement full of mismatched containers can waste shelf space and make stacking unstable.
Finally, do not forget lighting. A well-organized basement is still annoying if you need a flashlight to find the snow boots. Add LED shop lights, motion-sensor lights, or battery-powered lights in closets and under-stair areas.
Budget-Friendly Ways to Add Basement Storage
You do not need a luxury renovation to improve basement storage. Start with one wall of adjustable shelving and a set of clear bins. Add hooks for awkward gear, a pegboard for tools, and a few labels. Repurpose old cabinets if they are clean, sturdy, and not musty. Use rolling carts for craft supplies, laundry items, or tools that move around the basement.
If your budget is tight, improve the layout before buying anything. Group similar items together. Move rarely used items to less convenient zones. Put heavy items lower and daily-use items at waist or eye level. Sometimes the best basement storage upgrade is not more stuffit is a better map.
My Best Experience-Based Tips for Adding Basement Storage
The biggest lesson from real basement organization projects is that people usually underestimate two things: moisture and behavior. Moisture is obvious once it causes damage, but by then the cardboard has sagged, the labels have blurred, and the “temporary” pile in the corner has developed a personality. Behavior is sneakier. A storage system only works if people will actually use it when they are tired, busy, carrying groceries, or looking for the air mattress ten minutes before guests arrive.
In practice, the best basement storage systems are simple and slightly forgiving. For example, one family I worked with had a beautiful row of labeled bins, but every holiday season the decorations exploded across the basement because the bins were stacked four high. Nobody wanted to unstack them, so the system failed. The fix was easy: shallower shelving, fewer stacked bins, and each holiday getting its own shelf section. Suddenly, decorating did not require weightlifting and a prayer.
Another useful experience: always create a “landing zone.” This is one empty shelf, cart, or table where new basement-bound items can sit temporarily. Without a landing zone, people put things on the floor “just for now,” which is how clutter begins its villain origin story. Once a week or once a month, move landing-zone items into their proper homes. It keeps the system alive without demanding perfection every day.
Labels matter more than most people think. Fancy labels are optional; clear labels are not. The best labels use everyday language. Instead of “seasonal accessories,” write “winter hats and gloves.” Instead of “entertaining,” write “party plates and birthday candles.” A label should answer the question a normal human would ask while standing in the basement wearing slippers.
One more field-tested tip: leave space for growth, but not too much. Empty space is useful because households change. Kids grow, hobbies appear, decorations multiply, and someone will eventually buy a bulk pack of paper towels the size of a refrigerator. But too much empty basement storage invites unnecessary collecting. Aim to keep each zone about 80% full. That gives you breathing room while still forcing the occasional edit.
For unfinished basements, raised storage is non-negotiable. Even if the basement has been dry for years, a water heater leak, washing machine hose failure, or heavy storm can change the story overnight. Shelving turns a potential disaster into a minor cleanup. It is much easier to mop a floor under shelves than to rescue family photos from a soggy cardboard box.
For finished basements, the lesson is visual calm. Closed cabinets, matching baskets, and built-ins make a basement feel like living space instead of overflow space. If the room is used for movie nights or guests, hide the bulk supplies and tools. Nobody wants to watch a cozy film beside a tower of toilet paper and a snow shovel.
The final experience-based tip is to schedule a basement reset twice a year. Spring and fall are ideal. Check for leaks, wipe shelves, test the dehumidifier, donate unused items, and update labels. A basement storage system does not have to be perfect forever. It just needs regular tune-ups, like a car, a garden, or your patience during tax season.
Conclusion: Make the Basement Work Harder, Not Messier
Adding basement storage is one of the smartest ways to reclaim space in your home, but the best systems are planned, dry, safe, and easy to maintain. Start by controlling moisture and clearing clutter. Then add sturdy shelving, clear bins, wall storage, under-stair solutions, and labeled zones that match your household’s routines.
The secret is not to store more just because you can. The secret is to store better. When every bin has a label, every shelf has a purpose, and everything is kept off the floor, your basement stops being the land of forgotten objects and becomes a practical extension of your home. That is not just organization. That is domestic peace with a dehumidifier.