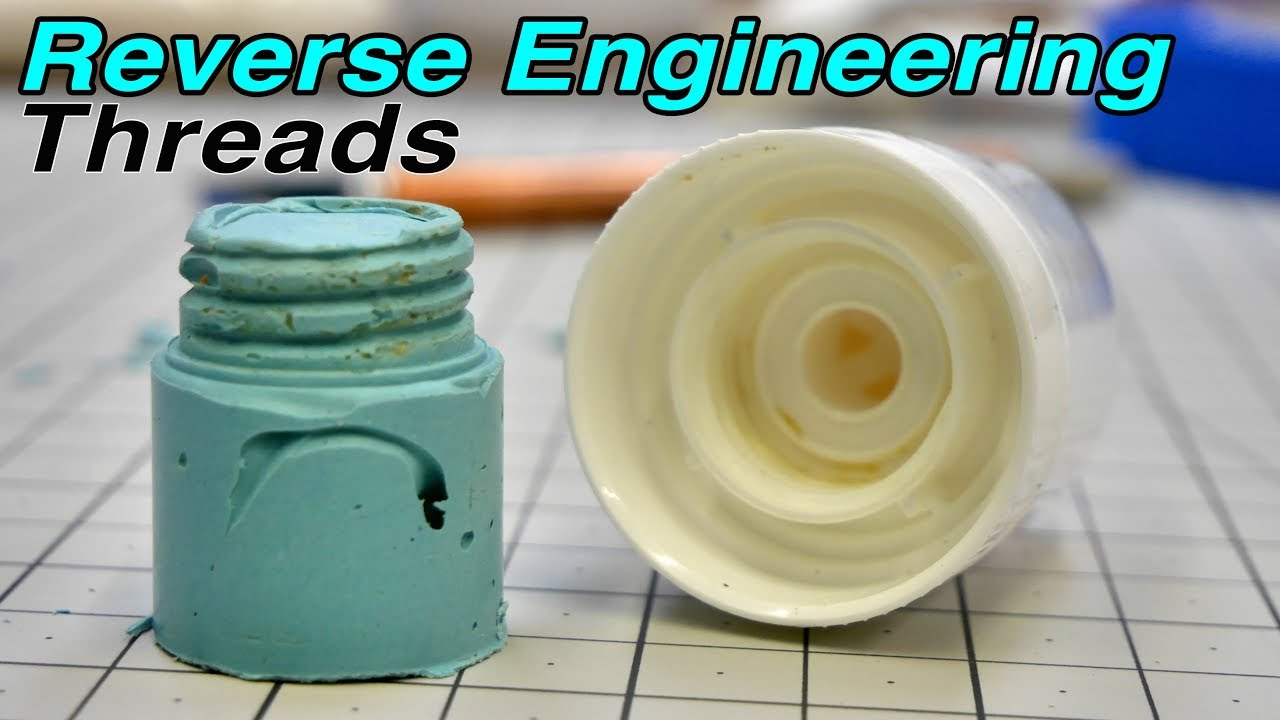
At first glance, a bottle thread looks like the most boring little spiral in the universe. It sits there, smugly holding a cap, pretending it is not a tiny feat of engineering. But anyone who has tried to 3D print a custom bottle cap, build a leak-proof adapter, replace a missing closure, or connect a soda bottle to a homemade experiment knows the truth: bottle threads are where “simple project” goes to put on a lab coat and laugh at you.
Reverse engineering bottle threads is the process of measuring, understanding, and recreating the neck finish of a bottle so a cap, adapter, fitting, or custom part can screw on properly. It is part detective work, part CAD modeling, part packaging science, and part “why is this cap leaking on my desk?” The good news is that most bottle threads are not random. Many follow common packaging standards such as GPI/SPI finishes, PCO beverage finishes, and ASTM-style dimensional systems. Once you learn the language, the bottle stops being mysterious and starts looking like a small plastic machine.
This guide walks through how bottle threads work, how to measure them, how to model them, and how to turn that knowledge into practical projects. Whether your goal is fun, profit, repair, prototyping, or simply proving to a stubborn cap that you are in charge, this is where the thread begins.
What Bottle Threads Actually Are
A bottle thread is part of the neck finish, the area at the top of the bottle that mates with a closure. The closure might be a screw cap, pump, sprayer, flip-top lid, tamper-evident cap, dispensing fitment, or custom adapter. The thread is only one part of the system. A good seal may also depend on the top sealing surface, inner bore, plug seal, liner compression, tamper band, and shoulder geometry.
That is why copying only the visible spiral often fails. You can print a cap that screws on beautifully and still leaks like a gossip column. The thread gets the cap into position; the sealing geometry keeps the liquid inside. Reverse engineering bottle threads means studying both.
The Neck Finish Code
Many bottles use a two-part finish code such as 24-410, 28-400, or 38-400. The first number usually represents the approximate outside diameter of the thread in millimeters. The second number identifies the thread style, height, and number of turns. A 24-410 bottle, for example, has a neck diameter near 24 mm and a 410-style thread finish.
Common continuous-thread finishes include 400, 410, 415, 425, and 430. A 400 finish generally uses one full thread turn. A 410 finish usually has about one and a half turns. A 415 finish typically has two turns and a taller neck. These differences matter because a cap with the same diameter but the wrong finish may appear to fit, yet fail to seal reliably.
The Key Measurements: T, E, I, H, and S
Packaging engineers describe bottle finishes with a set of standard dimensions. These letters may look like alphabet soup, but they are much easier to digest than actual soup poured through a bad adapter.
T Dimension
The T dimension is the outside diameter across the threads. This is usually the first number in a neck finish code. For reverse engineering, measure it with calipers across the widest point of the thread. Take several readings because molded plastic can vary slightly.
E Dimension
The E dimension is the outside diameter of the neck excluding the thread. Think of it as the minor diameter where the thread root sits. This helps define thread depth and cap clearance.
I Dimension
The I dimension is the inside diameter of the bottle opening. It matters for filling equipment, plug seals, pour inserts, and adapters that enter the neck. Ignore it and your design may screw on perfectly while blocking the opening like a tiny plastic cork with ambition.
H Dimension
The H dimension is the height of the neck finish, measured from the top sealing surface down to where the finish meets the shoulder. This tells you how much vertical room the closure has to engage.
S Dimension
The S dimension is the distance from the top of the finish to the top edge of the first thread. It affects where the closure begins to engage and how quickly the cap tightens against the sealing surface.
Why Reverse Engineer Bottle Threads?
The fun part is obvious: bottle threads are everywhere, and turning trash into useful hardware feels like engineering wizardry. The profit part comes from solving small, annoying problems that people will happily pay to stop thinking about.
Examples include custom caps for refillable products, lab adapters, irrigation fittings, fermentation airlock lids, camera mounts for bottle-based floats, soap dispenser conversions, travel-size refill systems, educational kits, and replacement caps for discontinued containers. In small-batch manufacturing, a well-designed adapter can connect off-the-shelf bottles to pumps, tubes, sensors, or dispensing hardware without requiring custom-molded packaging.
For makers, reverse engineering bottle threads is a gateway skill. It teaches precision measurement, tolerance management, CAD modeling, material selection, and practical testing. Also, it gives you an excuse to own more calipers. That alone may be worth the journey.
Step-by-Step: How to Reverse Engineer a Bottle Thread
1. Identify the Bottle Family
Start by asking what kind of bottle you have. A shampoo bottle, soda bottle, medicine bottle, water bottle, sauce bottle, and laboratory bottle may use very different finishes. Beverage bottles often use PCO-style finishes such as PCO 1810 or PCO 1881. Cosmetic and household bottles often use continuous-thread finishes such as 24-410 or 28-410. Wide-mouth jars may use larger continuous-thread closures.
2. Measure the Thread Diameter
Use digital calipers to measure the widest outside diameter of the thread. This is your T dimension. If the result is close to 24 mm, 28 mm, 38 mm, or another common size, you may be dealing with a standard finish rather than a custom one.
3. Count the Thread Turns
Look at how far the thread wraps around the neck. A one-turn thread suggests a 400-style finish. About one and a half turns suggests a 410 finish. Two turns may point toward a 415 finish. Beverage finishes may use multiple starts, meaning more than one thread begins around the neck. Multi-start threads can tighten quickly with a short twist, which is why drink caps often come off with a satisfying little snap.
4. Measure the Pitch or Lead
Pitch is the distance between neighboring thread ridges. Lead is how far the cap advances in one full revolution. On a single-start thread, pitch and lead are the same. On a multi-start thread, lead equals pitch multiplied by the number of starts. This distinction is crucial when modeling soda bottle threads because many beverage closures use multi-start geometry.
5. Capture the Thread Profile
Threads are not just spirals; they have profiles. Some are rounded, some are angled, and some are buttress-like. You can estimate the profile with close-up photos, a contour gauge, silicone casting, or careful caliper measurements. For many 3D-printed adapters, a simplified rounded or trapezoidal thread works well, but pressure applications demand more respect.
6. Study the Seal
Before modeling, inspect how the original cap seals. Does it use a flat liner against the top land? Does it have an inner plug that enters the bottle opening? Does it rely on a cone seal? Does a tamper band catch under a support ring? The seal is the difference between a useful product and a desktop fountain.
7. Build a Parametric CAD Model
Create a sketch with the measured diameters and heights. Use a helix or thread feature to generate the spiral. Keep dimensions parametric so you can adjust thread depth, pitch, clearance, and cap height after test fitting. A good first model is rarely perfect. A good adjustable model becomes perfect faster.
8. Print and Test in Small Iterations
Print only the threaded section first. There is no need to print a giant adapter body when the thread still feels like chewing gravel. Test fit, adjust clearance, and repeat. Once the thread engages smoothly, add the seal and functional features.
PCO 1810 vs. PCO 1881: The Soda Bottle Mystery
If you are reverse engineering beverage bottle threads, you will likely meet PCO finishes. PCO stands for Plastic Closure Only, and it is common in carbonated beverage packaging. Older bottles often used PCO 1810, while many modern carbonated soft drink bottles use PCO 1881. The newer PCO 1881 finish is shorter and lighter, helping reduce plastic use while maintaining sealing performance for pressurized beverages.
This matters because a cap or adapter designed for one finish may not perform correctly on the other. The threads may seem close, but the neck height, support ring, sealing land, and thread engagement can differ. For still-water experiments, a loose fit may only be annoying. For carbonation, pressure, or transport, it can become an enthusiastic leak generator.
Common Mistakes When Copying Bottle Threads
Mistake 1: Measuring Only Once
Plastic bottles are molded parts. They flex, shrink, and vary. Measure around the neck in several places. Use averages and leave enough clearance for real-world tolerance.
Mistake 2: Forgetting Printer Tolerance
A CAD-perfect thread may not print perfectly. FDM printers especially can create slightly oversized internal features and rough layer lines. Add clearance. Smooth the thread. Print slowly. If needed, use resin printing for smaller, more precise closures.
Mistake 3: Confusing Thread Fit with Seal Fit
A cap that screws on is not automatically sealed. The sealing surface needs compression, alignment, and the right material. Hard plastic against hard plastic often needs a gasket, liner, or flexible seal.
Mistake 4: Ignoring Food Safety
If the adapter touches drinking water, food, medicine, cosmetics, or anything that goes on or in a body, material choice matters. Many hobby 3D prints are porous and difficult to sanitize. Use appropriate materials, coatings, liners, or commercially manufactured components for serious applications.
Mistake 5: Treating Pressure Like a Suggestion
Carbonated bottles can hold pressure, but your printed adapter may not. Pressure testing should be done carefully, away from faces, pets, laptops, and anyone who says, “I’m sure it’ll be fine.”
Practical Project Ideas
Custom Watering Adapter
Reverse engineer a common soda bottle thread and create a screw-on watering rose. Add small holes in a removable face plate. Suddenly an empty bottle becomes a tiny garden tool instead of recycling-bin confetti.
Soap Dispenser Conversion
Measure a 28-410 or 24-410 bottle and design an adapter that lets a pump fit a refill container. This is useful for reducing waste and making bulk products easier to use.
Fermentation Airlock Cap
Create a cap that accepts a standard airlock or tubing barb. The thread must fit securely, while the seal must prevent gas from escaping anywhere except the intended vent path.
Lab and Workshop Fluid Adapter
For non-food workshop use, bottle-thread adapters can connect containers to tubes, valves, filters, or small pumps. This is handy for coolant, cleaning fluids, plant nutrients, or demonstration rigs.
Where the Profit Comes From
The money is not usually in selling “a bottle thread.” It is in solving a specific problem around that thread. A photographer may need a floating bottle mount. A gardener may want a drip irrigation adapter. A small cosmetics brand may need a prototype cap before committing to tooling. A teacher may want classroom kits that convert soda bottles into rockets, filters, or science demonstrations.
Profit also comes from repeatability. Once you have a reliable parametric model for a 24-410, 28-410, or PCO-style finish, you can reuse it across multiple designs. One accurate thread library can become the foundation for dozens of products. That is the quiet magic of reverse engineering: today’s measurement session becomes tomorrow’s product catalog.
Experience Notes: Lessons From the Bottle-Thread Trenches
The first lesson is that bottle threads reward patience more than brute force. When beginners start reverse engineering threads, they often try to copy what they see visually. They take a photo, trace a spiral, print a cap, and then wonder why it feels crunchy. The better approach is slower and much more boring, which means it works. Measure the T dimension, measure the E dimension, count the starts, estimate the lead, check the neck height, and identify the sealing method. The cap does not care how excited you are. It cares whether the geometry is right.
The second lesson is that “close enough” has two meanings. For a desk toy or dry-fit display model, close enough means the cap screws on without embarrassing you. For a liquid container, close enough means no leaks after shaking, squeezing, warming, cooling, and leaving it upside down on a paper towel. For carbonation, close enough means you should probably redesign it twice and test it behind a shield. The application decides the tolerance.
A useful trick is to separate the thread test from the final product. Print a short ring with only the internal thread and sealing feature. Mark the version number on the outside with raised text, such as V1, V2, and V3. Then test each version on the same bottle. This avoids wasting plastic and keeps your experiments organized. It also prevents the classic maker problem of holding three nearly identical parts and whispering, “Which one was the good one?”
Another lesson is that caps often fail because the designer forgets torque. A printed part may screw on nicely by hand, but when tightened, layer lines can bind, the thread can deform, or the sealing surface can tilt. Adding a small lead-in chamfer helps the cap start cleanly. Rounding sharp thread edges reduces grinding. Increasing wall thickness around the thread can prevent the cap from expanding under load. For FDM prints, orienting the cap upright usually produces usable circular geometry, but layer adhesion must be considered if the cap will be stressed.
Material choice is also a practical teacher. PLA is easy to print but can soften in heat and may crack under repeated stress. PETG is tougher and more chemically resistant for many workshop uses. Nylon can be strong but absorbs moisture and may require careful printing. Resin prints can capture fine threads but may be brittle unless an engineering resin is used. For actual food or beverage contact, hobby printing deserves caution because layer lines can trap residue and many materials are not certified for repeated contact.
The best experience-based advice is to keep a small library of real caps. When you find a cap that fits a bottle, label it. Write down the bottle type, measured diameter, thread turns, and whether the seal uses a liner or plug. Over time, you will build a physical reference set that is more useful than memory. Memory says, “I think this was 28 mm.” A labeled cap says, “Nice try, professor, this is 28-410.”
Finally, do not underestimate the business value of boring compatibility. Customers rarely care how elegant your helix equation is. They care that the adapter fits the bottle they already own, does not leak, ships reliably, and solves a real annoyance. Reverse engineering bottle threads is fun because it turns ordinary packaging into a playground. It becomes profitable when that playground produces a repeatable, useful, tested solution.
Conclusion
Reverse engineering bottle threads is a small skill with surprisingly large possibilities. It combines packaging standards, careful measurement, CAD modeling, 3D printing, and practical testing. Once you understand neck finishes, thread turns, pitch, lead, and sealing surfaces, the humble bottle becomes a platform for invention.
The smartest path is not to guess. Identify the finish, measure the critical dimensions, model parametrically, print small test pieces, and validate the seal under real use conditions. Whether you are building a garden tool, a lab adapter, a refill system, or a niche product for sale, the thread is only the beginning. The real profit is in making something that fits, seals, and saves someone from buying an entirely new container.
And yes, after all this, you may never look at a soda bottle the same way again. That is normal. Welcome to the club. We meet near the calipers.