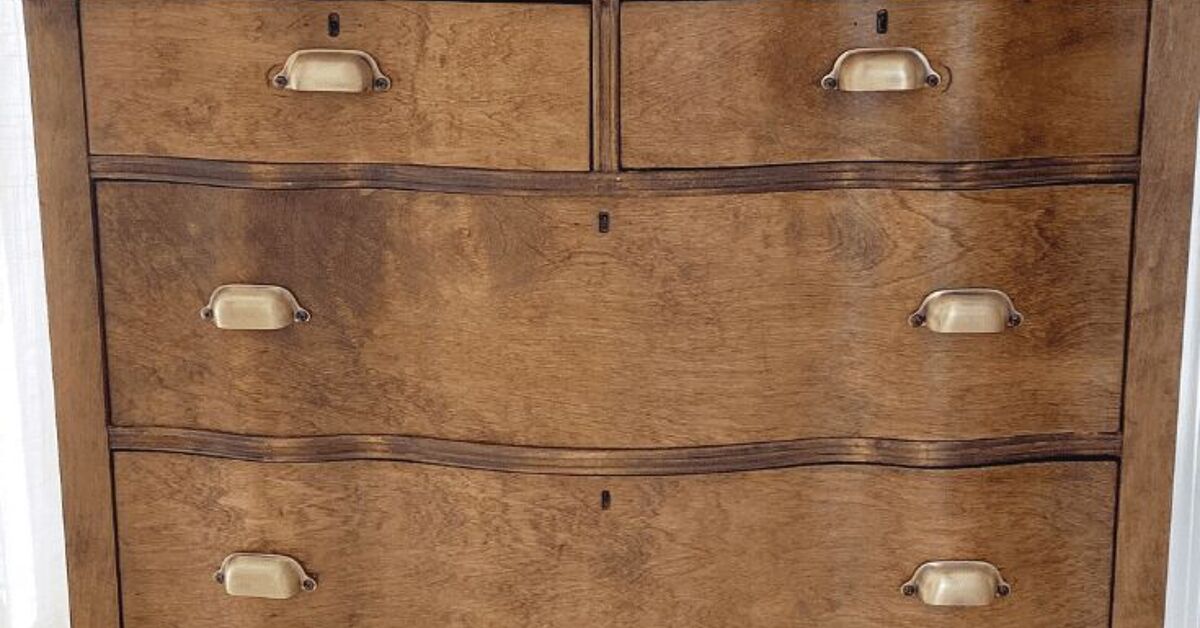
Vintage furniture has a special talent for looking both completely exhausted and weirdly fabulous at the same time. A scratched dresser, a cloudy dining table, or a thrift-store chair with questionable orange varnish may not look promising at first glance. But underneath the grime, water rings, and decades of “creative” decorating choices, there may be beautiful wood, thoughtful craftsmanship, and a story worth keeping.
Learning how to refinish vintage furniture is not just about making old pieces look new. It is about deciding what deserves preservation, what needs repair, and what can be transformed into something useful for modern life. Done well, furniture refinishing can turn a tired flea-market find into a statement piece. Done badly, it can turn a solid walnut dresser into an expensive pile of regret.
This guide walks through the furniture restoration process step by step, from identifying the piece and checking for damage to sanding, staining, painting, sealing, and maintaining your finished work. Grab your gloves, clear some workspace, and prepare to meet the surprisingly attractive wood hiding under that suspicious brown finish.
Before You Refinish: Decide Whether the Piece Should Be Restored Instead
Not every old piece of furniture should be stripped, painted, or aggressively sanded. Some vintage furniture is valuable because of its original finish, maker’s marks, hardware, age, or craftsmanship. Removing the original patina from a rare antique can reduce both historical interest and resale value.
Before starting a DIY furniture refinishing project, inspect the piece carefully. Look for labels, stamps, carved signatures, unusual joinery, original hardware, hand-cut dovetails, and high-quality veneer patterns. A solid wood dresser from the 1950s may be an ideal refinishing candidate. A rare nineteenth-century cabinet from a known maker may deserve professional evaluation before you touch it with sandpaper.
Ask These Questions First
- Is the furniture antique, collectible, or emotionally important to your family?
- Is the existing finish damaged beyond simple cleaning or touch-up?
- Is the piece made from solid wood, wood veneer, laminate, or particleboard?
- Are the drawers, joints, legs, and hardware structurally sound?
- Would cleaning, waxing, or minor repairs preserve the original finish better than full refinishing?
Sometimes the best furniture restoration is surprisingly gentle. A thorough cleaning, a small repair, and a fresh protective coat may bring a worn piece back to life without erasing its history. Think of it as giving the furniture a spa day, not a complete personality transplant.
Identify the Material Before You Start Sanding
One of the biggest beginner mistakes in refinishing vintage furniture is assuming every brown surface is solid wood. Many older pieces use veneer: a thin layer of attractive wood glued over a less expensive base. Veneer can be beautiful and durable, but it is not forgiving when attacked with an electric sander and too much confidence.
Solid Wood
Solid wood furniture usually shows continuous grain across edges, drawer fronts, and panels. It can tolerate more sanding and repair, although you still want to work carefully. Oak, maple, walnut, cherry, pine, and mahogany are common woods found in vintage furniture.
Wood Veneer
Wood veneer often has a thin decorative surface layer over plywood or another substrate. Check edges, damaged corners, and drawer sides for clues. If the visible wood layer looks extremely thin, treat it like a delicate pastry crust: do not overwork it, and definitely do not power-sand it into oblivion.
Laminate or Faux Wood
Laminate furniture has a synthetic printed surface rather than real wood grain. It can usually be painted successfully with proper cleaning, light sanding, bonding primer, and durable paint. However, laminate should not be stained like natural wood because it will not absorb stain evenly.
Gather the Right Furniture Refinishing Tools and Supplies
A successful vintage furniture makeover is less about owning every tool in the hardware store and more about choosing the right basics. You do not need a workshop that looks like a television renovation show. You do need patience, good lighting, and enough drop cloths to keep your garage from becoming a crime scene involving walnut stain.
Basic Supplies for Wood Furniture Refinishing
- Drop cloths or plastic sheeting
- Protective gloves, safety glasses, and a suitable respirator
- Cleaning solution and soft rags
- Screwdriver and containers for hardware
- Wood filler or epoxy for repairs
- Sandpaper in several grits, such as 120, 150, 180, and 220
- Sanding block, sanding sponge, or orbital sander
- Paint scraper or putty knife
- Wood stripper, if needed
- Stain, paint, primer, or wood dye
- Clear topcoat, such as polyurethane, polycrylic, lacquer, shellac, or hardwax oil
- Quality brushes, foam applicators, or lint-free cloths
- Tack cloth or vacuum with a brush attachment
Safety First: Old Paint and Dust Are Not Harmless
Vintage furniture may have been painted or refinished many times. If you are working on an older painted piece, especially one from a home built before 1978, treat the paint with caution. Disturbing old paint can create hazardous dust, including possible lead dust.
Work outdoors when practical or in a well-ventilated area that can be isolated from children, pets, food, and living spaces. Avoid dry scraping or dry sanding old paint without proper containment and protection. Use protective equipment, clean the work area carefully, and consider lead testing before removing old paint.
Also remember that oil-based stains, solvents, and some finishes release fumes. Follow product instructions, keep ignition sources away, and dispose of oily rags safely. Rags soaked in oil-based stain or finish can generate heat and create a fire risk if they are crumpled into a pile. Lay them flat to dry outdoors or store them in a sealed metal container according to the product directions. Your vintage dresser deserves a second life; your garage does not need an exciting new career as a bonfire.
Step 1: Clean the Furniture Thoroughly
Never judge a vintage piece before cleaning it. Dirt, furniture polish, cooking grease, nicotine residue, wax buildup, and decades of mystery grime can make good wood look terrible.
Remove drawers, doors, handles, knobs, hinges, and detachable hardware. Label each part and place screws in small containers or bags. Then wipe the furniture with a gentle cleaner that removes dirt and grease without soaking the wood. Use a dampnot drippingcloth, and dry the surface promptly.
Cleaning does two important things. First, it tells you whether the original finish can be saved. Second, it prevents sanding dust, stain, or paint from mixing with greasy residue. A beautiful finish applied over old furniture wax is basically a future peeling problem wearing a nice shirt.
Step 2: Repair the Structure Before Refinishing
A gorgeous finish cannot rescue a wobbly chair, broken drawer, loose table leg, or damaged veneer. Structural repairs should happen before sanding or staining.
Common Vintage Furniture Repairs
- Reglue loose chair joints and clamp them until dry.
- Replace missing screws or damaged drawer stops.
- Repair cracked wood with wood glue and clamps.
- Fill small dents and chips with stainable wood filler.
- Use epoxy filler for larger losses, especially on painted furniture.
- Flatten lifting veneer carefully, then glue and clamp it.
- Replace broken hardware only after checking whether the original piece can be repaired.
For veneer repairs, move slowly. Lifted veneer can often be reglued if it is still present. Missing veneer may require a patch cut from matching material. Keep the repair as clean and simple as possible. The goal is not to make the piece look factory-new from six inches away; the goal is to make it stable, attractive, and usable.
Step 3: Test the Existing Finish
Before stripping an old finish, it helps to know what you are dealing with. Vintage furniture may be coated with shellac, lacquer, varnish, polyurethane, paint, wax, or a confusing combination created by previous owners who believed every product should be applied at once.
Test a hidden spot, such as the back edge of a drawer or underside of the table. A small amount of denatured alcohol can soften shellac. Lacquer thinner may affect lacquer. If the finish remains stubborn and glossy, it may be varnish or polyurethane. Always test carefully and use solvents only with proper ventilation and protective equipment.
This step can help you decide whether you need complete stripping or whether a light scuff sanding and a compatible new topcoat will do the job.
Step 4: Strip or Sand the Old Finish
There are two main ways to remove an old finish: chemical stripping and sanding. The best choice depends on the furniture, the finish, and how much patience you have left after removing forty-seven tiny screws from an old cabinet.
When to Use Chemical Stripper
Use furniture stripper when the piece has thick paint, multiple finish layers, intricate carving, turned legs, or decorative details that would be difficult to sand. Apply stripper according to the label, allow it to work, then gently scrape softened finish with a plastic scraper or putty knife. Avoid gouging the wood.
After stripping, remove residue according to the stripper instructions. Let the furniture dry completely before sanding. Rushing this stage can trap chemicals in the wood and interfere with stain or topcoat adhesion.
When to Sand
Sanding is ideal for smoothing raw wood, removing light surface damage, and preparing furniture for paint or clear finish. Sand with the grain whenever possible. Start with a grit coarse enough to remove damage, then work gradually to finer grits.
For most solid wood furniture, start around 120 or 150 grit, then move to 180 and finish around 220 grit. Do not jump from very rough sandpaper to very fine sandpaper and hope for the best. Sanding works in stages, like making a good sandwich: the layers matter.
Be extra cautious around edges, carvings, and veneer. These areas can be sanded through quickly. Hand-sanding may take longer, but it is often safer for delicate vintage pieces.
Step 5: Remove Dust and Prepare the Wood
Once sanding is complete, remove every bit of dust you can. Vacuum the furniture with a brush attachment, wipe it with a clean cloth, and use a tack cloth only if it is compatible with your chosen finish. Dust left on the surface can create rough texture, dull patches, and tiny bumps that make a refinished table feel like it was sealed during a sandstorm.
Before staining, test your color on a hidden area, extra wood sample, or the underside of a drawer. Different woods absorb stain differently. Pine, maple, birch, and some veneered surfaces may stain unevenly or look blotchy. A wood conditioner or sanding sealer can help create more even color on difficult woods.
Step 6: Choose the Right Finish for Your Vintage Furniture
The right finish depends on the look you want and the furniture’s daily use. A delicate bedside table needs less protection than a dining table that will host family dinners, homework, coffee cups, holiday pies, and at least one person who insists coasters are a conspiracy.
Stain and Clear Topcoat
Use stain when you want to highlight natural wood grain while changing or deepening the color. Apply stain in manageable sections, follow the grain, and wipe away excess after the recommended amount of time. Let the stain dry completely before applying a protective topcoat.
Painted Finish
Painting is a smart option for furniture with damaged veneer, mismatched repairs, laminate surfaces, or wood that is not especially attractive. Clean the surface, scuff sand it, use a bonding primer when needed, and apply thin coats of durable furniture paint. Several thin coats usually look better and last longer than one thick coat that behaves like frosting on a cake.
Clear Protective Finishes
Polyurethane offers durable protection for high-use surfaces. Water-based topcoats dry faster and tend to remain clearer over light wood and white paint. Oil-based finishes often add warmth and amber tone, which can be beautiful on darker woods but may yellow pale finishes over time.
Shellac can create a warm traditional look and works well for certain restoration projects. Hardwax oils provide a natural, low-sheen appearance and can be easier to repair locally. Choose a product based on your desired look, the furniture’s use, drying conditions, and compatibility with the stain or paint underneath.
Step 7: Apply the Finish in Thin, Patient Coats
Apply your chosen finish in thin, even coats. Brush along the grain and avoid repeatedly brushing areas that have started to dry. Overworking a finish can cause streaks, bubbles, lap marks, and language that your neighbors may hear through the garage door.
Allow each coat to dry fully according to the manufacturer’s instructions. Lightly sand between coats when recommended, usually with fine sandpaper or a sanding sponge, then remove the dust before adding the next layer.
For a dining table, desk, or heavily used dresser top, use enough coats to build durable protection. For decorative pieces, a lighter finish may be enough. Let the final coat cure completely before using the furniture. Dry to the touch is not the same as fully cured. Your patience now will prevent rings, scratches, and sticky surfaces later.
Step 8: Reassemble, Style, and Protect Your Restored Piece
Once the finish has cured, reinstall drawers, doors, knobs, handles, and hinges. Clean original hardware gently if you want to preserve its character. Replace hardware only when it is missing, damaged beyond repair, or does not suit the new function of the piece.
Protect your refinished vintage furniture with coasters, felt pads, placemats, and common sense. Avoid direct sunlight, standing water, extreme heat, and harsh cleaners. A little ongoing care will help the new finish last much longer.
Common Furniture Refinishing Mistakes to Avoid
- Stripping a valuable antique before researching its age and origin.
- Using an orbital sander aggressively on thin veneer.
- Skipping cleaning before sanding, priming, staining, or painting.
- Applying stain without testing it first.
- Using incompatible stain and topcoat products.
- Applying thick coats that drip, wrinkle, or stay sticky.
- Ignoring cure time before using the furniture.
- Throwing oily rags into a pile or trash can.
- Painting hardware that could have been cleaned and preserved.
- Trying to fix every tiny imperfection until the furniture loses its character.
Experience: What Refinishing Vintage Furniture Teaches You
Refinishing vintage furniture has a sneaky way of changing how you look at old things. At first, you may see a scratched table, a crooked drawer, or an ugly layer of varnish that resembles melted caramel. But after spending a few hours cleaning, repairing, sanding, and studying the details, the furniture starts to reveal itself.
You begin to notice the small signs of craftsmanship that are easy to miss in a dusty thrift store. Maybe the drawer has hand-cut dovetails. Maybe the legs are solid maple instead of hollow plastic. Maybe the hardware has a lovely aged patina under a layer of paint. The furniture stops feeling like junk and starts feeling like evidence that someone, somewhere, cared enough to build it properly.
One of the best lessons is that not every problem needs a dramatic solution. A water ring may fade with a careful repair. A loose joint may only need glue and a clamp. A cloudy finish may respond to cleaning and a fresh protective coat. It is tempting to strip everything down to bare wood because bare wood feels like a clean slate. But sometimes the goal should be preservation, not perfection.
Vintage furniture also teaches patience in a very direct and occasionally rude way. You cannot rush drying time. You cannot force stain to absorb evenly. You cannot sand through a veneer layer and then stare at it intensely until it grows back. Every stage asks you to slow down, inspect your work, and accept that good results come from many small decisions.
There is also a wonderful freedom in refinishing furniture that is already imperfect. A brand-new expensive cabinet can make you nervous. A beat-up 1960s dresser found at an estate sale gives you permission to experiment. You can test a stain color, try a new paint technique, replace the knobs, or turn a forgotten sideboard into a coffee bar. The piece already has history, so adding your own chapter feels natural.
The most satisfying moment often comes after the final coat has cured and the furniture returns to the room. The transformation can be dramatic, but it is rarely about making the piece look brand-new. The goal is to make it look loved again. A few old dents may remain. The grain may still show small marks from its previous life. The brass hardware may keep its mellow wear. Those details are not failures. They are reminders that useful objects can survive change and still become beautiful.
That is the real charm of refinishing vintage furniture. You are not simply sanding wood and applying a topcoat. You are rescuing materials, honoring craftsmanship, and creating a useful piece with more personality than anything shipped in a flat box with an instruction sheet the size of a restaurant menu. When you unlock the beauty within an old piece of furniture, you may discover that the beauty was never really gone. It was just waiting for someone to look closer.
Conclusion
Learning how to refinish vintage furniture gives you the power to transform neglected pieces into beautiful, functional parts of your home. Start by identifying the material, checking whether the original finish should be preserved, and making structural repairs before cosmetic changes. Clean thoroughly, sand carefully, test colors, choose compatible products, and apply thin coats with plenty of drying time.
Whether you restore a mid-century dresser, repaint a laminate side table, revive a worn dining chair, or repair an inherited cabinet, the best results come from patience and respect for the piece. Vintage furniture does not need to be perfect to be beautiful. Sometimes a few honest marks are exactly what make it unforgettable.