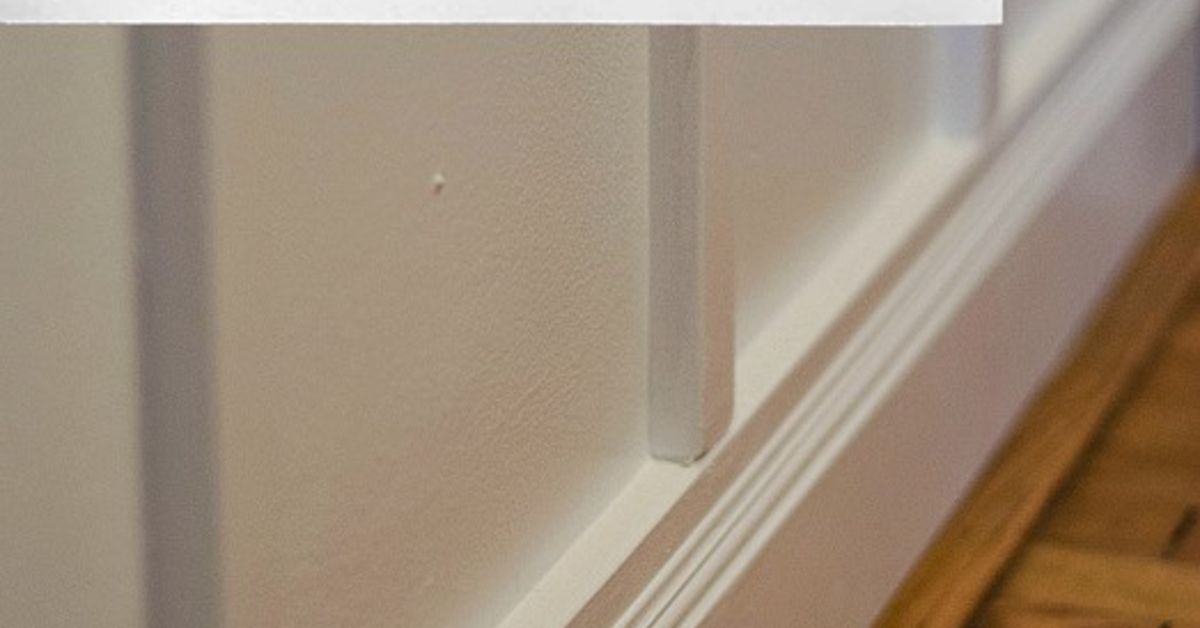
Thin baseboards have a special talent: they make a perfectly nice room look like it forgot to get dressed. The walls may be freshly painted, the floors may be gorgeous, and the furniture may be doing its best, but those skinny builder-grade baseboards can still whisper, “I came free with the house.”
The good news? You do not always need to rip everything out and start over. One of the easiest ways to make baseboards thicker is to layer additional trim above or below the existing baseboard, then caulk and paint everything the same color so it reads as one substantial piece of molding. This simple DIY baseboard upgrade can make a room look taller, cleaner, and more custom without requiring advanced carpentry skills or a dramatic “why is there a hole in the wall?” renovation moment.
In this guide, you will learn how to make baseboards look thicker using easy trim add-ons, including base cap molding, shoe molding, quarter-round, lattice strips, and the classic faux-tall-baseboard trick. We will cover tools, materials, installation steps, design choices, common mistakes, and real-world experience so your project looks intentionalnot like the baseboard had a growth spurt in the dark.
What Does “Making Baseboards Thicker” Really Mean?
When people say they want thicker baseboards, they usually mean one of three things:
- Taller baseboards: The trim extends higher up the wall and looks more elegant.
- Deeper baseboards: The molding projects farther from the wall and has more dimension.
- More decorative baseboards: The trim has layers, curves, or profiles that make it look custom.
The easiest fix is usually visual thickness rather than physically replacing the entire baseboard. By adding a small piece of molding above the existing baseboard and painting the wall space between them the same trim color, you can create the illusion of a much taller, thicker baseboard. It is a smart trick because your eyes read the whole painted area as one continuous trim assembly.
For example, if your current baseboard is 3 1/4 inches tall, you can install a thin decorative molding 1 1/2 to 2 inches above it. Once the strip, the original baseboard, and the wall space between are painted semi-gloss white, the finished baseboard may appear closer to 5 or 6 inches tall. That is a big upgrade for a small amount of material.
Best Easy Fixes for Thicker-Looking Baseboards
1. Add a Decorative Trim Strip Above the Baseboard
This is the most popular easy fix because it gives the biggest visual change with the least demolition. You install a narrow molding strip, often called lattice molding, panel molding, or screen molding, above the existing baseboard. The gap between the old baseboard and new strip is painted the same color as the trim.
This method works especially well in bedrooms, dining rooms, hallways, and living rooms where you want a classic custom look. It is also budget-friendly because you are not replacing the original baseboards. You are simply giving them a promotion.
2. Add Base Cap Molding to the Top
Base cap molding is designed to sit on top of a flat baseboard and add a finished profile. If your baseboard is plain and square, a cap gives it shape, shadow, and detail. This method is ideal when your existing baseboard is sturdy but boring.
Base cap molding can make a basic board look like traditional millwork. It is especially effective in older-style homes, formal rooms, or spaces where you already have crown molding, chair rail, or paneled walls.
3. Add Shoe Molding or Quarter-Round at the Bottom
Shoe molding and quarter-round are small trim pieces installed along the bottom edge of baseboards where they meet the floor. They are often used to cover small gaps caused by uneven flooring, expansion spaces, or old-house settling.
Shoe molding is slimmer and more elegant, while quarter-round is more rounded and noticeable. Both can make the baseboard look more layered and finished. For a cleaner look, nail shoe molding into the baseboard rather than into the floor, especially if the floor needs room to expand and contract.
4. Stack Multiple Trim Profiles
If you want a truly custom look, combine methods. A flat baseboard, a base cap on top, and shoe molding at the bottom can create a thick, high-end trim assembly. This approach works beautifully when you want the baseboard to feel architectural rather than accidental.
The trick is restraint. Do not stack so many profiles that your baseboard starts looking like a wedding cake wearing sneakers. Choose trim pieces that share a similar style and scale.
5. Replace the Baseboard Entirely
Sometimes the easiest fix is not adding to the old baseboard but replacing it with taller, thicker molding. This is best when the current trim is damaged, warped, very short, or made from poor material. Replacement takes more time, but it produces the cleanest result.
For most DIYers, however, the add-on method is faster, cheaper, and less stressful. Unless your existing baseboard is in terrible condition, you can usually upgrade it without removing it.
Tools and Materials You Will Need
Before you start, gather the right supplies. Trim work is much easier when you are not wandering around the house every four minutes looking for a pencil that has somehow entered witness protection.
Tools
- Tape measure
- Pencil
- Level or laser level
- Miter saw or miter box
- Stud finder
- Brad nailer or hammer and finish nails
- Caulk gun
- Putty knife
- Sanding sponge
- Painter’s tape
- Angled paintbrush
Materials
- Decorative molding, lattice strip, base cap, shoe molding, or quarter-round
- Paintable caulk
- Wood filler or spackling for nail holes
- Construction adhesive, if needed
- Primer
- Trim paint, usually satin, semi-gloss, or gloss
- Drop cloths
For painted baseboards, primed MDF or finger-jointed pine is common and affordable. For stained wood trim, choose a wood species that matches your existing baseboard as closely as possible. If you are painting everything, matching the exact material matters less than matching the profile and finish.
Step-by-Step: How To Make Baseboards Thicker the Easy Way
Step 1: Clean and Inspect the Existing Baseboards
Start by cleaning the baseboards with a damp cloth and mild soap. Dust, pet hair, and old grime can interfere with caulk, adhesive, and paint. If the baseboards have peeling paint, loose caulk, dents, or swollen areas, fix those first.
If your home was built before 1978, be careful with sanding or disturbing old painted trim. Older homes may contain lead-based paint, and scraping or sanding can create hazardous dust. Use lead-safe practices or hire a certified professional if you are unsure.
Step 2: Decide How Tall You Want the Finished Baseboard to Look
Stand back and look at the room. A small room with low ceilings may look best with a finished baseboard height of 4 1/2 to 5 1/2 inches. A larger room or home with higher ceilings can often handle 6 to 8 inches or more.
For an easy faux-thick baseboard, measure from the floor to the top of your existing baseboard. Then decide how much higher you want the visual trim to extend. A gap of 1 to 2 inches between the existing baseboard and the new trim strip usually looks natural.
Step 3: Mark a Level Line Around the Room
Use a level or laser level to mark the top or bottom edge of your new molding. Do not simply measure up from the floor in every spot because floors are often uneven. If you follow a wavy floor too closely, your new trim may look like it is slowly trying to escape.
A level line gives the room a crisp, professional appearance. If the gap varies slightly because the floor is not perfectly level, caulk and paint will help hide minor differences.
Step 4: Measure and Cut the Trim
Measure each wall carefully and cut your trim pieces to fit. For outside corners, use miter cuts so the pieces meet cleanly. For inside corners, you can miter or cope the joint. Coping often handles seasonal movement better, but mitering is more beginner-friendly if the room is fairly square.
Always dry-fit pieces before nailing. This means placing the trim against the wall to check the fit before committing. Dry-fitting is the DIY version of “measure twice, avoid emotional damage once.”
Step 5: Attach the New Molding
Apply a thin bead of construction adhesive to the back of the molding if you need extra hold, especially for lightweight trim. Then position the trim on your level line and secure it with brad nails or finish nails.
Try to nail into studs when possible. For small decorative strips, adhesive plus short brad nails is often enough. Do not overdo the nails. More nails do not automatically mean better trim; sometimes they just mean more holes to fill while questioning your life choices.
Step 6: Add Shoe Molding or Quarter-Round, If Desired
If the bottom of your baseboard has gaps or looks unfinished, add shoe molding or quarter-round along the floor. Cut outside corners at 45 degrees and cope or miter inside corners. Nail the molding into the baseboard, not into the floor.
This lower trim layer makes the baseboard look thicker and also hides small flooring gaps. It is especially useful after installing hardwood, laminate, luxury vinyl plank, or tile.
Step 7: Fill Nail Holes and Sand Smooth
Use wood filler or lightweight spackling to fill nail holes. Let it dry, then sand lightly with a fine sanding sponge. The goal is a smooth surface that disappears under paint.
Do not use caulk for nail holes if you want the cleanest finish. Caulk stays flexible and can shrink or show dimples. Filler is better for small holes; caulk is better for seams and gaps.
Step 8: Caulk the Seams
Run a thin bead of paintable caulk along the top and bottom edges of the new molding, along the top edge of the original baseboard, and anywhere small gaps appear. Smooth the bead with a damp finger or caulk finishing tool.
Use paintable acrylic latex caulk or a paintable siliconized acrylic caulk for interior trim. Avoid pure silicone if you plan to paint, because paint usually does not stick well to it.
Step 9: Prime and Paint Everything the Same Color
This is the magic step. Paint the original baseboard, the new molding, and the wall space between them the same trim color. Use a trim paint in satin, semi-gloss, or gloss for durability and easy cleaning.
Once painted, the separate parts visually merge into one thicker baseboard. The wall strip between the pieces stops looking like drywall and starts looking like part of the trim cleaning.
Once painted, the separate parts visually merge into one thicker. Congratulations: you have successfully tricked the eye, which is basically interior design with better shoes.
Design Tips for a More Expensive Look
Match the Style of Your Home
Simple flat molding works well in modern and transitional homes. Curved base cap molding suits traditional, colonial, cottage, and craftsman-inspired spaces. If your door casings are plain, keep the baseboard upgrade clean. If your home has detailed trim, you can use a more decorative profile.
Keep Proportions in Mind
A tiny room does not need a 10-inch baseboard unless you want the trim to become the main character. As a general rule, taller ceilings can support taller baseboards. Standard 8-foot ceilings usually look good with finished baseboards around 4 to 6 inches tall. Rooms with 9- or 10-foot ceilings can often handle 6 to 8 inches.
Use Consistent Paint
For the illusion to work, the original baseboard, new trim, and wall gap must be painted the same color and sheen. If the middle strip is painted wall color, the trick falls apart. If everything is painted trim color, the eye reads it as one built-up molding.
Upgrade Door Trim at the Same Time
Thicker baseboards can make thin door casing look underdressed. If the room still feels unbalanced, consider adding backband molding to door trim or replacing skinny casing with a wider profile. The room will feel more cohesive.
Common Mistakes to Avoid
Installing the New Trim Too High
The faux-baseboard trick works best when the added trim is close enough to the original baseboard to feel connected. If the gap is too large, it may look like a random stripe floating on the wall.
Skipping Caulk
Caulk is what turns separate trim pieces into one polished installation. Without caulk, every seam and tiny shadow line will announce itself. Use a small bead, smooth it carefully, and let it dry before painting.
Using the Wrong Caulk
Use paintable caulk for painted trim. Pure silicone is great in wet areas but not ideal for painted baseboards because paint adhesion is poor. Always check the label before buying.
Ignoring Uneven Floors and Walls
Most houses are not perfectly square, level, or straight. That is not a personal failure; that is construction. Dry-fit trim, use caulk for small gaps, and avoid assuming every corner is exactly 90 degrees.
Painting Too Soon
Let filler and caulk dry according to the manufacturer’s instructions before painting. Rushing this step can lead to cracking, smearing, or sunken nail holes. Patience is cheaper than repainting.
When Should You Replace Instead of Add On?
Adding trim is the easiest fix, but replacement may be better in certain situations. Replace the baseboard if it is badly water-damaged, swollen, cracked, separating from the wall, or too short to work with the design you want. Replacement is also smart if you are already replacing floors and the baseboards must come off anyway.
If your existing baseboard is in good shape, however, building it up is usually faster and more affordable. It also avoids the risk of damaging drywall during removal. That alone can save you from a weekend that starts with “I’ll just pop this off quickly” and ends with learning drywall repair on the internet at midnight.
Specific Example: Turning a 3-Inch Baseboard Into a 6-Inch Look
Imagine you have a basic 3-inch baseboard in a bedroom. You want a taller, more custom appearance without removing it. Here is a simple plan:
- Clean the baseboard and wall area above it.
- Measure 2 inches above the existing baseboard and mark a level line.
- Install a narrow decorative molding strip along that line.
- Fill nail holes with wood filler.
- Caulk the top and bottom edges of the new strip.
- Caulk the top edge of the old baseboard.
- Paint the old baseboard, the new strip, and the wall space between them the same semi-gloss white.
The result looks like a much taller baseboard, even though the original trim stayed in place. This is one of the best easy fixes for builder-grade baseboards because it is inexpensive, beginner-friendly, and highly visible.
Experience Section: What I’ve Learned From Making Baseboards Look Thicker
The first thing you learn when upgrading baseboards is that trim work rewards patience more than strength. You do not need to be the strongest person in the house. You need to be the person willing to measure carefully, dry-fit the piece, notice that the corner is not square, sigh politely, and adjust. Trim has a way of exposing every tiny wall wave and floor dip, so the best results come from working with the room instead of pretending the room was built by laser-guided angels.
One of the most useful experiences is testing the design before installing anything. A small sample of molding held above the existing baseboard can tell you a lot. Sometimes a 1-inch gap looks classy; sometimes it looks too skinny. Sometimes a 2-inch gap creates a perfect tall-baseboard effect; sometimes it looks like the wall is wearing a belt. Painter’s tape is your friend here. Tape a line around a short section of wall where the new trim would go, then stand back. Look at it in daylight and at night. If it feels right before you nail anything, you are much more likely to love the finished project.
Another lesson: caulk can save a project, but it cannot perform miracles while wearing a cape. Small gaps along the wall are normal and easy to hide. Huge corner mistakes or badly cut miters are harder to disguise. For outside corners, take your time and sneak up on the cut if needed. Cut the piece a little long, test it, then shave off tiny amounts. It is slower, but it is better than cutting too short and creating a corner gap large enough to store snacks in.
Paint choice also matters more than people expect. A crisp white semi-gloss finish can make even inexpensive molding look polished. But if the paint is too thick, poorly brushed, or applied over dusty trim, the final result may look lumpy. Clean first, sand lightly, prime bare wood or MDF, and use long, smooth brush strokes. The paint is what unifies the old baseboard, new molding, and wall strip into one visual piece, so treat it as part of the carpentry, not an afterthought.
One practical tip from real projects: do one room first before committing to the whole house. A bedroom, hallway, or powder room is a great test space. You will learn how your walls behave, what trim profile you like, how long the process takes, and whether your chosen paint color works with your floors. After that, repeating the method in other rooms becomes much easier.
Finally, do not underestimate the emotional power of thicker baseboards. It sounds like a tiny detail, but it can make a room feel finished in a way that furniture alone cannot. Thick baseboards create a visual foundation. They make walls look cleaner, floors look more intentional, and the whole room feel more “custom home” and less “rental with commitment issues.” For a weekend project, that is a pretty satisfying return.
Conclusion
Making baseboards thicker does not have to mean tearing out every piece of trim in your house. The easiest fix is to build up what you already have. Add a decorative molding strip above the baseboard, install base cap molding, use shoe molding at the bottom, caulk the seams, and paint everything the same trim color. The result is a thicker, taller, more custom-looking baseboard without the cost or chaos of full replacement.
For the best finish, choose trim that matches your home’s style, keep proportions balanced, use paintable caulk, and take your time with cuts and corners. A little patience here goes a long way. After all, baseboards may live at floor level, but when they look good, the whole room stands taller.
Note: This article is based on widely used U.S. trim-carpentry practices, including layered molding, base cap installation, shoe molding, caulking, priming, painting, and lead-safe preparation for older homes.