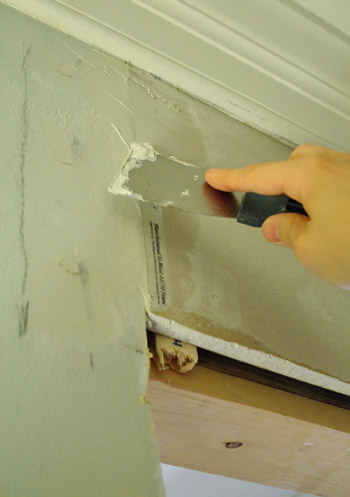
Drywall has a wonderfully misleading personality. A clean sheet looks simple: gypsum core, paper faces, four corners, and no moving parts. Then you try carrying and making every seam disappear. Suddenly, that innocent rectangle has opinions.
Fortunately, DIY drywall installation is manageable when you treat it as a series of small, precise jobs rather than one enormous construction wrestling match. Good results begin before the first screw is driven. Planning the layout, straightening the framing, choosing suitable panels, and controlling dust matter just as much as taping and sanding.
These practical DIY drywalling tips will help you measure, cut, hang, tape, mud, sand, prime, and repair drywall while avoiding the mistakes that make walls look homemade in all the wrong ways.
Plan the Drywall Project Before Buying Materials
Choose the Right Type of Drywall
Standard 1/2-inch drywall is commonly used for interior residential walls, but panel type and thickness should match the room, framing, local building code, and required fire rating. Ceilings, garages, utility rooms, bathrooms, and fire-rated assemblies may require different products.
Moisture- or mold-resistant drywall can be helpful in humid areas, but it is not automatically suitable for shower walls or other surfaces exposed directly to water. Those locations generally need an approved tile backer and waterproofing system.
Larger drywall sheets create fewer joints, which means less taping and mudding. However, they are heavier and may be impossible to maneuver through tight hallways or stairways. Before ordering 12-foot panels, confirm that they can actually reach the room. Otherwise, you may own the world’s least convenient hallway decoration.
Calculate Materials With a Waste Allowance
Measure the total wall and ceiling area, subtracting only very large openings. Purchase enough panels to cover the calculated area, plus approximately 10 percent for damaged corners, offcuts, mistakes, and layout changes.
Also estimate drywall screws, joint tape, corner bead, joint compound, primer, and sanding supplies. Buying one extra bucket of compound is usually less frustrating than stopping halfway through a finish coat because the mud pan has begun echoing.
Inspect the Framing
Drywall follows whatever lies beneath it. A bowed stud creates a bowed wall, and missing backing leaves panel edges unsupported. Before hanging drywall, inspect the framing with a long level or straightedge.
Plane or replace badly crowned studs, shim recessed framing, and install blocking at inside corners, ceiling edges, cabinets, handrails, television mounts, and other locations that may require solid fastening later.
Confirm that plumbing, wiring, insulation, ventilation, and required inspections are complete before closing the wall cavities. Photograph every open wall so you have a permanent record of stud locations, pipes, wires, and blocking.
Gather the Essential Drywall Tools
A beginner does not need every tool in a professional drywall contractor’s van. However, several purpose-built tools can prevent hours of frustration.
- Drywall T-square and tape measure
- Utility knife with sharp replacement blades
- Drywall rasp and jab saw
- Drill with a drywall screw-setting bit or a screw gun
- Panel lifter for raising lower wall sheets
- Drywall lift for ceiling installation
- Four-, six-, 10-, and 12-inch drywall knives
- Mud pan or drywall hawk
- Mixing paddle and clean bucket
- Sanding sponge or vacuum-assisted pole sander
- Bright portable work light
- Eye protection and suitable respiratory protection
Protect floors before beginning and isolate the work area with plastic sheeting. Drywall dust has an extraordinary ability to enter rooms that were never invited to the renovation.
Plan the Panel Layout Carefully
Install Ceiling Drywall First
Hang ceiling drywall before covering the walls. The upper wall panels can then help support the ceiling edges around the room’s perimeter.
Full ceiling sheets are heavy and awkward, so rent a drywall lift or work with a capable helper. A lift holds the sheet securely while you align its edges and install the first screws. It is safer than balancing a panel on your head while trying to remember where you left the drill.
Every panel end must land over the center of a ceiling joist, furring strip, or other approved framing member. Stagger end joints where possible and follow the panel manufacturer’s required fastening schedule.
Keep Joints Away From Openings
Avoid placing drywall seams directly at the corners of doors or windows. Openings concentrate movement, and a joint extending from a corner is more likely to crack.
Instead, cut a larger panel so it wraps around the opening and place the seam farther away. Stagger butt joints between rows and avoid filling walls with tiny scraps. Small pieces may save material, but every additional joint creates more taping, drying, and sanding.
Choose Horizontal or Vertical Installation Appropriately
Drywall may be installed horizontally or vertically depending on wall height, framing, code requirements, and the design of a rated assembly. Horizontal installation is common in residential construction because it can reduce the total length of seams and place tapered joints at a convenient working height.
Regardless of orientation, unsupported ends must land on framing or approved backing. Do not leave a panel edge floating between studs and expect joint compound to become a structural material. It will not accept the promotion.
Measure and Cut Drywall Accurately
Use the Score-and-Snap Method
For a straight cut, mark the face paper, position a drywall T-square along the line, and score the paper with a sharp utility knife. Snap the panel away from the scored side, cut through the back paper, and smooth the edge with a drywall rasp.
The knife only needs to cut the face paper. Pressing deeply into the gypsum wastes effort and quickly dulls the blade.
Cut Openings Conservatively
Measure electrical boxes from two reliable reference points, such as the floor and the edge of the previous panel. Mark each opening carefully and cut it slightly larger than the box but smaller than the cover plate.
A rotary cutout tool is fast, but it can wander beyond the box or damage hidden wiring. Confirm where cables and pipes are located, manage electrical power safely, and keep cuts shallow and controlled.
Dry-fit complicated sheets before fastening. If a panel needs several outlet openings and a notch around a beam, check every measurement twice. Drywall is forgiving, but it has never been impressed by optimism.
Fasten Drywall Without Damaging It
Use drywall screws of the type and length required for the panel thickness, framing material, and wall or ceiling assembly. Manufacturer instructions commonly specify closer fastener spacing on ceilings than on walls, but always follow the requirements for your particular product and local code.
Drive each screw until its head sits slightly below the paper surface without tearing through it. The paper helps the screw clamp the panel to the framing. A screw that breaks through the face paper should be supplemented with a correctly driven screw nearby.
Begin fastening near the center of the panel and work toward the edges. This helps the sheet lie flat instead of trapping a bulge. Keep edges aligned without crushing them tightly together.
When installing lower wall panels, use a foot-operated panel lifter or a simple lever made from scrap wood to raise the sheet snugly against the upper row. Maintain the recommended clearance above the floor so the drywall does not absorb minor floor moisture.
Tape and Mud Drywall With Thin Coats
Prepare Every Joint
Before applying tape, run a clean drywall knife over all screw heads. If the knife clicks against a fastener, set that screw slightly deeper. Remove loose paper, trim broken edges, and prefill wide gaps.
Setting-type joint compound is useful for prefilling because it hardens through a chemical reaction and generally shrinks less than many air-drying compounds. Mix only as much as you can apply before it sets. Hardened compound is durable, but it makes a terrible addition to your favorite bucket.
Select the Proper Drywall Tape
Paper tape is a dependable option for flat seams and inside corners. When correctly embedded, it creates a strong joint with a relatively low profile.
Self-adhesive mesh tape is convenient for certain repairs and applications, but it must be paired with a compatible joint compound and installed according to its manufacturer’s directions. Do not assume every tape works equally well with every type of mud.
Embed Tape Without Creating Bubbles
Apply an even bed of joint compound over the seam, center the tape, and press it into the wet mud with a taping knife. Remove excess compound while leaving a thin, continuous layer beneath the tape.
Applying too little pressure leaves excess mud and a raised joint. Applying too much pressure squeezes out the bedding compound and can cause bubbles or poor adhesion.
For inside corners, crease paper tape and bed both sides. Wipe one side at a time using smooth, controlled strokes. Outside corners require straight, securely installed corner bead. If the bead is crooked, adding thicker mud will merely create a larger crooked corner.
Build the Finish Gradually
Once the taped coat is completely dry, scrape away ridges and crumbs before adding the next coat. The second coat should cover the tape and extend beyond the first. Apply the final coat wider still, feathering the edges into the drywall face.
Butt joints have no recessed factory edges, so they require a broad, shallow buildup. A narrow, thick band creates a visible hump. Spreading the compound farther on both sides makes the transition appear flat.
Keep tools and compound clean. One dried flake in fresh mud can create a groove through an otherwise smooth pass. Scrape the mud pan regularly and never return contaminated compound to the original bucket.
Sand Less by Applying Mud Better
Drywall finishing should not become sculpture by subtraction. The goal is to leave only enough compound to conceal and flatten the joint.
Use a drywall knife to scrape dried ridges before sanding. Inspect the surface with a bright work light positioned at a low angle. This raking light exposes tool marks, high spots, and visible edges.
Sand lightly with an appropriate fine abrasive. Avoid cutting into the tape or damaging the drywall paper. When you find a low spot, apply another thin coat instead of grinding away the surrounding wall.
Use a vacuum-assisted sanding system or a properly filtered shop vacuum to capture fine dust. Wear eye protection and suitable respiratory protection, isolate nearby rooms, and avoid spreading dust through the HVAC system. Clean with vacuuming and damp wiping rather than compressed air.
Prime Drywall Before Applying Paint
Joint compound and drywall paper absorb paint differently. Applying a quality drywall primer helps create a more uniform surface and reduces visible changes in color or sheen.
Primer also reveals imperfections that were difficult to see on the unfinished wall. Inspect the primed surface under the lighting conditions the room will normally use. Large windows, wall-washing fixtures, dark colors, and glossy paint can make minor seams much more noticeable.
High-visibility walls may require a higher level of drywall finish or a skim coat over the entire surface. Correct visible defects with a thin layer of compound, sand lightly, spot-prime, and inspect again before painting.
Common DIY Drywall Mistakes to Avoid
- Covering bowed framing and expecting mud to flatten the wall
- Installing seams at door and window corners
- Using panels with badly damaged edges
- Breaking the face paper with overdriven screws
- Leaving underdriven screws that show through the finish
- Cutting outlet openings wider than the cover plates
- Using joint compound to fill large unsupported gaps
- Applying thick coats that shrink, crack, or dry slowly
- Coating over mud that has not dried completely
- Over-sanding until tape or fuzzy paper appears
- Painting bare drywall without primer
- Repairing water damage before fixing the leak
Call a qualified professional when a wall or ceiling has major water damage, widespread mold, damaged framing, questionable electrical work, significant sagging, or a required fire-rated assembly that must follow a tested design.
Experience-Based Lessons From DIY Drywall Projects
The first lesson many homeowners learn is that hanging drywall moves quickly while finishing does not. A small bedroom may be covered with panels in a day, creating the exciting illusion that the project is almost finished. Then come taping, filling, finishing, drying, sanding, priming, inspecting, and touching up the seam that becomes visible only when morning sunlight hits it sideways.
Plan the project around drying time rather than the speed of screw-driving. Joint compound that appears dry on the surface may still be soft underneath, especially in cool or humid conditions. Applying another coat too soon can trap moisture, disturb the previous layer, or dramatically increase the final drying time.
Another recurring lesson is that one of the most valuable drywall tools is an ordinary pencil. Mark stud centers on both the floor and ceiling before hanging panels. Transfer light fastening guidelines onto each sheet. Label electrical-box measurements and record the intended installation sequence. These simple marks prevent the classic experience of repeatedly driving screws into empty space while pretending it is a scientific framing investigation.
Ceiling work teaches humility faster than almost any other interior project. A full sheet becomes heavier with every second it remains overhead. Renting a drywall lift may seem unnecessary at the store, but it becomes an excellent decision as soon as the first panel is raised. The lift allows time to align edges, confirm the layout, and drive screws without rushing. Its rental cost is usually lower than replacing a broken panel, damaged light fixture, or injured shoulder.
Finishing teaches the opposite lesson: less material and less force often produce better results. Beginners commonly apply too much compound because they want the joint to disappear in one pass. Instead, they create a raised ridge that requires aggressive sanding. Better results come from several controlled coats, each serving a specific purpose. The taped coat bonds the joint, the fill coat conceals the tape, and the finish coat creates a wide, gradual transition.
Tool cleanliness matters more than most first-time drywallers expect. A single hardened crumb can drag through a fresh coat and leave a groove. Attempting to repair that groove often creates another ridge, which requires more sanding, which produces more dust, which somehow enters a closed cabinet two rooms away. Keeping a small bucket of clean water nearby and wiping knives frequently saves considerable time.
Lighting also changes everything. A seam may look perfect under a ceiling bulb and terrible under a portable light held nearly parallel to the wall. Inspecting with raking light between coats makes defects easy to repair while the compound remains thin. Discovering the same ridge after applying glossy paint is a much less cheerful experience.
Experienced DIYers also learn when to stop sanding. A low area should be filled rather than surrounded by an expanding crater. When tape begins to show or the drywall paper becomes fuzzy, the sanding has already gone too far. Apply a thin skim coat, allow it to dry, feather it gently, and prime the repaired area.
The most satisfying moment is rarely the installation of the final sheet. It is the moment primer covers the patchwork of gray paper, white compound, pencil marks, and corrected mistakes. The room suddenly looks complete. That transformation is why careful preparation matters: drywall conceals framing, pipes, insulation, and wiring, but it does not permanently conceal careless workmanship.
Conclusion
Professional-looking drywall depends less on secret techniques than on disciplined sequencing. Straighten the framing, plan the layout, keep joints away from openings, set screws correctly, embed tape securely, and apply thin coats that become progressively wider.
Control sanding dust, prime before painting, and inspect each surface under strong side lighting. Most importantly, allow every coat to dry and repair small defects before they become painted defects.
Approach the work patiently, and your finished walls can look smooth, straight, and pleasantly uneventful. In drywalling, “uneventful” may be the highest compliment available.