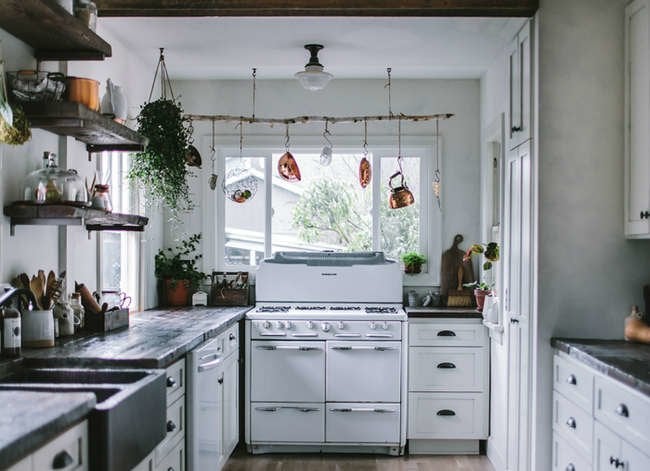
Every home has a secret storage department. It is not in the basement, not behind a hidden bookcase, and sadly not guarded by a tiny butler with a label maker. It is hiding in plain sight: empty jars, shoeboxes, cardboard tubes, leftover baskets, old tins, delivery boxes, spare hooks, fabric scraps, and furniture pieces that have been quietly waiting for a second career.
The best DIY storage solutions are not always the ones that require a trip to the hardware store. Sometimes the smartest organizer is already in your recycling bin, junk drawer, closet, or garage. Free storage ideas are especially useful for small homes, apartments, dorm rooms, busy family spaces, and anyone who has ever opened a cabinet and been personally attacked by falling plastic lids.
This guide shares 18 clever storage solutions you can DIY for free using things you may already own. These ideas are practical, budget-friendly, renter-friendly, and flexible enough for kitchens, bathrooms, closets, bedrooms, home offices, garages, craft rooms, and entryways. The goal is simple: reduce clutter, reuse what you have, and make your home work harder without making your wallet cry in the corner.
Why Free DIY Storage Works So Well
Good organization is not about buying matching bins until your pantry looks like it has a modeling contract. It is about giving every item a clear place to live. When your scissors, chargers, spices, cleaning cloths, hair ties, craft supplies, and mail all have a “home,” your actual home feels calmer.
Free DIY storage also encourages smarter habits. When you repurpose a jar for cotton swabs, a shoebox for cords, or a cereal box for magazines, you are not just saving money. You are reducing waste, using vertical space, creating zones, and solving the tiny annoyances that make everyday life feel messy. The trick is to match the storage idea to the item: small containers for small objects, vertical solutions for tight rooms, hidden storage for visual clutter, and open storage for things you use constantly.
18 Clever Storage Solutions You Can DIY for Free
1. Turn Empty Jars Into Clear Storage Containers
Glass jars are the superheroes of free home organization. They are sturdy, washable, see-through, and surprisingly attractive once the label is removed. Use them in the pantry for rice, pasta, tea bags, coffee pods, dried beans, or snack mixes. In the bathroom, they can hold cotton balls, makeup brushes, floss picks, bath salts, or hair ties.
For a more polished look, group jars of similar sizes together on a shelf or tray. If you have mismatched lids, paint them the same color or cover the tops with fabric scraps. You can also label jars with masking tape, chalk marker, or a small piece of paper tucked inside. The best part? Clear jars help you see what you own, which prevents the classic “buying the third bag of lentils because the first two were hiding” problem.
2. Make Drawer Dividers From Cardboard Boxes
Cardboard boxes are free, easy to cut, and perfect for creating custom drawer dividers. Use delivery boxes, cereal boxes, cracker boxes, or shoe boxes to divide drawers into sections for socks, underwear, office supplies, batteries, craft tools, or kitchen utensils.
To make a simple divider, measure the drawer height and cut strips of cardboard to fit. Interlock the pieces with small slits or tape them into a grid. For a prettier finish, wrap the cardboard in leftover gift wrap, brown paper bags, old maps, or fabric scraps. This DIY storage solution is especially useful because it can be customized to the exact size of your drawer, unlike store-bought organizers that always seem to leave one awkward gap big enough for chaos to sneak in.
3. Use Shoeboxes as Closet and Shelf Organizers
Shoeboxes are basically free mini storage bins with lids. Use them to organize scarves, belts, small handbags, seasonal accessories, craft supplies, greeting cards, photos, charging cables, or extra toiletries. In a closet, they stack neatly and keep smaller items from spreading across shelves like they pay rent.
For quick identification, tape a label to the front of each box. You can also cut a small handle opening on one side to make the box easier to pull from a shelf. If you want a cleaner look, cover shoeboxes with leftover wallpaper, wrapping paper, or plain kraft paper. This turns random packaging into storage that looks intentional instead of “I meant to deal with this six months ago.”
4. Repurpose Egg Cartons for Tiny Items
Egg cartons are excellent for corralling small things that love to disappear. Use them for jewelry, earrings, beads, buttons, screws, nails, paper clips, safety pins, hair clips, or sewing supplies. Each little cup becomes its own compartment, which makes sorting painless.
Place an egg carton inside a drawer, toolbox, craft bin, or desk tray. For kids’ art supplies, it can separate sequins, googly eyes, crayons, and other tiny treasures that somehow end up under the couch. Just make sure the carton is clean and dry before using it. For extra strength, choose cardboard cartons rather than foam ones.
5. Turn Toilet Paper Rolls Into Cord Organizers
Cords have a mysterious ability to tangle themselves when no one is watching. Empty toilet paper rolls or paper towel tubes can fix that for free. Wrap each cord loosely, slide it into a tube, and label the outside: phone charger, HDMI cable, headphones, laptop cord, or mystery cable you are too afraid to throw away.
Line the tubes upright inside a shoebox or drawer to create a tidy cable station. This idea is perfect for home offices, entertainment centers, and junk drawers. You can also decorate the tubes with paper or tape if you want them to look less like, well, toilet paper rolls living their second life.
6. Create a Magazine Holder From a Cereal Box
Before you recycle that cereal box, turn it into a magazine file. Cut the top off at an angle, leaving one side taller than the other, then use it to store notebooks, mail, folders, coloring books, cutting boards, aluminum foil boxes, or cleaning manuals.
This DIY storage solution works especially well on desks, pantry shelves, and kitchen counters. Cover the box with decorative paper or leave it plain for a minimalist “I am organized and also eat cereal” vibe. It is lightweight, easy to replace, and narrow enough for tight spaces.
7. Hang Bags on the Back of a Door
The back of a door is prime real estate. If you already have hooks, over-the-door hangers, removable adhesive hooks, or even a sturdy ribbon tied over the top, use that vertical space to store reusable grocery bags, hats, scarves, umbrellas, lightweight backpacks, cleaning cloths, or pet leashes.
No hooks? A fabric tote bag can become a hanging organizer. Put smaller items inside the tote and hang it from an existing knob, coat rack, or closet rod. This works beautifully in entryways, laundry rooms, bathrooms, and bedrooms where floor space is limited.
8. Use an Empty Tissue Box for Plastic Bags
If your plastic grocery bags are currently shoved into another plastic grocery bag, congratulations: you have created the traditional household bag monster. A cleaner solution is to stuff them into an empty tissue box. The opening lets you pull out one bag at a time, like tissues, only less sneezy.
Place the tissue box under the sink, in the pantry, near the trash can, or in the car. This free organizer is great for reusing bags as trash liners, pet cleanup bags, or packing material. It also keeps them compressed, contained, and far less likely to explode out of a cabinet at the worst possible moment.
9. Turn Tin Cans Into Desk or Bathroom Organizers
Clean tin cans are simple, durable containers for pencils, paintbrushes, makeup brushes, toothbrushes, combs, kitchen utensils, or craft tools. Remove any sharp edges carefully, wash and dry the can, then wrap it with paper, twine, fabric, or leftover contact paper.
Group several cans together on a desk or shelf to create a free caddy. You can even tape or glue cans side by side for a larger organizer. In a garage or craft room, cans are useful for sorting small tools, markers, brushes, zip ties, and hardware. They are proof that “trash” sometimes just needs a good rinse and a promotion.
10. Use Muffin Tins or Ice Cube Trays for Drawer Storage
Old muffin tins and ice cube trays make surprisingly effective organizers for tiny items. Use them in desk drawers for pushpins, rubber bands, paper clips, stamps, and binder clips. In a bathroom drawer, they can sort hair pins, rings, earrings, nail clippers, lip balms, and small cosmetics.
In a workshop, these trays can hold screws, washers, bolts, and other hardware during small repairs. In a craft room, they separate beads, buttons, charms, and embroidery thread. The individual compartments make it easy to see what you have without rummaging through a drawer like a raccoon with deadlines.
11. Transform Old Baskets Into Shelf Zones
Baskets are often scattered around the home holding random things. Gather them, empty them, and assign each one a specific job. One basket can hold bathroom towels, another can store pantry snacks, another can collect library books, and another can become a landing zone for mail.
The key is to use baskets as zones, not dumping grounds. Add labels if needed, especially for family spaces. A basket labeled “returns,” “school supplies,” “cleaning cloths,” or “dog gear” is more likely to be used correctly. Baskets also soften open shelving and make everyday clutter look calmer.
12. Make Under-Bed Storage From Flat Boxes
Under the bed is one of the most underused storage areas in many homes. Flat boxes from boots, appliances, or online deliveries can slide under the bed and hold seasonal clothing, gift wrap, extra linens, kids’ artwork, shoes, or rarely used accessories.
For easy access, tie a ribbon or strip of fabric to one end as a pull handle. Label the visible side so you do not have to open every box to find the winter gloves. If the box is too tall, cut it down and reinforce the corners with tape. This is a smart way to hide storage without buying plastic bins.
13. Use a Ladder or Chair as Vertical Storage
An old wooden ladder, step stool, or sturdy chair can become useful vertical storage. Lean a ladder against the wall to hang blankets, scarves, towels, magazines, or lightweight baskets. A chair in a bedroom corner can hold tomorrow’s outfit, a stack of books, or a small basket for accessories.
This idea works best when the item is stable and placed where it will not block walkways. It is especially helpful in bedrooms, bathrooms, and living rooms where you want storage that also looks decorative. The goal is not to create a clothing mountain on a chair. The goal is to give that chair a purpose before laundry stages a coup.
14. Turn a Junk Drawer Into a Command Drawer
Instead of accepting the junk drawer as a lawless territory, turn it into a command drawer with free containers. Use jar lids, small boxes, mint tins, egg carton sections, or cardboard dividers to separate pens, scissors, batteries, tape, stamps, rubber bands, keys, and spare change.
Start by removing everything from the drawer. Toss trash, relocate items that belong elsewhere, and group similar objects together. Then assign each group a small container. A command drawer should help you find useful things quickly, not serve as a museum of expired coupons and unidentified plastic pieces.
15. Repurpose Wine Boxes or Crates as Open Shelving
Sturdy wine boxes, wooden crates, or produce boxes can become open storage on shelves, in closets, or along entryway walls. Use them for shoes, books, toys, folded sweaters, pantry overflow, craft supplies, or cleaning products.
If the box is attractive, leave it as is. If it looks rough, sand any splintery spots and line the bottom with paper or fabric. Crates can be stacked to create flexible cubbies, but keep heavy items low and avoid unstable towers. This free DIY storage idea is especially useful for renters because it creates organization without permanent changes.
16. Use Binder Clips to Control Cables and Small Supplies
Binder clips are tiny organizing champions. Clip them to the edge of a desk and thread charging cords through the metal handles to stop cables from falling behind furniture. Use them to group papers, close snack bags, hold labels, organize receipts, or bundle cords.
In the freezer, binder clips can help keep bags upright. In a craft room, they can hold fabric pieces or ribbon ends. In a home office, they can tame everything from mail to earbuds. They are small, strong, and usually already hiding in a drawer somewhere, waiting for their moment.
17. Make Pantry Zones With Reused Boxes
A pantry becomes easier to use when it is divided into zones: breakfast, baking, snacks, dinner ingredients, canned goods, spices, and lunch supplies. You do not need fancy bins to create these zones. Cut down delivery boxes, shoeboxes, or cereal boxes and use them as open containers.
For example, one box can hold packets of oatmeal, another can hold baking chips and extracts, and another can hold small snack bags. Label each zone clearly. This system makes grocery planning easier because you can see what is low before buying more. It also prevents small packets from getting lost behind the peanut butter, where they go to think about their choices.
18. Create a Free Drop Zone Near the Entryway
The entryway collects keys, mail, sunglasses, wallets, school papers, dog leashes, and everything people drop the second they walk in. A free drop zone can prevent that clutter from spreading through the house.
Use a tray, shallow box, basket, jar, or repurposed dish to create designated spots. One container can hold keys, another can hold outgoing mail, and a larger basket can hold hats or reusable bags. If you have wall space, add existing hooks for bags and jackets. A good drop zone does not need to be fancy. It just needs to be obvious enough that even a tired person can use it correctly.
Room-by-Room Tips for Making DIY Storage Look Better
Kitchen
In the kitchen, focus on visibility and access. Use jars for dry goods, boxes for pantry zones, cans for utensils, and trays for small packets. Keep frequently used items at eye level and store rarely used tools higher or lower. Clear counters by grouping items into containers instead of letting them spread out like a snack-based landslide.
Bathroom
Bathrooms need moisture-friendly storage and easy cleaning. Glass jars, tins, baskets, and small boxes work well for toiletries, hair accessories, extra soap, and cotton products. Avoid storing paper organizers where they may get wet. If counter space is tight, use vertical surfaces, door backs, and under-sink zones.
Bedroom and Closet
Closets work best when items are grouped by type. Shoeboxes can hold accessories, flat boxes can slide under the bed, and baskets can store seasonal items. If your closet feels crowded, remove anything that belongs in another room before adding more storage. Sometimes the best organizer is not a bin; it is a brave little decluttering session.
Home Office
For desks and offices, prioritize small-item control. Tin cans, cardboard dividers, binder clips, cereal box magazine holders, and jar lids can organize supplies without costing anything. Keep your daily tools close and move occasional supplies farther away. A clear desk is easier to use, easier to clean, and less likely to become a paper swamp.
Garage, Shed, or Utility Area
Garages and sheds need durable storage. Crates, cans, jars, hooks, and labeled boxes can organize tools, hardware, gardening supplies, extension cords, and cleaning products. Store heavier items low, keep sharp tools safely contained, and label small hardware clearly. A garage does not have to be perfect, but it should not require an archaeological dig to find a screwdriver.
How to Make Free Storage Solutions Feel Intentional
Free DIY storage can look stylish when it follows a few simple rules. First, repeat materials when possible. A row of mismatched jars can look charming, but a row of similar jars looks organized. Second, use labels. Labels turn random containers into a system. Third, keep colors simple. Cover cardboard boxes with the same paper or use neutral tones so shelves feel calmer.
Fourth, avoid overfilling containers. A basket stuffed to the top may technically hold things, but it will be annoying to use. Leave breathing room so items can be removed and returned easily. Fifth, review your storage every few months. If a system is not working, adjust it. Organization is not a one-time performance. It is more like brushing your teeth: less glamorous than a makeover, but extremely helpful when done regularly.
Common Mistakes to Avoid
The biggest mistake is keeping too much. Storage is not magic. If you have 47 takeout containers and three lids, no organizer can save that relationship. Before making storage, edit what you own. Recycle broken packaging, donate duplicates, and toss items that are expired, damaged, or no longer useful.
Another mistake is hiding things too well. If you put daily items in closed boxes on high shelves, you will stop using the system. Store everyday items where they are easy to reach. Reserve hidden storage for seasonal, backup, or rarely used belongings.
Finally, do not create storage that blocks movement. A box in a hallway, a chair piled with clothes, or a crate in front of a cabinet may technically be storage, but it will make the room harder to live in. Good storage should support daily routines, not ambush your shins.
Extra Experience: What Actually Works When You DIY Storage for Free
After testing and observing plenty of free DIY storage ideas, one lesson becomes obvious: the best solution is the one you will actually use on a busy Tuesday. A beautifully wrapped box on a high shelf may look nice, but if you need a ladder every time you want a phone charger, that system is already plotting against you. Practicality wins.
One of the most successful free storage upgrades is the pantry zone system. It does not require matching containers or expensive labels. Even plain cardboard boxes can make a pantry feel instantly more organized when each one has a clear category. Breakfast items in one box, baking supplies in another, snacks in another, and small packets in another. The improvement is immediate because the pantry stops being one big pile and becomes a set of smaller, manageable sections.
Another surprisingly effective idea is using jars in bathrooms and offices. Clear jars remove the guessing game. You can see cotton swabs, hair ties, paper clips, rubber bands, or spare buttons at a glance. They also make small items feel less messy because the container itself has structure. A handful of hair ties on a counter looks like clutter. The same hair ties in a jar look like you have your life together, even if your laundry chair strongly disagrees.
Cardboard drawer dividers are also worth trying because they solve a common problem: store-bought organizers rarely fit perfectly. Homemade dividers can be cut to match the drawer, the items, and the way you naturally use the space. In a kitchen drawer, a wide section can hold spatulas while a narrow section holds measuring spoons. In a desk drawer, small compartments can separate pens, clips, tape, and sticky notes. The custom fit makes the drawer feel calmer every time it opens.
The biggest challenge with free DIY storage is durability. Cardboard is useful, but it will not last forever in damp bathrooms, heavy-use garages, or crowded toy bins. That does not make it a bad option. It simply means you should match the material to the job. Use glass, metal, or sturdy plastic containers for items that are heavy, wet, or handled often. Use cardboard for lightweight, dry items such as paper, socks, cords, snacks, and craft supplies.
Another real-world tip is to create storage at the point of clutter. If mail piles up on the kitchen counter, putting a basket in the bedroom will not help. If shoes collect near the door, the shoe storage needs to be near the door. If charging cables end up beside the couch, create cable storage there. Organization works best when it follows your habits instead of pretending you are a completely different person who always walks across the house to put things away.
Free storage solutions also work better when they are not overdesigned. You do not need to decorate every jar, cover every box, or label every single object. Start with function. Once the system works, then make it pretty if you want. A plain shoebox that keeps cords organized is already a win. A covered shoebox with a perfect label is just the bonus round.
Finally, the most valuable experience is this: organizing is easier when you stop waiting for the perfect product. Many people delay decluttering because they think they need matching bins, custom shelves, or a weekend shopping trip. In reality, you can make huge improvements with items you already have. Start with one drawer, one shelf, or one cabinet. Use a jar, a box, a tray, or a basket. Give the mess a boundary. That small act often creates momentum, and momentum is the secret ingredient every organized home needs.
Conclusion
Free DIY storage solutions prove that a more organized home does not have to begin with a shopping cart. With jars, boxes, cans, baskets, tubes, trays, and a little creativity, you can turn everyday household items into practical organizers for nearly every room. The smartest storage ideas are simple, visible, accessible, and easy to maintain.
Whether you are taming a junk drawer, rescuing a crowded pantry, organizing cords, clearing bathroom counters, or making better use of closet shelves, the answer may already be sitting in your recycling bin. Start small, label clearly, group similar items, and let your home become a little easier to live inone repurposed shoebox at a time.
Note: This article is original, publication-ready content based on practical home organization, DIY storage, decluttering, and upcycling principles. No source links or unnecessary reference elements have been included.