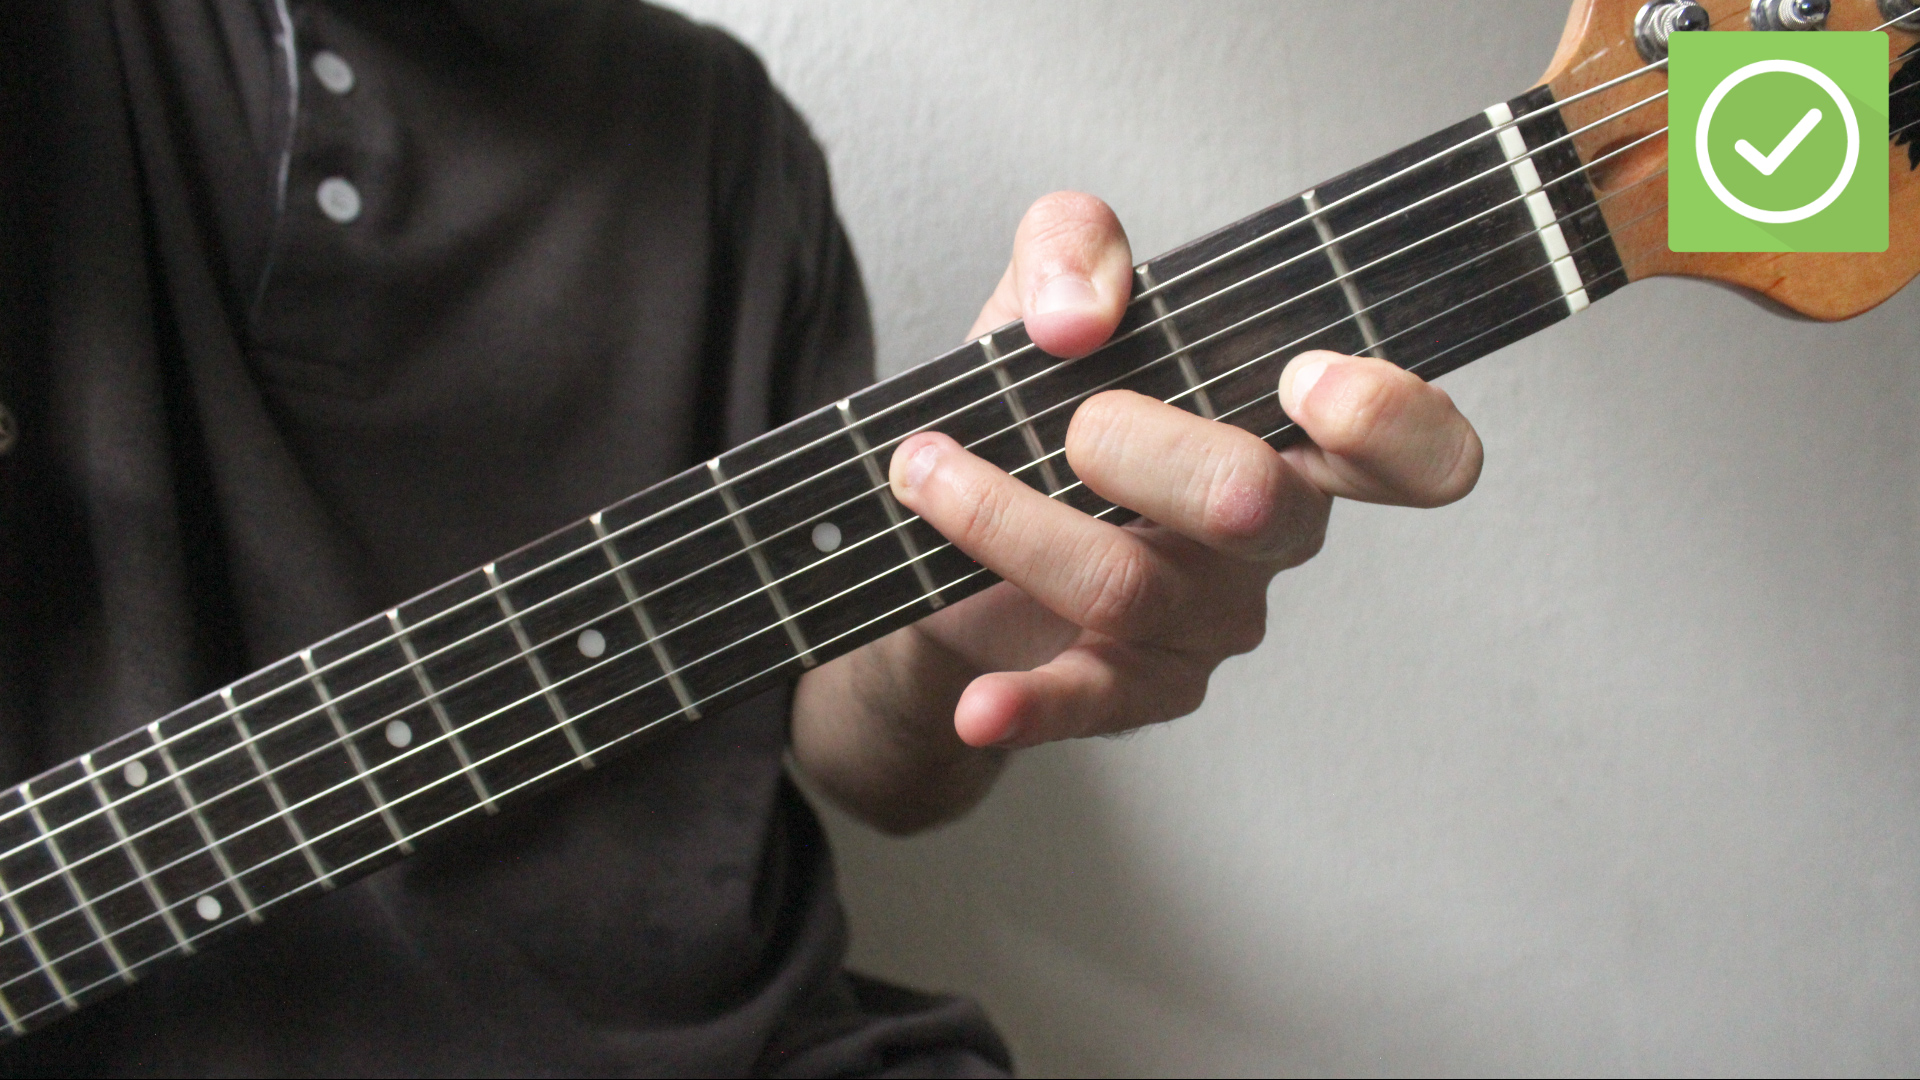
Learning barre chords on guitar can feel like being asked to do a tiny push-up with one finger while the rest of your hand solves a puzzle. One minute you are happily strumming open G, C, D, and E like a campfire legend; the next minute someone says, “Great, now play F major,” and your fingers file a formal complaint.
The good news? Barre chords are not a mysterious punishment invented by guitar teachers with unusually strong index fingers. They are movable chord shapes that let you play major, minor, seventh, and many other chords all over the neck. Once you understand how they work, the fretboard stops looking like a long wooden question mark and starts becoming a map.
In this guide, you will learn three practical ways to play barre chords on a guitar: the full six-string E-shape barre chord, the five-string A-shape barre chord, and the smaller partial barre chord. These three approaches give beginners and improving players a realistic path from “Why does this buzz like an angry bee?” to “Wait, I can actually play this song now.”
What Is a Barre Chord?
A barre chord is a chord in which one finger, usually the index finger, presses down multiple strings across the same fret. That finger acts almost like a movable capo. Your remaining fingers build a familiar chord shape above it. By sliding the whole shape up or down the neck, you can play the same chord quality in different keys.
For example, an open E major shape moved up one fret becomes an F major barre chord. Move that same shape to the third fret, and it becomes G major. Move it to the fifth fret, and you have A major. The shape stays the same; the root note changes. It is basically musical copy-and-paste, except your hand has to do the copying.
Barre chords are especially useful because many songs include chords that are awkward or impossible to play cleanly with only open-position shapes. Chords like F, B minor, C minor, A-flat, and F-sharp become much easier to access when you know movable barre chord shapes.
Why Barre Chords Matter
Barre chords unlock the guitar neck. Instead of being trapped near the first three frets, you can move into different positions and play in nearly any key. This is essential for rhythm guitar, songwriting, transposing songs, playing with singers, and reading chord charts.
They also help you understand the fretboard. When you learn that E-shape barre chords have their root on the sixth string and A-shape barre chords have their root on the fifth string, you start seeing patterns instead of random dots and frets. That is a huge step toward becoming a more confident guitarist.
Do barre chords take practice? Absolutely. Are they worth it? Also absolutely. Think of them as the gym membership of guitar technique: slightly uncomfortable at first, but eventually you notice your playing has stronger shoulders.
Before You Start: Set Up Your Hand for Success
Use the Side of Your Index Finger
One of the most common beginner mistakes is placing the soft, flat part of the index finger directly across the strings. That can work for some players, but many guitarists get better results by rolling the index finger slightly toward the thumb side. The side of the finger is firmer, so it can press the strings more evenly.
Place Your Thumb Behind the Neck
Your thumb should usually sit behind the neck, roughly opposite your index finger. Avoid wrapping the thumb too far over the top when practicing full barre chords. A centered thumb gives your hand better leverage and makes it easier to apply pressure without squeezing like you are trying to crush a walnut.
Stay Close to the Fret
Press the strings just behind the fret wire, not in the middle of the fret space. The closer your finger is to the fret, the less pressure you need to produce a clean sound. If you are too far back, the notes may buzz, and your hand will work harder than necessary.
Check Your Guitar Setup
If your guitar has very high action, meaning the strings sit far above the fretboard, barre chords will feel much harder than they need to. Beginners often blame their hands when the guitar itself is part of the problem. A proper setup from a guitar technician can make barre chords noticeably easier.
Way 1: Play Six-String Barre Chords With the E Shape
The E-shape barre chord is usually the first full barre chord guitarists learn. It is based on the open E major or E minor chord shape, but moved up the neck with your index finger replacing the nut.
How the E-Shape Barre Chord Works
In an E-shape barre chord, the root note is on the sixth string, also called the low E string. Wherever your index finger lands on the sixth string determines the name of the chord.
Here are a few examples:
- 1st fret, sixth string = F major or F minor
- 3rd fret, sixth string = G major or G minor
- 5th fret, sixth string = A major or A minor
- 7th fret, sixth string = B major or B minor
- 8th fret, sixth string = C major or C minor
How to Play an E-Shape Major Barre Chord
Let’s use F major as the example because it is famous, useful, and slightly dramatic.
- Place your index finger across all six strings at the 1st fret.
- Place your middle finger on the 2nd fret of the G string.
- Place your ring finger on the 3rd fret of the A string.
- Place your pinky on the 3rd fret of the D string.
- Strum all six strings slowly.
This gives you the classic F major barre chord. Move the same shape to the third fret, and it becomes G major. Move it to the fifth fret, and it becomes A major.
How to Play an E-Shape Minor Barre Chord
The minor version is almost the same, but you remove the middle finger. For F minor:
- Barre all six strings at the 1st fret with your index finger.
- Place your ring finger on the 3rd fret of the A string.
- Place your pinky on the 3rd fret of the D string.
- Leave the G string covered only by the barre.
That one missing middle finger changes the sound from bright and stable to darker and moodier. Guitar theory has feelings, apparently.
Practice Tip for E-Shape Barre Chords
Start higher up the neck, around the fifth or seventh fret, instead of beginning with F at the first fret. The string tension is usually easier to manage there. Try A major at the fifth fret, then slide the shape down one fret at a time as your hand becomes stronger and more accurate.
Way 2: Play Five-String Barre Chords With the A Shape
The A-shape barre chord is based on the open A major or A minor chord shape. Instead of using the sixth string as the root, this shape uses the fifth string. That makes it perfect for chords such as B, C, D, and E-flat.
How the A-Shape Barre Chord Works
In A-shape barre chords, your root note is on the fifth string. The sixth string is usually muted or avoided. If your index finger is on the third fret of the fifth string, the chord is C. If it is on the fifth fret, the chord is D. If it is on the seventh fret, the chord is E.
Here are common fifth-string root examples:
- 2nd fret, fifth string = B major or B minor
- 3rd fret, fifth string = C major or C minor
- 5th fret, fifth string = D major or D minor
- 7th fret, fifth string = E major or E minor
- 8th fret, fifth string = F major or F minor
How to Play an A-Shape Major Barre Chord
Let’s use B major as the example:
- Place your index finger across the top five strings at the 2nd fret, starting from the A string.
- Place your ring finger across the D, G, and B strings at the 4th fret.
- Mute or avoid the low E string.
- Strum from the A string down.
Some players prefer to use three separate fingers on the 4th fret instead of using the ring finger as a mini-barre. Both methods are valid. Use the version that gives you the cleanest sound without turning your hand into a pretzel.
How to Play an A-Shape Minor Barre Chord
For B minor:
- Barre the top five strings at the 2nd fret with your index finger.
- Place your middle finger on the 3rd fret of the B string.
- Place your ring finger on the 4th fret of the D string.
- Place your pinky on the 4th fret of the G string.
- Strum from the A string down.
This shape appears everywhere in popular music. If you have ever tried to play a song and found B minor standing in the doorway like a tiny security guard, this is the shape that lets you get past it.
Practice Tip for A-Shape Barre Chords
Pay close attention to the low E string. It usually should not ring out in A-shape barre chords. Lightly touch it with the tip of your index finger or simply aim your strumming hand from the A string downward. Clean muting is part of clean rhythm playing.
Way 3: Play Partial Barre Chords
Partial barre chords are smaller versions of full barre chords. Instead of barring all five or six strings, you press down two, three, or four strings with one finger. These are excellent for beginners, acoustic players, singer-songwriters, and anyone whose hand is not yet ready for a full six-string wrestling match.
Why Partial Barres Are Useful
Partial barre chords reduce strain while still teaching the main idea of barring. They also sound lighter and clearer in many musical situations. In a band mix, a huge six-string chord can sometimes sound muddy, while a smaller three- or four-string voicing sits perfectly.
Partial barres are not “cheating.” They are real guitar tools. Professional players use them all the time for funk, blues, folk, pop, worship music, jazz, country, and rock. Sometimes the smaller chord is not the beginner option; it is the better musical choice.
Example: Small F Major Partial Barre
If the full F major chord is giving you trouble, try this smaller version:
- Place your index finger across the 1st fret of the high E and B strings.
- Place your middle finger on the 2nd fret of the G string.
- Place your ring finger on the 3rd fret of the D string.
- Strum only the top four strings.
This gives you a clean, musical F major shape without needing to barre all six strings. It works beautifully in many songs, especially when switching between C, F, G, and Am.
Example: Three-String Mini Barre
You can also use one finger to barre the top three strings. For example, barring the top three strings at the 5th fret gives you notes that can function as part of an A minor or C major sound, depending on the musical context. These small shapes are useful for rhythm fills, reggae-style chops, funk accents, and quick chord stabs.
Practice Tip for Partial Barres
Focus on tone, not size. A clean partial barre is better than a full barre chord that sounds like a broken lawn mower. Play each string one at a time and adjust your finger angle until every note rings clearly.
Common Barre Chord Problems and How to Fix Them
Problem 1: Muted Strings
If one or more strings are muted, your index finger may be sitting in a soft crease. Move the finger slightly up or down so the strings press against a firmer part of the finger. Also check that your other fingers are arched enough to avoid touching neighboring strings.
Problem 2: Buzzing Notes
Buzzing usually means the string is not pressed firmly enough or your finger is too far from the fret wire. Move closer to the fret and apply pressure more efficiently. Do not simply squeeze harder forever. That road leads to hand fatigue and dramatic sighing.
Problem 3: Hand Pain
Some finger discomfort is normal when building guitar strength, but sharp pain is not. Relax your shoulder, wrist, and forearm. Take breaks. Keep your wrist in a natural position. Barre chords should feel challenging, not dangerous.
Problem 4: Slow Chord Changes
Practice changing between two chords at a time. For example, move from G major open to B minor barre, or from C major to F partial barre. Use a metronome at a slow tempo. Speed comes from relaxed repetition, not panic-strumming through the evidence.
A Simple Barre Chord Practice Routine
Here is a practical 10-minute routine for building barre chord strength and control:
- Minute 1: Warm up with open chords such as G, C, D, Em, and Am.
- Minutes 2-3: Practice barring one fret with your index finger and picking each string individually.
- Minutes 4-5: Play E-shape major barre chords at the 5th, 3rd, and 1st frets.
- Minutes 6-7: Practice A-shape minor chords such as Bm, Cm, and Dm.
- Minutes 8-9: Switch between open chords and partial barres.
- Minute 10: Play a real song progression slowly and focus on clean sound.
Do this daily for a few weeks, and your hand will begin to understand the assignment. Barre chords improve through consistent, focused practice rather than one heroic two-hour session that leaves your hand feeling like it signed up for a medieval tournament.
Specific Examples: Chord Progressions to Try
Beginner-Friendly Partial Barre Progression
Try this simple progression:
C – F partial barre – Am – G
This progression helps you practice moving in and out of a small F chord without needing the full six-string version.
E-Shape Barre Progression
Try:
G – C – D – G
Play G as an E-shape barre at the 3rd fret, C as an A-shape barre at the 3rd fret, and D as an A-shape barre at the 5th fret. This teaches you how E-shape and A-shape barre chords work together.
Minor Barre Chord Progression
Try:
Am – G – F – E
Use open Am and E, then practice G and F as E-shape barre chords. This progression has a dramatic sound and helps you get comfortable sliding full barre shapes down the neck.
Experience Notes: What Barre Chords Feel Like in Real Practice
Most guitarists remember their first serious battle with barre chords. It usually starts with F major. You see the diagram, place your fingers carefully, strum confidently, and hear something that sounds less like music and more like a cardboard box falling down stairs. This is normal. Barre chords are a coordination skill, not just a strength skill.
In real practice, the first breakthrough often comes when you stop trying to crush the strings. Many beginners press too hard because they assume barre chords are about brute force. But clean barre chords are more about position, leverage, and timing. When your index finger is close to the fret, slightly rolled to the side, and supported by a balanced thumb, the chord becomes easier. Not easy, exactly, but less like negotiating with six tiny metal snakes.
Another useful experience is practicing barre chords on an electric guitar before an acoustic. Electric guitars often have lighter strings and lower action, which can make the technique less intimidating. That does not mean acoustic players are doomed. It simply means you can build the movement on a friendlier instrument and then transfer it back to acoustic once your hand understands the mechanics.
It also helps to practice barre chords in musical situations instead of treating them like isolated gym exercises. For example, do not only hold F major for ten seconds and stare at your hand like it owes you money. Put it into a progression: C to F, Am to F, G to F, or Dm to G to C to F. Your brain learns faster when the chord has a job inside a song.
One of the biggest lessons is that partial barre chords are not a failure. Many players spend months believing they must play the full six-string version every time. In reality, smaller voicings often sound cleaner and more professional. If you are singing, recording, or playing with another guitarist, a partial barre may fit the arrangement better. The goal is music, not proving your index finger can bench-press a guitar neck.
Another practical discovery is that the first fret is the hardest place to start. The F chord feels tough partly because it sits near the nut, where string tension can feel less forgiving. Practicing the same E-shape barre at the fifth fret, such as A major, can be much easier. Once that sounds clean, move it down gradually. This turns the dreaded F chord into the final level of a game instead of the tutorial boss.
Finally, progress with barre chords is rarely instant. You may have one day where every note rings beautifully, followed by another day where your hand appears to have forgotten its entire career. That is not failure. That is motor learning. Keep sessions short, listen carefully, adjust slowly, and celebrate small wins. The first clean F chord may not come with fireworks, but it should. Maybe not actual fireworks near the guitar, though. Let’s keep the instrument insured.
Conclusion
Barre chords are one of the most important milestones in learning guitar. They can be frustrating at first, but they open the door to movable shapes, new keys, smoother chord progressions, and a much deeper understanding of the fretboard. Start with the E-shape barre chord, add the A-shape barre chord, and use partial barres whenever they make the music cleaner and easier to play.
Remember: clean sound beats finger gymnastics. Practice slowly, keep your hand relaxed, use good positioning, and give your fingers time to adapt. Before long, chords like F, B minor, C minor, and A-flat will stop looking like villains and start feeling like useful tools. Your guitar neck is bigger than the first three frets. Barre chords are how you move in.