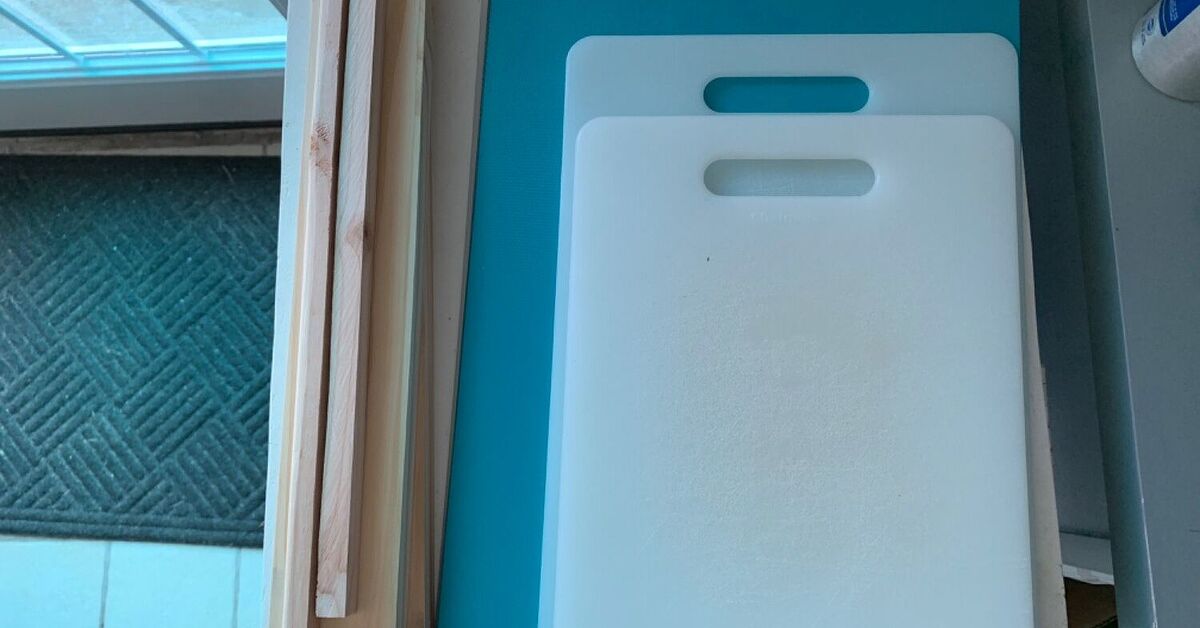
Cutting boards are the quiet overachievers of the kitchen. They handle onions, apples, sourdough, steak, Sunday pancakes, and the occasional “I swear this is a charcuterie board” snack dinner. Yet somehow, after all that service, they usually end up wedged behind the toaster, leaning dangerously beside the sink, or hiding under baking sheets like they are in witness protection.
The good news? You do not need a full kitchen remodel, a custom cabinet maker, or a weekend-long woodworking marathon to fix the problem. With a simple 30-minute cutting board storage project, you can turn an awkward cabinet door, narrow shelf, or unused vertical slot into a clean, practical home for your boards. This guide covers fast DIY cutting board storage ideas, food-safe organization tips, small kitchen examples, and real-world lessons from actually living with boards that used to fall over like dominoes.
Why Cutting Board Storage Matters More Than You Think
At first, cutting board storage sounds like one of those tiny home projects people do after watching too many organizing videos. But it has a real impact on how your kitchen works. When cutting boards are stacked flat, you usually have to lift three things to reach the one you need. When they are stored wet, trapped together, or shoved behind appliances, they can dry unevenly and become harder to clean. When they live on the counter full-time, they steal prep space from the very meals they are supposed to help you make.
Smart cutting board storage solves three problems at once: access, airflow, and clutter. Vertical storage keeps boards easy to grab. A rack or divider gives each board a dedicated slot. Door-mounted storage frees up cabinet shelves. And, perhaps most importantly, your kitchen stops sounding like a cymbal crash every time you open a cabinet.
The Best 30-Minute Cutting Board Storage Idea
The fastest and most useful version of this project is a cabinet-door cutting board holder. It uses the inside of a base cabinet door, usually below the counter near your main prep area. Instead of wasting that door surface, you mount a shallow rack that holds two or three boards upright.
Best Location
Choose a cabinet close to where you chop, rinse, or cook. The cabinet under the sink can work if plumbing allows enough clearance, but a cabinet near the prep counter is often better. Before installing anything, close the door slowly with your thickest cutting board held against the inside. If it hits shelves, pipes, or stored items, choose a thinner rack location or move to another cabinet.
Simple Materials
You can build a basic cutting board holder with a thin sheet of acrylic, plywood, or narrow wood strips. Acrylic looks clean and resists moisture, while plywood is easy to cut and inexpensive. You will also need screws, spacers, sandpaper, a drill, and measuring tape. If you want the absolute easiest route, a ready-made cabinet-door organizer can also work, but check the depth carefully before buying.
Quick Build Method
Measure the inside width of the cabinet door. Cut your rack panel or wood rails so they fit comfortably without hitting the cabinet frame. Sand any sharp edges. Add spacers behind the rack so the cutting boards have room to slide in. Then predrill holes and mount the rack to the door with short screws that will not poke through the front. Test the door slowly. If it closes cleanly, congratulations: your cutting boards have officially moved out of chaos and into responsible adulthood.
Step-by-Step: Build a Cutting Board Holder in 30 Minutes
Step 1: Empty and Measure the Cabinet
Remove the items from the cabinet and measure the inside of the door. Pay attention to hinges, shelves, pipes, and any tall items that may block the rack. A holder that looks perfect while the door is open is not useful if the cabinet refuses to close afterward. That is not storage; that is a tiny kitchen protest.
Step 2: Decide How Many Boards You Actually Need
Most kitchens benefit from at least two boards: one for fresh produce, bread, or ready-to-eat foods, and another for raw meat, poultry, or seafood. If you own six boards but only use two, this is a perfect moment to declutter. Keep the daily drivers and move seasonal serving boards elsewhere.
Step 3: Cut the Rack Panel or Rails
For a panel-style rack, cut acrylic or plywood to create a shallow front lip that keeps boards from sliding out. For a rail-style holder, cut two horizontal strips: one lower strip to support the boards and one upper strip to keep them upright. The rack does not need to be fancy. It needs to be smooth, secure, and shallow enough for the cabinet door to close.
Step 4: Add Spacers
Spacers create breathing room between the cabinet door and the rack. You can use small wood blocks, plastic spacers, or short metal sleeves. Leave enough depth for your thickest board, but avoid making the rack so deep that it hits the cabinet contents.
Step 5: Predrill and Mount
Predrilling helps prevent splitting and makes the installation cleaner. Use short screws appropriate for the thickness of the cabinet door. Tighten them firmly, but do not overdo it. Cabinet doors are strong, not invincible.
Step 6: Test With Real Boards
Load the boards, close the door slowly, and listen for contact. If something bumps, shift the contents of the cabinet or adjust the rack location. Once everything clears, your 30-minute cutting board storage project is finished.
Other Cutting Board Storage Ideas for Small Kitchens
Vertical Cabinet Dividers
If you have a lower cabinet with enough depth, vertical dividers are one of the best cutting board storage solutions. They work for cutting boards, baking sheets, muffin tins, cooling racks, and serving trays. Instead of stacking flat items, you stand them on their sides. This makes every item visible and easy to pull out without triggering a cookware landslide.
Countertop Plate Stand
For renters or anyone avoiding tools, a sturdy plate stand can become instant cutting board storage. Place it near your prep zone and use it for one or two everyday boards. This option works best if your boards are attractive, dry completely, and do not crowd the counter. In a small kitchen, visible storage should earn its spot.
Wire Basket on a Kitchen Island
A repurposed wire bin can hold cutting boards, rolling pins, or flat trays on the side of an island or open shelf. This gives the kitchen a casual, functional look. It is especially handy if you cook often and want boards within reach without hiding everything behind cabinet doors.
Wall Hooks for Boards With Handles
Boards with handles or hanging holes can become functional decor. Mount hooks on an open wall, pantry side, or cabinet end panel. This works beautifully for wooden boards used for bread, cheese, and serving. Avoid hanging damp boards directly against a wall; let them dry fully first.
Pull-Out Tray Cabinet
If you are planning a future kitchen upgrade, a narrow pull-out cabinet with dividers is a dream setup. It keeps boards upright, hidden, and easy to access. For a quick project, though, the cabinet-door rack remains the faster and cheaper solution.
Food Safety Tips for Cutting Board Storage
Storage is not just about making your kitchen look tidy. It also supports better food safety. Cutting boards touch raw ingredients, moisture, knives, and hands. That means they need to be cleaned thoroughly and stored in a way that allows them to dry.
Store Boards Vertically When Possible
Vertical storage improves airflow around the board. This helps boards dry more evenly after washing. A board trapped flat under another board may stay damp longer, especially if it is wood or bamboo. Damp storage is not your friend. It is the kitchen equivalent of leaving wet socks in a gym bag.
Separate Boards by Use
Use one board for produce, bread, and ready-to-eat foods, and another for raw meat, poultry, and seafood. Color-coded boards are helpful if multiple people cook in the same kitchen. If you prefer wood boards, label the edge or assign one shape to meat and another to produce.
Wash Before Storing
After use, wash cutting boards with hot, soapy water. Rinse well and dry them thoroughly. Many plastic boards can go in the dishwasher, but always check the manufacturer’s care instructions. Wooden and bamboo boards usually prefer hand-washing and quick drying.
Replace Worn Boards
Deep grooves, warping, cracks, and stubborn odors are signs that a cutting board may be past its prime. A storage rack will organize your boards, but it cannot perform miracles on a board that looks like it survived a pirate duel.
How to Choose the Right Cutting Board Storage for Your Kitchen
The best cutting board storage depends on your kitchen layout, board collection, and cooking style. A tiny apartment kitchen may need a cabinet-door holder. A family kitchen with many baking sheets may benefit from vertical dividers. A design-forward kitchen may look better with wooden boards displayed on wall hooks.
Ask yourself four questions before choosing a setup. Where do I chop most often? How many boards do I actually use every week? Do my boards need hidden storage or visible storage? And will they dry properly in this location? The right answer is usually the one that makes cooking easier, not the one that looks most impressive on social media.
Common Cutting Board Storage Mistakes
Stacking Too Many Boards Flat
Flat stacks are fine for occasional serving boards, but they are annoying for daily prep boards. The board you want is almost always on the bottom. This is one of the laws of kitchen physics, right after “the measuring spoon you need is in the dishwasher.”
Storing Boards While Damp
Putting boards away before they dry can lead to odor, warping, or trapped moisture. Let them air-dry upright before sliding them into a cabinet rack.
Installing a Rack Without Checking Door Clearance
This is the classic DIY mistake. Measure twice, close once. Cabinet interiors are often tighter than they appear, especially under sinks or near pull-out shelves.
Keeping Every Board Forever
If you have boards you never use, chipped plastic boards, or warped boards that wobble during chopping, let them go. Better storage starts with owning a realistic number of items.
Best Example Setup for a Real Kitchen
Here is a simple setup that works for many homes: mount a two-slot cutting board holder inside the cabinet door nearest the prep counter. Store a plastic board for raw meat in the back slot and a wood or bamboo board for produce and bread in the front slot. Keep a large serving board vertically in a pantry or dining cabinet, since it is not used every day. Add a small label to the meat board if needed.
This arrangement keeps daily boards close, encourages separate use, frees counter space, and allows boards to dry upright. It also prevents the “where did I put the cutting board?” moment that somehow happens five minutes after you just used it.
Maintenance: Keep the Storage System Working
Once a month, remove the boards and wipe the rack. Crumbs, onion skins, and mystery kitchen dust can collect in the bottom rail. If the rack is wood, check for moisture damage. If it is acrylic or metal, wash it with mild soap and dry it well. For wooden boards, apply food-safe mineral oil as needed according to the board’s care instructions.
Also review whether the system still fits your cooking habits. If you bought a new oversized board, the rack may need a spacer adjustment. If you stopped using a board, remove it. Organization is not a one-time trophy. It is a small habit that keeps paying rent in your kitchen.
Experience Notes: What Living With 30-Minute Cutting Board Storage Teaches You
After using a simple cutting board storage setup for a while, you notice something funny: the project feels bigger than it is. Technically, it is just a small rack on a door or a few dividers in a cabinet. Emotionally, it feels like your kitchen finally stopped arguing with you. The boards are no longer leaning against the backsplash, sliding behind the coffee maker, or clattering out when you reach for a baking sheet.
The first practical lesson is that placement matters more than beauty. A gorgeous wall display across the room is less useful than a plain rack beside your prep counter. When the board is within arm’s reach, you actually use the right one. You grab the produce board for tomatoes. You grab the meat board for chicken. You put each one back where it belongs because the storage location is not a puzzle. Good organization should feel almost boring. That is how you know it works.
The second lesson is that vertical storage changes the rhythm of cooking. When boards are stacked flat, you delay using them. You think, “I’ll just slice this lemon on a plate,” which is how chaos begins. With upright storage, the board slides out quickly, and meal prep feels smoother. Even small tasks, like chopping herbs or slicing a sandwich, become easier because the tool is ready.
The third lesson is that drying space is part of storage. Many people wash a board, towel it quickly, and shove it into a dark cabinet. A better habit is to let the board stand upright until fully dry, then return it to the rack. If your storage system supports airflow, the board feels fresher and lasts longer. This is especially noticeable with wood and bamboo boards, which dislike being trapped damp.
The fourth lesson is about decluttering. Once you create a dedicated cutting board holder, you immediately see which boards deserve space. The cracked plastic one? Gone. The tiny novelty board shaped like a pineapple that cannot hold half an onion? Maybe decorative retirement. The heavy serving board you use twice a year? Move it to a less valuable cabinet. The storage project becomes a quiet inventory check.
The fifth lesson is that a 30-minute project can improve daily habits more than a dramatic renovation. You may not need new cabinets. You may need one smart use of the cabinet door you already own. That is the charm of 30-minute cutting board storage: it is fast, affordable, and surprisingly satisfying. It gives every board a place, gives your counter a break, and gives you one less thing to wrestle before dinner.
Conclusion
30-minute cutting board storage is one of the easiest kitchen upgrades with an outsized payoff. Whether you choose a cabinet-door rack, vertical dividers, wall hooks, a countertop stand, or a wire basket, the goal is the same: keep boards upright, accessible, dry, and separated by use. The best solution does not need to be expensive or complicated. It simply needs to fit your kitchen, your boards, and the way you cook.
Start with the cabinet closest to your prep zone, measure carefully, and create a simple holder that gets your boards off the counter and out of the avalanche zone. In half an hour, your kitchen can feel cleaner, safer, and easier to use. Not bad for a project smaller than most TV episodes.