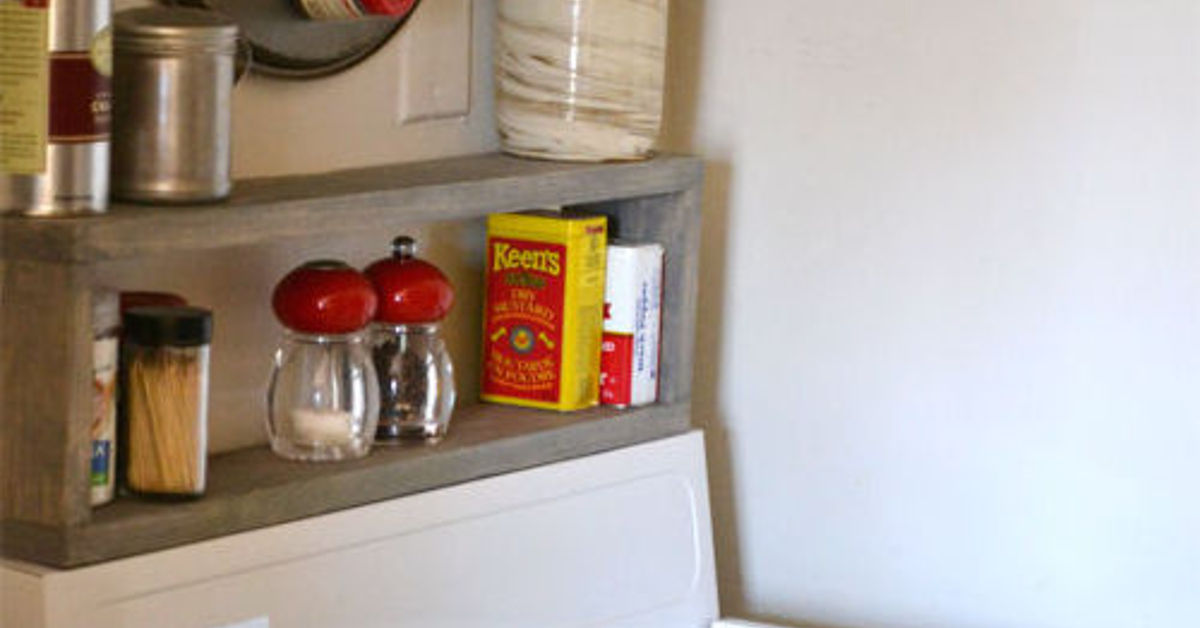
If your kitchen is so small that opening the oven and the dishwasher at the same time feels like a trust fall, you are not alone. Small kitchens have a special talent for running out of storage right when you buy one more spice jar, one more mug, or one more “essential” mini waffle maker. That is exactly why the wall space above the stove gets so much attention. It is visible, central, and often underused. Done right, a DIY shelf above the stove can turn dead space into smart storage without making your kitchen feel boxed in.
But let’s say the quiet part out loud: above the stove is not the same as above a desk or above a coffee bar. Heat, steam, grease, and safety matter here. A good shelf in this location is not just pretty. It is carefully planned, properly mounted, easy to clean, and selective about what it holds. In other words, it should look charming without behaving like a magnet for splatter and bad decisions.
This guide walks through the practical side of building a DIY shelf above the stove in a small kitchen, including how to plan it, what materials work best, what not to store there, and how to make it look intentional instead of accidental. If you have been staring at that blank wall and thinking, “You could hold my olive oil collection,” this is your moment.
Why an Above-the-Stove Shelf Works So Well in a Small Kitchen
In a compact kitchen, every vertical inch matters. Open shelving can make a small room feel lighter than bulky upper cabinets, and a shelf above the stove can create a convenient home for items you use often enough to want nearby but not so often that they must live on the counter. It also helps pull the eye upward, which can make a tight kitchen feel taller and more open.
The best part is that this project can be customized for your exact layout. A narrow floating shelf can work in a sleek modern kitchen. A wood shelf with simple brackets can add warmth to a farmhouse-inspired space. A painted shelf that matches the trim can disappear visually while still doing real work. It is one of those rare upgrades that can be useful, affordable, and surprisingly good-looking at the same time.
First Things First: Is It Safe to Put a Shelf Above the Stove?
Yes, it can be safe, but only if you respect the realities of heat and ventilation. That means your shelf design must work with your stove, your wall, and your range hood setup, not against them. This is not the place for freestyle measuring and wishful thinking.
Know Your Clearances
Always follow the installation guidance for your specific stove and range hood. Manufacturer recommendations vary by appliance type and hood style, and gas ranges usually require more clearance than electric models. As a general rule, you should never place a wood shelf low over exposed burners just because it “looks right” in a photo. Photos do not have to deal with steam, flame, or bacon.
If your stove has a vent hood, the safest design is usually a shelf installed above the hood surround or integrated into a decorative hood structure, rather than a shelf floating too close to the cooking surface. If you do not have a hood that vents well, be even more cautious. Cooking sends heat, moisture, and grease upward, and poor ventilation turns that wall zone into a tiny weather system.
Choose the Right Shelf Location
A good above-the-stove shelf should sit high enough to respect clearance rules, shallow enough to avoid looming over the cooking area, and far enough from direct heat that it does not become a grease trap. In many small kitchens, the sweet spot is a slim shelf higher on the wall, designed for light, tidy storage rather than heavy cookware.
Store the Right Things
This shelf is not a parking lot for everything that does not fit elsewhere. Avoid paper goods, plastic bags, boxed food, candles, aerosol cans, or anything flammable. Also skip items that become annoying when coated in oil mist, like fabric baskets, recipe cards, or that adorable vintage sign you will eventually have to scrub with a toothbrush.
What to Store on a Shelf Above the Stove
The ideal items are useful, heat-tolerant, easy to wipe down, and visually neat. Think of this shelf as a curated supporting actor, not the star of the storage show.
- Matching spice jars with tight lids
- Salt cellar or pepper grinder used at the stove
- Small ceramic crocks for utensils, if the shelf is large and well placed
- Everyday oil bottles with secure tops, stored away from direct heat
- Small canisters for tea, coffee, or dry ingredients, if the shelf is not too close to the cooking zone
- A couple of attractive bowls or mugs for visual softness
What works best is a limited number of items with a consistent look. Glass jars, ceramic containers, and metal tins tend to read cleaner than a random parade of labels, packets, and mystery lids.
What You Should Never Store There
Here is where we save your shelf from becoming an expensive lesson.
- Paper towels, napkins, paper bags, or cookbooks
- Plastic wrap, plastic containers, or disposable food packaging
- Flammable cleaners or household chemicals
- Heavy Dutch ovens, cast iron, or stacked dinnerware that pushes the load limit
- Anything you do not want to clean regularly
- Decor that hangs down into the cooking zone
If an item would be unhappy in heat, annoying with grease, or dangerous near a flame, it belongs somewhere else. Your shelf should support your cooking routine, not audition for a cautionary tale.
Best Materials for a DIY Shelf Above the Stove
Because this area deals with moisture, heat, and cleaning, material choice matters more than it would in a hallway or bedroom.
Wood
Wood is the most popular choice because it adds warmth and can be cut to fit almost any space. Solid wood, plywood with a finished edge, or quality shelf boards can all work well. Seal it with a durable paint, polyurethane, or another kitchen-friendly finish that can handle wiping and occasional splatter cleanup.
Metal Brackets
If you are using visible support, metal brackets are a practical option. They add strength, come in many styles, and are usually easier for beginners than building a truly floating shelf from scratch.
Painted MDF or Low-Quality Particleboard
These are not my first choices here. They can look fine at first, but moisture and heat are not kind to flimsy materials. In a kitchen, the phrase “budget-friendly” should not mean “swells dramatically after one pasta night.”
Easy-Clean Finishes
Whatever shelf material you choose, the finish should be easy to wipe down. Matte, rough-sawn, heavily textured wood may look rustic and charming, but grease loves texture more than you do.
Tools and Materials for the Project
A simple wall shelf above the stove usually requires:
- Shelf board cut to size
- Heavy-duty brackets or a floating shelf mounting kit
- Stud finder
- Level
- Tape measure
- Drill and screws
- Wall anchors rated for the load, if studs do not align with both supports
- Sandpaper
- Paint or clear protective finish
If you want a built-in look, you can also add a thin front trim piece or small lip across the shelf. That detail helps keep jars from inching forward and gives the shelf a more finished appearance.
How to Build a DIY Shelf Above the Stove
1. Measure the Space Carefully
Measure the width of the wall area above the stove, then decide how wide and deep the shelf should be. In a small kitchen, shallow is usually smarter. A deep shelf can feel bulky, gather more grease, and create head-bumping energy that no one asked for.
2. Check Clearances and Ventilation
Before you drill anything, confirm that your planned shelf height works with your appliance and vent setup. If you have a hood, measure from the cooking surface to the bottom of the hood, then from the hood to the proposed shelf placement. If there is any doubt, check the model manual. Design inspiration is fun. Fire codes are funnier when they are not about your house.
3. Locate Studs
Use a stud finder and mark the wall studs. Shelves meant to hold kitchen items should ideally be fastened into studs for strength. If your stud placement is awkward, you may need to adjust bracket spacing or use a mounting system rated for your wall type and expected load.
4. Cut, Sand, and Finish the Shelf
Cut your board to length, sand the edges smooth, and apply your finish before installation. This is easier than painting over your stovetop later while balancing on a step stool and reconsidering all your life choices.
5. Install the Brackets or Cleat
Use a level, mark the bracket placement, and drill pilot holes. Fasten the hardware securely. If you are doing a floating shelf, make sure the internal support is rock solid before you slide the shelf body into place.
6. Attach the Shelf
Secure the shelf to the brackets or floating support system. Check again for level. A crooked shelf in a kitchen has a unique ability to be visible from every angle, forever.
7. Style It Sparingly
Once installed, add only what the shelf can comfortably and safely hold. Start light, live with it for a week, then adjust. The goal is practical storage with breathing room, not a tiny overachieving gift shop above your burners.
Design Ideas That Actually Work
Minimal and Modern
Use a slim white or natural wood shelf with hidden supports. Add matching jars or two to three neutral containers. Keep the look crisp and calm.
Warm and Farmhouse-Inspired
Try a stained wood shelf with black metal brackets. Add labeled glass spice jars, a ceramic utensil crock, and one small framed piece placed safely back from the front edge.
Built-In Look
If you already have a hood surround, extend the design upward with a coordinating shelf. This approach looks more intentional than a random board on the wall and helps the storage blend into the kitchen architecture.
Tiny-Apartment Practical
Keep it narrow and use it only for the most useful items: a few spices, salt, pepper, and one oil bottle. In a truly small kitchen, restraint is not boring. It is a competitive advantage.
Common Mistakes to Avoid
- Installing the shelf too low
- Ignoring the stove or hood manual
- Using weak anchors for a heavy load
- Choosing a shelf that is too deep for the space
- Overdecorating and under-organizing
- Storing flammable or messy items near heat
- Forgetting that kitchen shelves need regular cleaning
The best shelf above the stove is one that feels almost obvious once it is installed. It should solve a problem cleanly, look like it belongs there, and avoid becoming another surface that stresses you out every time you fry something.
How to Keep the Shelf Clean
Even with good ventilation, this area can collect dust mixed with cooking residue. Wipe the shelf weekly with a degreasing cleaner safe for its finish, and do not let sticky buildup become a permanent resident. Use containers with lids, keep labels facing forward, and edit the shelf once a month. If an item has not earned its spot, relocate it.
A small kitchen works better when every visible surface has a purpose. That includes this shelf. It should be easier to maintain than open shelving across an entire wall, but it still benefits from discipline. The magic word here is not “more.” It is “better.” Better placement, better storage, better use of the room you have.
Final Thoughts
A DIY shelf above the stove can be one of the smartest storage upgrades in a small kitchen, as long as you treat it like a functional kitchen project instead of a photo-only trend. Respect clearances, mount it securely, choose durable materials, and store only what makes sense in that zone. Do that, and you get extra storage, better organization, and a kitchen that feels more thoughtful without needing a full renovation.
That is the beauty of a good small-space project. It does not need to be huge to change how the room works. Sometimes one well-placed shelf is all it takes to make a cramped kitchen feel a lot more capable. And frankly, any project that makes room for your spices without requiring a second mortgage deserves a little respect.
Experience and Real-Life Lessons From Adding a Shelf Above the Stove
Anyone who has lived with a small kitchen for a while learns the same truth: lack of storage is not just inconvenient, it changes how you cook. You buy fewer ingredients because there is nowhere to put them. You stop using certain tools because they are buried behind three other things. You keep a bottle of oil on the counter, a jar of salt near the window, and a random bag of paprika wherever gravity allows. A shelf above the stove can genuinely improve that daily chaos, but only if it is planned around real use instead of fantasy-kitchen perfection.
One of the biggest lessons people discover after adding this kind of shelf is that convenience matters more than volume. At first, it is tempting to think the shelf should hold everything: spices, plates, cookbooks, small plants, decorative bowls, maybe a candle if you are feeling optimistic. Then you cook one big skillet dinner, look up, and realize the shelf is now wearing a thin coat of grease like a very unfortunate moisturizer. The smarter approach is to keep only the essentials there, especially things that are used often and easy to wipe clean.
Another common experience is that the shelf changes the rhythm of cooking in a good way. When salt, pepper, chili flakes, and olive oil are neatly organized within reach, cooking feels smoother. You stop opening three cabinets while your onions threaten to burn. You stop shuffling items across the countertop like a stage manager during opening night. In a small kitchen, fewer movements can make the whole room feel calmer.
There is also a strong visual effect. Many compact kitchens feel crowded because everything important lives at eye level or on the counters. A shelf above the stove pulls some of that functional storage upward. That shift can make the space feel more intentional and less cramped. It is not magic, but it is close enough that your kitchen may suddenly seem like it has its life together.
Of course, real-life use also teaches a few humbling lessons. A deep shelf can feel oppressive fast. Overloading it makes the wall look busy. Dark finishes can show dust. Open storage demands editing. And if the shelf is installed without enough attention to stud placement or load capacity, it stops being a cute DIY victory and starts being a physics experiment. None of these are reasons to skip the project. They are reasons to do it thoughtfully.
People who are happiest with an above-the-stove shelf usually do a few things right. They measure carefully. They keep the design simple. They match containers so the shelf looks calm instead of chaotic. They choose a finish that can handle regular wiping. Most of all, they stay realistic about what the shelf is for. It is not a replacement for all cabinetry. It is a hardworking helper, and a very stylish one when treated properly.
If your kitchen is tiny, chances are you do not need more stuff nearly as much as you need better zones. That is where this project shines. It creates a cooking zone, not just another surface. It gives your most-used items a home. It frees up a little counter space. And in a small kitchen, even gaining the width of a cutting board can feel like winning a Nobel Prize in domestic engineering.