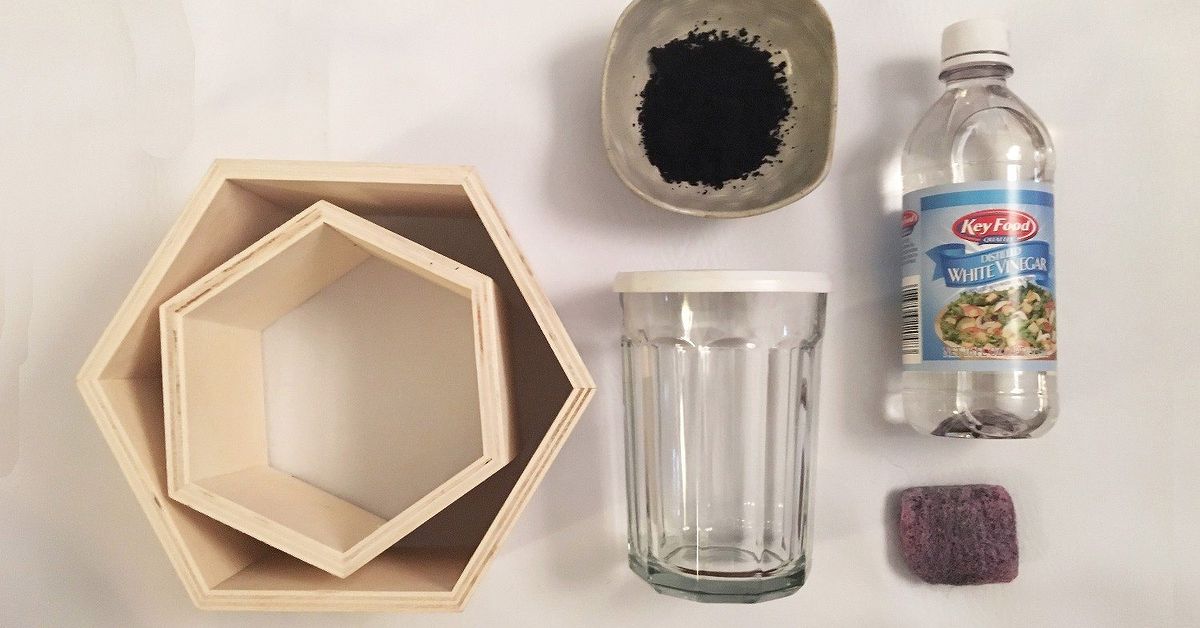
There is something wonderfully suspicious about wood that looks older than your mortgage. A new pine board can be useful, sure, but give it a weathered gray-brown finish and suddenly it looks like it has survived a hundred summers, three barn dances, and at least one dramatic family secret. That is the charm of a homemade vintage wood stain DIY project: it turns ordinary bare wood into something with soul, warmth, and character without forcing you to buy a tiny can of mystery liquid with a dramatic name like “Forgotten Prairie Smoke.”
The classic homemade vintage wood stain uses vinegar, steel wool, and sometimes black tea or coffee. It is inexpensive, surprisingly effective, and fun in the slightly mad-scientist way that good DIY projects should be. The color does not simply sit on the surface like paint. Instead, the iron-rich vinegar solution reacts with tannins in the wood, creating shades that can range from soft weathered gray to deep brown, charcoal, or nearly black. The exact result depends on the wood species, the strength of your mixture, how long it steeps, and whether you boost the wood with tea first.
This guide explains the process from start to finish: what to use, how to mix the stain, how to prepare wood, how to control the color, how to seal the finished project, and how to avoid the common mistakes that make DIY wood look less “vintage farmhouse” and more “forgotten behind the garage.”
What Is Homemade Vintage Wood Stain?
Homemade vintage wood stain is a DIY wood-aging solution made from common household materials. The most popular recipe combines white vinegar and steel wool. As the steel wool sits in vinegar, the acid breaks down the iron. When brushed onto wood, that iron solution reacts with tannins, which are natural compounds found in many woods. The result is a muted, aged finish that looks weathered rather than freshly painted.
High-tannin woods such as oak, walnut, mahogany, and cherry tend to darken dramatically. Oak may turn deep brown, gray-black, or almost ebony depending on the mixture. Walnut becomes rich and moody. Cherry can shift into a deeper antique tone. Low-tannin woods, including pine, poplar, maple, and some common construction lumber, may react more lightly. On those woods, black tea or coffee can be applied first to add tannins and create a stronger vintage effect.
The beauty of this method is that it is not perfectly predictable. That may sound terrifying if you enjoy total control, but it is exactly why the finish feels authentic. Real old wood has uneven tones, darker pores, lighter edges, and little surprises in the grain. Homemade stain gives you that lived-in look without waiting until the year 2126.
Why Use a DIY Vintage Wood Stain Instead of Store-Bought Stain?
Commercial stains are excellent when you need a consistent color across cabinets, floors, or furniture sets. But homemade stain has advantages for rustic and vintage-style projects. It is cheap, easy to make, and creates natural-looking variation. It is also ideal for small projects where you do not want to buy a full can of stain just to finish one shelf, picture frame, crate, or side table.
A vinegar and steel wool stain is especially useful when you want a weathered wood finish, aged farmhouse look, antique gray tone, rustic brown color, or ebonized effect. Unlike pigment-heavy stains, this reactive stain lets the wood grain remain visible. It does not cover up the personality of the board; it gives the board a backstory.
Another benefit is flexibility. You can make several batches using different vinegars and steeping times. White vinegar usually creates grayish and brownish tones. Apple cider vinegar can lean warmer. A stronger tea base can make pale wood react more boldly. More steel wool and more steeping time generally produce a darker solution. Diluting the mixture with water or vinegar can soften the effect.
Materials and Tools You Will Need
Before you begin, gather your supplies. You do not need fancy equipment, but you do need clean containers and a little patience.
Basic Materials
- 1 clean glass jar with a loose-fitting lid
- 1 piece of fine steel wool, such as #000 or #0000
- 1 to 2 cups distilled white vinegar
- Black tea bags or strong brewed coffee, optional but helpful
- Fine-grit sandpaper, usually 180 to 220 grit
- Disposable gloves
- Foam brush, natural-bristle brush, or clean rag
- Paint strainer, coffee filter, or cheesecloth
- Scrap wood for testing
- Water-based polyurethane, paste wax, shellac, or another clear topcoat
Safety Supplies
- Eye protection
- Rubber or nitrile gloves
- Drop cloth or cardboard
- Good ventilation
- A safe drying area away from children, pets, and open flames
Use a glass jar because vinegar can react with metal containers. Do not seal the jar tightly while the steel wool is reacting. The mixture can produce gas, and a tightly sealed jar is not a charming rustic accessory; it is a bad idea wearing a lid.
Step-by-Step: How to Make a Homemade Vintage Wood Stain DIY
Step 1: Prepare the Steel Wool
Use fine steel wool because it breaks down faster than coarse steel wool. If the steel wool feels oily, rinse it with dish soap and warm water, then let it dry. Some steel wool pads have a light protective oil coating that can slow the reaction. Tear or cut the steel wool into smaller pieces to expose more surface area.
Step 2: Add Vinegar
Place the torn steel wool into a clean glass jar. Pour in enough white vinegar to cover it completely, usually 1 to 2 cups. Stir gently with a wooden stick or disposable utensil. Cover the jar with a paper towel, coffee filter, or a lid placed loosely on top. The goal is to keep dust out while allowing gas to escape.
Step 3: Let the Mixture Steep
Let the jar sit for at least 24 hours. For a lighter vintage gray, 24 to 48 hours may be enough. For a deeper brown-gray or ebonizing solution, let it steep for several days or up to a week. Stir it occasionally. The liquid may look pale at first, but do not be fooled. It often darkens on the wood, not necessarily in the jar.
For a more intense mixture, use more steel wool or a longer steeping time. For a softer effect, use less steel wool, reduce the steeping time, or dilute the finished liquid. This is where your test board becomes your best friend and your actual project stops sweating nervously.
Step 4: Brew Tea or Coffee for Low-Tannin Wood
If you are staining pine, poplar, maple, birch, or other low-tannin wood, brew strong black tea or strong coffee. For tea, steep 3 to 5 black tea bags in 2 cups of hot water until the liquid is very dark. Let it cool. Brush the tea onto the bare wood and allow it to dry completely before applying the vinegar and steel wool solution.
This step adds tannins to the surface, helping the iron solution react more strongly. Without it, pine may turn only slightly gray, or it may develop a faint greenish cast. With tea, the same board can shift into a warmer, more convincing antique tone.
Step 5: Prepare the Wood Surface
Start with bare, unfinished wood. Remove old paint, wax, grease, and existing finish. Sand the surface with 180- to 220-grit sandpaper, moving with the grain. Do not over-polish the wood. If the surface is sanded too smoothly, the stain may not absorb evenly. After sanding, remove all dust with a vacuum, tack cloth, or slightly damp rag.
End grain absorbs more liquid than face grain, so it may become darker. If your project has visible end grain, test carefully. You can lightly sand end grain to a higher grit to reduce absorption or apply the stain more sparingly there.
Step 6: Test Before You Stain the Real Project
Testing is not optional. It is the difference between “beautiful vintage finish” and “why is my shelf purple?” Use a scrap piece from the same board or at least the same wood species. Apply tea first if you plan to use it. Let it dry. Then apply the vinegar and steel wool stain. Wait until it fully dries, because the color can continue developing as it reacts.
Look at the test sample in natural light. If it is too light, add another coat or use a stronger mixture. If it is too dark, dilute the stain or sand lightly after drying. If it looks too cool or gray, try apple cider vinegar or add a coffee pre-treatment. If it is too warm or rusty, reduce steeping time or strain the mixture earlier.
Step 7: Strain the Stain
Once the mixture is ready, strain it through a coffee filter, cheesecloth, or paint strainer into a clean container. This removes steel wool particles that could leave dark specks on the wood. A few tiny particles may not matter on a rustic crate, but they can look messy on a tabletop or picture frame.
Step 8: Apply the Homemade Stain
Brush or wipe the stain onto the wood in the direction of the grain. Work in manageable sections and keep a wet edge. The color may appear underwhelming at first. Give it time. The reaction often develops over several minutes and can continue changing as the wood dries.
For a subtle aged look, apply one light coat. For a darker vintage finish, apply a second coat after the first coat dries. On detailed furniture, use a small brush to reach corners and carved areas. Wipe away puddles, especially in joints, grooves, and end grain.
Step 9: Let It Dry Fully
Allow the stained wood to dry for several hours, preferably overnight. The surface should feel dry and no longer smell strongly of vinegar before you seal it. If the grain feels rough, lightly sand with very fine sandpaper or a sanding sponge. Be gentle. You are smoothing raised fibers, not trying to erase your hard work like a regretful time traveler.
Step 10: Seal the Finish
A homemade vintage stain should be sealed, especially on furniture, shelves, tabletops, trays, and anything that will be touched often. For a matte rustic look, use paste wax. For stronger protection, use water-based polyurethane. For a warm traditional tone, shellac can work beautifully. Oil-based topcoats may deepen the color and add amber warmth, but they can also change the shade, so always test first.
Apply thin coats according to the finish instructions. Let each coat dry, then lightly buff between coats if recommended. A clear topcoat protects the color, makes cleaning easier, and gives the wood a finished feel instead of “I stained this in the driveway and ran out of energy.”
Best Wood Types for a Vintage DIY Stain
Oak
Oak is one of the best woods for this method because it contains plenty of tannins. White oak and red oak can turn deep gray, brown, or black depending on the mixture. The open grain also creates dramatic contrast, making oak ideal for rustic shelves, tabletops, benches, and picture frames.
Walnut
Walnut already has a rich natural color, and iron-acetate stain can push it into a darker, more elegant antique tone. Use a lighter hand if you still want to see the natural chocolate-brown character.
Cherry
Cherry can respond with a deeper, aged warmth. Since cherry darkens naturally over time, the homemade stain can create an instant old-world look. Test carefully because cherry can shift quickly.
Pine
Pine is affordable and easy to find, but it can be blotchy and low in tannins. Use strong black tea first, sand evenly, and test before staining. Pine may produce a soft gray, smoky brown, or slightly greenish tone depending on the board.
Maple
Maple is dense and low in tannins, so it often gives a subtle reaction. Tea can help, but maple may still remain lighter than oak or walnut. This can be useful if you want a gentle weathered look rather than a dramatic dark finish.
Color Variations You Can Create
Weathered Gray
Use white vinegar, fine steel wool, and a short steeping time of 24 to 48 hours. Apply one thin coat. This works well for coastal, farmhouse, and rustic decor.
Warm Antique Brown
Try apple cider vinegar or use coffee as a pre-treatment. Let the steel wool mixture steep for several days. This is a good choice for crates, signs, floating shelves, and small furniture.
Dark Charcoal or Ebonized Wood
Use a stronger solution and apply it to oak or walnut. Let the mixture steep up to a week, strain it, and apply multiple coats if needed. Seal with a clear protective finish to preserve depth.
Layered Barn-Wood Look
Distress the wood before staining. Use a wire brush, hammer, chain, awl, or screw head to add dents and texture. Apply tea, then stain. After drying, lightly sand edges and raised areas to mimic natural wear.
Common Mistakes and How to Fix Them
The Color Is Too Light
Apply a second coat, use a stronger vinegar and steel wool mixture, or pretreat the wood with black tea. If the wood is naturally low in tannins, tea is often the missing ingredient.
The Color Is Too Dark
Lightly sand the surface after it dries. For the next coat or future projects, dilute the solution with water or fresh vinegar. Apply thinner coats and wipe sooner.
The Finish Looks Blotchy
Blotchiness usually comes from uneven sanding, glue residue, or naturally uneven absorption. Sand consistently, remove dust thoroughly, and check for hidden glue spots before staining. On pine, use tea carefully and apply thin coats.
The Wood Turned Orange or Rusty
The steel wool may have rusted heavily or the mixture may have sat too long with too much exposed metal. Strain the mixture well and test. If the tone is too rusty, make a new batch with less steeping time.
The Surface Feels Rough
Water-based mixtures raise wood grain. Let the stain dry fully, then sand lightly with a fine sanding sponge. Do not sand aggressively or you may remove color from high spots.
Project Ideas for Homemade Vintage Wood Stain
This DIY stain works beautifully on projects where character matters more than perfect uniformity. Try it on floating shelves, farmhouse signs, wooden trays, storage crates, small benches, picture frames, mirror frames, plant stands, desktop organizers, or a simple coffee table. It is also excellent for making new lumber blend with older rustic decor.
For example, a plain pine board can become a convincing farmhouse shelf when treated with black tea, stained with vinegar and steel wool, lightly sanded on the edges, and sealed with matte polyurethane. A new oak frame can become a dramatic antique-style mirror with one strong coat and a wax finish. A set of mismatched crates can look coordinated if they are stained with the same batch, even if each board reacts slightly differently.
Safety Tips for DIY Wood Staining
Even though this homemade stain uses everyday materials, treat it with respect. Work in a ventilated space. Wear gloves and eye protection. Keep the jar loosely covered while the steel wool reacts with vinegar. Do not use a sealed metal container. Label the jar clearly so nobody mistakes it for strange iced tea, which would be a deeply unfortunate beverage experience.
If you use oil-based topcoats, stains, or finishes after the homemade stain, handle rags carefully. Oil-soaked rags can create a fire risk if they are piled up because heat can build as the finish cures. Lay them flat outdoors to dry according to local rules, or store them in a sealed, water-filled metal container until proper disposal. Always follow the instructions on the finish product you choose.
My Hands-On Experience With Homemade Vintage Wood Stain DIY
The first time I tried a homemade vintage wood stain DIY recipe, I expected it to behave like regular stain. I brushed it on a scrap of pine, stared at it for ten seconds, and thought, “Well, that was a dramatic waste of vinegar.” Then the board began changing. Slowly, like it had remembered an old heartbreak, the pale surface shifted into a smoky gray-brown. That little delay is part of the magic. Unlike commercial stain, this mixture needs time to react.
The biggest lesson I learned is that scrap testing saves projects. I tested the same batch on pine, oak, and maple, and all three looked like they came from different planets. Oak went dark quickly, with bold grain lines that looked expensive. Pine became softer and more rustic, especially after a black tea wash. Maple barely reacted at first, then settled into a quiet gray that looked subtle but classy. If I had applied the mixture directly to a finished furniture piece without testing, I would have blamed the stain, the wood, the weather, and possibly my ancestors.
Another useful experience: strong tea makes a real difference on pale wood. For a small wall shelf, I brewed four black tea bags in two cups of hot water and let it cool. I brushed the tea onto sanded pine, waited until it dried, then applied the vinegar and steel wool stain. The result was much richer than stain alone. It did not look fake or painted. It looked like the shelf had spent several years in a charming shed owned by someone who says things like “I can fix that” and actually can.
I also learned not to skip straining. One early batch had tiny bits of steel wool floating in it. I brushed it onto a small crate and ended up with a few dark freckles. On a rustic crate, that was acceptable. On a tabletop, it would have been annoying. Now I strain every batch through a coffee filter or folded cheesecloth before applying it. The stain goes on smoother, and I spend less time pretending accidental specks were part of the artistic vision.
Dry time matters too. A freshly stained board can look finished before it really is. If you seal too soon, the surface may still smell like vinegar or feel slightly damp. I prefer letting pieces dry overnight. The next day, I lightly sand the raised grain with a fine sanding sponge, wipe away dust, and apply a thin clear coat. That final step changes everything. The color deepens slightly, the surface feels professional, and the project moves from “homemade experiment” to “yes, I absolutely meant to make it look this good.”
For beginners, I recommend starting with a small project like a picture frame, tray, or shelf. Use pine if you want an affordable test, but use oak if you want a more dramatic reaction. Make two or three sample boards with different combinations: stain only, tea plus stain, and two coats of stain. Label them. Let them dry. Seal half of each sample so you can see how the topcoat changes the color. This tiny testing ritual may feel fussy, but it is the secret to getting predictable results from a wonderfully unpredictable process.
In the end, homemade vintage wood stain is less about perfection and more about personality. The knots, streaks, grain lines, and uneven tones are not flaws; they are the point. With vinegar, steel wool, tea, patience, and a little testing, you can make new wood look aged, warm, and full of character. And yes, your kitchen may briefly smell like a salad met a hardware store, but that is a small price to pay for a finish with this much charm.
Conclusion
Making a homemade vintage wood stain DIY is one of the easiest ways to give new wood an aged, rustic, and custom look. With vinegar, steel wool, and optional tea or coffee, you can create a reactive stain that works with the natural tannins in wood instead of simply covering the surface. Oak and walnut deliver deep, dramatic tones, while pine and maple can be improved with a strong tea pre-treatment.
The key is preparation. Sand evenly, remove dust, test on scrap wood, strain the mixture, apply thin coats, and let everything dry fully before sealing. Once protected with wax, polyurethane, shellac, or another clear finish, your DIY stained wood can look warm, weathered, and intentionally vintage. Not bad for a project that starts with vinegar and a humble wad of steel wool.