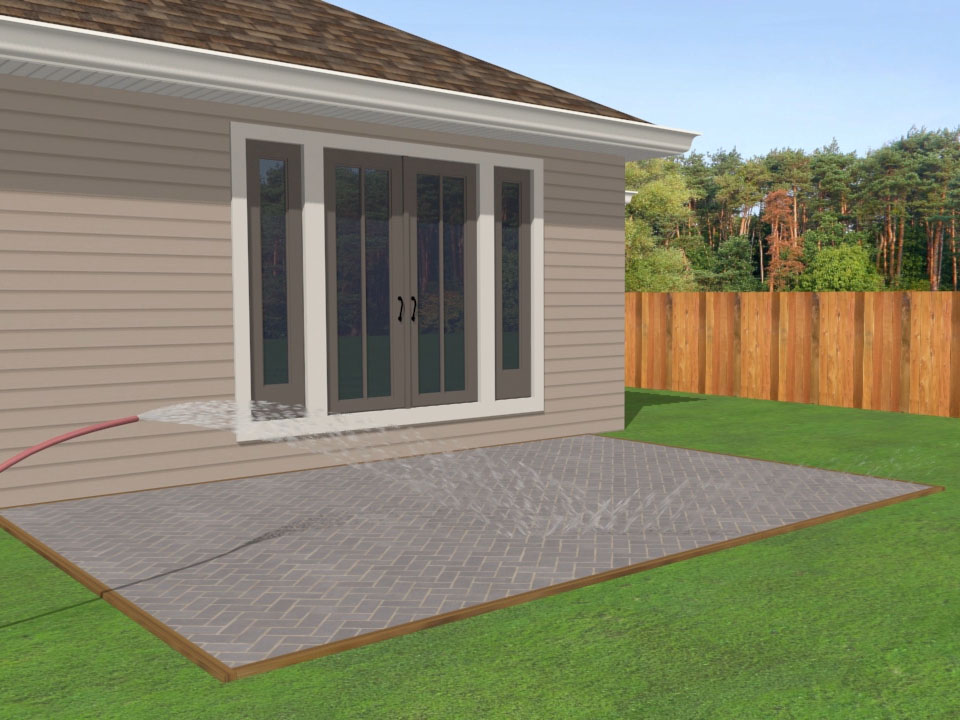
A brick patio has a rare talent: it can make a plain backyard look intentional, welcoming, and just a tiny bit like you have your life together. The good news is that learning how to lay a brick patio is not mysterious. It is mostly measuring, digging, compacting, leveling, and resisting the urge to “eyeball it” after lunch. The bad news? Your back will absolutely know you did something productive.
This guide walks you through 14 clear steps to build a dry-laid brick patio using patio bricks or brick-style pavers over a compacted gravel base and sand bed. That method is popular for DIY patios because it avoids mortar, drains well when built correctly, and allows individual bricks to be replaced later. Whether you want a small bistro corner, a fire pit seating area, or a full outdoor dining space, the process is the same: build a strong foundation first, then make the pretty part behave.
Before you start, check local rules, call 811 before digging in the United States, and think carefully about drainage. A patio should slope away from the house, not toward the foundation like a tiny brick conspiracy.
Tools and Materials You’ll Need
Gather your tools before the first shovel hits the ground. You will need patio bricks or pavers, paver base or crushed gravel, coarse bedding sand, joint sand or polymeric sand, edge restraints, landscape spikes, stakes, string line, a tape measure, marking paint, shovel, rake, level, tamper or plate compactor, rubber mallet, screed pipes, a straight 2×4, broom, garden hose, work gloves, safety glasses, hearing protection, and a masonry saw or angle grinder with a diamond blade if cuts are needed.
For a long-lasting brick patio, do not use ordinary wall bricks unless they are rated for paving. Patio pavers are made to handle foot traffic, weather, and ground contact. Wall bricks may crack, flake, or age dramatically in the wrong direction.
How to Lay a Brick Patio in 14 Steps
Step 1: Choose the Patio Location
Start by choosing a location that fits how you actually live. A patio outside the kitchen is great for dining. A shaded corner may be better for morning coffee. A spot too far from the house may look charming on paper but become the place where outdoor chairs go to retire.
Look for a relatively level area with good drainage. Avoid low spots where water collects after rain. Also consider tree roots, irrigation lines, utility lines, and the mature size of nearby plants. A patio under a large tree can be beautiful, but roots and falling debris may create extra maintenance.
Step 2: Plan the Size, Shape, and Pattern
Measure the furniture you plan to use, then add walking space around it. A small café table may need only 6 to 8 feet of width, while a dining table with chairs often needs 10 to 12 feet or more. For a fire pit area, leave enough clearance between seating and the heat source.
Choose a brick pattern early. Running bond is beginner-friendly and clean. Basket weave feels classic and works beautifully with rectangular bricks. Herringbone is strong and elegant but requires more cuts along the edges. If this is your first DIY brick patio, a simple pattern will save time, frustration, and possibly a few dramatic conversations with your tape measure.
Step 3: Mark the Patio Layout
Use stakes and string to mark straight edges. For curved patios, use a garden hose or rope to test the shape before marking with spray paint. Measure diagonally from corner to corner on rectangular layouts. If both diagonal measurements match, the patio is square.
Set the string at the finished patio height if possible. This gives you a visual guide for excavation, base depth, and slope. Keep in mind that the finished surface should sit slightly above surrounding soil so water does not wash dirt onto the bricks.
Step 4: Calculate Materials
Multiply the patio length by width to get square footage. Add 5 to 10 percent extra brick for cuts, breakage, and future repairs. If your pattern is complicated, your patio is curved, or your confidence is currently held together by coffee, lean toward 10 percent extra.
For the base, many pedestrian patios need several inches of compacted crushed stone, often around 4 to 6 inches depending on soil and climate. Areas with poor soil, freeze-thaw cycles, or heavier use may need a deeper base. Bedding sand is usually screeded to about 1 inch thick. Do not make the sand layer thick to fix uneven excavation; thick sand can shift and cause settling.
Step 5: Excavate the Area
Remove grass, roots, and topsoil inside the marked layout. Excavate deep enough for the compacted gravel base, 1 inch of bedding sand, and the thickness of your bricks or pavers. For example, if your pavers are 2 1/4 inches thick, your sand bed is 1 inch, and your compacted base is 4 inches, you need to dig about 7 1/4 inches below finished height.
Extend the excavation several inches beyond the finished patio edge. This allows the base and edge restraints to support the perimeter. A patio edge without support is like a bookshelf with one screw: it might hold for a while, but nobody should brag about it.
Step 6: Establish the Proper Slope
A patio should drain away from the house and other structures. A common target is about 1/4 inch of drop per foot, or roughly 1 inch over 4 feet. Use a level and string line to set this slope before building the base.
Do not skip this step. A perfectly flat patio may look satisfying during installation, but rainwater will quickly reveal the problem. Standing water can soften the base, encourage weeds, stain brick, and turn your outdoor living area into a shallow decorative pond nobody ordered.
Step 7: Compact the Soil
Once the excavation is complete, compact the soil subgrade with a hand tamper or plate compactor. Remove soft spots and fill low areas with base material, not loose soil. The subgrade does not need to look pretty, but it must be firm and stable.
If the soil is clay-heavy, soggy, or unstable, consider adding geotextile fabric before the gravel base. Fabric can help separate soil from the aggregate, reducing migration and long-term settling. For difficult drainage conditions, it may be worth consulting a hardscape professional before continuing.
Step 8: Add and Compact the Gravel Base
Add crushed stone or paver base in layers, usually 2 to 3 inches at a time. Rake each layer evenly, lightly moisten it if needed, and compact it thoroughly. Multiple thin compacted layers are better than one thick lazy layer. Gravel likes discipline.
Check the slope as you go. The base should follow the same drainage pitch as the final patio surface. Take your time here because the base is the real structure of the patio. The bricks are the outfit; the base is the spine.
Step 9: Install Edge Restraints
Edge restraints keep the patio from spreading outward over time. Depending on your design, you can use plastic, metal, concrete, pressure-treated lumber, or soldier-course brick edging. Many modern paver patios use plastic or metal restraints secured with long landscape spikes driven into the compacted base.
Install restraints along exposed edges according to the manufacturer’s instructions. Make sure they sit tight against the pavers and are anchored into the compacted base, not just loose sand. Without proper edging, the outside bricks can creep, gaps can open, and your neat patio can start looking like it is slowly leaving the property.
Step 10: Screed the Bedding Sand
Place two parallel screed pipes or pieces of 1-inch conduit on top of the compacted base. Pour coarse bedding sand between them, then drag a straight 2×4 across the pipes to create a smooth, even 1-inch sand layer. Remove the pipes and fill the shallow grooves with sand.
Only screed the amount of sand you can cover with bricks that day. Do not walk on the finished sand bed. If you disturb it, smooth it again before placing bricks. Bedding sand is not there to hide big mistakes in the base; it is there to create a consistent setting layer.
Step 11: Lay the First Bricks
Start at a straight edge, such as the house, walkway, or a carefully squared corner. Place the first bricks gently onto the sand. Do not drag them across the bedding layer. Use string lines to keep courses straight, and leave consistent joints according to the paver design.
Tap each brick lightly with a rubber mallet to seat it. Check level often, but remember that the patio should follow the planned slope. A brick that sits too high can be tapped down slightly. A low brick should be lifted and given a little more sand underneath. Do not pound like you are settling a personal dispute.
Step 12: Continue the Pattern Across the Patio
Work outward from your starting point, staying on the installed bricks rather than stepping on the screeded sand. Keep the pattern aligned and check your lines every few rows. Small errors are easier to fix early than after half the patio has formed a stylish but accidental curve.
If you are using a running bond pattern, stagger the joints evenly. For basket weave, keep the paired bricks square to each other. For herringbone, confirm the angle regularly. Patio patterns have a way of drifting when you stop paying attention.
Step 13: Cut Bricks to Fit Edges and Obstacles
At edges, posts, steps, or curves, mark bricks carefully and cut them with a masonry saw, wet saw, or angle grinder fitted with a diamond blade. Wear eye protection, hearing protection, gloves, and a dust mask or respirator suitable for masonry dust. Wet cutting helps reduce dust.
For clean results, measure twice and cut once. Actually, measure three times if the brick is your last matching piece. Fit cut bricks snugly, but do not force them so hard that they disturb the surrounding pattern.
Step 14: Fill Joints, Compact, and Clean Up
Spread joint sand over the patio and sweep it diagonally across the bricks so it falls into the joints. Run a plate compactor over the surface if recommended for your paver type, then sweep in more sand until the joints are filled. If using polymeric sand, follow the manufacturer’s instructions exactly for sweeping, blowing off residue, and misting with water.
Do a final cleanup with a broom and hose as appropriate. Avoid pressure washing new polymeric sand before it cures. Save a few extra bricks in a dry place for future repairs. You will thank yourself later when one brick cracks and you do not have to play “match the discontinued color” at three stores on a Saturday.
Common Mistakes to Avoid
Using the Wrong Bricks
Regular wall bricks are not always suitable for patios. Choose paving bricks or concrete pavers rated for outdoor foot traffic. They are denser, more durable, and better able to handle moisture and freeze-thaw stress.
Skipping Base Compaction
Most patio failures begin below the surface. If the base is loose, uneven, or too shallow, the bricks can settle and shift. Compact the soil and gravel base carefully. It is not glamorous work, but neither is fixing a wavy patio next spring.
Forgetting Drainage
A patio that slopes toward the house can create moisture problems near the foundation. Always plan the pitch before excavation and keep checking it during base installation, sand screeding, and brick laying.
Installing Weak Edges
The perimeter holds the patio together. Secure all exposed edges with proper restraints. Even a beautiful brick pattern will fail if the outer bricks slowly migrate into the lawn like they are seeking better opportunities.
Maintenance Tips for a Brick Patio
Brick patios are low-maintenance, not no-maintenance. Sweep regularly to remove leaves and debris. Rinse stains before they settle in. Pull weeds early, especially along edges and joints. Refill joint sand when it washes out or settles. If the patio becomes uneven, one advantage of a dry-laid design is that you can lift affected bricks, correct the base or sand, and reinstall them.
Sealing is optional for many brick patios, but it can help protect color, reduce staining, and make cleaning easier. If you choose to seal, wait until the patio is clean and dry, then use a product designed for your specific paver material. Test a small area first because some sealers change the surface color or sheen.
Cost and Time Expectations
A small DIY brick patio may take a weekend if the site is simple and the materials are nearby. A larger patio with curves, steps, poor soil, or lots of cuts can take several weekends. Tool rental, delivery fees, base material, edging, and waste should all be included in the budget.
The biggest money saver is doing the labor yourself. The biggest risk is rushing the base. If you are going to compromise anywhere, compromise on decorative extras, not the foundation. A simple patio built correctly will outperform a fancy patio built on wishful thinking.
Real-World Experience: What Laying a Brick Patio Teaches You
The first thing you learn when laying a brick patio is that “level” and “flat” are not the same thing. A patio can look smooth and still need a slope. Many beginners aim for a perfectly level surface because it feels logical indoors. Outside, water is the boss. If you ignore drainage, rain will file a complaint immediately.
The second lesson is that the base takes longer than expected. People imagine the fun part is setting bricks, and it is. But the excavation, gravel hauling, raking, compacting, and checking string lines are where the patio earns its future. A strong base feels repetitive while you are doing it, but months later, when the bricks still sit tight and even, you understand why every experienced installer talks about it like a sacred ritual.
Another practical experience: order more material than the math suggests. Bricks chip. Cuts go wrong. Patterns need adjustment. Sometimes a brick looks fine in the pallet but has a corner that seems to have lost a fight with a forklift. Having extra pavers keeps the project moving and gives you matching replacements later. Patio materials change color and style over time, and finding the same brick years later can feel like searching for a missing sock in a hotel laundry.
Comfort matters, too. Wear knee pads. Rotate tasks if possible. Dig for a while, then rake. Screed sand, then lay bricks. Drink water. Stretch. DIY pride is wonderful, but it is not a substitute for functioning hamstrings. If you are working in hot weather, start early and save cutting or cleanup for cooler hours.
When setting the bricks, trust your lines more than your eyes. Your eyes will lie, especially when shadows move across the yard. A string line gives honest feedback. Check it often. The same goes for the pattern. A tiny shift in a running bond or herringbone layout may not seem important at row five, but by row twenty it can look like the patio is slowly turning toward another zip code.
Cutting edge pieces is where patience pays off. Mark each brick individually instead of assuming every gap is identical. Outdoor spaces are rarely perfectly square. Houses settle, fences wander, and garden beds follow emotional geometry. Custom marking makes the finished patio look professional.
Finally, the best brick patios feel connected to the yard around them. After installation, add planters, low lighting, outdoor chairs, or a simple border of mulch and plants. The patio should not look like a brick island dropped from the sky. It should feel like a natural outdoor room. Build it carefully, finish it thoughtfully, and you will have a space that handles cookouts, quiet mornings, muddy shoes, and every guest who says, “Wait, you built this yourself?”
Conclusion
Learning how to lay a brick patio is a manageable DIY project when you respect the process. Plan the layout, dig to the correct depth, build a compacted base, screed a consistent sand bed, install strong edge restraints, and place each brick with patience. The patio you see is only the top layer; the patio you rely on is underneath.
A brick patio adds charm, function, and long-term value to an outdoor space. It can become a dining room without walls, a coffee spot with birdsong, or the official family headquarters for grilled food and mildly competitive lawn games. Take your time, measure carefully, and remember: the shovel work is temporary, but the patio bragging rights last for years.