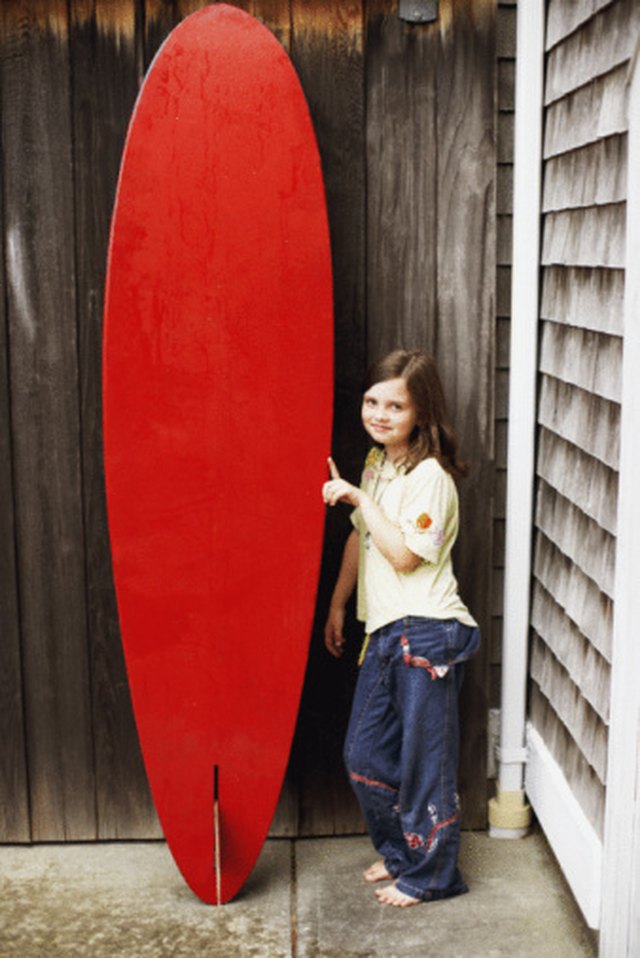
Want surfboard decor without paying “I live in a beach house” money? Good news: cardboard is cheap, easy to cut, and shockingly good at pretending it’s something fancy once you seal and paint it. Whether you’re styling a coastal living room, throwing a beach-themed party, or turning a kid’s bedroom into a tiny surf shack, a cardboard surfboard can look legitwithout the risk of anyone trying to paddle out on it (please don’t).
This guide walks you through planning, building, strengthening, finishing, and hanging a lightweight cardboard surfboard that looks like real wall art. You’ll also get practical fixes for the most common “uh-oh” moments (warping, fuzzy edges, peeling paint), plus a longer “real-world experience” section at the end packed with learned-the-hard-way tipsminus the actual hard way.
Why Cardboard Surfboard Decor Works (And Why It’s Not Just a Crafty Shortcut)
Cardboard is basically the unsung hero of DIY decor. Corrugated sheets are light, strong for their weight, and easy to shape into a surfboard outline. With smart layering (think: cardboard “plywood”), a sealed surface, and a clean paint job, the finished piece reads as intentional decornot “I made this out of an Amazon box five minutes ago” (even if you did).
Best places to use cardboard surfboard decor
- Wall art: Over a sofa, in a hallway, or above a console table.
- Party decor: Photo booth prop, welcome sign, or dessert-table backdrop.
- Kids’ rooms: Playful, lightweight, and easy to swap out as tastes change.
- Retail displays: Summer promos, beach collections, or window styling.
Materials and Tools
You can keep this project super basic or go full “movie prop department.” The list below is flexibleuse what you have, upgrade what matters.
Cardboard and structure
- Large corrugated cardboard sheets (clean, uncrushed; double-wall is a bonus)
- Extra scrap cardboard for ribs, standoffs, fins, and hanging supports
- Optional brown kraft paper or grocery bag paper for smoothing (great for a clean finish)
Adhesives
- Hot glue for fast assembly (great for internal structure)
- PVA glue (white school glue or wood glue) for laminating and sealing
- Spray adhesive (optional) for attaching paper skins evenly
Cutting and shaping
- Box cutter/utility knife + extra blades (sharp blades = cleaner edges)
- Scissors (for paper and small details)
- Metal ruler or straightedge
- Cutting mat or scrap board to protect your table
- Sandpaper (80–120 grit for shaping, 220 grit for smoothing)
Finishing
- Sealer: diluted PVA glue, decoupage medium, or gesso
- Primer: acrylic primer or gesso (recommended for bright, even paint)
- Paint: acrylic craft paint or spray paint
- Topcoat: clear acrylic sealer (spray) or brush-on clear coat for durability
- Painter’s tape (for stripes and crisp lines)
- Foam roller/brushes (foam helps reduce brush strokes)
Step-by-Step: Build Your Cardboard Surfboard
Step 1: Pick a surfboard style and size (so it fits your space)
Start with the wall, not the surfboard. Measure the area where you want to hang it and choose a size that looks balanced. Common decor-friendly lengths:
- Mini: 24–36 inches (great for shelves, kids’ rooms, small walls)
- Mid-size: 48–60 inches (classic wall decor scale)
- Statement piece: 72+ inches (big blank wall, big beach energy)
For shape, keep it simple if it’s your first build: a longboard outline is smooth and forgiving. A “fish” tail looks cool but has more tricky cuts.
Step 2: Make a full-size template (symmetry is your best friend)
Draw a centerline down a large sheet of paper or directly on your cardboard. Mark the widest point (usually a bit above center) and sketch one side of the board. Then fold your template on the centerline and cut it out so both sides match. No folding paper big enough? Use the “flip and trace” method: draw one side, cut it, flip it over, trace the mirror image.
Tip for clean curves: use a flexible strip of thin cardboard or a ruler that can bend slightly, and trace a smooth arc. The goal is “surfboard sleek,” not “potato chip outline.”
Step 3: Cut the main board shape
Transfer your template to cardboard and cut with a utility knife using multiple light passes (instead of one superhero push that tears the corrugation). Keep your blade perpendicular to the cardboard for straighter edges.
Step 4: Laminate layers for thickness and stiffness
A single sheet looks flat and can warp. Laminating two to four layers makes your surfboard feel like real wall decor. Here’s the trick: alternate the corrugation direction with each layer (like wood grain). This helps the board resist bending.
- Trace your surfboard shape onto 2–4 sheets of cardboard.
- Cut them out as neatly as possible.
- Spread PVA glue in a thin, even layer (too much glue can cause waves).
- Stack layers, alternating corrugation direction.
- Press flat under books or a board with weights until fully dry.
Quick option: hot glue works, but it can create bumps. For a smoother finish, use PVA for the big surfaces and hot glue only for internal supports.
Step 5: Shape the rails (edges) so it looks like a real board
Real surfboards have rounded rails (edges). Cardboard doesn’tyet. You have two easy approaches:
- Bevel + sand: cut a shallow bevel along the edge on both sides, then sand to round it out.
- Edge wrap: glue thin strips of cardboard around the perimeter, then sand smooth. This adds a “built-up” look.
Want it extra clean? Cover the edges with kraft paper (or grocery bag paper) using glue like a paper skin, then sand lightly once dry.
Step 6: Add fins, a stringer, and small “real board” details
Details are what make the piece feel intentional. A few easy wins:
- Stringer: add a thin strip down the center (painted or glued on) to mimic a wood stringer.
- Fins: cut 1–3 fins from cardboard, laminate them, and slot them into a small base tab for stability.
- Leash plug: a small circle of cardboard near the tail adds realism.
- Logo patch: a small rectangle or circle where a brand decal would be.
If this is going on a wall, fins should be low-profile so nobody gets “decor punched” walking by. You can also paint fins on instead of attaching them.
Step 7: Reinforce the back for hanging (so it stays flat)
The back is where smart structure pays off. Add one or more of these reinforcements:
- Center spine: a long strip of layered cardboard down the back centerline.
- Cross ribs: a few horizontal ribs (like a ladder) to prevent bowing.
- Perimeter frame: thin strips around the back edge for stiffness.
Planning to hang it? Create two flat mounting pads on the back (upper third of the board) so hanging hardware sits on stable surfaces, not on soft corrugation.
Seal, Prime, and Paint (Without the Cardboard Turning Into a Wavy Lasagna)
Step 8: Seal the cardboard first
Cardboard is thirsty. If you paint it raw, it absorbs moisture, swells, and sometimes warps. Sealing reduces absorption and makes paint look more vibrant and even.
Simple sealing options:
- Diluted PVA glue: thin coat, let dry, repeat (thin beats drippy).
- Decoupage medium: easy brush-on seal + smooth finish.
- Gesso: acts as both sealer and primer; great for bright paint.
Pro move: seal both the front and the back. Uneven moisture is a major cause of warping.
Step 9: Prime for a clean, pro paint job
If your design uses light colors (white, seafoam, pale yellow), priming is worth it. It blocks stains, evens texture, and helps paint stick. Apply thin coats and let them dry fully. Light sanding between coats can make the surface look less “cardboard” and more “finished decor.”
Step 10: Paint your design (and make it look expensive)
Here are three proven decor styles that look good almost anywhere:
- Classic stripes: painter’s tape + two or three colors (navy/white, coral/cream, or black/sand). Peel tape slowly for crisp lines.
- Faux wood surfboard: paint a tan base, then drag a slightly darker glaze with a dry brush to mimic grain. Add white pinstripes for that vintage vibe.
- Splatter art: a fun, kid-friendly “action painting” approachgreat for playrooms and summer parties.
If you use spray paint, use multiple light coats and keep the can moving. Start and end your spray pass off the edge of the board so you don’t get paint “blobs” at the beginning and end.
Step 11: Protect it with a clear topcoat
A clear coat keeps paint from scuffing and gives the finish that “store-bought” sheen (or matteyour choice). Brush-on clears are easier indoors and more controlled; spray clears can look very smooth but need good ventilation. Apply thin coats and let each coat dry properly.
Hanging and Display Ideas
Wall-hanging options
- Adhesive picture-hanging strips: best for lightweight boards on smooth walls. Clean the wall first and follow weight guidelines carefully.
- D-rings + picture wire: more secure and great for longer boards (requires attaching a small wood strip or reinforced pads).
- Leaning decor: place it on the floor and lean it against a wall (instant surf shop display).
Easy styling tricks
- Pair it with woven baskets, a jute rug, or a striped throw pillow to reinforce the coastal theme.
- Hang two smaller boards in a staggered layout for a “gallery wall” surf moment.
- Add a small hook below it for a beach hat or a lightweight tote bag.
Common Problems (And How to Fix Them Fast)
“My board warped!”
- Seal both sides next time (front and back).
- Use thinner glue/paint coats and let them dry fully.
- Press the board flat under weight while drying (with wax paper so it doesn’t glue itself to your table).
“The edges look fuzzy.”
- Sand lightly, then seal edges with glue or gesso.
- Wrap edges with kraft paper for a smoother, more finished look.
“Paint looks patchy.”
- Prime first (especially for light colors).
- Use a foam roller for flat areas and a brush only for details.
Make It Look Like Real Surf Decor: Small Details That Sell the Illusion
- Pinlines: thin lines near the edge (use painter’s tape or a paint pen).
- Wax texture: dry-brush a slightly lighter color in an oval where wax would go.
- Shadow effect: a subtle gray line under stripes can add depth without making it “busy.”
- Hardware realism: paint a tiny “fin box” rectangle even if you don’t add real fins.
Safety Notes (Because Cardboard Is Innocent, but Tools Aren’t)
- Cut away from your hands and change blades oftendull blades slip.
- Use spray products outdoors or in very well-ventilated areas and protect surrounding surfaces.
- If kids are helping, let them paint and decorate while an adult handles cutting tools and hot glue.
Experience Notes: What Usually Happens When You Actually Build One (And How to Get the Best Result)
Here’s the part nobody tells you in the cute “DIY in 6 minutes” videos: the difference between a cardboard surfboard that looks like fun decor and one that looks like a recycling bin audition usually comes down to patience in the middle steps. Most people rush the build (because it’s cardboard, so how serious can it be?), then get annoyed when the board warps, the paint looks dull, or the edges get fuzzy. The good news is that those problems are predictableand totally avoidable once you know what to watch for.
First, cardboard has a personality: it remembers moisture. If you paint the front heavily and leave the back raw, the fibers swell unevenly and the board starts to curl like it’s trying to catch a wave. Makers who get the best results tend to treat cardboard like wood: they seal it early, they coat both sides, and they let it dry flat under light pressure. Even a simple “seal coat” of diluted glue on both sides can make the whole project feel more stablelike you upgraded from cereal-box material to something closer to lightweight paneling.
Next: edges are everything. The eye reads edges as “quality.” A clean, rounded rail makes the piece feel like real surf decor; a jagged edge screams “shipping box.” People who love their final result almost always spend extra time on edge worksanding lightly, sealing the edges, and (when they want it extra smooth) wrapping the perimeter with kraft paper. It’s not glamorous, but it’s the difference between “handmade” and “homemade.”
Another common discovery: laminating layers is the secret weapon. A single sheet can look flimsy on a big wall. Two to four layers, glued neatly and pressed flat while drying, suddenly gives the board presence. Alternating corrugation direction helps keep it from bending, and adding a simple spine on the back (even just a long strip of layered cardboard) makes it hang straighter. People often expect the front decoration to do the heavy lifting, but the structure is what makes the decoration look intentional.
When it comes to painting, the most reliable “experience tip” is: thin coats win. Thick paint makes cardboard soggy; thin coats build color without drama. Foam rollers are popular for a reasonthey reduce brush strokes and lay down paint evenly. And if you’re doing stripes, the best-looking boards usually come from pressing painter’s tape down firmly (especially along the edges) and peeling it off slowly while the paint is still slightly tacky. That’s how people avoid the dreaded “paint lifted with the tape” heartbreak.
Finally, hanging is where reality checks happen. Lightweight adhesive strips can work beautifully, but only if the board is truly light, the wall is clean, and the back of the board has stable mounting pads. Many makers end up reinforcing the back more than they expectednot because the cardboard can’t hang, but because a flat, stiff back keeps the board from bowing away from the wall. If you want the most “finished” look, a slightly spaced-off hang (a tiny gap behind the board) creates a soft shadow line that makes it feel like gallery artwithout actually being gallery art.
In short: the build is easy, the finish is the flex. Take your time sealing, smoothing, and reinforcing, and you’ll end up with surfboard decor that looks like it belongs in a beach boutiquewhile quietly being made from yesterday’s delivery box. That’s the kind of glow-up cardboard deserves.
Conclusion
Cardboard surfboard decor is the perfect mix of budget-friendly, customizable, and surprisingly stylish. Build a strong base with layered cardboard, shape the rails so it looks “real,” then seal, prime, and paint in thin coats to avoid warping. Finish with a protective clear coat and hang it securely for instant coastal characterno oceanfront property required.