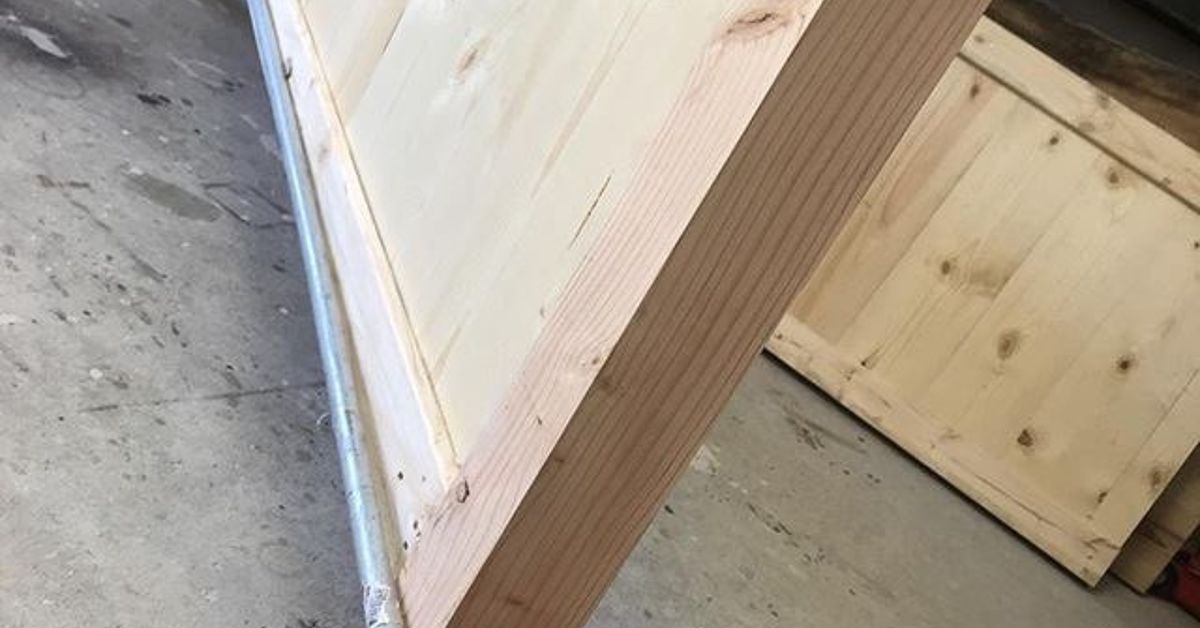
A farmhouse bedroom set should feel substantial, comfortable, and pleasantly unfussy. It should not wobble when you sit down, squeak every time you roll over, or require an engineering degree to move through a doorway. Fortunately, a well-planned DIY farmhouse bed frame delivers the character of custom furniture without the custom-furniture price tag.
This project uses readily available lumber, practical joinery, a slatted mattress platform, and classic farmhouse details. The instructions focus on a queen-size frame, but the same construction method can be adapted for other mattress sizes. More importantly, the bed establishes a design vocabularysquare posts, framed panels, simple trim, and a consistent finishthat can later be repeated on matching nightstands, a dresser, or a storage bench.
Plan the Bed Around the Mattress
Begin with the mattress, not a random diagram found during a midnight scroll. A standard queen mattress is nominally 60 inches wide by 80 inches long, but actual dimensions can vary slightly. Measure the mattress you plan to use and check its manufacturer’s foundation requirements before cutting lumber.
For a typical queen bed, an interior opening of approximately 60 1/2 by 80 1/2 inches provides a little breathing room without allowing the mattress to wander around like an unsupervised shopping cart. Increase or decrease those dimensions if your mattress measures differently.
Decide Between a Platform and Foundation Bed
A platform bed supports the mattress directly on closely spaced slats. A traditional panel bed usually holds a box spring or compatible foundation beneath the mattress. Many foam and hybrid mattresses require a firm platform with narrow gaps between slats, while some traditional mattresses are designed for a foundation.
Manufacturer requirements vary. Several major mattress brands limit slat gaps to roughly 3 to 4 inches, and some require center support with additional legs for queen and king beds. Designing for gaps of about 2 inches is a conservative approach, but the mattress warranty should have the final word.
Materials and Hardware
The following list creates a sturdy queen-size farmhouse bed with a tall headboard, a lower footboard, removable side rails, and center support. Lumber quantities may change with your chosen panel pattern.
- Four 4-by-4 posts for the headboard and footboard
- Two 2-by-10 boards for the side rails
- Several 2-by-4 boards for panel rails, braces, and the center beam
- 1-by-6 boards or cabinet-grade plywood for panel infill
- Two 2-by-2 boards for mattress-support cleats
- Fifteen 1-by-4 boards for queen-size platform slats
- Bed-rail brackets, bed bolts, or other load-rated knockdown hardware
- Joist hangers or suitable brackets for the center beam
- Structural wood screws in appropriate lengths
- Pocket-hole screws for noncritical panel assembly
- Wood glue, sandpaper, stain or paint, and a protective topcoat
- Felt pads, thin cork, or paraffin wax for potential friction points
Remember that dimensional lumber has nominal names. A 2-by-4 is normally about 1 1/2 by 3 1/2 inches, and a 1-by-6 is approximately 3/4 by 5 1/2 inches. Measure the actual boards before creating a cut list. Lumber apparently enjoys introducing itself with one set of dimensions and arriving with another.
A Practical Queen-Size Starting Cut List
- Two headboard posts: 4-by-4 by 58 inches
- Two footboard posts: 4-by-4 by 28 inches
- Two side rails: 2-by-10 by 80 1/2 inches
- Two cleats: 2-by-2 by 80 1/2 inches
- One center beam: 2-by-4 by 80 1/2 inches
- Fifteen slats: 1-by-4 by approximately 60 1/2 inches
- Headboard and footboard horizontal rails: cut to fit the measured space between posts
- Panel boards and decorative braces: cut after the outer assemblies are dry-fitted
Treat these measurements as a planning example rather than a certified structural plan. Lumber quality, joinery, hardware, mattress specifications, and expected loads all affect the finished frame.
Tools You Will Need
- Miter saw or circular saw with a straightedge guide
- Drill and impact driver
- Pocket-hole jig, if using pocket joinery for the panels
- Random-orbit sander
- Clamps and a carpenter’s square
- Tape measure, pencil, and combination square
- Level or long straightedge
- Stud finder if the headboard will be anchored to the wall
Wear eye and hearing protection, control airborne dust, and follow every tool manufacturer’s instructions. Use guards as designed and disconnect power before changing blades or making adjustments. Stain, paint, and topcoat should be applied with adequate ventilation and according to their labels.
How to Build the DIY Farmhouse Bed Frame
Step 1: Select and Acclimate the Lumber
Choose straight boards with minimal twist, cup, or major checking. Structural pieces deserve the best lumber in the stack; decorative panel boards can tolerate more personality. Avoid wet construction lumber because it may shrink, twist, or open joints after moving into a climate-controlled bedroom.
Store the lumber flat in a dry indoor environment for several days before milling and assembly. Wood responds to humidity primarily across the grain, so acclimation helps reduce unpleasant surprises later.
Step 2: Cut, Label, and Sand the Parts
Cut the posts, rails, cleats, and center beam first. Label mating pieces with painter’s tape or pencil marks in hidden areas. Dry-fit the main structure before cutting decorative panel boards; small differences in actual lumber thickness can change the required dimensions.
Sand each component before assembly. Start around 80 or 100 grit if the boards are rough, continue with 120 grit, and finish near 150 or 180 grit depending on the coating instructions. Ease sharp corners lightly so they accept finish evenly and are less eager to attack bare shins.
Step 3: Assemble the Headboard
Lay the headboard posts on a flat surface. Position the lower and upper horizontal rails between them, checking that the assembly is square. Use mortise-and-tenon joinery, dowels, loose tenons, or properly sized pocket-hole screws with glue for the framed panel. Pocket holes should face the wall or the back of the bed.
Add vertical 1-by-6 boards, tongue-and-groove planks, or a plywood panel inside the frame. For the familiar farmhouse appearance, install diagonal trim in an X or chevron pattern. Decorative braces do not need to carry the bed’s structural load, so focus on clean alignment and balanced spacing.
If using multiple solid-wood infill boards, do not force them together excessively. Seasonal wood movement needs somewhere to go. A plywood panel is more dimensionally stable and can be framed to resemble individual planks.
Step 4: Build the Footboard
Construct the footboard using the same joinery and panel pattern as the headboard. Keeping the footboard lower makes the room feel open and prevents the bed from resembling a very handsome wooden fortress.
Compare the headboard and footboard while both are lying flat. Verify matching widths, centered panels, square corners, and consistent trim overhangs. Correcting a mismatch now is easier than discovering it after the finish has dried.
Step 5: Prepare the Side Rails
Attach one 2-by-2 cleat along the inside face of each side rail. Its top edge determines the slat height and, therefore, how deeply the mattress sits inside the frame. Mark this position from the top edge of both rails so the supports remain level.
Predrill the cleats and secure them with glue and structural screws spaced approximately every 10 to 12 inches. Keep screws safely away from the locations reserved for bed-rail hardware.
Use load-rated bed-rail brackets or bed bolts to connect the side rails to the posts. Removable hardware makes the bed easier to transport and allows joints to be tightened in the future. Do not rely exclusively on small pocket screws for the main rail-to-post connections; these joints carry repeated dynamic loads every night.
Step 6: Install the Center Support
A queen-size platform should have a center beam running from the headboard to the footboard. Mount a 2-by-4 on edge with suitable hangers or brackets so its top aligns with the side cleats.
Add at least two or three center legs beneath the beam. Cut them only after temporarily assembling the frame on a level floor. Each leg should contact the floor without lifting the surrounding posts. Adjustable furniture feet are useful when the bedroom floor is less level than its optimistic appearance suggests.
Step 7: Make and Space the Slats
Cut the slats to span from one side cleat to the other. Sand their top edges and remove splinters that could damage the mattress cover. Distribute approximately fifteen 1-by-4 slats across an 80 1/2-inch opening to create gaps of about 2 inches.
Make a spacer block rather than measuring every gap individually. Secure at least the first and last slats to prevent migration. The remaining slats can be retained with screws, fabric webbing, or purpose-made holders. Predrill near board ends to reduce splitting.
Step 8: Dry-Assemble and Stress-Test the Frame
Assemble the bed without the mattress. Measure both diagonals; equal measurements indicate a square frame. Confirm that the rails are seated fully, the center beam is level, and every leg touches the floor.
Apply gradual pressure at the corners, center, and slats while listening for movement. Tighten loose hardware and address racking before finishing. Never test an unfinished frame by launching yourself onto it like a professional wrestler. Gradual loading produces better information and fewer dramatic stories.
Step 9: Apply the Farmhouse Finish
For a natural rustic bed, apply a warm brown stain followed by a durable clear topcoat. For a painted farmhouse look, use an off-white, muted gray, charcoal, or dusty green furniture paint. A two-tone combinationstained panel boards with a painted frameadds visual depth.
Test the entire finish schedule on an offcut. Pine can absorb stain unevenly, so a compatible wood conditioner, gel stain, or tinted finish may produce more consistent color. Apply several thin coats rather than one heroic puddle. Allow each product to dry and cure for the time stated by its manufacturer before bringing the bed into the bedroom.
Step 10: Complete the Farmhouse Bedroom Set
Repeat a few bed-frame details on the other pieces rather than copying everything. Nightstands might use the same square legs and X-braced sides. A dresser can repeat the headboard’s panel profile, while a storage bench can share its top-cap shape.
Use the same wood species, edge treatment, hardware color, and finish schedule throughout the set. These recurring details make separately built pieces look intentional without turning the bedroom into a furniture showroom where every object appears to have the same parents.
Common DIY Bed Frame Mistakes
- Building from nominal measurements: Measure the actual lumber and mattress before cutting.
- Skipping center support: Wide beds need a properly supported center beam to reduce sagging.
- Spacing slats too far apart: Follow the mattress manufacturer’s requirements to protect both comfort and warranty coverage.
- Using weak rail connections: Choose hardware intended for bed rails and repeated loading.
- Finishing after final assembly: Pre-finishing separate components usually produces cleaner edges and fewer missed areas.
- Ignoring the doorway: Design the frame to come apart unless the bed will remain in the workshop forever.
- Installing damp lumber: Wet boards can shrink, twist, and create loose or noisy joints.
How to Prevent Squeaks and Wobble
Squeaks usually come from movement between wood surfaces, hardware, slats, or flooring. Tighten rail fasteners after the first few weeks of use because parts may settle. Apply paraffin wax at removable wood-to-wood contact points, or add thin felt or cork where slats rub against cleats.
Use thread-locking products only when they are compatible with the chosen hardware and future disassembly. If the frame wobbles, check the floor first, then inspect square, center-leg contact, rail connections, and split lumber. Do not camouflage a structural problem with thicker carpet pads.
Workshop Experience: Lessons That Make the Next Bed Better
The most useful lesson from practical farmhouse bed builds is that planning saves more time than fast cutting. The tempting approach is to buy lumber in the morning and have a finished bed before dinner. That schedule usually works only if dinner is served three days later. Sorting boards, checking moisture, measuring the mattress, and drawing the rail connections prevent the mistakes that consume entire afternoons.
Dry assembly is equally valuable. In many builds, individual components appear perfect on the workbench but reveal small alignment errors when connected. One rail may sit slightly higher, a post may rotate out of square, or the center leg may be 1/8 inch too long. None of these problems is difficult to correct before finishing. After staining and topcoating, however, every adjustment feels like negotiating with a tiny wooden lawyer.
Another recurring experience involves the headboard panel. Decorative boards cut from a single measurement rarely fit as neatly as expected because framing lumber is not perfectly uniform. Building the outer headboard first and cutting each infill piece to its actual opening produces cleaner joints. Numbering the planks also helps preserve an attractive grain sequence, especially when using stained pine, oak, or poplar.
The finish often determines whether the bed looks custom or merely homemade. Rushing directly from coarse sanding to dark stain can emphasize scratches, glue smears, and milling marks. A bright work light held at a low angle reveals defects that ordinary overhead lighting politely ignores. Testing stain on project offcuts also shows whether blotch control or an additional sanding step is necessary.
Squeaks provide another memorable education. A frame can feel rock-solid during assembly and begin chirping after several nights because a slat shifts or two dry surfaces rub together. Closely fitted hardware, restrained slats, waxed removable joints, and a center beam supported firmly against the floor eliminate most noise. It is easier to build these details into the frame than to crawl underneath the mattress later with a flashlight and diminishing optimism.
Finally, removable side rails are worth the additional hardware. A permanently glued queen bed may be extremely strong, but that strength becomes less charming when moving it around a narrow hallway. Knockdown connectors allow the headboard, footboard, rails, beam, and slats to travel as manageable parts. Labeling those parts and storing the fasteners in a small bag attached to the frame turns the next move from a puzzle into a straightforward reassembly.
Conclusion
A successful DIY farmhouse bed frame combines rustic style with disciplined construction. Measure the mattress, use dry and straight lumber, reinforce the platform with a center beam, keep slat gaps within the mattress manufacturer’s limits, and connect the rails with hardware designed for repeated loads. The decorative panels create the farmhouse personality, but square assemblies and dependable support create the bed you will actually enjoy using.
Once the frame is complete, its proportions, finish, and trim details can guide the rest of the farmhouse bedroom set. The result is a coordinated room built one practical piece at a timeand a bed with a much better origin story than “it arrived in six boxes and one bolt was missing.”
Note: Inspect the frame and tighten removable hardware periodically. This adaptable project is not a load-certified engineering plan; revise dimensions, supports, fasteners, and slat spacing for the mattress manufacturer’s requirements, expected occupants, and selected materials.