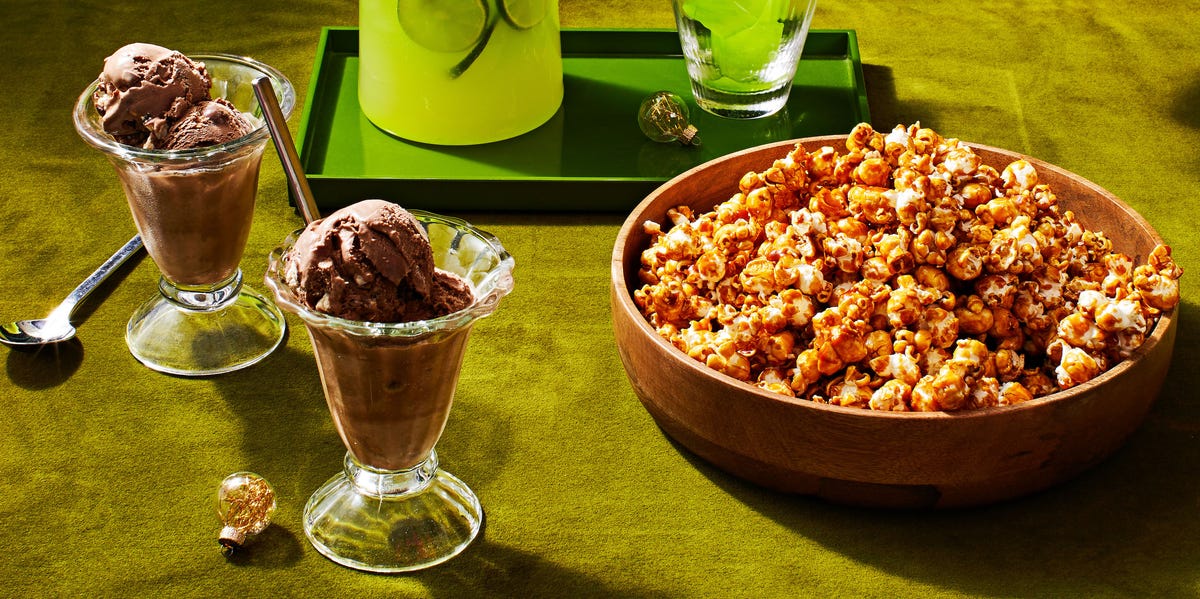
Chocolate malt ice cream is what happens when classic chocolate ice cream puts on a varsity jacket, walks into an old-school soda fountain, and says, “Make mine extra nostalgic.” It is creamy, deeply chocolatey, slightly toasty, and just mysterious enough to make people ask, “Wait, why is this so much better than regular chocolate ice cream?” The answer is malted milk powder, the humble pantry ingredient that tastes like milkshake memories, candy-shop counter stools, and summer vacation all at once.
This chocolate malt ice cream recipe uses a custard-style base for a rich, scoopable texture, Dutch-process cocoa for smooth chocolate depth, real melted chocolate for body, and malted milk powder for that signature nutty, caramel-like flavor. It is not difficult, but it does reward patience. Think of it as a tiny kitchen project with a very persuasive ending: a frozen dessert so good that your freezer may need its own security system.
Below, you will learn how to make chocolate malt ice cream at home, how to avoid icy texture, how much malt powder to use, when to add mix-ins, and how to customize the recipe without turning your ice cream maker into a dairy-based science experiment. Let’s churn.
Why This Is the Best Chocolate Malt Ice Cream Recipe
The best chocolate malt ice cream needs three things: bold chocolate flavor, a creamy base, and enough malt character to be noticeable without tasting like someone accidentally dropped breakfast powder into dessert. This recipe balances all three. The cocoa powder gives the ice cream a classic chocolate foundation, while chopped semisweet chocolate adds richness and a smooth mouthfeel. Malted milk powder brings the old-fashioned diner flavor that separates chocolate malt ice cream from ordinary chocolate ice cream.
The custard base matters, too. Egg yolks add silkiness and help emulsify the dairy, giving the finished ice cream a luxurious texture. Heavy cream supplies fat, whole milk keeps the base from becoming too heavy, and sugar helps the ice cream freeze softly enough to scoop. A pinch of salt sharpens everything, because chocolate without salt is like a joke without timing.
What Is Chocolate Malt Ice Cream?
Chocolate malt ice cream is chocolate ice cream flavored with malted milk powder. Malted milk powder is usually made from malted barley, wheat flour, and milk solids. It has a toasty, nutty, slightly sweet flavor that became famous in soda-fountain drinks and malted milkshakes. When added to ice cream, it gives the chocolate a warmer, rounder flavor and a nostalgic “malt shop” personality.
A chocolate milkshake is delicious. A chocolate malt is the one wearing sunglasses indoors because it knows it has more charisma. That extra scoop of malt flavor makes this homemade ice cream taste like a frozen version of a chocolate malted milkshake, only richer and slower to enjoy.
Ingredients for Homemade Chocolate Malt Ice Cream
For the Ice Cream Base
- 2 cups heavy cream
- 1 1/2 cups whole milk
- 3/4 cup granulated sugar
- 1/3 cup Dutch-process cocoa powder
- 1/2 cup malted milk powder
- 4 large egg yolks
- 4 ounces semisweet chocolate, finely chopped
- 1 teaspoon vanilla extract
- 1/4 teaspoon kosher salt
Optional Mix-Ins
- 3/4 cup chopped malted milk balls
- 1/2 cup mini chocolate chips
- 1/3 cup chocolate fudge ribbon
- Crushed waffle cones for serving
Ingredient Notes and Smart Substitutions
Use Dutch-process cocoa powder if possible. It has a smoother, darker flavor than natural cocoa powder and blends beautifully with dairy. Natural cocoa will still work, but the flavor may be a little sharper.
Choose regular malted milk powder, not diastatic malt powder. Diastatic malt powder is usually used in bread baking and contains active enzymes. For ice cream, you want the classic malted milk powder used for drinks and desserts.
Semisweet chocolate is the sweet spot. Milk chocolate can make the ice cream too sweet, while very dark chocolate can overpower the malt. Semisweet chocolate keeps the flavor balanced.
Whole milk is better than low-fat milk. Homemade ice cream depends on fat and sugar for texture. Using skim milk can lead to a harder, icier result. This is dessert, not a spreadsheet.
How To Make Chocolate Malt Ice Cream
Step 1: Whisk the Dry Ingredients
In a medium saucepan, whisk together the sugar, cocoa powder, malted milk powder, and salt. This helps break up cocoa and malt powder clumps before the dairy goes in. Malted milk powder loves to clump like it is forming a tiny dessert union, so whisking now saves frustration later.
Step 2: Add Dairy and Warm the Mixture
Slowly whisk in the whole milk until the dry ingredients dissolve. Add the heavy cream and place the saucepan over medium heat. Warm the mixture until it steams and small bubbles appear around the edges, but do not let it boil. Boiling can scorch the dairy and give the ice cream a cooked flavor that nobody invited.
Step 3: Temper the Egg Yolks
Place the egg yolks in a medium bowl and whisk until smooth. Slowly pour about 1 cup of the hot chocolate mixture into the yolks while whisking constantly. This step gently raises the temperature of the eggs without scrambling them. Scrambled egg chocolate ice cream is not a flavor trend we need to start.
Step 4: Cook the Custard
Pour the warmed egg mixture back into the saucepan. Cook over medium-low heat, stirring constantly with a heatproof spatula, until the custard thickens slightly and reaches 160°F to 170°F on an instant-read thermometer. The mixture should coat the back of a spoon. Do not rush this part; gentle heat makes smooth custard.
Step 5: Melt in the Chocolate
Remove the saucepan from the heat. Add the chopped semisweet chocolate and let it sit for one minute, then stir until completely melted and glossy. Stir in the vanilla extract.
Step 6: Strain and Chill
Pour the custard through a fine-mesh strainer into a clean bowl. This catches any tiny bits of cooked egg or undissolved cocoa. Press plastic wrap directly against the surface of the custard, then refrigerate until very cold, at least 4 hours or overnight. A colder base churns better and produces a creamier texture.
Step 7: Churn the Ice Cream
Pour the chilled custard into your ice cream maker and churn according to the manufacturer’s instructions. Most machines take 20 to 30 minutes. The ice cream should look like thick soft serve when it is ready.
Step 8: Add Mix-Ins
If using chopped malted milk balls, add them during the final minute of churning. For the best crunch, freeze the candy pieces before adding them. This helps them stay firm instead of melting into chewy little surprises.
Step 9: Freeze Until Scoopable
Transfer the churned ice cream to a freezer-safe container. Press parchment paper or plastic wrap against the surface, cover tightly, and freeze for 4 to 6 hours, or until firm enough to scoop.
Tips for the Creamiest Chocolate Malt Ice Cream
Chill the Base Thoroughly
Warm custard does not churn well. A properly chilled base freezes faster in the machine, which helps create smaller ice crystals and a smoother final texture. If you are short on time, place the bowl of custard in an ice bath and stir until cold before refrigerating.
Do Not Reduce the Sugar Too Much
Sugar does more than sweeten ice cream. It also affects texture by helping the ice cream stay softer in the freezer. If you dramatically reduce it, your dessert may freeze into something closer to chocolate malt concrete. Delicious concrete, perhaps, but still concrete.
Store It Airtight
Air exposure causes freezer burn and dulls flavor. Use a shallow, airtight container and press parchment or plastic wrap directly onto the surface before sealing. This small step makes homemade ice cream taste fresh longer.
Let It Rest Before Scooping
Homemade ice cream is often firmer than store-bought because it has less air. Let the container sit at room temperature for 5 to 10 minutes before scooping. Your wrist will thank you.
Chocolate Malt Ice Cream Variations
Chocolate Malt Crunch Ice Cream
Fold in chopped malted milk balls and mini chocolate chips. This version tastes like a frozen candy counter and is ideal for anyone who believes texture is a love language.
Double Chocolate Malt Ice Cream
Add a fudge swirl after churning. Spoon one-third of the churned ice cream into the container, drizzle with fudge sauce, and repeat the layers. Do not stir aggressively; gentle ribbons are prettier and taste better.
Mocha Malt Ice Cream
Add 1 tablespoon of instant espresso powder to the warm dairy mixture. Coffee deepens the chocolate flavor without making the ice cream taste strongly like coffee.
Salted Chocolate Malt Ice Cream
Increase the kosher salt to 1/2 teaspoon and finish each serving with a tiny pinch of flaky sea salt. This version tastes more grown-up, though it will still disappear like a kid found it.
What To Serve With Chocolate Malt Ice Cream
This ice cream is excellent on its own, but it also plays well with warm desserts. Scoop it over brownies, chocolate cake, blondies, or a skillet cookie. For a classic soda-shop sundae, top it with whipped cream, hot fudge, crushed malt balls, and a cherry. For something simple, sandwich it between chocolate wafer cookies and freeze until firm.
You can also turn it into a next-level milkshake. Blend two scoops of chocolate malt ice cream with a splash of whole milk and a spoonful of extra malt powder. The result is rich, thick, and capable of improving a Tuesday.
Common Mistakes To Avoid
Using Too Much Malt Powder
Malt flavor is wonderful, but too much can make the ice cream taste dusty or overly sweet. Start with 1/2 cup for a balanced flavor. If you are a serious malt fan, increase it by 1 or 2 tablespoons next time.
Skipping the Strainer
Even careful custard can have tiny lumps. Straining gives the finished ice cream a smoother texture. It takes one minute and makes you look like the kind of person who owns matching measuring spoons.
Adding Mix-Ins Too Early
Malted milk balls and chocolate chips should go in at the end of churning. Add them too early, and they may sink, smear, or interfere with the freezing process.
Overheating the Custard
Custard should be cooked gently. If it boils, the eggs can curdle and the chocolate may taste harsh. Keep the heat moderate and stir constantly.
How To Store Homemade Chocolate Malt Ice Cream
Store chocolate malt ice cream in an airtight container in the coldest part of the freezer, not in the door. It is best within 1 to 2 weeks, though it can last longer if tightly sealed. For the freshest flavor, avoid repeated thawing and refreezing. Every time ice cream melts and refreezes, larger ice crystals can form, and creaminess quietly leaves the building.
Frequently Asked Questions
Can I make chocolate malt ice cream without eggs?
Yes. For an eggless version, skip the yolks and increase the heavy cream to 2 1/2 cups while using 1 cup of whole milk. Heat the dairy, sugar, cocoa, malt powder, salt, and chocolate until smooth, then chill and churn. The texture will be slightly lighter but still delicious.
Can I make this recipe without an ice cream maker?
You can, though the texture will be denser. Pour the chilled base into a shallow freezer-safe dish and freeze, stirring vigorously every 30 minutes for about 3 hours. This breaks up ice crystals. It will not be quite as airy as churned ice cream, but it will absolutely satisfy a chocolate malt craving.
What brand of malted milk powder should I use?
Use a classic malted milk powder meant for drinks and desserts. Plain malted milk powder gives the cleanest flavor, while chocolate malted milk powder can add extra sweetness and a stronger chocolate-malt taste.
Why is my homemade ice cream icy?
Icy texture usually comes from a warm base, too little sugar or fat, slow freezing, or poor storage. Chill the custard thoroughly, use full-fat dairy, churn in a properly frozen machine, and store the ice cream tightly covered.
Experience Notes: What I Learned Making Chocolate Malt Ice Cream at Home
The first time you make chocolate malt ice cream, you may be tempted to treat it like regular chocolate ice cream with a spoonful of malt powder tossed in for decoration. That works, technically, but it does not deliver the full soda-fountain magic. The trick is letting the malt become part of the base, not just an accessory. When the malt powder dissolves into warm milk and cream, its toasty flavor spreads through the custard and rounds out the chocolate. The ice cream tastes less like “chocolate plus something” and more like one complete, confident flavor.
One useful lesson is that cocoa powder needs patience. If you dump cocoa into cold dairy and hope for the best, it will float around like tiny brown life rafts. Whisking cocoa with sugar and malt powder first helps it disperse, and slowly adding milk turns it into a smoother mixture. This small step prevents lumps and gives the base a polished flavor. It is not glamorous, but neither is scraping cocoa paste off the side of a saucepan while questioning your life choices.
Another experience-based tip: do not underestimate salt. A quarter teaspoon may look minor, but it wakes up the chocolate and keeps the sweetness from becoming flat. Malted milk powder has a naturally sweet, milky flavor, so the salt creates balance. If you add chopped malted milk balls, the contrast becomes even more important because the candy adds extra sweetness.
Texture improves dramatically when the base is chilled overnight. You can churn it after a few hours if it is very cold, but overnight chilling makes the process feel easier and the flavor slightly deeper. The chocolate settles down, the malt comes forward, and the custard thickens just enough to churn beautifully. It is the dessert equivalent of letting everyone sleep before making major decisions.
When adding malted milk balls, freeze them first and chop them unevenly. Some small crumbs melt into the ice cream, while bigger pieces stay crunchy. That mix of textures makes each scoop more interesting. Perfectly uniform pieces are not necessary; in fact, a little chaos is charming here. Ice cream should not look like it was assembled by a committee.
Serving temperature also matters. Straight from the freezer, homemade chocolate malt ice cream can be firm because it contains less air than many commercial brands. Let it sit for a few minutes before scooping. The flavor blooms as it softens, and the texture turns creamy instead of stubborn. A warm scoop helps, too. Run it under hot water, dry it quickly, and glide through the ice cream like you know what you are doing.
Finally, this recipe is a crowd-pleaser because it feels familiar but special. Chocolate lovers get their rich cocoa fix. Malt fans get that nostalgic diner flavor. Kids like the candy crunch. Adults pretend they are only having “a small scoop,” then return with a bowl large enough to require zoning approval. That is the charm of homemade chocolate malt ice cream: it is simple, old-fashioned, and just fancy enough to make everyone quiet for the first few bites.
Conclusion
This chocolate malt ice cream recipe is creamy, deeply flavored, and loaded with classic malt-shop character. By combining cocoa powder, melted chocolate, malted milk powder, egg yolks, cream, and whole milk, you get a homemade frozen dessert that tastes richer and more memorable than standard chocolate ice cream. The method is straightforward: make a custard, chill it well, churn it until thick, add crunchy malted milk balls if you like, and freeze until scoopable.
The secret is balance. Too little malt, and the flavor disappears. Too much, and the ice cream becomes overly sweet. This version lands in the happy middle, where chocolate and malt work together like best friends who definitely shared a milkshake in 1957. Serve it in cones, bowls, sundaes, milkshakes, or straight from the container while standing in front of the freezer. No judgment. The spoon understands.
Note: This article is written in original American English for web publication and is based on established homemade ice cream methods, custard safety practices, and classic chocolate malt flavor principles.