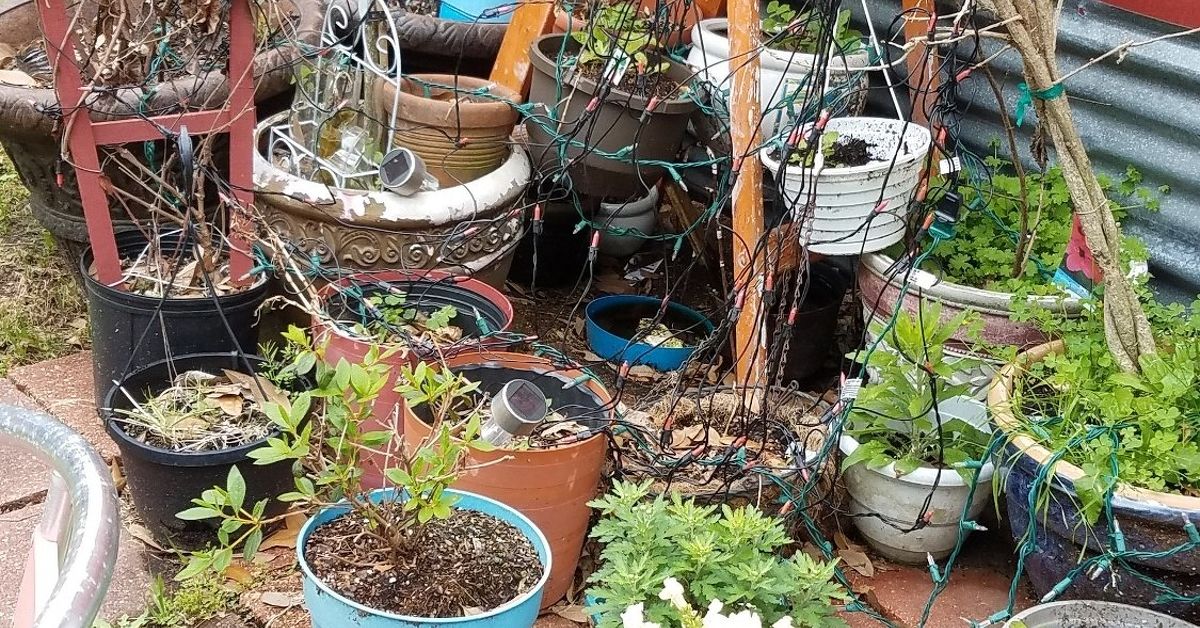
Your home’s exterior starts talking before anyone reaches the front door. A neat walkway says, “Welcome.” A freshly painted entry says, “We have our lives reasonably under control.” A leaning mailbox surrounded by weeds says something else entirelypossibly, “The raccoons are in charge now.”
Fortunately, improving curb appeal does not require a bulldozer, a landscape architect, or a suspiciously large home-equity loan. Cleaning neglected surfaces, defining planting beds, repairing small defects, updating exterior hardware, and creating a stronger focal point can dramatically improve the way a property looks from the street.
Curb appeal is especially important when selling a home. In a National Association of Realtors report, 92% of real estate professionals said they had recommended that sellers improve curb appeal before listing, while 97% considered it important for attracting buyers. Even when a move is nowhere on the calendar, exterior improvements can make arriving home feel better every day.
Begin With a Curb Appeal Audit
Before buying paint, flowers, lanterns, or a decorative metal rooster that may become the subject of neighborhood gossip, stand across the street and look at the entire property. Better yet, take photographs in daylight and at dusk. Photos reveal visual clutter and awkward proportions that homeowners often stop noticing.
Evaluate the exterior in five categories:
- Cleanliness: Look for dirty siding, stained concrete, algae, cobwebs, overflowing planters, and grimy windows.
- Condition: Note peeling paint, loose railings, cracked steps, damaged screens, sagging gutters, and missing trim.
- Landscaping: Identify weeds, bare patches, overgrown shrubs, exposed soil, and plants blocking windows or walkways.
- Entryway: Check the door, lighting, house numbers, mailbox, doormat, porch furniture, and hardware.
- Nighttime appearance: Make sure paths, steps, and the address are visible after sunset.
Complete maintenance and repair work before decorating. New planters cannot distract from rotting trim forever, no matter how cheerful the petunias appear. Exterior-improvement guidance consistently recommends assessing the home as a whole and fixing deterioration before layering on cosmetic details.
High-Impact DIY Curb Appeal Projects
1. Clean Everything That Is Supposed to Be Clean
A thorough cleaning may be the least glamorous curb appeal project, but it often produces the most immediate transformation. Wash the siding, porch ceiling, railings, front steps, exterior doors, window glass, light fixtures, and mailbox. Sweep beneath furniture and remove cobwebs from corners.
Concrete and masonry may benefit from pressure washing, but more force is not automatically better. Excessive pressure can damage wood, force water behind siding, loosen mortar, or etch softer surfaces. Begin with the gentlest effective setting, test an inconspicuous spot, and follow the equipment manufacturer’s instructions.
Clean gutters and downspouts while inspecting them for leaks or loose sections. A sparkling front door loses some of its magic when a miniature waterfall pours over the gutter every time it rains.
2. Make the Front Door the Main Character
The front door is a natural exterior focal point and one of the easiest places to use a confident color. Deep green, navy, muted red, warm terracotta, black, and sunny yellow can all work, depending on the siding, roof, trim, and architectural style.
Do not choose a door color while standing beneath the store’s fluorescent lights and trusting a paint chip the size of a cracker. Test samples on the door or a movable board and observe them during the morning, afternoon, and evening. Exterior light can make the same color appear dramatically cooler, warmer, brighter, or duller.
For a durable finish, remove or mask the hardware, clean the door, repair dents, sand rough or glossy areas, and use a suitable primer when required. Apply exterior-rated paint in the conditions recommended by the manufacturer. Major paint manufacturers emphasize that cleaning and sanding are essential steps rather than optional activities for people who enjoy extra chores.
Complete the makeover with a clean doormat, polished or replaced hardware, and a wreath or simple seasonal decoration. Avoid making the entry so crowded that guests must complete an obstacle course to ring the bell.
3. Coordinate Exterior Hardware
House numbers, door handles, knockers, porch lights, mailboxes, and doorbells are small details, but mismatched finishes can make the facade feel visually scattered. They do not need to be identical, though they should look related.
Choose one dominant finishsuch as matte black, aged bronze, brushed nickel, or warm brassand repeat it in two or three locations. Install house numbers that are large enough to read from the street and position them where plants, shadows, or an open storm door will not hide them.
If replacement is unnecessary, clean and repaint suitable metal components with an exterior product designed for that surface. Do not paint over locks, electrical components, glass, or moving mechanisms. Your doorbell should look refreshed, not fossilized.
4. Repair and Define the Walkway
The route to the front door should be obvious, stable, and reasonably comfortable to navigate. Pull weeds from joints, remove slippery growth, reset loose pavers, and repair hazardous cracks. Trim plants that spill over the walking surface or slap visitors in the ankles.
A plain concrete path can be upgraded with brick edging, landscape stones, or nearby planting beds. Gravel and stepping-stone paths can also be attractive when properly excavated, edged, compacted, and designed for drainage. Select materials that relate to the house. Brick complements many traditional facades, while simple rectangular pavers often suit contemporary architecture.
Installing edging stones is generally considered a manageable beginner project, but careful layout and a stable base determine whether the finished border remains straight or slowly wanders across the yard like it has weekend plans.
5. Refresh Planting Beds With Discipline
Start by removing weeds, dead growth, broken edging, and plants that have outgrown their locations. Prune selectively rather than turning every shrub into a green meatball. When a mature plant blocks windows, crowds the walkway, or requires constant cutting, moving or replacing it may be better than fighting it indefinitely.
Define bed edges with a spade, metal edging, stone, brick, or another material compatible with the home. Add an even layer of mulch while keeping it away from siding, tree trunks, and plant crowns. Mulch should look like a tidy blanket, not a volcanic eruption around every tree.
Build layers by placing lower plants toward the front and taller plants farther back, while preserving views of windows and architectural details. Choose species according to sunlight, soil, moisture, climate, mature size, and maintenance needsnot merely because they behaved nicely beneath the garden-center misting system. University extension guidance recommends matching trees and shrubs to actual site conditions and using diverse plantings to improve long-term resilience.
6. Add Containers for Fast, Flexible Color
Container gardens provide one of the fastest DIY curb appeal improvements. A pair of substantial planters can frame a formal entrance, while an asymmetrical cluster may feel more natural around a cottage or casual porch.
For a professional-looking arrangement, combine plants with three general roles:
- A tall or upright focal plant
- Full plants that occupy the middle of the container
- Trailing plants that soften the rim
Use containers that are appropriately scaled to the entry. One tiny pot beside a wide double door looks less like intentional design and more like a plant waiting for a ride. Make sure every container has drainage and that its plants share similar moisture and light requirements.
Window boxes, hanging baskets, and porch planters can also bring color above lawn level, making them useful for homes with limited front-yard space.
7. Improve the Lawn Without Demanding Perfection
A healthy lawn can create a clean visual frame, but it does not need to resemble a professional baseball field. Mow at the appropriate height for the grass type, sharpen the mower blade, edge along hard surfaces, remove debris, and address obvious bare patches.
Before automatically adding fertilizer, consider a soil test and local recommendations. Thin turf may be caused by shade, compacted soil, poor drainage, heavy traffic, drought stress, disease, or an unsuitable grass variety. In deeply shaded areas, a shade-tolerant groundcover or expanded planting bed may be more sensible than repeatedly reseeding grass that has already submitted its resignation.
8. Update Exterior Lighting
Outdoor lighting contributes to appearance, navigation, and visibility. Clean cloudy glass, replace burned-out bulbs, straighten leaning fixtures, and update dated sconces when the wiring and mounting conditions allow a safe DIY replacement.
Choose fixtures that are properly rated for exterior exposure. Their scale matters: tiny lights can disappear beside a large door or garage, while enormous fixtures can make a modest porch look as though it is being interrogated.
Low-voltage or solar path lights can define a walkway, but use them sparingly. Place fixtures where light is needed and maintain consistent spacing. The goal is a welcoming glow, not an airport runway. Current curb appeal guidance also identifies porch and pathway lighting as an inexpensive way to highlight landscaping while improving nighttime function.
9. Give the Mailbox Its Dignity Back
A roadside mailbox occupies valuable visual territory. Clean it, straighten the post, repaint compatible surfaces, replace damaged numbers, and remove weeds around the base. A compact planting bed can connect the mailbox visually to the house by repeating colors or plant varieties used near the front porch.
Keep plants clear of the mail carrier’s access route, allow for their mature size, and follow postal and local requirements. Avoid thorny varieties, aggressive vines, or flowers that turn mail delivery into an episode of wilderness survival.
10. Camouflage Necessary Eyesores Carefully
Trash containers, utility equipment, hoses, and recycling bins can weaken an otherwise polished view. Screening may involve a short fence panel, decorative enclosure, lattice, or strategically positioned shrubs.
Never block required ventilation, utility access, drainage, meters, shutoffs, or service clearances. Air-conditioning equipment needs adequate airflow, and utility workers need safe access. The most successful screen looks like part of the landscape while continuing to let essential equipment do its decidedly unglamorous job.
A Realistic DIY Curb Appeal Budget
Organize improvements by impact rather than purchasing everything that looks attractive in the seasonal aisle.
Projects Under $100
- Wash windows, siding, doors, and porch surfaces
- Paint the mailbox or selected exterior accents
- Replace the doormat and faded house numbers
- Weed, edge, and mulch one prominent planting bed
- Add one well-scaled container near the entrance
Projects From $100 to $500
- Repaint the front door and replace its hardware
- Install new porch lights
- Create a mailbox garden
- Add pathway lighting
- Repair edging or reset a small section of walkway
Projects Above $500
- Replace a damaged or outdated front door
- Build a larger paver path
- Upgrade porch railings or columns
- Repair significant masonry or concrete damage
- Refresh the garage door or large exterior surfaces
Choose one focal project and support it with several inexpensive maintenance tasks. A freshly painted door becomes more convincing when the steps are clean, the light works, and the shrub beside it no longer resembles a sea monster.
Common Curb Appeal Mistakes
Using Too Many Competing Styles
A farmhouse sign, tropical plants, Victorian lighting, modern house numbers, and nautical rope decor may all be attractive individually. Together, they can make the porch appear to be hosting a design convention. Select a style that respects the home’s architecture and repeat a limited range of shapes, colors, and materials.
Choosing Plants Before Understanding the Site
Sun-loving flowers will not become more cooperative because they match the door. Observe how many hours of direct light each area receives and check drainage before planting.
Ignoring Mature Plant Size
A shrub may look charming in its one-gallon nursery pot and become a window-swallowing beast several years later. Read the mature dimensions and provide adequate spacing from foundations, utilities, paths, and other plants.
Decorating Around Damage
Do not hide loose steps, decayed wood, electrical problems, major cracks, or drainage issues behind decorative objects. Repair safety and moisture problems first, calling a qualified professional when the work exceeds your skills.
Forgetting the View From Inside
Exterior improvements should not block natural light, cover windows, create security blind spots, or make routine maintenance difficult. Good curb appeal works from both sides of the glass.
Conclusion: Build a Better First Impression One Project at a Time
Successful DIY curb appeal is less about creating a flawless showplace and more about making the property appear clean, cared for, and visually organized. Begin with maintenance, establish a clear path to the entrance, strengthen the front door as a focal point, and use landscaping to frame rather than conceal the house.
The best improvements also suit the homeowner’s real schedule. A low-maintenance bed containing five well-chosen plants will look better six months from now than an elaborate garden that requires three hours of attention every Saturday. Consistency usually beats complexityand leaves more time for enjoying the porch instead of apologizing to it.
DIY Curb Appeal: Lessons From Hands-On Experience
The most useful lesson from completing curb appeal projects is that the smallest task often reveals the next most important task. You begin by repainting the front door. Then the refreshed door makes the old light fixture look tired. The new light makes the dirty siding more obvious. Two weekends later, you are standing in the driveway holding a scrub brush and wondering how a single quart of paint became a lifestyle.
That chain reaction is not necessarily bad. It helps prioritize work. The key is to complete projects in an orderly sequence: repair, clean, paint, landscape, and decorate. Reversing that order usually creates extra labor. Fresh mulch gets covered with paint chips. New planters must be moved repeatedly. Carefully washed windows collect dust from sanding. Experience teaches that project order matters almost as much as product choice.
Another practical lesson is to start with one camera-friendly zone. The front entrance is often the best candidate because it contains several manageable elements within a small area: door, trim, light, numbers, mat, steps, and planters. Improving this zone creates a visible result without requiring the entire yard to be transformed at once.
Photographs are surprisingly useful during the process. Take the first picture from the street, another from the driveway, and a third from the walkway. After each project, repeat the same angles. You may discover that a beautifully painted door is barely visible behind an overgrown shrub or that two matching planters look too small from thirty feet away. Real-world curb appeal is judged from a distance, not from the heroic close-up you took while the paint was still drying.
Budgeting also improves with experience. Many beginners spend too much on decorative objects and too little on preparation. A premium door color cannot compensate for peeling paint beneath it. Expensive flowers struggle in poor soil just as efficiently as inexpensive flowers. Attractive landscape lights lean when pushed into loose ground without proper support. The unexciting suppliescleaner, primer, caulk, sandpaper, quality fasteners, compost, edging, and drainage materialsoften determine whether the final result lasts.
Plant selection provides another memorable education. Buying plants by appearance alone is like choosing a roommate based entirely on a profile picture. The arrangement may look wonderful for a week, after which sunlight, water, growth habits, and personal boundaries become important. Checking mature size and site requirements prevents repeated pruning, transplanting, and conversations that begin with, “I thought this was supposed to stay small.”
It is also wise to stop occasionally and remove something. Curb appeal projects tend to accumulate objects: more pots, more signs, more seasonal decorations, more solar lights, and perhaps one bench that nobody has ever sat on. Editing the exterior can be as effective as adding to it. Store broken containers, remove faded ornaments, coil the hose, hide empty bags of soil, and give each remaining feature enough visual space to be noticed.
Finally, hands-on experience shows that curb appeal is never completely finished. Plants grow, paint weathers, mulch fades, storms rearrange branches, and spiders apparently consider porch lights premium real estate. The solution is not to chase perfection. Create a simple seasonal routine: clean in spring, prune and refresh containers in summer, clear leaves in fall, and inspect lighting and surfaces before winter.
A home with strong curb appeal does not have to be the largest or most expensive property on the street. It simply needs to look intentional. Straighten what leans, clean what has collected grime, repair what is broken, and highlight the parts worth noticing. Do that consistently, and the house will deliver a warm first impressioneven when the garage contains three unfinished projects and a mysterious box of cables nobody is emotionally prepared to throw away.