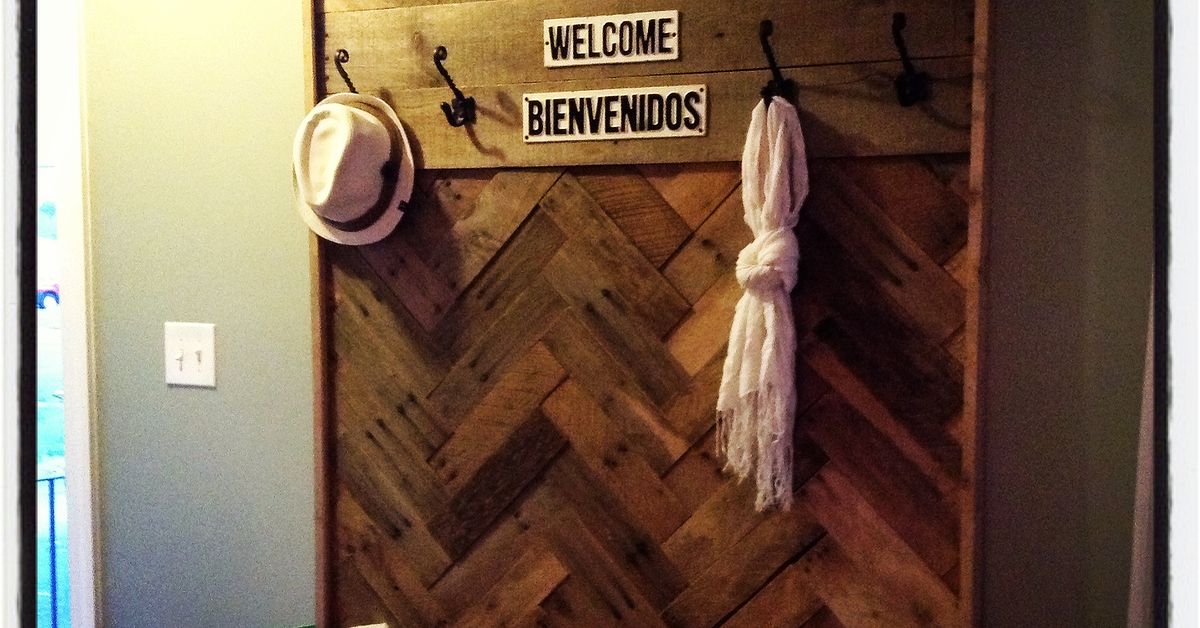
A hallway can become a miniature wilderness of shoes, backpacks, umbrellas, dog leashes, and coats that apparently reproduce after dark. A DIY pallet hallway tree turns that chaos into a compact storage station with a bench, hooks, a shelf, and enough rustic character to make “organized” look pleasantly accidental.
This project uses reclaimed pallet boards as decorative cladding rather than trusting mystery lumber to carry every structural load. A simple frame made from straight dimensional lumber supports the bench and vertical back, while cleaned pallet slats provide weathered texture. The result is sturdier, easier to square, and less likely to wobble like a café table with one short leg.
The finished hallway tree described below is approximately 42 inches wide, 18 inches deep, and 72 inches tall. You can adjust those dimensions, but measure the wall, baseboards, door swing, traffic path, and nearest outlet before cutting anything. Entryway furniture should store clutter without becoming clutter.
Why Build a Pallet Hallway Tree?
A hall tree combines several hardworking pieces of entryway furniture in one footprint. The lower bench gives you a place to sit while putting on shoes. The open shelf beneath it holds boots, baskets, or everyday footwear. The tall back supports coat hooks, while an upper shelf handles hats, small bins, and lightweight seasonal items.
Using pallet boards adds texture and keeps usable wood out of the waste stream. More importantly, a homemade design can be sized around your actual hallway. A narrow apartment entry might need a 30-inch version with three hooks. A busy family mudroom could use a 60-inch unit with divided cubbies and child-height pegs. Custom sizing is where DIY earns its keep.
Plan the Hallway Tree Before Picking Up a Saw
Recommended Finished Dimensions
- Overall width: 42 inches
- Overall height: 72 inches
- Bench depth: 18 inches
- Bench height: 18 inches
- Shoe shelf clearance: 6 to 8 inches
- Adult hook height: approximately 58 to 64 inches
- Top shelf depth: 8 to 10 inches
These measurements create a comfortable seat while keeping the upper section slim enough for most hallways. Mark the proposed footprint on the floor with painter’s tape before building. Walk through the space, open the front door, carry in a grocery bag, and perform the highly scientific “two people trying to pass each other” test.
Choose Pallets Carefully
Not every pallet belongs indoors. Start with clean, dry wood from a source that can explain what the pallet carried. Avoid boards with oil stains, chemical odors, mold, heavy discoloration, embedded debris, or insect damage. A pallet that spent its career beneath leaking industrial drums has already selected a different retirement plan.
Look for an IPPC treatment mark when one is present. The code HT indicates heat treatment, while MB indicates methyl bromide fumigation. For indoor furniture, use clean material with a known history and an acceptable treatment mark, preferably heat-treated wood.
A stamp does not identify every substance that might have spilled on a pallet. Visual inspection and a trustworthy source still matter. When the pallet’s history is unknown, use new lumber and distress it to create a reclaimed appearance instead.
Materials and Tools
Materials
- One or two clean, dry, suitable pallets
- Four 2-by-4 boards for the bench frame and uprights
- One 2-by-8 or laminated boards for the bench seat
- One 1-by-10 board for the upper shelf
- One 1-by-4 board for the hook rail
- Wood glue
- 2 1/2-inch construction screws
- 1 1/4-inch wood screws or brad nails
- Four to six coat hooks
- Two heavy-duty shelf brackets or wood corbels
- Wood filler, if desired
- Primer, paint, stain, or clear topcoat
- Metal anti-tip or angle brackets
- Wall fasteners suitable for studs or the specific wall material
Tools
- Tape measure, pencil, speed square, and level
- Drill and driver bits
- Circular saw, miter saw, or handsaw
- Pry bar, hammer, and nail puller
- Random-orbit sander or sanding block
- 80-, 120-, and 180-grit sandpaper
- Clamps and a stud finder
- Eye protection, hearing protection, gloves, and suitable respiratory protection
Step-by-Step DIY Pallet Hallway Tree Instructions
1. Dismantle the Pallets Carefully
Pallet boards split easily because they are thin, dry, and frequently attached with aggressive ring-shank nails. Work slowly. Slip a pallet breaker or flat pry bar close to each fastener and lift in small increments, alternating sides.
If the nails refuse to cooperate, cut through them with a reciprocating saw and remove the remaining metal afterward. Inspect every board for nails, staples, screws, and broken fasteners before cutting or sanding. Metal and spinning blades are not friends; they are barely on speaking terms.
Sort the salvaged boards by thickness, width, color, and condition. Set aside deeply cracked or badly twisted pieces. Slight imperfections add character, but a board shaped like a propeller will not suddenly become cooperative because you compliment its grain.
2. Clean, Dry, and Sand the Wood
Brush off loose dirt outdoors, then scrub suitable boards with mild soap and water. Do not saturate them. Allow the wood to dry completely in a well-ventilated area before cutting, sanding, or finishing. Damp boards can shrink later and open gaps in the back panel.
Begin sanding with 80-grit paper to remove splinters and rough fibers. Continue with 120 grit, then use 180 grit on surfaces people will touch, especially the bench edge and hook area.
You can preserve saw marks, nail holes, and color variation for a rustic finish, but remove anything sharp enough to snag clothing. Wear eye and respiratory protection, control airborne dust, and clean the work area thoroughly when finished.
3. Build the Bench Frame
Cut two 2-by-4 rails to 42 inches and four crosspieces to approximately 15 inches, adjusting the measurements for your intended finished depth. Assemble a rectangular top frame with wood glue and construction screws. Check both diagonal measurements to confirm that the frame is square.
Add two internal cross supports so the bench top does not flex. Cut four legs to the appropriate length for an 18-inch finished seat height. If the seat is 3/4 inch thick, legs measuring approximately 17 1/4 inches will usually work.
Attach the legs inside the corners of the frame. Add lower side rails and front-to-back supports approximately 5 inches above the floor. These rails will support the shoe shelf and reduce side-to-side movement.
Use straight dimensional lumber for the structural skeleton. Pallet slats vary in thickness and may contain hidden weaknesses, so they are generally better used as decorative surfaces than as primary bench supports.
4. Add the Shoe Shelf and Bench Seat
Lay pallet slats across the lower supports with small, consistent gaps between them. The gaps allow dirt and moisture to fall through instead of collecting around shoes. Predrill near board ends to prevent splitting, then secure the slats with short screws or brad nails.
For the seat, use solid boards, edge-glued lumber, or quality plywood with a finished front edge. A smooth, level seat is more comfortable and easier to clean than uneven pallet slats.
Round the exposed corners with sandpaper or a router. Attach the seat from underneath when possible so the top remains free of visible screw heads.
5. Construct the Tall Back
Cut two 2-by-4 uprights so the completed unit reaches approximately 72 inches. Secure the uprights to the rear of the bench frame with bolts or suitable structural screws. Add one horizontal rail near the top and another behind the planned hook line.
Arrange the pallet boards on the floor before attaching them. Alternate widths, spread dark and light pieces across the panel, and position the most attractive weathered boards near eye level. Random wood still benefits from a plan.
Attach the pallet slats vertically across the horizontal rails. Leave narrow, consistent gaps between boards, predrill near fragile ends, and check alignment every few pieces. A small error at the bottom can become an impressive lean by the time you reach the top.
6. Install the Shelf and Coat Hooks
Mount the upper shelf on sturdy brackets or wood corbels attached to the uprights and top rail. Keep the shelf relatively shallow so it does not crowd the person sitting below. Reserve it for hats, lightweight baskets, and seasonal accessories rather than heavy household equipment.
Install coat hooks through the pallet cladding and into the structural hook rail. Do not depend on a thin pallet slat alone to support heavy coats or loaded backpacks.
Space the hooks approximately 6 to 8 inches apart. Double hooks create separate positions for bags and jackets. A lower hook can serve children, keys, reusable shopping bags, umbrellas, or a pet leash.
7. Test, Level, and Anchor the Unit
Place the hallway tree in its intended location and check it with a level. Shim the base if the floor is uneven. Account for baseboards by notching the rear legs or installing solid spacers between the frame and wall.
Secure the upper frame to wall studs with suitable metal brackets and fasteners. A tall hall tree can become top-heavy when its hooks and shelf are loaded, so wall anchoring is an essential part of the installation.
Do not assume that a random drywall anchor can safely carry the load. Attach to studs whenever possible. For masonry, plaster, metal framing, or another wall system, use hardware specifically intended and rated for that material. Keep heavier belongings on the lower shelf and avoid placing tempting children’s items overhead.
8. Apply the Finish
Vacuum the entire project and wipe away sanding dust. For a farmhouse look, stain selected pallet boards while painting the structural frame white, charcoal, navy, or muted green. For a modern style, paint the entire piece one color and allow the reclaimed texture to provide depth.
A clear water-based topcoat can preserve the wood’s natural variation without adding as much amber color as many oil-based finishes. Low- or zero-VOC products may also reduce indoor emissions, although you should still follow the manufacturer’s ventilation, drying, and application instructions.
Apply additional protection to the seat and lower shelf because these areas will encounter wet coats, damp bags, muddy shoes, and the occasional beverage placed somewhere it absolutely does not belong.
Design Variations That Make the Hall Tree More Useful
Add Storage Baskets
Measure baskets before setting the shelf or cubby spacing. This sounds obvious, yet many beautiful storage compartments have been built one-quarter inch too short for the containers purchased specifically for them.
Woven baskets soften the industrial appearance of pallet wood, while washable plastic bins are practical for muddy shoes, sports equipment, and children’s accessories.
Build a Narrow Hallway Tree
For a tight corridor, reduce the width to 30 or 32 inches and the bench depth to approximately 15 inches. Use three hooks, a single shoe shelf, and a shallow upper ledge.
Preserve a comfortable walking path. A storage unit that forces everyone to turn sideways is less “space-saving furniture” and more “indoor obstacle course.”
Create Family Storage Zones
Divide the back into individual sections and assign one hook or basket to each family member. Lower hooks make the organizer accessible to children and increase the chance that backpacks will reach the wall instead of landing in the traditional location known as “directly in front of the door.”
Add a Cushion
A removable cushion makes the bench more comfortable and adds color. Choose durable, washable fabric because entryway seating encounters dirt more often than ordinary living-room furniture. Use nonslip material or ties to prevent the cushion from sliding.
Common Mistakes to Avoid
- Using an unknown or contaminated pallet: Attractive grain is not worth questionable exposure.
- Skipping the metal inspection: Hidden nails can damage tools and create dangerous projectiles.
- Building without checking for square: Small alignment errors multiply as the back and shelf are added.
- Fastening hooks only to pallet slats: Hooks need structural wood behind them.
- Making the upper shelf too deep: A bulky shelf crowds the seating area and increases leverage at the top.
- Ignoring baseboards: Notch the rear legs or add spacers so the unit sits correctly against the wall.
- Finishing before a test fit: Assemble and inspect the unit in its actual location first.
- Failing to anchor the furniture: Loaded hooks and an upper shelf can quickly shift the center of gravity.
Real-World Experience: What This Project Teaches You
The most useful lesson from building a pallet hallway tree is that reclaimed wood should set the visual direction without controlling every structural decision. On an early version of this type of project, the temptation was to build nearly everything from pallet pieces. That plan lasted until the boards were placed on a flat workbench. Some were twisted, several had different thicknesses, and one had a curve impressive enough to qualify as modern sculpture.
Using straight 2-by-4 lumber for the frame immediately made the project calmer. The pallet wood could then do what it did best: look interesting. The dimensional lumber created reliable corners, a level seat, and solid attachment points, while the old slats supplied color and texture.
Layout also matters more than expected. Random wood does not automatically produce an attractive random pattern. When boards were attached in the order they came off the pallet, one side looked dark and busy while the other appeared pale and empty. Removing the pieces and arranging them on the floor created a much better balance.
The most successful layout alternated wide and narrow boards, distributed knots across the panel, and placed the most weathered pieces near eye level. Ten minutes of arranging prevented years of staring at the finished project and wondering why it felt lopsided.
Another practical discovery involved the bench depth. A deep seat sounds comfortable, but every inch matters in a hallway. A taped outline on the floor showed that an early 21-inch-deep design pinched the walking path near the open door. Reducing the depth to 18 inches preserved comfortable seating while making the entry feel noticeably larger. Painter’s tape may be the least glamorous tool in the workshop, but it is excellent at preventing large, beautifully finished mistakes.
The hook rail deserves similar attention. Thin pallet boards may hold lightweight decorative hardware, but repeated pulling from heavy backpacks can loosen weak fasteners. Installing a hidden structural rail behind the slats gives each hook screw solid wood to grip. The hardware feels firmer, and the decorative boards experience less movement.
Placing one hook lower than the others also proved unexpectedly useful. It became the everyday location for a reusable shopping bag, umbrella, and dog leashthe small objects that otherwise migrate to doorknobs, chairs, and the floor.
Finishing taught another lesson in restraint. Reclaimed wood already has nail holes, color changes, dents, and saw marks. Heavy stain can flatten those differences into one dark surface. Light sanding followed by a clear matte topcoat preserved more character and made dust easier to wipe away.
The seat was the exception. Additional sanding there was worth the effort because people touch it constantly. Rustic charm belongs in the grain, not in splinters attached to someone’s jeans.
After installation, the wall anchors transformed the project from a piece of furniture into part of the room. Before anchoring, the tall back moved slightly when a heavy coat was pulled from a hook. Once metal brackets were secured to studs, the unit felt solid and quiet. That final step required little time but provided the biggest improvement in confidence.
The completed hall tree also changed household habits. Shoes were more likely to reach the shelf because it was open and easy to access. Keys stayed on the same hook. Bags stopped collapsing in a pile near the door.
The project did not create perfect organizationno woodworking plan has yet defeated a determined teenagerbut it gave everyday objects obvious homes. That is the real success of entryway storage: not looking spotless in a staged photograph, but making the next busy morning easier.
Conclusion
A DIY pallet hallway tree combines reclaimed character with genuinely useful entryway storage. The strongest version uses clean, carefully selected pallet boards for texture and dependable dimensional lumber for the structural frame.
Plan the footprint, construct a square bench, reinforce the hook area, keep heavy belongings low, and anchor the completed unit securely to the wall. Once those fundamentals are handled, personalize the design with paint, baskets, cubbies, lower hooks, a washable cushion, or a compact key shelf.
The finished hallway tree will organize coats and shoes, provide a convenient place to sit, and give the entryway the confident appearance of furniture that costs far more and arrives in a box containing one mysterious extra screw.
Note: Reclaimed pallet wood varies in condition and history. Use only material that is clean, dry, suitable for indoor reuse, and free of suspicious stains, odors, mold, pests, and embedded metal. Secure tall furniture to the wall with hardware appropriate for the wall construction.