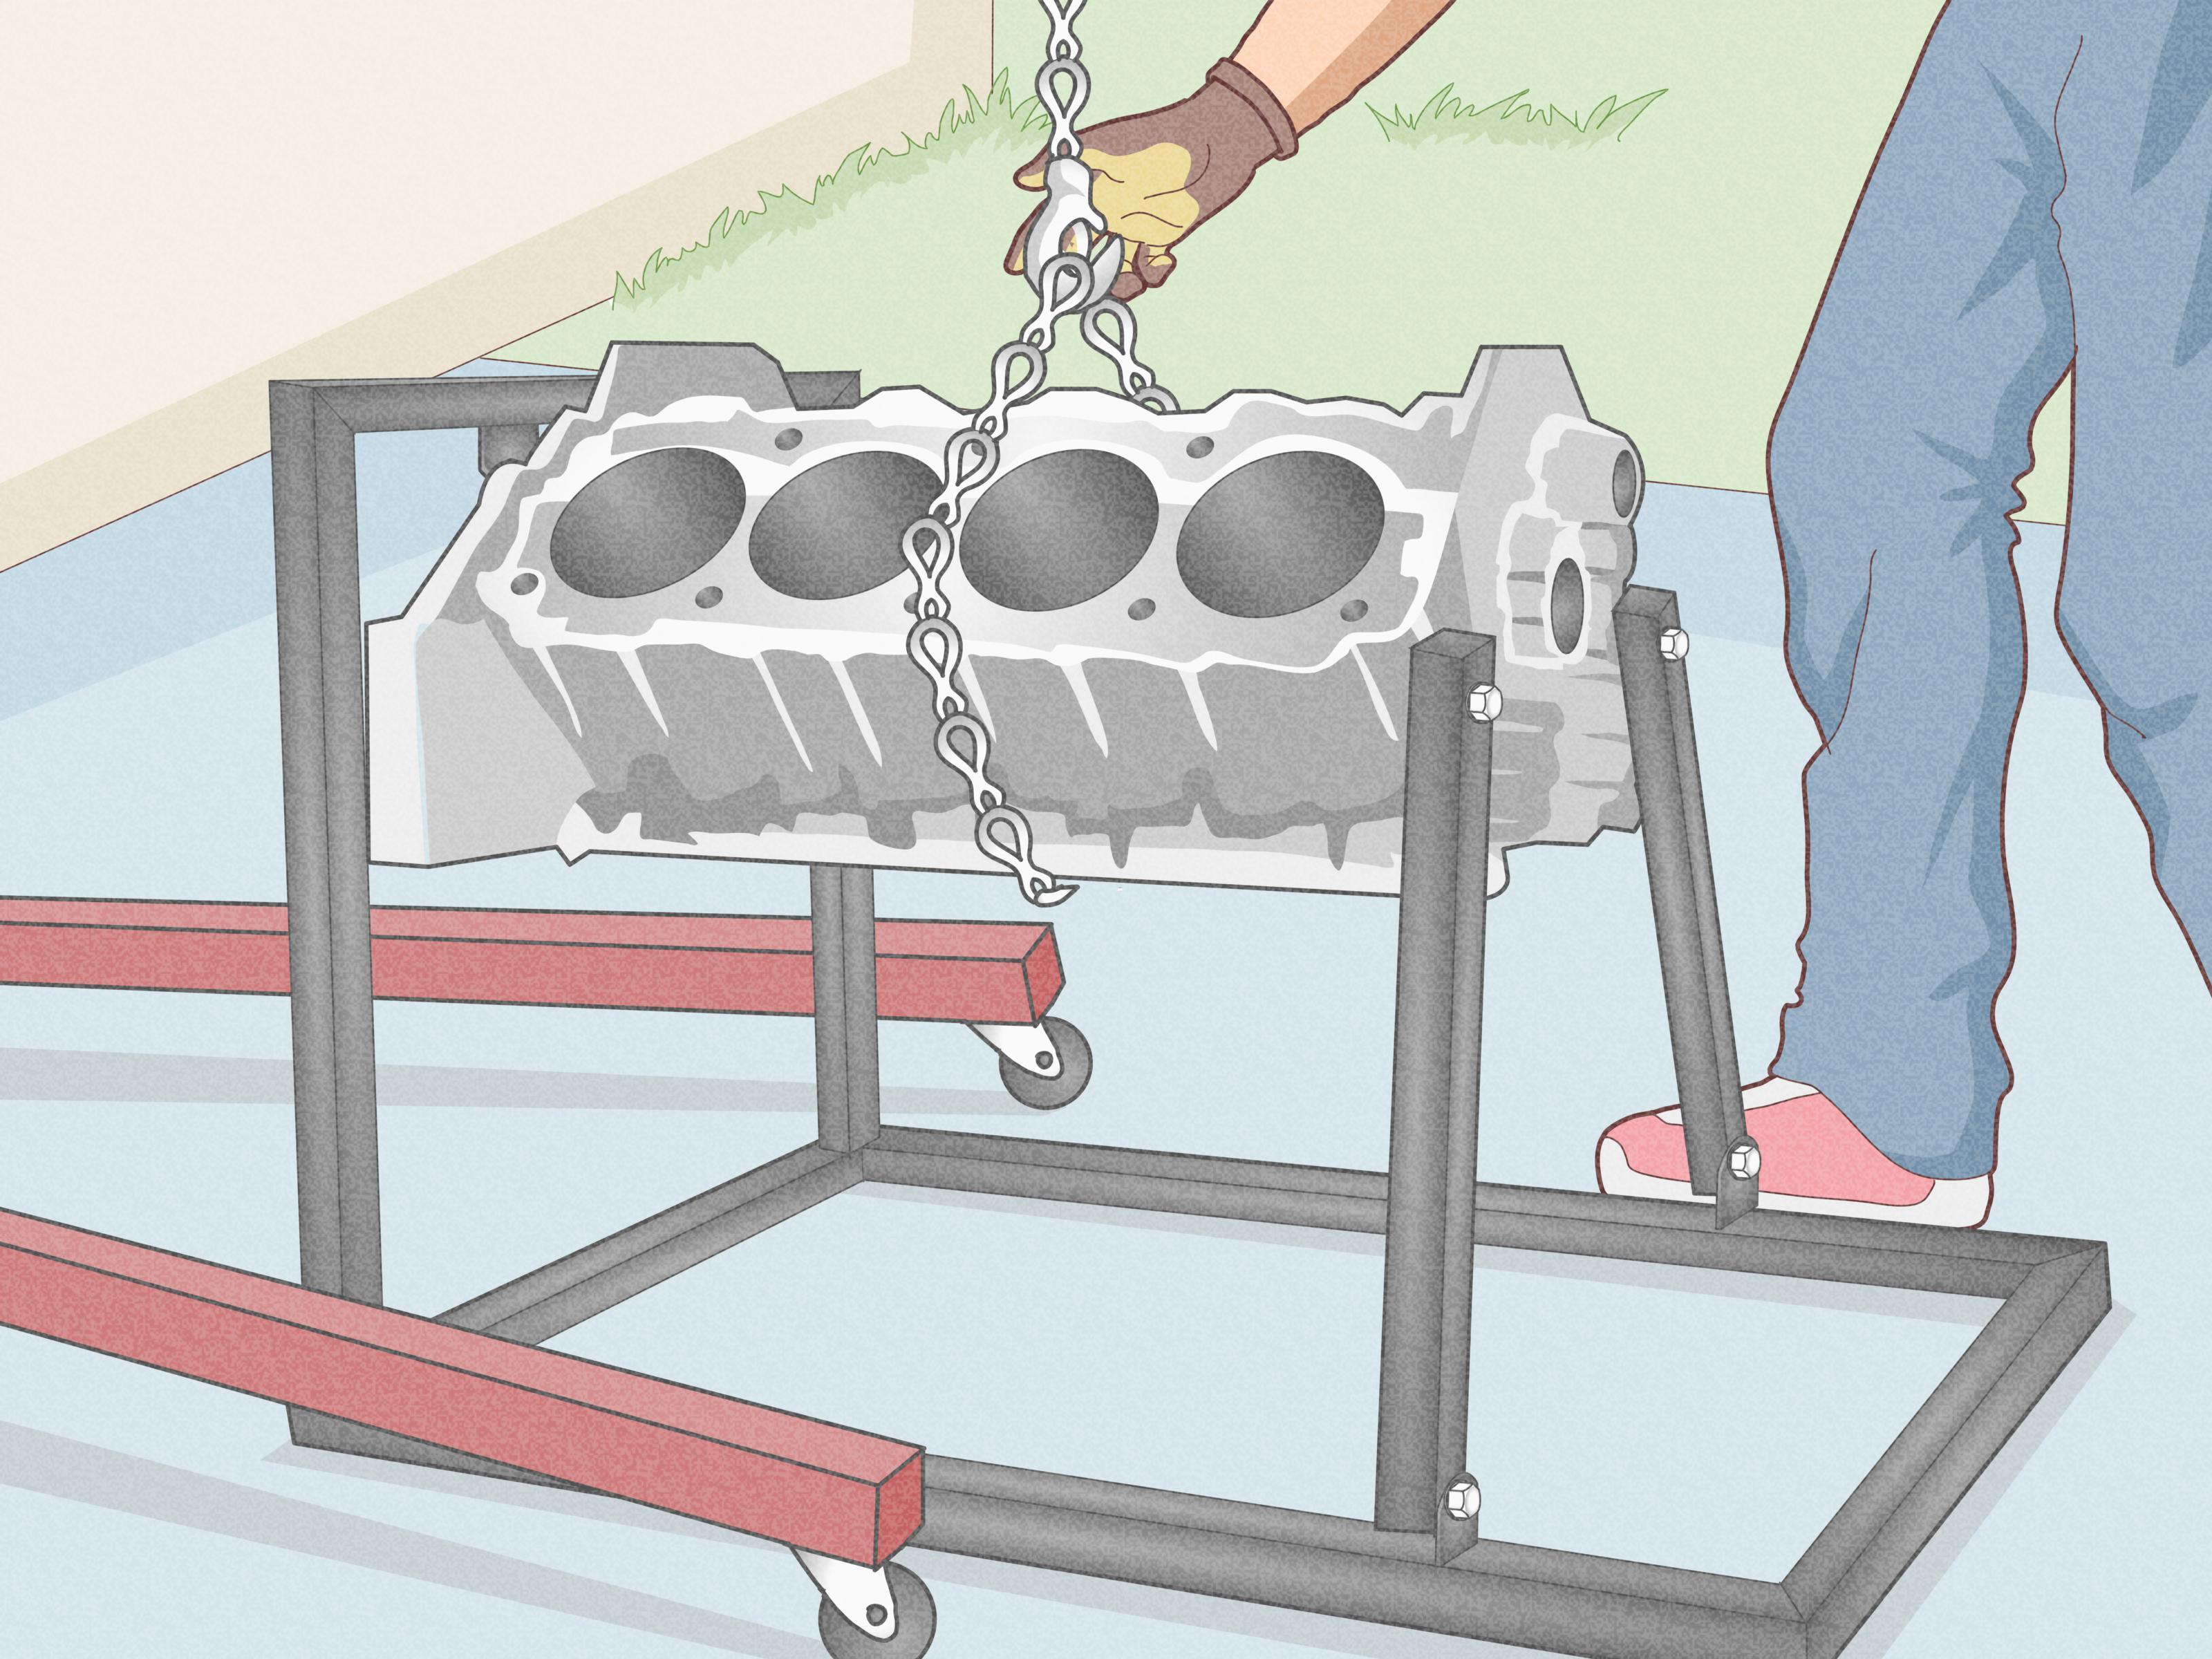
If you searched for easy ways to make an engine stand, you are probably in one of two camps: the careful DIYer who wants to rebuild an engine without balancing it on a milk crate and prayer, or the optimistic garage hero who looked at a pile of steel tubing and thought, “How hard could it be?” The honest answer is this: when you are dealing with a heavy engine, the safest way to “make” an engine stand is usually to create a smart setup around a commercially rated engine stand or a professionally fabricated frame, not to freestyle a load-bearing structure from scrap metal and confidence.
That does not make the project less DIY. It makes it smarter. You can still handle the planning, measuring, mounting, organizing, and workflow like a pro. In fact, most successful engine projects are won long before the first bolt is removed. They are won when the stand is stable, the engine is centered, the floor is level, and the builder is not making “creative” decisions with questionable bolts.
This guide walks through 15 practical steps to make your engine stand project happen safely and efficiently. It covers choosing the right stand, setting it up the right way, mounting the engine correctly, and avoiding the classic mistakes that turn a fun garage weekend into a frustrating lesson in gravity.
Why Your Engine Stand Setup Matters
An engine stand is not just a place to park an engine. It is your rotating work platform, your cleaning station, your teardown helper, and sometimes your emotional support tool when one stubborn fastener has decided to become a permanent part of the block. A good engine stand setup gives you better access, better ergonomics, and better safety. A bad setup gives you a wobbly mess, sore shoulders, and the kind of nervous laugh mechanics use when something feels “probably okay.”
The goal is simple: support the engine securely, keep the weight centered, make rotation manageable, and maintain a clean, stable work area. Everything below is designed around that mission.
15 Steps to Make Your Engine Stand Project Easy
-
1. Start With the Engine’s Real Working Weight
Before you shop, build a plan, or roll anything into the garage, figure out what you are actually supporting. Bare long blocks, fully dressed engines, transmissions, accessories, flywheels, and adapters all change the load. Do not guess. Write down the likely working weight of the engine as it will sit on the stand. Then choose a stand with a rating that comfortably exceeds that number. “Close enough” is a wonderful phrase for horseshoes, not suspended metal.
-
2. Choose a Stand Style That Matches the Job
Not every engine stand is built for the same kind of work. A light-duty stand may be fine for a smaller engine teardown. A heavier build, a big-block project, or anything you plan to rotate frequently deserves a sturdier option with a wider base, better casters, and a secure locking head. If storage space matters, a foldable stand can be practical. If stability is your top priority, a heavier fixed-base design often feels more planted.
-
3. Resist the Urge to Build a Load-Bearing Frame From Scrap
Here is the garage truth nobody likes to hear: scrap steel is not a personality trait. Yes, it is tempting to weld together an engine stand from whatever is leaning against the wall. No, that does not automatically make it safe. Load-bearing shop equipment needs proper material choice, sound welds, verified geometry, and hardware that belongs in the same conversation as the load. If you want a custom setup, work from a professionally engineered design or hire a qualified fabricator. Your future self will be thrilled.
-
4. Inspect the Stand Before It Ever Sees an Engine
Whether the stand is new, borrowed, or inherited from the mysterious uncle who once rebuilt a V8 on a gravel driveway, inspect it. Check the frame, upright, welds, mounting head, locking pin, casters, wheels, and hardware. Look for cracks, bent sections, missing pieces, sloppy holes, or signs that someone previously “improved” it with a drill bit and questionable judgment. If anything looks compromised, stop there.
-
5. Build on a Hard, Level Floor
A strong engine stand can still feel unstable on a bad surface. Set up on clean, hard, level flooring. Concrete is ideal. Avoid slopes, gravel, soft asphalt, uneven pavers, and any surface that turns caster movement into interpretive dance. Sweep the area before assembly. Tiny debris under casters can make a heavy load track poorly, and nothing says “bad idea” faster than a stand that wants to steer itself.
-
6. Assemble the Stand Exactly as Intended
Use the manufacturer’s hardware when specified, follow the assembly sequence, and tighten fasteners correctly. Do not substitute mystery bolts from an old coffee can unless you can positively verify they match the size, grade, and application you need. A stand only works as a system when the parts are installed as designed. The phrase “I had something close enough in the drawer” has launched many unnecessary headaches.
-
7. Match the Mounting Arms to the Engine Correctly
The four adjustable arms on the mounting head need to align with strong, appropriate bolt points on the block or bellhousing area, depending on the design. This is not a random puzzle. Test fit the arms without rushing. Confirm that the mounting pattern gives even support and does not place odd stress on weak points. If you need a dedicated engine adapter, use one. The right adapter is cheaper than the wrong story.
-
8. Use Proper Fasteners, Spacers, and Thread Engagement
Mounting bolts matter. A lot. Use the correct diameter, length, thread pitch, and strength for the engine’s mounting points. The bolts should engage enough thread without bottoming out. If spacers are needed, use solid, appropriate spacers rather than improvising with stacked washers that look like they were selected by a raccoon. Clean the threads, confirm fitment, and tighten evenly.
-
9. Use an Engine Hoist to Transfer the Load Calmly
An engine stand is not a lifting tool. Use an engine hoist or crane to raise and position the engine, then move it into alignment with the stand’s mounting head. Work slowly. One person can guide while another manages the hoist if needed. Keep hands clear of pinch points. If the engine is fighting the alignment, pause and adjust. Forcing a heavy engine into place is how garages teach expensive lessons.
-
10. Center the Load Before You Commit
Once the engine is mounted, look at the weight distribution before fully releasing the hoist. The engine should sit centered enough that the stand does not feel like it wants to lean, dip, or twist. If the weight looks awkward, correct it now, not after you have already convinced yourself it will “probably settle.” Loads do not settle. People settle. Loads surprise.
-
11. Lock Rotation Before Working
Being able to rotate the engine is one of the best parts of using a stand. It is also the moment when people forget that a heavy, off-center load can move suddenly. Lock the rotating head securely before wrenching, scraping gasket material, or leaning on a breaker bar. Rotate slowly and deliberately, especially if the engine is partially assembled and the center of gravity changes as parts come off.
-
12. Organize the Work Zone Around the Stand
A smart engine stand setup is not just the stand. It is also the area around it. Keep parts trays, labeled bags, rags, solvents, tools, and lighting within reach without cluttering the floor. Give yourself a rolling cart if possible. When everything has a place, you spend less time wandering around the garage looking for that one bolt you absolutely set down “right there.” Spoiler: it was never right there.
-
13. Move the Stand Only When You Truly Need To
Yes, engine stands have wheels. No, that does not mean they should be joy-ridden across the shop like parade floats. Move the stand only when necessary, and only on a clear path. Go slowly. Make sure the load is secure, the floor is clean, and helpers stay clear. If your garage layout allows it, choose the work position first and keep the stand there. Heavy things love momentum in all the worst ways.
-
14. Inspect As the Project Progresses
As you strip accessories, remove heads, or add components, the balance can change. Recheck the mounting bolts, locking pin, caster condition, and general stability throughout the build. This is especially important on long projects where the engine may stay on the stand for weeks. A five-minute inspection beats the alternative, which is suddenly discovering that “something felt loose for a while.”
-
15. Know When Buying Is Better Than Building
The easiest way to make an engine stand project successful is often to stop trying to reinvent the stand. Buy a rated stand, assemble it correctly, mount the engine carefully, and spend your energy on the engine work itself. That is still a DIY win. Not every tool needs to be born in your garage from leftover tubing and pure stubbornness. Sometimes the expert move is choosing the boring, reliable option and getting back to the fun part.
Common Mistakes to Avoid
The biggest mistakes are usually not dramatic at first. They look small. Using the wrong bolts. Working on a sloped floor. Ignoring a bent caster. Mounting the engine in a rush because dinner is in thirty minutes and the garage is already a mess. But those little shortcuts add up. Avoid modifying the stand, avoid overloaded setups, avoid unstable surfaces, and avoid working directly under any supported load. The safest engine stand setup is almost always the least exciting one.
What a Good Engine Stand Setup Looks Like
A good setup feels almost boring in the best way. The stand rolls smoothly when unloaded, stays planted when loaded, locks positively, and lets you rotate the engine without feeling like you are wrestling a refrigerator. The mounting arms fit cleanly. The bolts seat properly. The work area is lit, tidy, and dry. Nothing creaks. Nothing leans. Nothing makes you step back and squint. That is the vibe you want.
Conclusion
If your goal is to make an engine stand project easy, the winning strategy is not wild fabrication. It is smart preparation. Choose a properly rated stand, set it up on a hard and level surface, mount the engine with the correct hardware, and treat balance like the main character it is. Those habits make engine work smoother, safer, and a lot more enjoyable.
There is still plenty of room for DIY pride here. You can plan the workspace, organize the teardown, label every part, dial in your rotation angle, and build a workflow that feels like a professional shop without spending like one. That is the sweet spot: practical, efficient, and safe. In other words, the kind of garage decision you will still like tomorrow.
Shop Lessons and Real-World Experiences
One of the most common experiences people have with an engine stand is realizing that the stand itself is not the whole project. The real project is the system around it. Someone buys a decent stand, feels confident, and then tries to roll it across a floor scattered with sockets, cardboard, and old gasket bits. Suddenly the stand feels awkward, not because it is bad, but because the environment is bad. A clean floor and a planned path can make the same stand feel twice as stable.
Another common lesson is how much easier engine work becomes when the mounting height feels right. When the engine is too low, your back complains. When it is too high, you lose leverage and visibility. Many DIYers remember the first time they used a properly set-up stand and thought, “Oh, so this is what it feels like to not fight the tool all day.” Comfort is not laziness in the garage. It is efficiency with fewer groans.
People also learn quickly that fasteners can make or break confidence. Ask around any group of hobby mechanics and you will hear a version of the same story: the stand felt fine until they looked at the bolts and realized two were too short, one was mismatched, and another was doing the mechanical equivalent of crossing its fingers. Once the correct mounting hardware went in, the whole setup felt calmer. That is the thing about a good stand. It does not need to impress you. It just needs to stop giving you reasons to worry.
Then there is the rotation lesson. The first time someone rotates an engine on a stand, they usually expect a graceful, movie-scene moment. Sometimes that happens. Other times the engine reminds them that weight distribution is real and gravity has not taken the day off. Experienced builders learn to move slowly, brace properly, and lock the head before they lean into the next task. After that, rotation becomes one of the best features in the shop instead of a dramatic event.
Many long-term projects teach a quieter lesson: organization saves sanity. Builders who label bolts, bag parts, and keep trays near the stand tend to enjoy the process more. Builders who toss parts onto every nearby surface eventually spend half their weekend playing treasure hunt with hardware. The engine stand becomes the center of a clean, productive zone when the project is organized. Without that, it becomes a monument to chaos.
Finally, a lot of DIYers come away with the same conclusion: buying a proper stand was not “less handy” than building one from scratch. It was the decision that gave them more time to clean parts, inspect components, measure wear, and actually rebuild the engine. That is a pretty good trade. A stand should support the project, not become the project. Once people experience that difference, they usually stop romanticizing the scrap pile and start appreciating reliable tools. The garage gets calmer, the work gets better, and the engine gets the attention it deserves.