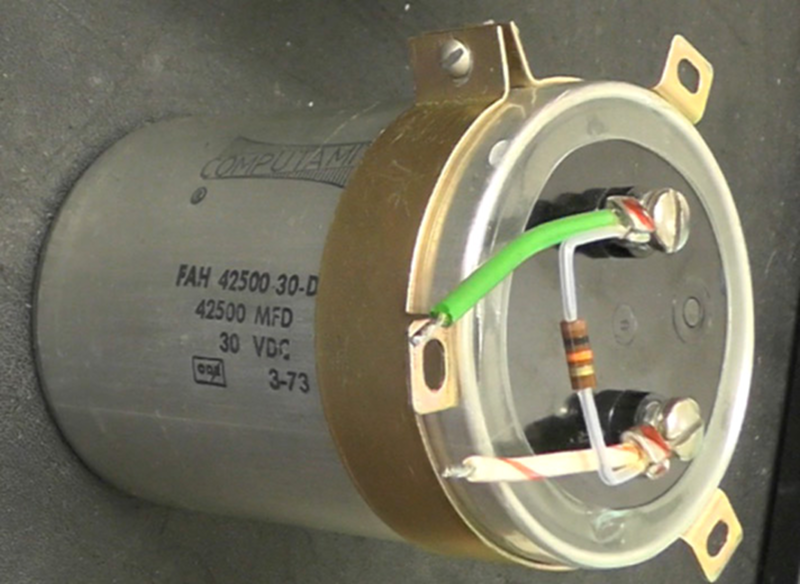
Electrolytic capacitor repair sounds like something whispered in the back corner of an electronics lab, usually beside a soldering iron, a multimeter, and one suspiciously puffy little cylinder. In reality, it is one of the most common repairs in power supplies, monitors, amplifiers, vintage radios, game consoles, computer motherboards, audio equipment, and household electronics. When an electrolytic capacitor fails, a device may refuse to start, flicker, buzz, hum, reboot randomly, or behave like it had one too many cups of gas-station coffee.
The good news is that many capacitor problems are diagnosable and repairable. The less glamorous news is that capacitors can store dangerous voltage, especially in mains-powered equipment, power supplies, flash circuits, tube amplifiers, microwave ovens, and large motor controllers. So yes, electrolytic capacitor repair can be satisfying. It can also bite. The goal is not to be brave; the goal is to be careful, methodical, and boringly safe. Boringly safe is how electronics repair people keep all ten fingers and continue judging bad solder joints in peace.
This guide explains what electrolytic capacitors do, why they fail, how to identify bad ones, how to select replacements, and how to perform a clean repair. It also includes practical repair experiences to help you avoid common mistakes that turn a five-dollar component swap into a tiny electrical soap opera.
What Is an Electrolytic Capacitor?
An electrolytic capacitor is a polarized capacitor commonly used when a circuit needs relatively high capacitance in a small package. You will often find them smoothing voltage in power supplies, filtering ripple, supporting voltage regulators, coupling audio signals, storing energy, or helping a circuit ride through brief load changes. They are usually cylindrical, marked with capacitance in microfarads, a voltage rating, a temperature rating, and a polarity stripe showing the negative lead.
The word “electrolytic” matters because the capacitor uses an electrolyte as part of its internal structure. That design provides a lot of capacitance for the size, but it also gives the part a limited life. Over time, heat, ripple current, humidity, poor storage conditions, excessive voltage, reverse polarity, and ordinary aging can reduce capacitance, increase equivalent series resistance, increase leakage current, or cause visible swelling and venting.
Common Signs of a Bad Electrolytic Capacitor
Some bad capacitors announce themselves like a cartoon villain. Others fail quietly and force you to do actual troubleshooting, which is rude but common.
Visible Symptoms
The most obvious signs include a bulging top, split vent, leaking brown or black residue, shrunken sleeve, tilted body, corrosion around the leads, or a base pushed upward from internal pressure. A healthy aluminum electrolytic capacitor usually has a flat top. If the top looks like a tiny soda can left in the sun, treat it as suspect.
Electrical Symptoms
A failing electrolytic capacitor may cause power supply ripple, startup failure, unstable voltage, audio hum, distorted sound, screen flickering, random resets, weak motor starting, overheating regulators, or intermittent operation. In switching power supplies, high ESR can be especially troublesome because the capacitor may still measure close to its rated capacitance but behave poorly under load.
Device-Level Clues
In a monitor, bad capacitors may create blinking power lights or delayed startup. In an amplifier, they may cause hum or weak bass response. In a router or modem, they may trigger random reboots. In a vintage radio, they may produce noise, low volume, or transformer stress. In a motherboard, they may cause boot loops or instability. The capacitor is small, but its drama budget is enormous.
Safety First: Before Touching the Board
Before any electrolytic capacitor repair, unplug the device and give it time to discharge. Do not assume that “off” means safe. Large capacitors can hold a charge after power is removed. A power supply capacitor charged to high voltage does not care that you watched three repair videos and feel emotionally prepared.
Use a proper discharge resistor or discharge tool, and verify with a multimeter. Avoid shorting capacitor terminals with a screwdriver. It may create sparks, damage the capacitor, damage the circuit board, or surprise you into dropping the tool into something expensive. For large capacitors or equipment connected directly to mains voltage, use rated tools, insulated probes, eye protection, and safe work habits. If you are not trained to work on high-voltage electronics, do not practice on high-voltage electronics.
Tools Needed for Electrolytic Capacitor Repair
For basic through-hole capacitor replacement, useful tools include a temperature-controlled soldering iron, solder, flux, desoldering braid or a solder pump, side cutters, needle-nose pliers, isopropyl alcohol, cotton swabs, a multimeter, and preferably an ESR meter or component tester. For surface-mount capacitors, hot air, tweezers, solder paste, and magnification may help.
Flux deserves special praise. It is the tiny invisible assistant that makes solder flow nicely instead of forming dull little metal potatoes. Use it. Clean the residue afterward when appropriate, especially in sensitive or high-impedance circuits.
How to Diagnose a Faulty Electrolytic Capacitor
Step 1: Inspect the Board
Look for bulging tops, leakage, burnt areas, cracked solder joints, lifted pads, damaged traces, and overheated components nearby. A failed capacitor may be the victim, not the original criminal. For example, a failed rectifier, overloaded voltage regulator, or blocked cooling vent may overheat capacitors until they quit their job and leave dramatically.
Step 2: Check Capacitance
A capacitance meter can show whether the capacitor has drifted far from its nominal value. Many electrolytic capacitors have a wide tolerance, often around plus or minus 20 percent, so a slight difference is not automatically a failure. But a 470uF capacitor measuring like a 20uF capacitor is not “aging gracefully.” It is applying for retirement.
Step 3: Check ESR
Equivalent series resistance, or ESR, is one of the most important capacitor health indicators. ESR is the small internal resistance that wastes energy as heat and affects how well the capacitor handles ripple current. A capacitor can look fine and still have high ESR. In power supply repair, an ESR meter can save hours because it reveals failures that a simple capacitance test may miss.
Step 4: Check Leakage and Short Circuits
Some capacitors fail by leaking too much current internally. Others fail shorted. A shorted capacitor can pull down a supply rail, blow fuses, overheat resistors, or stop a device from powering up. Leakage testing usually requires controlled voltage and appropriate equipment, so do not improvise with unsafe test setups.
Choosing the Correct Replacement Capacitor
Capacitor replacement is not just “same color, same size, good luck.” The markings on the original part are your starting point, but the circuit’s needs matter too. In a repair, you want a replacement that meets or exceeds the important ratings without creating fit, stability, or reliability problems.
Match the Capacitance
Capacitance is usually printed in microfarads, such as 10uF, 47uF, 470uF, or 2200uF. In most repairs, choose the same capacitance value unless you have a schematic or engineering reason to change it. A slightly higher value may sometimes work in bulk filtering, but it can affect startup current, regulator stability, timing circuits, or audio response. When in doubt, match the original.
Use an Equal or Higher Voltage Rating
The voltage rating is the maximum DC voltage the capacitor is designed to withstand. Replacing a 16V capacitor with another 16V capacitor is standard. Replacing it with a 25V or 35V part may be fine if it physically fits and has suitable ESR and ripple ratings. Replacing it with a lower voltage rating is generally a bad idea unless the circuit has been carefully evaluated. Capacitors do not enjoy being asked to hold more voltage than they were built for; they tend to respond with heat, leakage, swelling, or a memorable pop.
Respect Polarity
Most aluminum electrolytic capacitors are polarized. The negative side is usually marked by a stripe on the body, and the circuit board often marks positive or negative pads. Install the capacitor backward and you may get overheating, leakage, venting, or failure. In some circuits, a reverse-installed capacitor can fail quickly and dramatically. Before removing the old part, take a photo. Then take another photo. Future you will be grateful.
Check Temperature Rating
Common temperature ratings include 85°C and 105°C. For power supplies, monitors, LED drivers, automotive electronics, and hot enclosures, a 105°C capacitor is usually preferred. Heat is one of the main enemies of electrolytic capacitors. A part near a heatsink, transformer, rectifier, or power resistor lives a harder life than one relaxing in a cool corner of the board.
Check ESR and Ripple Current
Ripple current is the AC component that flows through the capacitor during operation. It creates internal heating, and the capacitor must be rated to handle it. Low ESR capacitors are often used in switching power supplies and motherboard voltage regulation circuits. However, “lowest ESR possible” is not always the right answer. Some regulators require a certain ESR range for stability. If the original capacitor is part of a feedback-sensitive regulator circuit, choose a replacement with similar electrical behavior or consult the datasheet.
Check Size, Lead Spacing, and Package Style
The replacement must fit the board. Check diameter, height, lead spacing, and clearance from covers or heatsinks. A taller capacitor may fit electrically but prevent the case from closing, which is the electronics repair version of buying shoes that are technically your size but spiritually wrong.
Step-by-Step Electrolytic Capacitor Repair
1. Document the Original Part
Before desoldering, record the capacitance, voltage rating, temperature rating, polarity, manufacturer series if visible, and board location. Take clear photos. Mark the negative side on the board if the silkscreen is confusing.
2. Discharge and Verify
Use a proper discharge method and verify voltage with a multimeter. For high-voltage capacitors, confirm the voltage is near zero before touching the circuit. Do not skip this step because the device “has been unplugged for a while.” Time is not a safety tool; measurement is.
3. Remove the Old Capacitor
Heat one lead and gently rock the capacitor, or desolder both leads with a pump or braid. Add fresh solder if the old solder is stubborn; fresh solder can improve heat transfer. Avoid pulling hard because you can lift pads or damage plated-through holes. The capacitor should leave the board politely, not like a tooth extraction in a pirate movie.
4. Clean the Area
If the capacitor leaked, clean the board carefully with isopropyl alcohol. Electrolyte residue can be conductive or corrosive. Inspect nearby traces and component leads for damage. If leakage has eaten copper, repair the trace before installing the replacement.
5. Install the New Capacitor
Insert the new capacitor with the correct polarity. Seat it close to the board, but avoid forcing it. Slight clearance can help airflow and reduce mechanical stress. Bend the leads slightly to hold it in place, solder cleanly, and trim the excess leads.
6. Inspect the Solder Joints
A good solder joint is shiny or smooth, properly wetted to the pad and lead, and not blobbed across neighboring pads. Look for bridges, cold joints, cracked pads, and leftover debris. Many “new capacitor failed” stories are really “bad solder joint joined the party” stories.
7. Power Up Safely
For unknown or high-risk repairs, use a current-limited bench supply, isolation transformer where appropriate, or a dim-bulb tester for mains-powered gear. Watch for smoke, heat, unusual sounds, or repeated fuse blowing. Confirm output voltages and ripple under load if possible.
When Not to Repair a Capacitor
Sometimes the safest repair is replacement of the entire board or device. Do not attempt capacitor repair on microwave oven high-voltage sections, CRT displays, large motor drives, photovoltaic inverters, or high-energy industrial systems unless you are properly trained. Some equipment contains capacitors that can deliver dangerous or lethal energy. The internet may be brave, but your nervous system prefers caution.
Also avoid replacing capacitors blindly when there are signs of major damage, such as charred boards, exploded semiconductors, cracked transformers, severe corrosion, or repeated failures after replacement. A capacitor may fail because another component is forcing it beyond its ratings. Repair the cause, not just the symptom.
Special Cases in Electrolytic Capacitor Repair
Vintage Electronics
Vintage radios, amplifiers, and test equipment often need “recapping,” which means replacing aged electrolytic capacitors. Old electrolytics may dry out, leak, or develop high leakage current. In vintage work, originality and safety must be balanced. Some restorers hide modern capacitors inside old capacitor cans to preserve appearance, while others prioritize serviceability and reliability.
Computer Motherboards
Motherboards and graphics cards often use low-ESR electrolytic or polymer capacitors. Replacement requires careful matching because voltage regulator circuits operate at high frequency and high ripple current. A general-purpose capacitor from a junk drawer may not survive or may create instability.
Audio Equipment
In audio circuits, capacitors can affect hum, noise, coupling, and tone. Power supply filter capacitors should be chosen for ripple current and voltage rating. Signal-path capacitors may require attention to leakage, tolerance, and physical layout. Replacing every capacitor with a fashionable boutique part is not automatically an upgrade; sometimes it is just expensive confetti.
Power Supplies
Power supplies are where electrolytic capacitors work hard. Heat, ripple current, and limited airflow shorten life. When repairing a failed power supply, check capacitors near hot components first. Replace with high-quality parts rated for the job, preferably from reputable brands and reliable distributors.
Common Mistakes to Avoid
The first mistake is ignoring safety. The second is installing the capacitor backward. The third is replacing a low-ESR capacitor with a random general-purpose part. The fourth is choosing a lower voltage rating because “it was in the drawer.” The fifth is failing to clean leakage damage. The sixth is assuming every capacitor is bad because one looks suspicious. Troubleshooting works best when suspicion and measurement shake hands.
Another common error is replacing only the obviously bulging capacitor in a group of identical capacitors exposed to the same heat. If one capacitor in a power supply output section has failed, its neighbors may be tired too. Replacing a set of related capacitors can be more reliable than replacing one and reopening the device two weeks later, muttering at yourself like a disappointed coach.
Practical Experiences From Electrolytic Capacitor Repair
One of the most useful lessons in electrolytic capacitor repair is that appearance is helpful but not final. I have seen capacitors with perfectly flat tops that measured terrible ESR, and I have seen slightly ugly capacitors that were still electrically acceptable. The board tells a story, but meters provide the footnotes. When a device has unstable startup, clicking power supply noises, or random resets, testing ESR often reveals the hidden culprit.
Another experience: take photos before removing anything. This sounds obvious until you are staring at two empty pads, a capacitor in your hand, and a board marking that looks like it was designed by a raccoon with a label printer. Some boards mark the positive pad, others mark the negative pad, and some are simply confusing. A phone photo can prevent backward installation and save a second repair session.
Heat is often the real villain. In many consumer power supplies, electrolytic capacitors sit near heatsinks or resistors because the board layout had limited space. After years of operation, the capacitor dries out and ESR rises. The device may still work when cold but fail after warming up, or it may need several attempts to start. Replacing the capacitor fixes the symptom, but improving airflow, removing dust, and keeping the replacement away from hot surfaces when possible can extend the repair’s life.
Quality of replacement parts also matters. Cheap no-name capacitors may work briefly, but in power supplies they often fail sooner than reputable low-ESR, high-temperature parts. Buying from reliable distributors reduces the chance of counterfeit or poorly stored components. A capacitor costs little compared with the time required to reopen a device, desolder the same pads again, and explain to yourself why you saved twenty cents like a tiny financial genius.
Good soldering technique is just as important as component selection. Old boards can have fragile pads, especially after heat exposure. Use enough heat to flow solder quickly, but do not cook the board. Add flux, use clean tips, and avoid yanking parts before solder is fully molten. If a pad lifts, repair becomes more complicated. Patience is cheaper than trace repair.
Finally, do not stop troubleshooting too early. A failed capacitor may have been damaged by a bad diode, overloaded regulator, shorted load, or excessive ripple current. After replacing capacitors, measure the output voltage and check for overheating. If the new capacitor gets hot quickly, something else is wrong. Successful electrolytic capacitor repair is not just changing a part; it is restoring the circuit to conditions where the new part can live a normal, boring, uneventful life. In electronics, boring is beautiful.
Conclusion
Electrolytic capacitor repair is one of the most practical skills in electronics repair because these parts age, heat up, dry out, leak, and sometimes fail in very visible ways. A careful repair can bring dead power supplies, noisy amplifiers, flickering monitors, and unstable devices back to life. The key is to work safely, diagnose intelligently, choose the correct replacement, respect polarity, match important ratings, and inspect your soldering like a tiny quality-control dragon.
For beginners, capacitor repair is a great doorway into electronics troubleshooting. For experienced technicians, it remains a daily reminder that small components can create big problems. Treat capacitors with respect, use proper tools, and never underestimate the power of one tired little cylinder to ruin an otherwise perfectly good afternoon.
Note: This article is for educational purposes. Always discharge capacitors safely, verify voltage with a meter, and avoid high-voltage equipment unless you have proper training and tools.