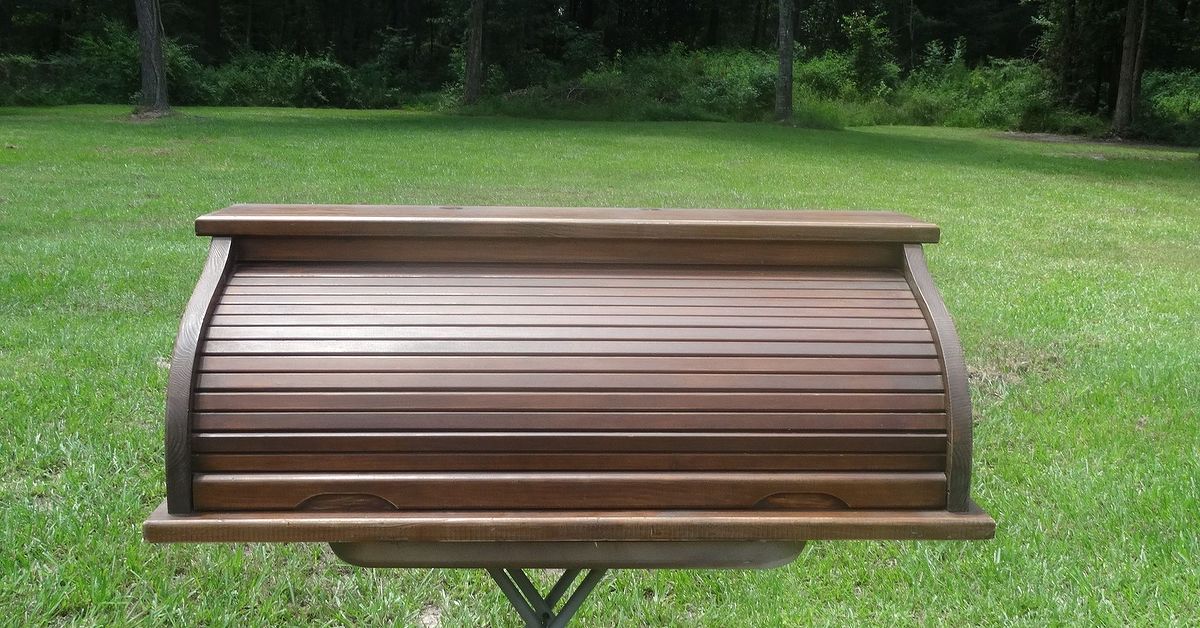
Some furniture grows up to become respectable. Some becomes “vintage.” And some lucky little pieces get a second life covered in potting soil, seed packets, tiny clay pots, and the occasional runaway beetle. A child’s roll top desk is one of those charming, slightly mysterious pieces that practically begs for a makeover. It has cubbies, drawers, a work surface, and that delightful tambour door that slides down like it is hiding classified garden secrets. In other words, it already has the soul of a miniature potting shed.
Turning a child’s roll top desk into a countertop potting shed is a clever upcycling project for gardeners, DIY decorators, apartment dwellers, and anyone who has ever looked at an old desk and thought, “You are too cute to throw away, but I have absolutely no idea where to put you.” Instead of letting it collect dust in a garage, you can transform it into a compact garden workstation for seed starting, repotting houseplants, organizing tools, storing plant labels, and making your porch look like it belongs in a magazine spread titled People Who Have Their Lives Together, Probably.
This guide walks through the design concept, preparation, refinishing, layout ideas, storage tricks, safety considerations, and practical gardening uses behind the project. The goal is simple: create a countertop potting shed that is functional, adorable, durable, and not secretly waiting to collapse under a bag of potting mix.
Why a Child’s Roll Top Desk Makes a Surprisingly Great Potting Station
A standard potting bench is wonderful, but not every home has room for a full outdoor workstation. A child’s roll top desk solves that problem with a smaller footprint and built-in organization. The top section often includes little compartments that can hold seed packets, plant tags, twine, small scissors, gloves, and hand tools. The desktop becomes a tidy work surface for filling seed trays or repotting succulents. The drawers can store extra saucers, plant food, nursery markers, mister bottles, or the mysterious collection of plastic pots that every gardener swears they will reuse “soon.”
The roll top feature is the real star. When the tambour door works properly, it can cover the inner cubbies and give the whole piece a finished look. One minute it is a working garden station; the next it is a neat countertop display. That is a rare talent. Most garden workspaces simply announce, “Yes, I have dirt under my fingernails and no, I will not apologize.”
Planning the Countertop Potting Shed Design
Start with the desk’s condition
Before painting anything sage green and calling it a cottagecore victory, inspect the desk carefully. Check whether the legs, drawers, back panel, desktop, and roll top are solid. Wiggle the joints. Open and close the tambour door. Look for loose veneer, cracks, missing knobs, mildew, deep scratches, old chewing gum, or suspicious glitter from a craft project in 1998. A small amount of wear gives character. Structural wobble gives headaches.
If the desk will sit on a porch, patio, mudroom counter, greenhouse shelf, or covered outdoor area, think about moisture. Wood furniture designed for indoor use needs protection before it becomes a garden station. Even if the desk stays inside near a sunny window, potting work brings water, soil, humidity, and fertilizer into the picture. The finish should be easy to wipe clean and strong enough to handle regular use.
Decide how “potting shed” you want it to be
There are two main directions for this DIY potting shed idea. The first is decorative and light-duty: a charming station for seed packets, small houseplants, herbs, and garden accessories. The second is more practical: a working countertop potting shed used for soil mixing, transplanting, cuttings, and tool storage. Both are valid. One wears a straw hat and drinks lemonade. The other has compost under its nails and knows where the pruning shears are.
For a decorative version, focus on paint color, labels, small containers, hooks, and display styling. For a hardworking version, add a washable surface, stronger drawer bottoms, water-resistant finish, removable trays, and maybe a thin metal or plastic mat on the worktop. The best version usually blends both: pretty enough for guests, useful enough for actual plants.
Supplies and Materials for the Makeover
You do not need a professional workshop to convert a child’s roll top desk into a countertop potting shed. Most projects can be done with basic tools and careful prep. Helpful supplies include mild cleaner, rags, sandpaper, wood filler, primer, exterior-grade or durable interior paint, a protective topcoat, painter’s tape, a screwdriver, new knobs or pulls, small hooks, labels, bins, baskets, and a work surface protector.
If the desk is older, especially if it may have been painted before 1978, treat the finish with caution. Old paint can contain lead, and sanding it casually is not a cute DIY moment; it is a health hazard in overalls. Use a lead test kit or consult a professional if you are unsure. When working with unknown old finishes, avoid aggressive dry sanding, work in a well-ventilated area, contain dust, wear appropriate protection, and follow lead-safe renovation practices. Safety is not the glamorous part of upcycling, but neither is breathing mystery dust from Grandpa’s attic.
Step-by-Step: Turning the Desk into a Countertop Potting Shed
Step 1: Clean every corner
Start with a deep clean. Remove drawers, knobs, loose liners, old stickers, and anything hiding in the cubbies. Vacuum the inside compartments and wipe the piece with a gentle cleaner. Garden projects need clean surfaces because paint and sealers do not bond well to dust, wax, grease, or whatever sticky substance children apparently manufacture with their elbows.
Let the desk dry completely before moving on. Moisture trapped under primer or paint can cause peeling later. If the piece smells musty, leave it in a dry, ventilated place for a few days and wipe interior surfaces with an appropriate cleaner. A potting shed should smell faintly of herbs and soil, not basement goblin.
Step 2: Repair the structure
Tighten screws, glue loose joints, fill small holes, and reinforce weak drawer bottoms if needed. If the back panel is thin or damaged, replace it with a sturdier board. If the desk will sit on a countertop, add felt pads or rubber feet to protect the surface below. If it will be placed where children may climb or pull on it, make sure it is stable and consider securing it appropriately. Top-heavy furniture and curious kids are not a charming combination.
The desktop is the main work area, so give it extra attention. If it is warped or deeply damaged, cover it with a removable plastic tray, a galvanized metal sheet, peel-and-stick waterproof liner, or a custom-cut acrylic panel. A protected surface makes soil cleanup much easier and prevents water rings from becoming permanent little crop circles.
Step 3: Sand lightly and prime properly
Once the desk is clean and repaired, scuff-sand glossy areas so primer can grip. You are not trying to remove every trace of the old finish. You are creating a slightly toothy surface. Think “polite texture,” not “archaeological excavation.” Wipe away dust thoroughly with a damp cloth or tack cloth.
Primer matters, especially if the desk has dark stain, slick varnish, or mixed materials. A quality bonding primer helps paint adhere and blocks stains from bleeding through. For a garden-themed makeover, primer is the boring friend who makes sure the fun friend actually gets home safely.
Step 4: Paint with personality
Color is where the project starts to feel magical. Soft green, creamy white, warm gray, muted blue, clay pink, and buttery yellow all work beautifully for a countertop potting shed. A darker color on the outside with a lighter interior can make the cubbies pop. For a farmhouse look, choose white or sage with simple black hardware. For a vintage garden style, try moss green with brass knobs. For a cheerful kid-desk-turned-garden-station twist, paint the interior cubbies in different soft shades like seed packets lined up in a drawer.
Use thin coats rather than one gloopy coat. Gloopy paint is how furniture starts looking like it was frosted by an impatient cupcake decorator. Let each coat dry according to the product instructions, then add another as needed. For the roll top, keep paint thin around the sliding tracks so the tambour door still moves. Paint buildup can jam the roll top faster than a toddler hiding crackers in a DVD player.
Step 5: Seal the finish
Because this piece will be used around soil and water, add a durable protective topcoat once the paint cures. Choose a finish appropriate for your paint type and location. For a covered porch or indoor gardening area, a water-based polyurethane or clear protective furniture topcoat may work well. For outdoor exposure, use products designed for exterior use. Pay special attention to the desktop, drawer fronts, lower edges, and any area likely to catch drips.
Even with a protective finish, this is not the piece to abandon in a thunderstorm unless you enjoy furniture with the texture of oatmeal. A converted roll top desk is best used in a covered area: a porch, sunroom, mudroom, garden shed, greenhouse, garage workstation, or kitchen-adjacent plant corner.
Smart Storage Ideas for the Mini Potting Shed
Use cubbies for seed packets and labels
The small compartments inside a roll top desk are perfect for seed organization. Sort packets by planting season, plant type, or level of optimism. Tomatoes, herbs, flowers, greens, and “things I bought because the packet was pretty” can each get a slot. Small envelopes or dividers keep packets upright and easy to browse.
Plant labels also fit nicely in cubbies. Store wooden markers, chalkboard stakes, waterproof tags, and permanent garden markers together. Nothing humbles a gardener faster than planting six identical green seedlings and realizing the labels vanished. Is it basil? Is it peppers? Is it an emotional support weed? Nobody knows.
Add hooks for tools and twine
Small screw-in hooks can hold hand trowels, mini pruners, scissors, twine, measuring tape, or a small brush. Install hooks along the side panels or inside the upper compartment if the roll top has enough clearance. A tension rod or dowel can also hold spools of twine or ribbon for tying plants and wrapping garden gifts.
Keep frequently used tools visible but not crowded. The point of a countertop potting shed is convenience, not creating a tiny hardware store having a nervous breakdown.
Use drawers for the messy stuff
Drawers are ideal for gloves, seed-starting trays, plant clips, moisture meters, spare nursery pots, small bags of plant food, and folded potting mats. Add washable drawer liners to catch dirt. Clear containers or small baskets prevent everything from sliding into one chaotic garden soup.
If you store fertilizers or plant treatments, keep them sealed, labeled, and away from children and pets. A pretty potting station should still follow basic household safety. Charming does not mean careless.
Creating a Practical Potting Work Surface
A good potting surface should be easy to clean, water-resistant, and large enough for small projects. Since a child’s desk is compact, use smart add-ons. A removable tray can hold soil while you transplant seedlings. A flexible potting mat with raised edges helps contain mess. A shallow bin can become a mini soil-mixing station. Keep a small brush and dustpan nearby for cleanup.
For container gardening, drainage and potting mix matter. Use containers with adequate drainage holes, choose a lightweight potting mix for pots and seed trays, and match plants to the available light. Herbs such as basil, parsley, thyme, mint, and chives are excellent candidates for a small potting station because they are useful, fragrant, and generally less dramatic than fiddle-leaf figs, which behave like Victorian poets with root balls.
Decorating the Countertop Potting Shed
Give it a garden personality
Once the functional pieces are in place, style the desk like a tiny garden shop. Add terracotta pots, seed tins, a small watering can, vintage-style labels, pressed flower art, or a cheerful sign. A small clip-on grow light can make the station more useful indoors, especially for seedlings or herbs near a window with limited sun.
For a more polished look, repeat materials. Use all terracotta pots, all galvanized containers, or all woven baskets. Repetition calms the design and keeps the small space from looking cluttered. A child’s roll top desk already has lots of lines and compartments, so simple styling helps it breathe.
Try a seasonal rotation
In spring, fill the cubbies with seeds, peat-free starter pots, plant markers, and labels. In summer, use the station for herb harvesting, flower arranging, and repotting. In fall, store bulbs, garden twine, gloves, and seed-saving envelopes. In winter, turn it into a houseplant care center with a mister, microfiber cloth, small scissors, and rooting jars. This little potting shed can earn its keep all year long.
Best Places to Use a Countertop Potting Shed
This project works especially well in small spaces. Place it on a sturdy counter in a mudroom, laundry room, enclosed porch, greenhouse, garage, covered patio, or garden shed. It can also sit on a buffet, console table, workbench, or outdoor cabinet if the base is stable and protected from weather.
Apartment gardeners can use it as a balcony prep station, provided it stays dry and secure. Houseplant lovers can set it near a bright window and use it to store potting mix, cachepots, plant food, and propagation supplies. If you sell seedlings, herbs, or cut flowers at a small local market, it can become a charming display piece. Nothing says “buy my basil” like a tiny roll top desk living its best botanical life.
Common Mistakes to Avoid
Skipping surface protection
Paint alone is usually not enough for a working potting surface. Soil is gritty, water finds every weakness, and terra-cotta pots can scratch painted desktops. Add a topcoat and use a removable mat or tray during messy jobs. Your future self will thank you while not scraping dried potting mix out of a drawer seam with a butter knife.
Overloading the desk
A child’s desk was not designed to hold giant bags of soil, ceramic planters the size of soup cauldrons, or a full watering can perched on the roll top. Store heavy items below the counter or on a separate shelf. Use the desk for small tools, seeds, labels, lightweight pots, and compact supplies.
Forgetting ventilation and drying time
Paint, primer, glue, and sealers need proper drying and curing time. Follow label directions and avoid rushing the process. A finish may feel dry to the touch before it is ready for heavy use. Give it time to harden before introducing trays, pots, water, and the full emotional intensity of gardening season.
Experience Addendum: What This Project Feels Like in Real Life
The first thing you learn when turning a child’s roll top desk into a countertop potting shed is that small furniture has big opinions. It may look innocent at the thrift store, sitting there like a tiny secretary from a storybook. Then you get it home and discover one drawer sticks, the roll top sounds like a wooden xylophone falling down stairs, and someone once decorated the underside with permanent marker hieroglyphics. This is not a problem. This is the project introducing itself.
In practice, the most satisfying part is cleaning out the cubbies and imagining what each little compartment will become. One slot for lettuce seeds. One for herb packets. One for plant labels. One for those tiny clothespins you bought for no clear reason but now suddenly seem essential. A roll top desk gives organization a sense of ceremony. Sliding the top open feels like opening a miniature garden command center. Sliding it closed feels like hiding the evidence after a very productive soil incident.
The most important lesson is to protect the worktop more than you think you need to. At first, you may promise yourself you will be careful. You will use a tray every time. You will wipe spills immediately. You will never overwater a basil seedling while holding a mug of coffee and answering a text. These are beautiful dreams. Gardening laughs at them. A clear acrylic sheet, removable potting mat, or metal tray turns the desk from “precious makeover” into “usable workstation.” That one choice makes the whole project less stressful.
Another real-world tip: do not overdecorate the station on day one. It is tempting to add a sign, twelve pots, three baskets, fairy lights, vintage scissors, botanical prints, and a watering can that is mostly decorative because it pours like a confused teapot. Start with the tools you actually use. Let the display grow naturally. The best potting stations look collected, not attacked by a craft aisle.
Over time, the countertop potting shed becomes more than storage. It becomes a little ritual space. You open it before planting seeds. You tuck away empty packets after the first sprouts appear. You keep your favorite gloves in the same drawer. You learn which cubby holds the good marker and which one contains the marker that died during the Great Tomato Labeling Event. The desk becomes part of the gardening rhythm.
The charm of this makeover is not perfection. A few brush marks, a nicked corner, or a drawer that needs a gentle tug can make the piece feel loved instead of showroom-stiff. After all, a potting shed should be useful. It should collect a little dust, a little soil, and a few stories. When a child’s roll top desk becomes a countertop potting shed, it keeps its playful spirit while gaining a practical new job. That is the heart of good upcycling: not just saving an old thing, but giving it a better reason to stay.
Conclusion
Transforming a child’s roll top desk into a countertop potting shed is the kind of DIY project that checks every satisfying box. It rescues old furniture, solves small-space garden storage, adds personality to a porch or mudroom, and creates a practical workstation for seeds, herbs, houseplants, and seasonal gardening tasks. With careful cleaning, light repairs, smart paint choices, proper sealing, and thoughtful organization, a forgotten little desk can become one of the most useful and charming pieces in your home garden setup.
The key is to respect both sides of the project: furniture and gardening. The desk needs stability, moisture protection, and a finish that can handle real use. The garden side needs drainage-friendly containers, organized supplies, clean tools, and a work surface that welcomes dirt without becoming permanently dirty. Put those together, and you get a compact potting shed with character, convenience, and just enough whimsy to make repotting a spider plant feel like a lifestyle choice.
Note: This article synthesizes real-world DIY furniture refinishing, potting bench design, container gardening, tool-care, and household safety guidance from reputable U.S. home improvement, government, and university extension resources. It is written as original web-publishing content without source-code citations or unnecessary reference markers.