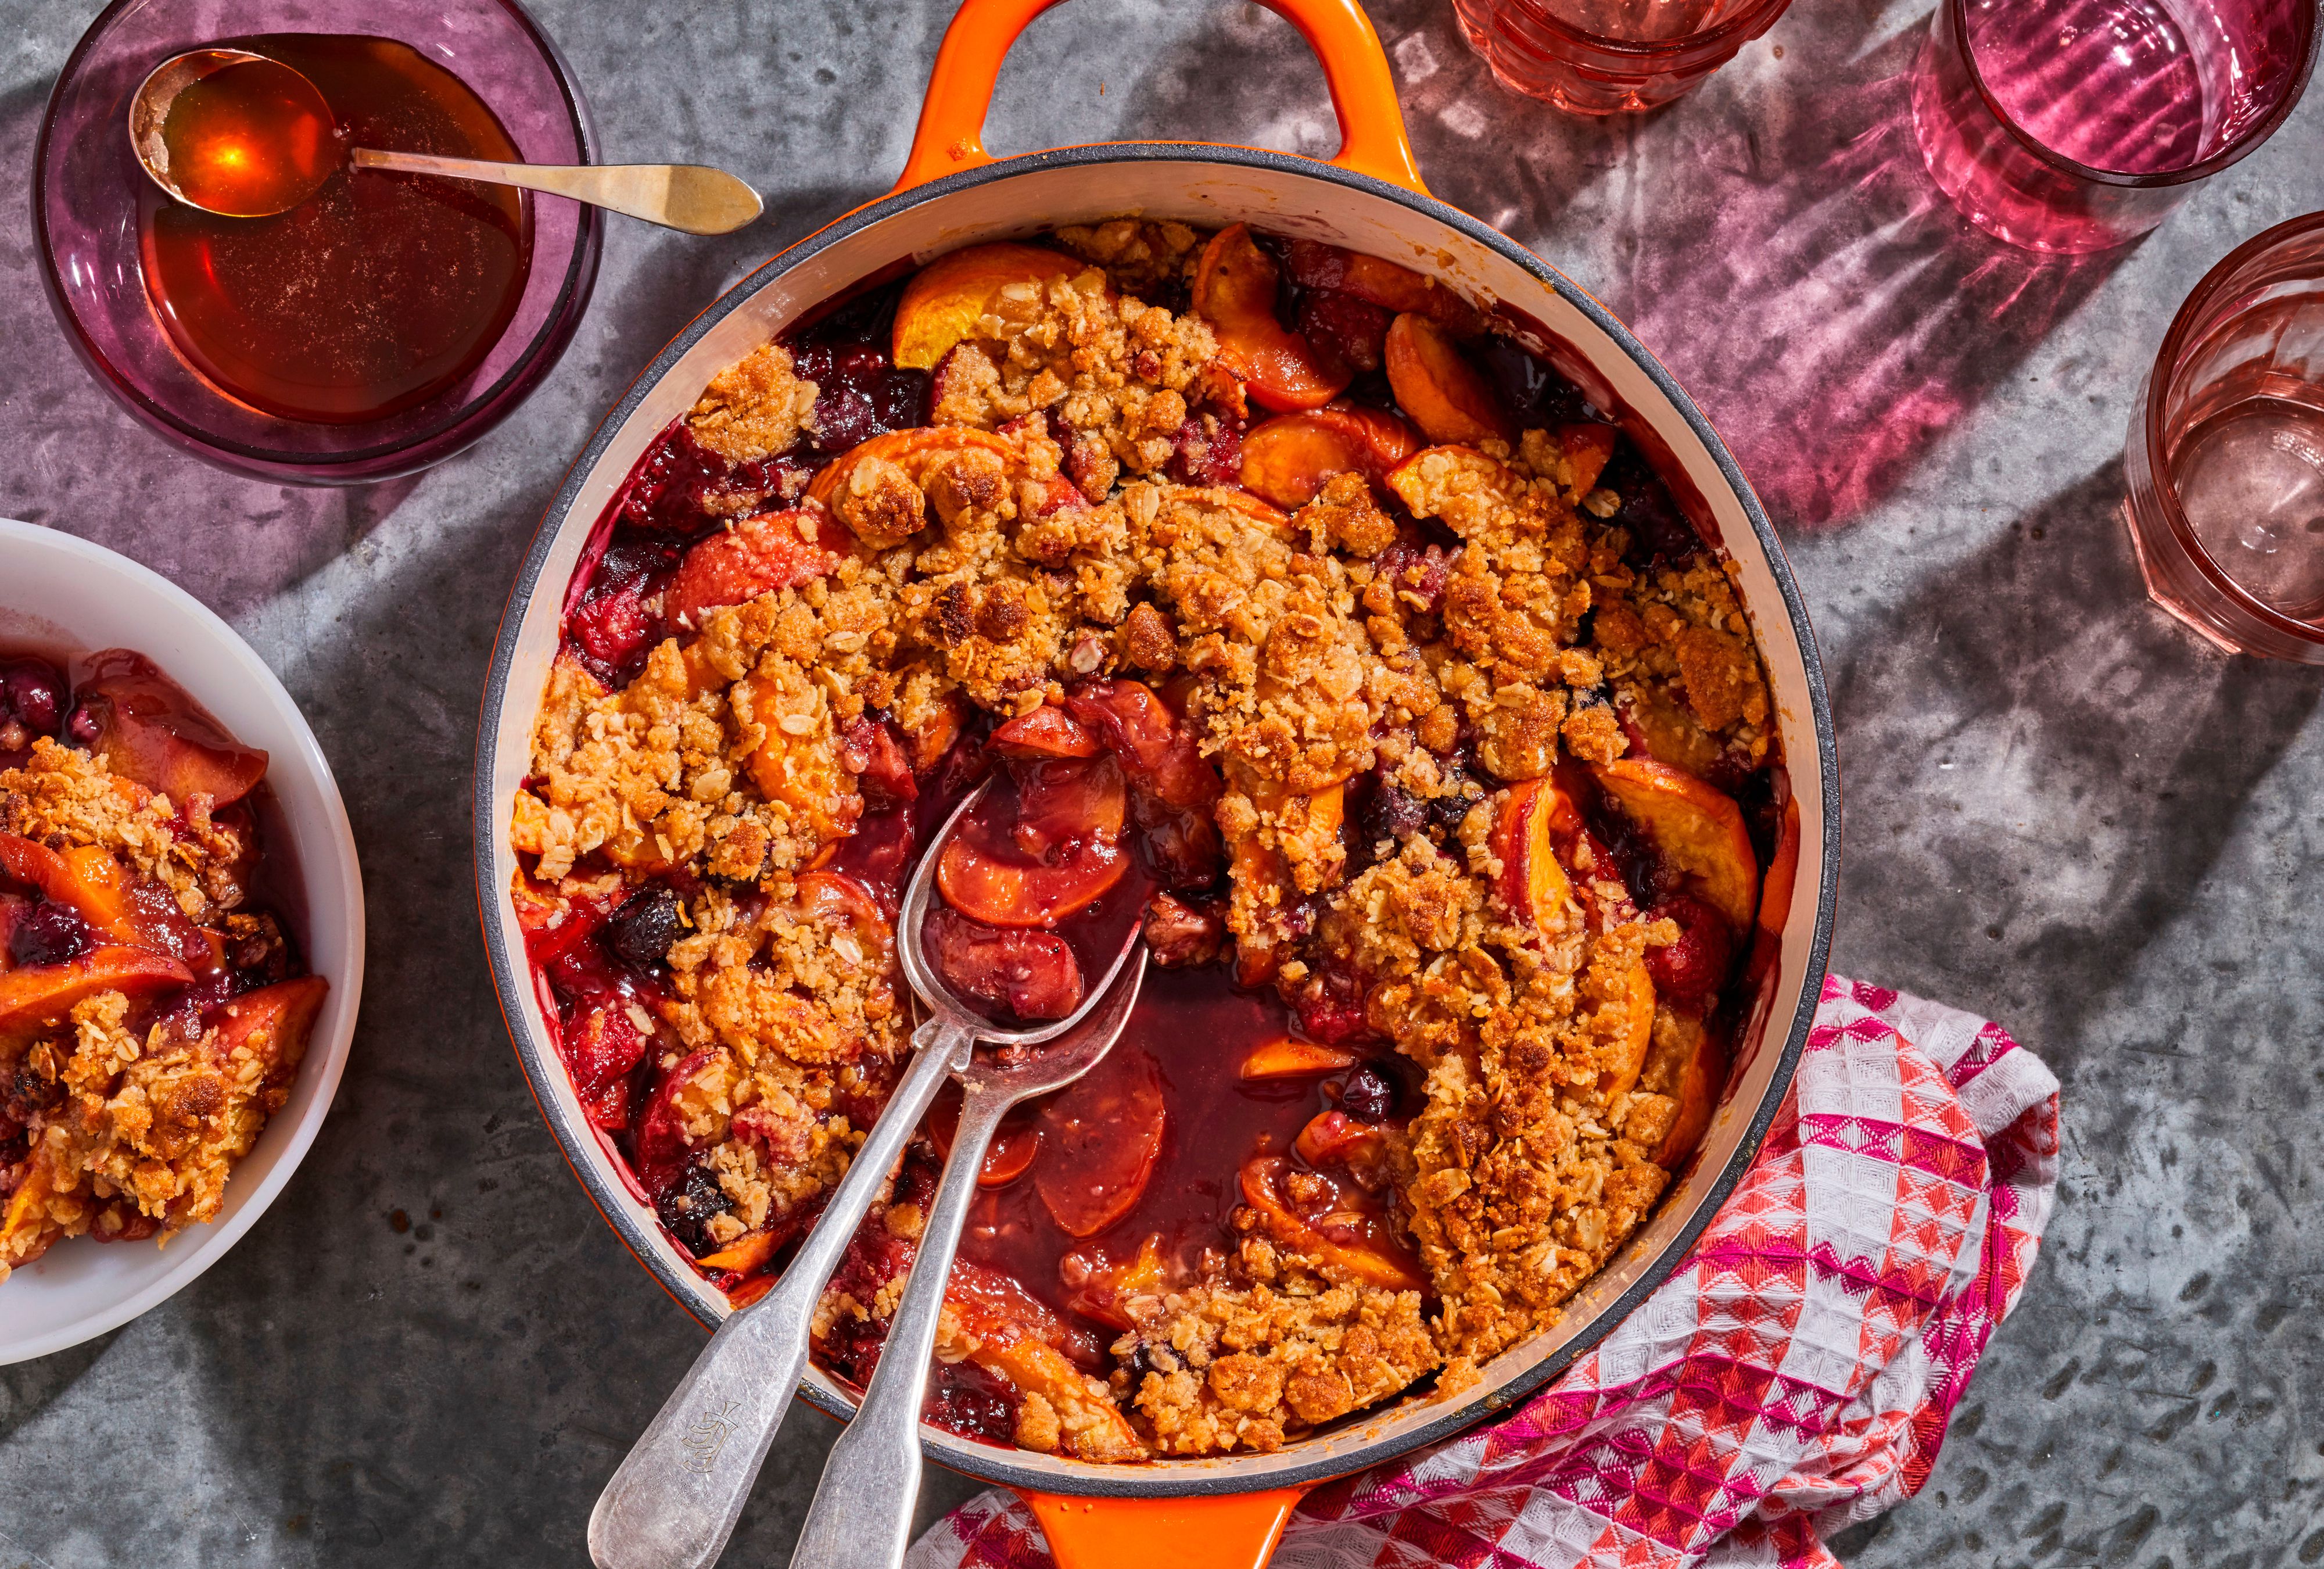
If a pie walked into the kitchen wearing sweatpants, it would be a fruit crisp. Cozy, forgiving, golden on top, bubbling underneath, and not the least bit interested in being fussy. This fruit crisp recipe is the dessert you make when you want something homemade, warm, and impressive without negotiating with pie dough like it owes you money.
The beauty of a classic fruit crisp is flexibility. Apples, peaches, berries, cherries, pears, plums, nectarines, or a mix of “please use me before I become compost” fruit can all work beautifully. The filling turns soft and jammy while the oat topping bakes into buttery, cinnamon-scented crumbs. Serve it warm with vanilla ice cream and suddenly everyone at the table becomes suspiciously quiet. That is not awkwardness. That is dessert doing its job.
This guide gives you a reliable base recipe, smart fruit combinations, topping tips, troubleshooting advice, storage notes, and real kitchen experience so your crisp comes out golden, juicy, and spoon-worthy every time.
What Is a Fruit Crisp?
A fruit crisp is a baked fruit dessert topped with a crumbly mixture usually made from oats, flour, sugar, butter, salt, and warm spices. Unlike a cobbler, which often has a biscuit-like or cake-like topping, a crisp has a looser, crunchier oat topping. Unlike pie, it does not require rolling, chilling, crimping, or pretending you know what “blind bake” means before your coffee kicks in.
The best fruit crisp has three key parts: tender fruit, a lightly thickened syrupy filling, and a topping that is crisp on the surface but slightly soft where it meets the fruit. That contrast is what makes it so addictive. One spoonful gives you juicy fruit, buttery oats, caramelized edges, and just enough cinnamon to make the kitchen smell like you have your life together.
Easy Fruit Crisp Recipe
Recipe Overview
- Prep time: 20 minutes
- Bake time: 40 to 50 minutes
- Total time: About 1 hour 10 minutes
- Servings: 8
- Best pan: 8×8-inch or 9×9-inch baking dish
Ingredients
For the Fruit Filling
- 6 cups sliced or chopped fruit
- 1/3 to 1/2 cup granulated sugar, depending on fruit sweetness
- 2 tablespoons cornstarch, or 3 tablespoons for very juicy berries or frozen fruit
- 1 tablespoon fresh lemon juice
- 1 teaspoon vanilla extract
- 1/2 teaspoon ground cinnamon
- 1/8 teaspoon salt
For the Crisp Topping
- 1 cup old-fashioned rolled oats
- 3/4 cup all-purpose flour
- 2/3 cup packed light brown sugar
- 1/2 teaspoon ground cinnamon
- 1/4 teaspoon salt
- 1/2 cup cold unsalted butter, cut into small cubes
- 1/2 cup chopped pecans or walnuts, optional
Best Fruits to Use
Use one fruit or combine several. Apples and berries are a classic team because apples bring structure while berries bring bright juice and color. Peaches and blueberries taste like summer took a victory lap. Pears and cranberries feel perfect for fall and holiday tables. Cherries make a rich, ruby-red crisp that looks fancy even if you made it while wearing mismatched socks.
Fresh fruit is wonderful when it is in season. Frozen fruit also works well, especially berries, peaches, cherries, and mango. Thaw frozen fruit first and drain off excess liquid if it looks watery. Canned fruit can work in a pinch, but drain it very well and reduce the sugar because canned fruit is often packed in syrup or juice.
Step-by-Step Instructions
Step 1: Prepare the Oven and Pan
Preheat the oven to 350°F. Lightly grease an 8×8-inch or 9×9-inch baking dish with butter or nonstick spray. Place the dish on a rimmed baking sheet if your fruit is especially juicy. This catches bubbling fruit juices before they become a dramatic oven situation.
Step 2: Make the Fruit Filling
In a large bowl, combine the fruit, sugar, cornstarch, lemon juice, vanilla, cinnamon, and salt. Toss gently until the fruit is evenly coated. The sugar draws out juices, the cornstarch thickens them, and the lemon juice keeps the flavor bright instead of flat. Pour the fruit mixture into the prepared baking dish and spread it into an even layer.
Step 3: Make the Oat Topping
In a separate bowl, stir together the oats, flour, brown sugar, cinnamon, and salt. Add the cold butter cubes. Use your fingers, a pastry cutter, or a fork to work the butter into the dry ingredients until the mixture forms crumbs and small clumps. Some pea-sized butter pieces are good. They melt during baking and create those crisp, golden pockets everyone fights over politely.
Step 4: Add the Topping
Sprinkle the oat topping evenly over the fruit. Do not press it down firmly. A loose topping allows heat to move through the dish and helps the fruit bubble while the surface browns. If you want bigger clusters, gently squeeze small handfuls of topping before scattering them over the fruit.
Step 5: Bake Until Golden and Bubbling
Bake for 40 to 50 minutes, or until the topping is golden brown and the fruit juices are bubbling around the edges. The bubbling is important because it shows the cornstarch has activated and the filling has thickened. If the topping browns too quickly, loosely cover the dish with foil for the final 10 minutes.
Step 6: Cool Before Serving
Let the fruit crisp cool for at least 15 to 20 minutes before serving. This short rest helps the filling set so it is juicy rather than soupy. Serve warm with vanilla ice cream, whipped cream, Greek yogurt, or a simple drizzle of heavy cream.
Why This Fruit Crisp Recipe Works
The Fruit-to-Topping Balance
A good crisp should not feel like a bowl of granola hiding three berries underneath. It also should not taste like fruit soup wearing an oat hat. Six cups of fruit with a generous oat topping gives the right balance: plenty of juicy filling and enough crunchy topping in every serving.
Cornstarch Keeps the Filling Silky
Fruit releases water as it bakes. Without a thickener, the filling can become thin and runny. Cornstarch creates a glossy, spoonable sauce that clings to the fruit. For apples and pears, 2 tablespoons usually works well. For blueberries, blackberries, cherries, or thawed frozen fruit, use 3 tablespoons because those fruits are juicier.
Lemon Juice Balances Sweetness
Even sweet desserts need a little brightness. Lemon juice adds contrast and keeps the fruit from tasting one-dimensional. It is especially helpful with peaches, apples, pears, and berries. You will not taste “lemon dessert” unless you add a lot more; you will simply taste better fruit.
Cold Butter Creates Better Crumbs
Cold butter is the secret to a crisp topping with texture. As it melts in the oven, it coats the oats and flour, creating crunchy edges and tender crumbs. Melted butter can work for quick toppings, but cold butter usually gives more defined clusters and a better old-fashioned fruit crisp texture.
Fruit Crisp Variations
Apple Berry Crisp
Use 3 cups sliced apples and 3 cups mixed berries. This version has the structure of apple crisp and the juicy color of berry crisp. Add a pinch of nutmeg for extra warmth.
Peach Blueberry Crisp
Combine 4 cups sliced peaches with 2 cups blueberries. Add 1/2 teaspoon lemon zest to the filling. This is the crisp to make when summer fruit is showing off at the farmers market.
Cherry Almond Crisp
Use 6 cups pitted cherries and add 1/4 teaspoon almond extract to the filling. Replace the optional walnuts or pecans with sliced almonds. Almond extract is strong, so do not pour with your whole heart unless your whole heart owns measuring spoons.
Apple Pear Cranberry Crisp
Use 3 cups apples, 2 cups pears, and 1 cup fresh or frozen cranberries. Increase sugar to 1/2 cup because cranberries are tart. This variation is excellent for Thanksgiving, Christmas, or any chilly evening that demands dessert with a sweater.
Tropical Fruit Crisp
Try mango, pineapple, and banana with a little lime juice. Add shredded coconut to the topping if you like a toasted coconut flavor. This version is softer and sweeter, so serve it with plain yogurt or lightly sweetened whipped cream for balance.
Tips for the Best Homemade Fruit Crisp
Cut Fruit Evenly
Evenly sized fruit pieces bake at the same rate. Apples and pears should be sliced about 1/4 inch thick. Peaches and plums can be slightly thicker because they soften faster. Berries can go in whole, though large strawberries should be halved or quartered.
Taste the Fruit First
The sugar amount should match the fruit. Very sweet peaches may need only 1/3 cup sugar. Tart apples, rhubarb, cranberries, or sour cherries may need 1/2 cup or slightly more. The goal is to support the fruit, not bury it under a sugar blanket and wish it goodnight.
Use Old-Fashioned Oats
Old-fashioned rolled oats give the best chewy-crisp texture. Quick oats can work, but the topping will be softer and less defined. Steel-cut oats are too firm for this recipe and may stay unpleasantly chewy.
Let It Rest
Warm fruit crisp smells so good that waiting feels unfair, but the rest time matters. Give it at least 15 minutes after baking. The filling will thicken, the topping will settle, and your tongue will avoid the lava-fruit experience.
Common Fruit Crisp Problems and Fixes
| Problem | Likely Cause | Easy Fix |
|---|---|---|
| Filling is too runny | Fruit was very juicy or not enough thickener was used | Add an extra tablespoon of cornstarch next time and let the crisp cool longer |
| Topping is pale | Not baked long enough or oven temperature is low | Bake until deeply golden and bubbling around the edges |
| Topping is soggy | Fruit released too much liquid or topping was pressed down | Drain thawed fruit and sprinkle topping loosely |
| Fruit tastes flat | Not enough acid or salt | Add lemon juice and a small pinch of salt |
| Crisp tastes too sweet | Fruit was already very ripe or canned in syrup | Reduce sugar and serve with unsweetened yogurt or cream |
Make-Ahead, Storage, and Reheating
You can prepare the topping up to 3 days ahead and keep it refrigerated in an airtight container. You can also freeze the unbaked topping for up to 3 months. When ready to bake, sprinkle it over the fruit straight from the freezer.
Fruit crisp is best the day it is baked, when the topping is at its crunchiest. Leftovers should be cooled, covered, and refrigerated. For best quality and safety, enjoy refrigerated leftovers within 3 to 4 days. Reheat individual portions in the microwave, or warm the whole dish in a 325°F oven until heated through. The oven does a better job bringing back the topping’s crispness.
To freeze baked fruit crisp, cool it completely, wrap tightly, and freeze for up to 3 months. Thaw overnight in the refrigerator and reheat in the oven. The topping will be softer after freezing, but it will still taste like comfort food made a very good decision.
Serving Ideas
The classic move is warm fruit crisp with vanilla ice cream. The cold ice cream melts into the hot fruit and creates a creamy sauce that needs no improvement. Whipped cream is lighter and lovely for berry crisps. Greek yogurt makes leftovers feel breakfast-adjacent, which is not the same as breakfast, but we are all doing our best.
For a dinner party, bake the crisp in a pretty ceramic dish and serve it family-style. For picnics or potlucks, bake it in a disposable foil pan and bring whipped topping or ice cream separately. For weeknights, spoon it into bowls while it is still warm and accept compliments as if you spent all afternoon on it.
Experience Notes: What Making Fruit Crisp Teaches You
After making fruit crisp with nearly every fruit that has ever rolled around the bottom drawer of a refrigerator, one lesson becomes clear: this dessert rewards attention more than perfection. You do not need bakery training. You do not need a stand mixer. You do not even need fruit that looks like it came from a glossy magazine. Slightly bruised peaches, soft pears, tired apples, and frozen berries can all become something wonderful when paired with butter, oats, brown sugar, and heat.
The first experience most home bakers have with fruit crisp is surprise. It looks too simple. You toss fruit with sugar and cornstarch, crumble a topping over it, bake it, and somehow the result tastes like a dessert with a backstory. The oven does the heavy lifting. The fruit collapses into a sauce, the topping browns, and the edges caramelize where the juices bubble up. That bubbling edge is the secret spoonful. It is hotter than gossip and twice as satisfying.
Apples are the easiest fruit for beginners because they hold their shape and forgive small mistakes. If you slice them evenly and add enough lemon juice, the filling usually behaves. Berries are more dramatic. They release lots of juice, stain everything purple, and need a little extra cornstarch. Peaches are generous but slippery; peeling is optional, though the skins may loosen during baking. Pears are soft and floral, but they need lemon juice badly because too much pear sweetness without acidity can taste sleepy.
One useful habit is to taste the fruit before adding sugar. This sounds obvious, but many recipes are followed so strictly that the actual fruit gets ignored. A tart Granny Smith apple and a ripe summer peach do not need the same amount of sugar. Neither do cranberries and blueberries. Good fruit crisp is about adjustment. If the fruit makes you pucker, add more sugar. If it tastes like candy already, hold back. If it tastes flat, add lemon juice. If it tastes thin, add a pinch of salt. Dessert is chemistry, but it is also listening.
The topping has its own personality. Some people love fine crumbs that blanket the fruit evenly. Others want big buttery clusters that crunch like cookie pieces. For bigger clusters, squeeze the topping in your hand before scattering it over the fruit. For a sandy, even topping, break it apart more thoroughly. Nuts add crunch, but they are optional. Cinnamon is classic, but ginger, cardamom, nutmeg, and citrus zest can change the mood completely.
The best experience of all is serving fruit crisp warm. Not straight from the oven, because that is how brave people learn painful lessons, but after a short rest. Bring it to the table with a spoon, a stack of bowls, and something creamy. The dish may not slice neatly. It may slump. It may look rustic, which is the polite culinary word for “delicious mess.” That is exactly the point. Fruit crisp is not trying to win a beauty pageant. It is trying to make people happy, and honestly, it has an excellent success rate.
Final Thoughts
This fruit crisp recipe is the kind of dessert that belongs in every home cook’s back pocket. It is simple enough for a weeknight, flexible enough for any season, and comforting enough to rescue a dull day. Once you learn the basic formula, you can make apple crisp in October, peach blueberry crisp in July, cherry crisp in June, and mixed berry crisp whenever your freezer starts looking like a smoothie shop had a small accident.
Use ripe fruit, balance it with lemon juice, thicken the juices, and give the oat topping enough time to turn golden. That is the whole delicious plan. No pie crust. No panic. Just warm fruit, buttery crumbs, and the happy sound of spoons scraping bowls.
Note: This recipe is flexible. Adjust sugar, spices, and thickener based on the fruit you use, and always let the crisp cool briefly before serving for the best texture.