Changing colors in knitting is one of those magical little skills that makes a project look instantly more impressive. One minute you are knitting a plain rectangle, and the next minute you are creating stripes, blocks, borders, letters, motifs, and colorwork that politely whispers, “Yes, I know what I’m doing.” The good news? You do not need wizard-level knitting powers. You only need a new yarn color, a little patience, and the confidence to ignore that tiny voice asking, “Should I just tie a giant knot and hope for the best?”
This guide explains how to change colors in knitting in 13 practical steps, including beginner-friendly stripes, mid-row color changes, intarsia-style blocks, colorwork tension, carrying yarn, weaving in ends, and fixing common mistakes. Whether you are making a scarf, blanket, sweater, hat, baby blanket, dishcloth, or your first “I swear it looked easier on the pattern photo” project, these steps will help your color transitions look neat, secure, and intentional.
Why Learning to Change Colors in Knitting Matters
Color changes are the doorway to more creative knitting. Once you can switch yarn colors cleanly, you can knit striped scarves, contrast cuffs, graphic blankets, picture patterns, color-blocked sweaters, Fair Isle-inspired designs, and simple decorative bands. Even a plain stockinette project becomes more interesting when you add a few well-placed stripes.
The key is understanding that different projects need different color-changing methods. A two-row stripe at the edge of a scarf is not handled exactly like a red heart knitted into the middle of a white sweater. A striped hat knit in the round has its own little issue called a jog, because knitting in the round forms a spiral rather than perfectly stacked rows. Do not panic. Knitting has a solution for almost everything, except maybe yarn shopping self-control.
Supplies You Need
Before you begin, gather your basic tools. You will need knitting needles, your current yarn color, your new yarn color, scissors, a tapestry needle, and the pattern or color chart you are following. If you are practicing, choose two smooth, medium-weight yarns in clearly different colors. Light-colored worsted-weight yarn is easiest to see, especially when you are learning how stitches connect.
Avoid very fuzzy, slippery, or dark yarn for your first practice swatch. Black yarn at midnight is not a learning tool; it is a character-building exercise.
How to Change Colors in Knitting: 13 Steps
Step 1: Decide Where the Color Change Should Happen
Look at your pattern and identify exactly where the new color begins. For simple stripes, the color usually changes at the beginning of a row or round. For picture knitting or color blocks, the change may happen in the middle of a row. Mark the spot with a stitch marker if needed.
If you are designing your own project, choose a color-change location that makes sense visually. In flat knitting, changing colors at the beginning of a right-side row often creates the cleanest look. In scarves and blankets, the edge may show, so you will want tidy tails and consistent tension.
Step 2: Finish the Last Stitch in the Old Color
Knit until you reach the stitch before your color change. Complete that stitch with the old color as usual. Do not pull the old yarn extra tight. Tight stitches at color changes cause puckering, and puckering is the fabric’s way of saying, “Please relax.”
Leave the old yarn attached for now unless your pattern tells you to cut it. For stripes, you may be able to carry the unused color up the side instead of cutting it every time. This saves time and reduces the number of ends you must weave in later.
Step 3: Pick Up the New Yarn Color
Take the new color and leave a tail of about 6 inches. This tail gives you enough length to secure the yarn later. Hold the new yarn behind the work if you are knitting, or in front if you are purling, following the normal position for your stitch.
You do not have to make a knot. In fact, most knitters avoid knots because they can create bumps, loosen over time, or show through the fabric. Instead, the new yarn will be secured by knitting with it and weaving in the tail afterward.
Step 4: Knit the First Stitch with the New Color
Insert your right needle into the next stitch as usual. Wrap the new color around the needle and pull it through to form the stitch. The first stitch may feel loose. That is normal. Hold both yarn tails gently for the next few stitches, but do not strangle them. Yarn likes boundaries, not a wrestling match.
After knitting the first stitch in the new color, continue for several stitches. You will notice the new yarn begins to stabilize as the fabric grows.
Step 5: Keep the First Few Stitches Even
The first few stitches after a color change often determine whether the transition looks smooth or messy. Knit at your normal tension. Many beginners pull too tightly because they are trying to secure the yarn. This can distort the edge, shrink the fabric, or create a visible pinch.
If the first stitch looks loose, resist the urge to fix it immediately. Knit a few more stitches, then gently tug the yarn tail on the wrong side to neaten the stitch. Small adjustments are better than dramatic yanking. Your knitting is fabric, not a lawn mower cord.
Step 6: Change Colors at the Beginning of a Row for Simple Stripes
For beginner stripes, the easiest method is to switch colors at the beginning of a row. Finish a row with Color A, turn your work, pick up Color B, and begin knitting the next row. This method works beautifully for scarves, dishcloths, blankets, and rectangular panels.
If you are making two-row or four-row stripes, you can often carry the unused yarn along the side edge. To do this, pick up the color you need by bringing it under or around the resting color at the edge. This creates a neat twist and keeps the unused yarn attached without cutting it.
Step 7: Carry Yarn Up the Side When Stripes Are Narrow
Carrying yarn is helpful when you switch between colors every few rows. Instead of cutting the yarn at each stripe, let the unused color travel up the side of the work. At the beginning of the color-change row, bring the old color over or under the new color so the strands twist gently at the edge.
Keep the carried strand loose enough that the edge does not tighten. If your carried yarn pulls the edge upward, you are twisting too tightly. If it creates floppy loops, you are leaving too much slack. Aim for a relaxed edge that lies flat after a gentle stretch.
Step 8: Cut the Yarn for Wide Stripes or One-Time Color Changes
If you will not use the old color again for many rows, cut it and leave a 6-inch tail. Carrying yarn over a long distance can create loops along the edge, waste yarn, and make the finished project look bulky. Cutting is often cleaner for wide stripes, large color sections, or one-time contrast bands.
When you cut yarn, do not trim the tail short right away. Short tails are difficult to weave in and may pop out after washing. Leave enough length to secure the end properly later.
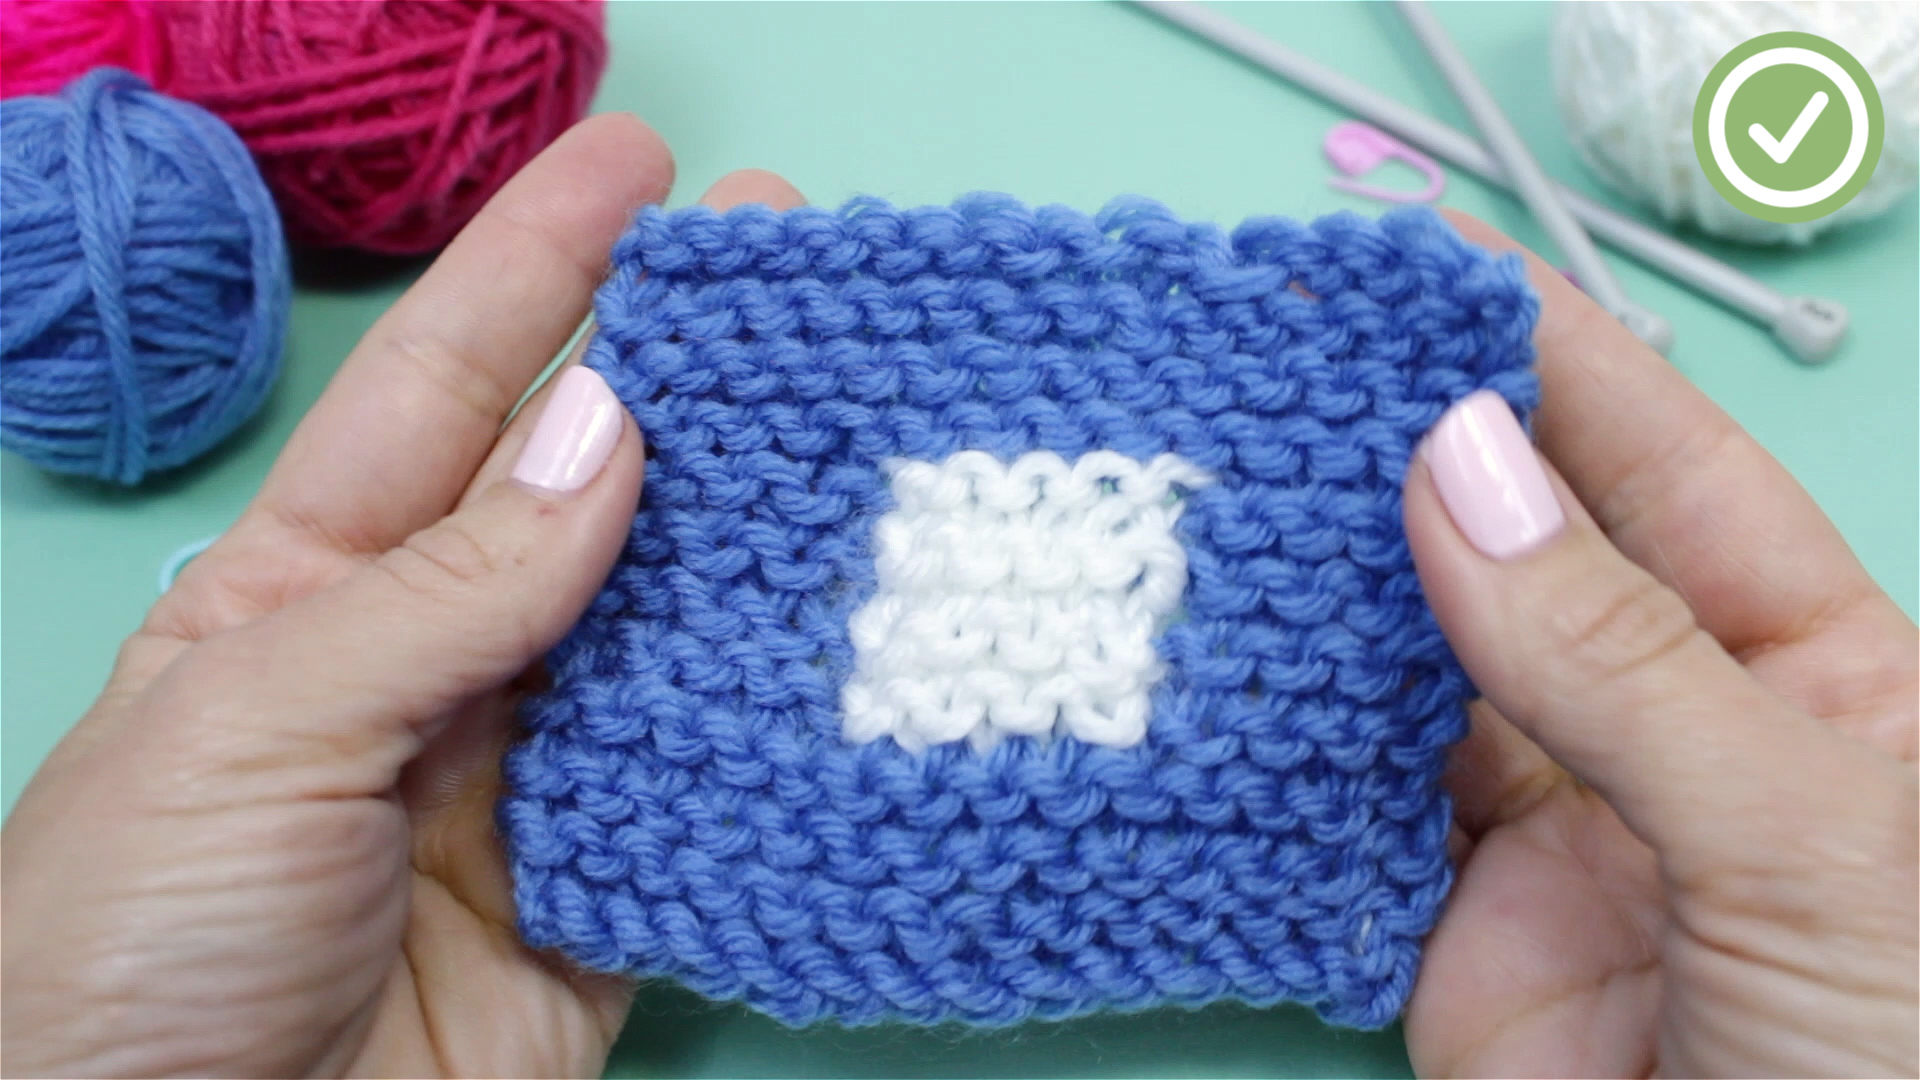
Step 9: Change Colors in the Middle of a Row with Intarsia
When changing colors in the middle of a row, use an intarsia-style method. This is common for shapes, letters, hearts, squares, diamonds, and picture designs. Instead of carrying one yarn across the whole back, use separate balls or bobbins for each color section.
At the color change, drop the old color and pick up the new color from underneath the old strand. This twists the two yarns together and prevents a hole from forming. If you simply drop one color and start the next without twisting, the two sections may separate like neighbors who refuse to share a fence.
Step 10: Manage Floats in Stranded Colorwork
For stranded knitting, such as Fair Isle-style patterns, two or more colors are worked across the same row or round. The unused color travels across the wrong side of the fabric as a float. Floats must be loose enough to let the fabric stretch, but not so loose that they snag.
A good habit is to spread the stitches out on the right needle before carrying the unused yarn across the back. This helps prevent tight floats. For longer stretches, catch or trap the float on the wrong side every few stitches. This keeps the back tidy and makes garments more comfortable to wear.
Step 11: Fix the Jog When Knitting Stripes in the Round
When knitting stripes in the round, the color change may create a visible step called a jog. This happens because circular knitting forms a spiral. For many casual projects, a tiny jog is acceptable. But if you want smoother stripes, use a jogless stripe technique.
One simple method is to knit one full round in the new color. At the beginning of the next round, slip the first stitch of the new color purlwise, then continue knitting. This visually lifts the color transition and helps the stripe appear more continuous. It is not actual magic, but it is close enough to impress your knitting group.
Step 12: Weave in Ends Securely
After the knitting is complete, weave in the yarn tails on the wrong side. Thread the tail onto a tapestry needle and follow the path of nearby stitches for a few inches. Whenever possible, weave a color tail into the same color area so it does not show through on the front.
Do not weave ends in a perfectly straight line if the fabric will stretch. A slight diagonal or duplicate-stitch path helps the tail stay hidden while allowing the fabric to move naturally. After weaving, gently stretch the fabric, then trim the excess tail close to the surface.
Step 13: Block the Project for a Polished Finish
Blocking helps even out stitches, relax color changes, smooth edges, and improve the finished look. Follow the care instructions for your yarn. Wool may benefit from wet blocking, while acrylic often responds better to steam blocking. Always test carefully, especially with heat-sensitive fibers.
Blocking will not fix every mistake, but it can make slightly uneven color changes look calmer and more professional. Think of it as a spa day for your knitting. Your stitches have been through a lot.
Common Mistakes When Changing Colors in Knitting
Pulling the New Color Too Tight
This is the most common beginner mistake. Tight color changes create puckers, hard edges, and distorted stitches. Keep your hands relaxed, spread the stitches on the needle, and check the fabric often.
Forgetting to Twist Yarns in Mid-Row Changes
If you are working intarsia or color blocks, always twist the yarns where colors meet. This joins the two sections together and prevents holes. The twist should be gentle but consistent.
Leaving Tails Too Short
Short tails are annoying to weave in and may not stay secure. Leave about 6 inches whenever you join a new color. Future you will be grateful. Future you may even forgive present you for buying seven extra skeins “just in case.”
Carrying Yarn Too Far
Carrying yarn works well for narrow stripes, but not for large gaps. If a color will not be used again soon, cut it and weave in the end later. Long carried strands can snag, tighten, or add unnecessary bulk.
Best Projects for Practicing Color Changes
If you are new to color changes, start with a small project. A striped dishcloth is ideal because it is flat, quick, and forgiving. A simple scarf with two-row stripes is another excellent choice. Once you feel comfortable, try a striped hat in the round, a baby blanket with color blocks, or a sweater with contrast hems and cuffs.
For mid-row changes, practice with a small intarsia square. Knit a plain background with a contrasting rectangle in the center. This teaches you how to twist yarns, manage separate balls, and keep the fabric joined. After that, you can move on to shapes, initials, or simple graphic motifs.
Helpful Tips for Neater Color Changes
Use yarns of the same weight when combining colors. Mixing thick and thin yarns can create uneven fabric unless the pattern is designed for that effect. Choose colors with enough contrast if you want the design to stand out. A pale gray motif on beige yarn may be elegant, but it may also look like a secret message only visible under dramatic lighting.
Always make a swatch if the project matters. A small test square lets you check tension, color contrast, yarn behavior, and whether the colors bleed during washing. This is especially important for high-contrast projects such as red and white, navy and cream, or black and pale pink.
Extra Experience: What Changing Colors in Knitting Teaches You
Changing colors in knitting is not just a technique; it is a tiny lesson in patience, planning, and accepting that yarn has opinions. The first time many knitters switch colors, the join looks loose, the tail dangles awkwardly, and the edge seems suspiciously lumpy. That does not mean you failed. It means you are learning the part of knitting that turns flat fabric into personality.
One useful experience is learning to slow down right before the color change. Beginners often rush because they want to see the new color appear. But the transition point deserves attention. Pause, check which side is facing you, leave a proper tail, and make the first stitch calmly. That one mindful moment can prevent holes, puckers, and mystery loops later.
Another lesson is that different yarn fibers behave differently. Wool tends to grip itself, which makes color changes and woven ends more forgiving. Cotton is smoother and less elastic, so loose tails may sneak out more easily. Superwash wool can also be slippery. If your ends keep popping free, the problem may not be your technique alone; your yarn may simply be a little dramatic.
Color choice also becomes easier with practice. Two colors may look beautiful in the skein but muddy when knitted together. If the values are too similar, a stripe or motif may disappear. A quick trick is to take a photo of the yarns and view it in black and white. If the colors look nearly identical in grayscale, they may not provide enough contrast for bold colorwork.
Many knitters also discover that the wrong side matters. A project can look lovely on the front while hiding a chaotic jungle of floats and tails on the back. At first, that is normal. Over time, you learn to trap floats, carry yarn neatly, and weave in ends so the inside looks tidy too. No one may see the wrong side, but you will know. Knitters always know.
Finally, changing colors teaches confidence. Once you understand the basic mechanics, patterns become less intimidating. Stripes stop looking like a “special technique” and start feeling like a design choice. Intarsia becomes less scary when you realize it is mostly twisting yarns at the border. Jogless stripes become a clever trick rather than a mystery. Each small skill opens the door to more creative projects.
So if your first color change looks imperfect, keep going. Knit a practice swatch. Try again with different yarn. Tug the stitches gently. Weave the ends carefully. Block the piece. The goal is not machine-made perfection; it is handmade fabric with structure, color, and charm. And if one stripe is slightly wonky, congratulations: your knitting has a plot twist.
Conclusion
Learning how to change colors in knitting gives you the freedom to create stripes, borders, motifs, color blocks, and stranded designs with confidence. Start with simple row changes, practice carrying yarn for narrow stripes, twist yarns for mid-row intarsia, manage floats in stranded colorwork, and always weave in your ends securely. With a little practice, your color changes will look cleaner, your projects will feel more polished, and your yarn stash will suddenly have even more reasons to grow.