Copying a DVD disc onto a PC and burning a new DVD sounds like a job reserved for the family “computer person,” the one who mysteriously owns every cable ever invented. Good news: for unprotected discs you own or have permission to copy, the process is much less dramatic than it looks. You need a DVD drive, enough storage space, the right blank disc, and a little patience while your computer makes the optical-drive noises of a tiny robot eating crackers.
This guide explains how to copy DVD discs onto a PC and burn a new DVD in 10 practical steps. It focuses on legal, everyday uses: backing up home movies, transferring old camcorder DVDs, preserving business training discs, duplicating church or school event recordings, or making a fresh playable DVD from video files you created. It does not explain how to bypass encryption or copy-protection systems on commercial movies, games, or protected software. In the United States, anti-circumvention rules can apply even when someone owns the physical disc, so the safest rule is simple: only copy DVDs you created, own the rights to, or have clear permission to duplicate.
With that important “don’t anger the copyright dragon” note out of the way, let’s walk through the process clearly.
Before You Start: What Kind of DVD Are You Copying?
Not every DVD behaves the same way. A data DVD works like a storage disc: it contains files, folders, photos, documents, or videos that can usually be copied directly to your PC. A DVD-Video disc is different. It often has a structured folder system, usually including a VIDEO_TS folder, so it can play in a standard DVD player. An ISO file is another option; it is a disc image, meaning one file that represents the full layout of a disc.
If your goal is to create an exact backup of an unprotected DVD, saving it as an ISO is usually the cleanest method. If your goal is to save individual files, copying the folders may be enough. If your goal is to make a DVD that plays in a living-room DVD player, you may need DVD authoring software, because simply dragging an MP4 file onto a blank disc often creates a data DVD, not a traditional DVD-Video disc.
How to Copy DVD Discs onto a PC and Burn a New DVD: 10 Steps
Step 1: Confirm That You Have Permission to Copy the DVD
Start with the legal checkpoint. You should only copy a DVD if it is your own content, public-domain material, licensed media that allows copying, or a disc you have permission to duplicate. Examples include wedding videos, school plays, company training materials, family archives, church recordings, or personal video projects.
If the DVD is a Hollywood movie or commercial software disc with copy protection, stop. Do not try to bypass encryption. Instead, use legal alternatives such as a digital copy included with the purchase, a licensed download, cloud backup from the content provider, or a new authorized disc. This protects you and keeps the tutorial focused on legitimate DVD backup and disc-burning tasks.
Step 2: Check Your PC’s DVD Drive
Your computer needs a drive that can read DVDs, and if you want to burn a new DVD, it also needs write capability. Look for terms such as DVD-RW, DVD+RW, DVD±RW, or DVD burner. If your laptop is modern and thin, it may not have an optical drive at all. In that case, a USB external DVD burner is usually the easiest solution.
Before copying, insert the DVD and wait for Windows to recognize it. Open File Explorer and check whether the disc appears under “This PC.” If the drive struggles, eject the disc, inspect it for dust or scratches, and gently clean it from the center outward with a soft microfiber cloth. Do not scrub in circles unless you enjoy turning tiny scratches into a circular racetrack.
Step 3: Choose the Right Blank DVD
For most projects, a standard single-layer DVD-R or DVD+R disc holds about 4.7 GB of data or roughly 120 minutes of standard DVD video. A dual-layer disc can hold more, but it requires a compatible burner and compatible blank media. DVD-R is widely compatible with older standalone DVD players, while DVD+R is also common and works well with many modern drives.
If you are making a disc for long-term storage, choose quality media from a reputable brand and store finished DVDs in sleeves or cases away from heat, sunlight, moisture, and fingerprints. A blank disc may look like a shiny miracle pancake, but it is still vulnerable to scratches and bad storage habits.
Step 4: Make Space on Your PC
Copying a DVD to your computer requires free storage. A single-layer DVD can use up to 4.7 GB, while a dual-layer disc can require around 8.5 GB. Give yourself extra room for temporary files, especially if you are converting video, creating an ISO image, or authoring a DVD menu. A safe target is at least 10–15 GB of free space for a simple project and more if you plan to edit or convert video.
Create a dedicated folder, such as DVD Backup Project, on your desktop or in your Videos folder. Inside it, make subfolders like Original Copy, ISO, Converted Files, and Final DVD. This small organization step prevents the classic beginner problem of creating six files named “final_final_really_final.mp4” and trusting destiny to know which one matters.
Step 5: Copy the DVD Files or Create an ISO Image
For an unprotected data DVD, copying is simple. Open the disc in File Explorer, select the files and folders, then copy them into your project folder on the PC. Wait until the transfer finishes, then open a few files to confirm they copied correctly.
For an unprotected DVD-Video disc, you may see folders such as VIDEO_TS and sometimes AUDIO_TS. Copying these folders may preserve the DVD structure, but not every burning method will automatically recreate a playable DVD. If you want a more exact backup, use a reputable disc imaging or burning program that can create an ISO image from an unprotected disc. An ISO is useful because it keeps the disc layout together in one file, making it easier to burn a new copy later.
Do not use tools or settings designed to defeat copy protection. If the program says the disc is encrypted or protected, treat that as a red light, not a puzzle invitation.
Step 6: Verify the Copy on Your PC
Before burning a new DVD, test what you copied. If it is a data DVD, open a sample of documents, photos, or videos. If it is a DVD-Video folder, open it in a media player that supports DVD folders. If it is an ISO file, mount it in Windows or open it with trusted software to confirm the contents appear correctly.
This step saves blank discs. Nothing is more humbling than burning a DVD, labeling it beautifully, handing it to someone, and discovering it contains exactly one empty folder named “New Folder.” Verification is not glamorous, but neither is redoing the job.
Step 7: Decide Whether You Need a Data DVD or DVD-Video Disc
This is the step that prevents confusion. A data DVD stores files. It is great for backups, documents, photos, MP4 videos, PDFs, and archives. It can be read by computers and some modern DVD/Blu-ray players, depending on file support.
A DVD-Video disc is designed to play in traditional DVD players with menus, chapters, and standard DVD formatting. If you want grandma’s old DVD player to play the disc without asking philosophical questions, you likely need DVD authoring software. DVD authoring programs can convert supported video files into the correct DVD structure and optionally add menus.
For a direct unprotected ISO backup, you can burn the ISO image to a blank disc. For custom videos, use DVD authoring software to create the proper disc format.
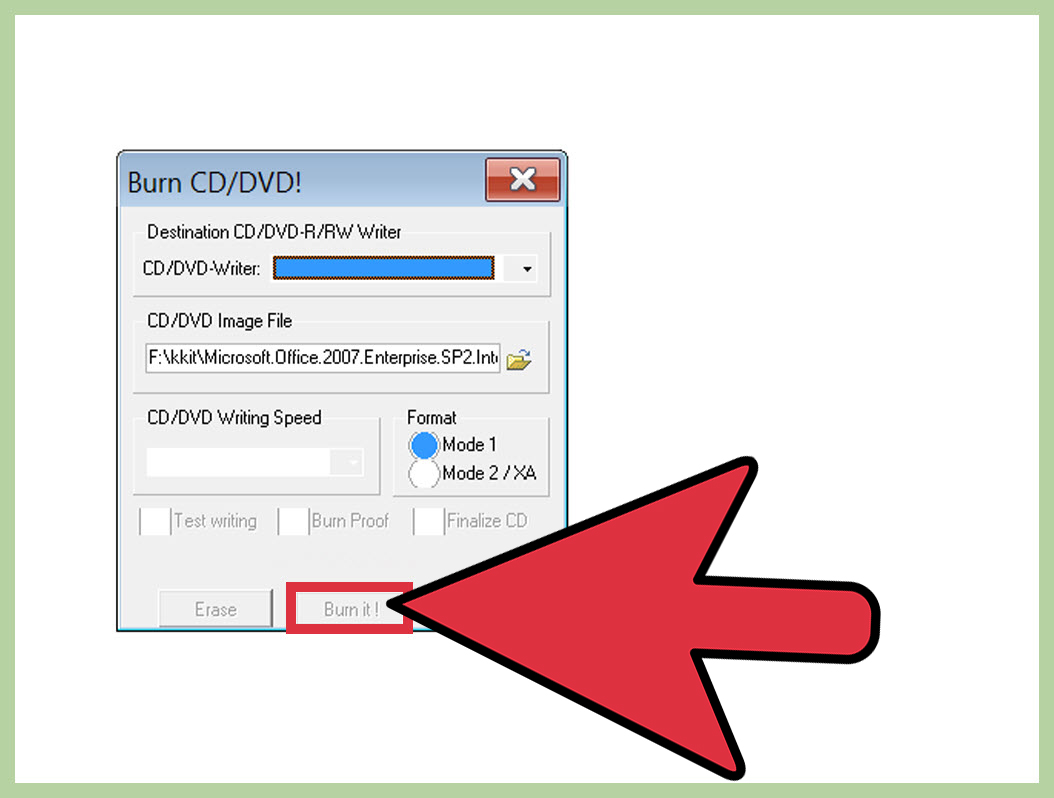
Step 8: Burn the New DVD
Insert a blank DVD into your burner. For a data DVD in Windows, you can use File Explorer or Windows Media Player depending on the file type and workflow. Choose the blank disc, add your files, and select the burn option. Use a clear disc title so you know what it contains later.
For an ISO image, right-click the ISO file in Windows and look for Burn disc image. On some Windows versions, you may need to choose Show more options first. Select the correct DVD burner, enable verification if available, and start the burn. Do not simply drag the ISO file onto a blank DVD unless your goal is to store the ISO as a file. To make a usable disc from an ISO, the image must be burned properly.
For a DVD-Video project, open your DVD authoring software, import your video files, choose the DVD format, set the aspect ratio, design a menu if desired, and burn the project to disc. Keep the design simple. A clean menu with “Play” and “Chapters” beats a glitter explosion that takes 40 seconds to load.
Step 9: Use a Moderate Burn Speed and Verify the Disc
Many burners and blank discs advertise fast speeds, but slower or moderate speeds can improve reliability, especially for important archives or discs intended for older DVD players. If your software offers options such as 4x, 8x, or 16x, choosing 4x or 8x is often a sensible balance between speed and stability.
Turn on verify after burning if your software offers it. Verification checks whether the burned disc matches the source data. It adds time, but it also reduces the chance of discovering a problem later when the original disc is missing, damaged, or already mailed to Uncle Bob in Arizona.
Step 10: Test the New DVD in the Device That Matters
After the burn finishes, eject and reinsert the DVD. Test it on your PC first. Open files, play videos, or mount the disc structure depending on what you created. Then test it in the real destination device. If the disc is meant for a standalone DVD player, test it there. If it is meant for a work computer, test it on that type of machine if possible.
Label the disc with a soft-tip disc marker, not a ballpoint pen. Include the title, date, and version. Store the original copy on your PC or an external drive until you are sure the new DVD works perfectly. For important memories, consider keeping two backups: one physical disc and one digital copy on an external drive or cloud storage.
Common Problems and Easy Fixes
The PC Does Not Recognize the DVD
Try cleaning the disc, restarting the computer, testing another DVD, or plugging the external drive into a different USB port. If no discs work, the drive may need a driver update, replacement, or a new external burner.
The Burn Fails Halfway Through
Use a new blank disc, lower the burn speed, close unnecessary programs, and make sure your laptop is plugged in. Cheap or damaged blank media can cause failed burns, so do not automatically blame your computer for everything. Sometimes the disc is simply having a bad personality day.
The DVD Works on the PC but Not in a DVD Player
You may have created a data DVD instead of a DVD-Video disc. Standard DVD players usually require DVD-Video formatting. Use DVD authoring software and burn the project as a playable DVD, not just as loose video files.
The Video Quality Looks Worse After Burning
DVD-Video uses standard-definition formatting. If you start with a high-definition video and convert it to DVD, the quality will be reduced. Keep the video length reasonable, avoid over-compressing, and use the best source file available.
Best Practices for Better DVD Backups
Keep your workflow simple. First, copy or image the disc. Second, verify the copy. Third, burn the new DVD. Fourth, verify the burned disc. That four-part rhythm catches most beginner mistakes.
Use descriptive folder names and disc labels. Store ISO files with dates, such as Family_Reunion_2009_DVD_Backup.iso. Avoid vague names like disc1.iso unless you enjoy future detective work.
Keep a digital backup even after burning a new DVD. Optical discs can last a long time when stored well, but they are not invincible. Heat, sunlight, scratches, and mystery drawer dust can shorten their life. For irreplaceable videos, keep copies in more than one location.
Real-World Experience: What Beginners Usually Learn After Copying DVDs
The first thing most people learn when copying DVD discs onto a PC is that “DVD” is not one single thing. It is a container, a format, a storage medium, and occasionally a tiny plastic source of confusion. A disc full of vacation photos behaves very differently from a DVD-Video disc created by a camcorder or authoring program. That is why the format decision matters so much. If you want computer storage, a data DVD is fine. If you want living-room playback, you need DVD-Video structure.
Another lesson is that old discs are unpredictable. A DVD that played perfectly ten years ago may suddenly freeze at minute 37 because of scratches, oxidation, cheap media, or storage in a hot garage. When preserving family memories, copy the disc as soon as possible instead of waiting until “someday.” Someday has a terrible track record in technology. It usually arrives right after the drive stops working.
People also underestimate the value of testing. A burned disc is not finished just because the software says “complete.” Test it. Then test it again in the device that will actually use it. A PC may read a disc that an older DVD player rejects. A DVD player may dislike certain media brands or struggle with discs burned at maximum speed. This is why moderate burn speeds, good blank discs, and verification settings are worth the extra minutes.
Organization is another practical habit that pays off. When copying multiple DVDs, create one folder per disc and name each folder before you start. Include dates, event names, and disc numbers. For example, Smith_Wedding_2006_Disc_01 is far better than DVD Copy New. If you are copying a set, photograph the original disc labels with your phone before starting. That gives you a quick reference if you later forget which disc belongs to which project.
For home videos, expect some quality limitations. A DVD is standard definition, so it will not magically become crisp 4K just because your modern monitor is enormous. If you convert old DVD content to MP4 for storage, use reasonable settings and keep the original copy too. For important projects, save both an ISO image and a more convenient video file. The ISO preserves the disc structure; the video file is easier to watch on phones, tablets, smart TVs, and cloud storage apps.
Finally, remember that DVDs are now part of a larger backup strategy, not the whole strategy. Burning a new DVD is useful for sharing, archiving, and keeping a physical copy, but the best protection comes from multiple backups. Keep one copy on your PC, one on an external drive, and one off-site or in the cloud when possible. For precious recordings, redundancy is not overkill. It is peace of mind wearing a sensible jacket.
Conclusion
Learning how to copy DVD discs onto a PC and burn a new DVD is mostly about choosing the right workflow. For unprotected discs you created or have permission to copy, the process is straightforward: check your drive, copy the files or create an ISO, verify the copy, burn to the correct blank DVD, and test the final disc. The key is knowing whether you need a data DVD, an ISO backup, or a DVD-Video disc that plays in standalone players.
Keep the process legal, keep your files organized, and do not skip verification. A careful DVD backup can preserve old memories, business materials, school projects, and personal archives long after the original disc starts looking like it survived a battle with a house cat.