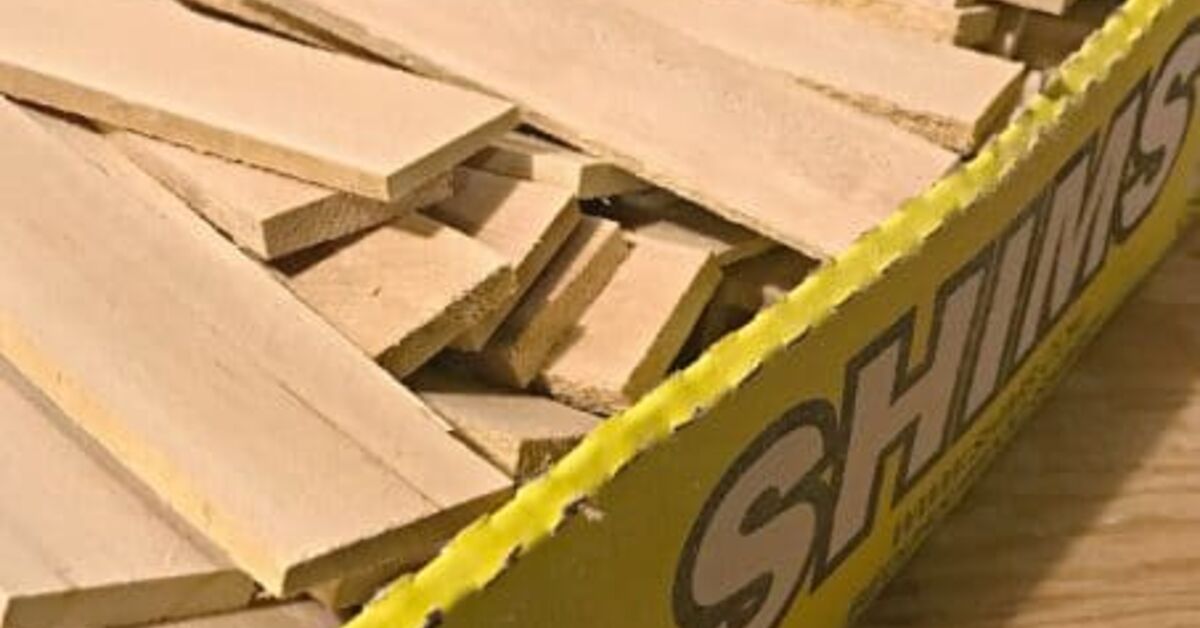
A plain wall is like a slice of plain toast. Perfectly fine. Also a little sad. If you want a room to feel warmer, richer, and far more custom without dropping custom-carpentry money, a wood shim accent wall is one of the smartest DIY upgrades around. These humble little wedges were born to level doors and cabinets, yet they also happen to be lightweight, affordable, easy to cut, and surprisingly good-looking when arranged with intention.
The beauty of this project is that it can go in several directions. You can stain the shims for a textured natural-wood statement, paint them for a moody modern wall, or mix tones for an artsy, layered look. You can cover a full wall, stop at chair-rail height, frame a dining nook, or turn an awkward hallway into the part of the house that suddenly gets all the compliments. Not bad for a pile of skinny wood wedges that usually live a very unglamorous life.
In this guide, you’ll learn how to plan, prep, install, and finish a dramatic wall accent using wood shims DIY-style, along with the mistakes to avoid, the finish options that work best, and the real-life experience of building one. Spoiler: the wall will look expensive. Your budget will know the truth.
Why Wood Shims Work So Well for an Accent Wall
Wood shims are a great material for a decorative feature wall because they’re lightweight, easy to layer, and naturally varied in grain. That variation is exactly what gives a wood shim wall its visual movement. Unlike uniform trim boards, shims create depth almost automatically, especially when the wall color behind them adds shadow.
Another advantage is flexibility. Because the pieces are small, you can build around outlets, windows, and door trim without wrestling with giant boards. Shims are also forgiving for beginner DIYers. If one piece looks wrong, you can replace that piece instead of reworking a whole section. And if you are aiming for a dramatic, textured finish, a little irregularity actually helps. This is one of the rare wall projects where “perfectly imperfect” is not a coping strategy. It is the design plan.
Choose the Best Wall Before You Buy Anything
Not every wall deserves the wood-shim treatment. The best accent walls usually have a clear stopping point and feel intentional the moment you walk into the room. Think dining room focal walls, entry walls, bedroom headboard walls, office backdrops, or the wall at the end of a hallway. A wall framed by inside corners usually looks more finished than one that awkwardly fades into open space.
Also think about moisture and maintenance. A wood shim accent wall is better suited to dry interior spaces than splash-prone zones. You want a wall that can stay clean, stable, and attractive without having to survive daily steam battles or sink splash warfare.
Finally, study the surface itself. If the wall is heavily textured, you may need to smooth it first. The more even the base, the cleaner your final pattern will look.
Materials and Tools
- Wood shims in one or two lengths for variety
- Construction adhesive or panel adhesive suitable for interior wall applications
- Brad nailer and brad nails if you want extra holding power
- Tape measure
- Level or laser level
- Miter saw, utility saw, or miter box
- Sanding block or sandpaper
- Drop cloths
- Rags for stain application
- Primer and paint, or stain and optional wood conditioner
- Paint brush and small roller
- Paintable caulk for perimeter joints if painting
- Lightweight spackle or wood filler for visible holes if needed
- Gloves, eye protection, and hearing protection when cutting
Design Options for a Dramatic Look
1. Random Textured Wood Wall
This is the most popular version. Pieces overlap, vary in tone, and create a sculptural surface. It looks high-end and organic at the same time.
2. Ombre Stain Effect
Use the same stain in heavier and lighter applications so the wall shifts gradually from light to dark. It reads like art, but it’s still made from bargain-bin materials.
3. Painted Graphic Wall
Prime and paint the shims and the wall behind them for a dramatic monochrome finish. Black, deep charcoal, forest green, and inky navy are especially striking.
4. Half-Wall Feature with Top Trim
If a full wall feels too intense, install shims on the lower half of the wall and cap the top with trim. It brings texture without taking over the room.
How to Plan the Layout
Measure the wall height and width in several places. Houses love pretending they’re square when they are not. Ceiling height may vary, corners may lean, and baseboards may not be perfectly level. That is normal. Annoying, but normal.
Before installation, decide whether you want a full random look or a more controlled pattern. A smart move is to make a small test board or lay out a few rows on the floor. This lets you see how the stain, spacing, and wood variation work together before you commit to the entire wall.
If you’re not sure how many shims to buy, do not rely on vibes alone. Cover a small sample area, such as 2 by 2 feet, count how many shims it takes, then multiply for your full wall. Add extra for cuts, mistakes, and the inevitable moment when one shim develops a personal grudge against your design.
Step-by-Step: How to Create a Dramatic Wall Accent Using Wood Shims DIY
Step 1: Prep the Wall
Remove wall décor, outlet covers, and switch plates. Patch holes, sand rough spots, and clean the wall so adhesive can bond properly. If you’re creating a wall with visible gaps between shims, paint the wall first in your chosen background color. A dark base coat adds shadow and makes the texture pop.
Step 2: Remove or Work Around Baseboards
For a floor-to-ceiling installation, remove the baseboard so the wall treatment looks integrated rather than layered on as an afterthought. If you’re doing a half wall or stopping above trim, you can leave the baseboard in place and plan your bottom row accordingly.
Step 3: Sand the Shims
Wood shims are rustic little creatures. Some are splintery, some are rough, and some look like they were born during a lumberyard windstorm. Lightly sand the front faces and edges so the finished wall looks intentional and feels safe to touch.
Step 4: Test Your Finish
Before finishing hundreds of pieces, test stain or paint on several shims. Wood absorbs color differently, and shims from different bundles may vary in grain. If you’re staining, this is also the moment to decide whether you want a natural, medium, or dramatic dark finish.
Step 5: Pre-Finish the Shims
For a stained wall, it is much easier to stain the visible faces and edges before installation. Let them dry fully. For a painted wall, you can either pre-paint or install first and finish later, but pre-finishing usually makes the final coat cleaner and faster.
Step 6: Mix the Bundles
Do not install one pack at a time. Mix pieces from several bundles so the grain and color variation looks natural across the wall instead of striped by accident. A little randomness is what makes the finished wall feel rich rather than repetitive.
Step 7: Mark Your Starting Line
Use a level to mark a straight reference line. Depending on your design, you may start at the top, bottom, or from a ledger line placed slightly above the base. A reference line matters because floors and ceilings are often slightly off, and your eye notices drift much faster than your brain forgives it.
Step 8: Install the First Pieces Carefully
The first row sets the tone for everything that follows. Apply adhesive to the back of the shim and press it firmly into place. If you are using a brad nailer, add a couple of brads for extra hold. Check the alignment often at the beginning. Once the first section is straight, the rest of the wall becomes much easier to build.
Step 9: Build the Texture as You Go
Continue attaching shims, varying lengths, tones, and thicknesses as needed. If your design includes intentional gaps, keep them consistent enough to look planned. If your goal is a dense texture wall, use smaller shims to fill open areas and create layered depth. Step back every few rows to evaluate the composition. Up close, everything looks chaotic. From six feet back, it becomes design.
Step 10: Cut Around Edges, Windows, and Outlets
As you reach the edges, mark each shim individually and cut to fit. Numbering the back of tricky edge pieces can save you from turning the final stage into a wooden jigsaw puzzle. Around outlets and switches, keep the cuts neat and leave room for the cover plate to sit properly.
Step 11: Add a Clean Finish at the Top and Sides
You can stop the installation with trim, butt it neatly into existing casing, or create a framed look around the whole treatment. A slim top trim piece helps the wall read as a finished feature rather than a collection of brave little wedges clinging to drywall.
Step 12: Touch Up and Finish
For painted versions, caulk the perimeter where the wall treatment meets trim, ceilings, and adjacent surfaces, then fill any visible nail holes before the final coat. For stained walls, skip caulking between individual shims and keep the natural relief visible. That texture is the star of the show.
Paint or Stain: Which Finish Looks Better?
If you want warmth, texture, and a more natural feel, stain is the winner. It highlights grain variation and makes the wall feel handcrafted. It also pairs beautifully with neutral rooms, earthy palettes, coastal spaces, and modern organic interiors.
If you want drama, graphic contrast, and a more contemporary mood, paint is the better choice. Painting the wall behind the shims in a dark tone before installation can create shadow lines that make even a simple layout look more architectural.
A hybrid approach works, too. Some DIYers stain the shims in several shades of the same color family, while others paint the background wall and leave the wood natural on top. That layered look can be especially striking in dining rooms, offices, and entry spaces.
Common Mistakes to Avoid
Skipping the wall prep
Dust, grease, and loose paint are enemies of good adhesion. Clean first.
Not testing stain first
Wood can absorb stain unevenly. A quick test prevents full-wall regret.
Installing from a crooked reference point
One bad starting line can throw off the whole design.
Forgetting about outlet depth and cover plates
Plan around electrical elements before the wall is crowded with installed pieces.
Using too much adhesive
Excess squeeze-out is messy and annoying to fix, especially on stained wood.
Ignoring texture on the existing wall
A lumpy wall can make a crisp design look unintentionally rustic. And not the cute kind.
Is This a Beginner-Friendly DIY?
Yes, with a small asterisk. This project is beginner-friendly in skill, but not always in patience. You do not need advanced carpentry knowledge to make a wood shim accent wall. What you do need is consistency, a decent eye for layout, and the willingness to repeat the same motion many, many times while questioning past decisions in the middle of row seven.
The good news is that the project is modular. You can work in stages, fix mistakes one piece at a time, and stop for the day without losing progress. That makes it much less intimidating than large-panel wall treatments or complicated trim patterns.
How to Make the Finished Wall Look More Expensive
- Use a dark painted backer wall for extra depth
- Mix shim lengths and tones intentionally
- Add a simple trim cap at the top or sides
- Keep cuts around outlets crisp
- Choose one visual direction and commit to it
- Step back often to check the balance of the composition
The most expensive-looking DIY walls are rarely the most complicated. They are the ones with clean planning, consistent execution, and a finish that suits the room.
Final Thoughts
A wood shim wall is proof that a dramatic accent does not have to be expensive, overly technical, or reserved for homes with renovation crews on speed dial. With the right wall, a clear layout, and a bit of finishing discipline, you can create a textured feature that feels warm, custom, and far more sophisticated than its price tag suggests. Whether you go natural, dark and moody, or somewhere in between, this is the kind of project that changes the room and your confidence level at the same time. Your wall gets a makeover, and you get bragging rights. That feels fair.
What the DIY Experience Is Really Like
The experience of building a dramatic wall accent using wood shims is a funny mix of excitement, repetition, doubt, and little bursts of genius. At the beginning, it feels almost too simple. You bring home a stack of inexpensive shims and think, “There is no way these tiny wedges are about to transform my room.” Then you lay out the first few pieces, and suddenly the wall starts whispering, “Oh, we are absolutely doing this.”
The prep stage is usually where reality taps you on the shoulder. Sanding takes longer than expected. Stain testing becomes a mini identity crisis. One color looks too orange, another too dark, another too “cabin in the woods,” and eventually you find the sweet spot. Once the finish goes on and the grain starts showing, that is often the first moment the project feels genuinely exciting. The wood pieces stop looking like leftover construction supplies and start looking like design material.
Installation is where the emotional roller coaster really gets its ticket punched. The first row can feel incredibly slow because every piece matters and every angle seems suspicious. You check the level, step back, squint, adjust, and repeat. But after a while, your hands learn the rhythm. Adhesive, place, press, check, move on. The wall becomes a puzzle in the best possible way. You stop thinking only in terms of rows and begin noticing flow, color balance, spacing, and texture. That is when the project starts feeling creative rather than merely technical.
There is also a very specific moment in nearly every wall project when the room looks worse before it looks better. Maybe half the wall is done. Maybe the unfinished edge is chaotic. Maybe there are tools everywhere and stain rags giving the room a “lumberjack was here” energy. That midpoint can mess with your confidence. But then another section goes up, the pattern starts connecting, and the design suddenly makes sense. It is one of the most satisfying shifts in DIY.
The final stretch is often the most rewarding. Trimming the edges, installing the last pieces, touching up the finish, and stepping back to see the whole wall for the first time feels fantastic. The texture catches light differently throughout the day. The room feels warmer. Furniture looks more grounded. Even the boring lamp in the corner seems to have developed better taste.
What surprises most people is how much a wood shim wall changes the mood of the room. It is not just visual. It adds depth, softness, and a handmade quality that flat painted walls usually cannot match. It also changes how you feel about your own skills. Once you turn a bundle of humble shims into something dramatic and custom-looking, other projects stop feeling quite so intimidating. Suddenly you are not just someone staring at a blank wall. You are the person who looked at that wall and thought, “I know exactly what you need.”