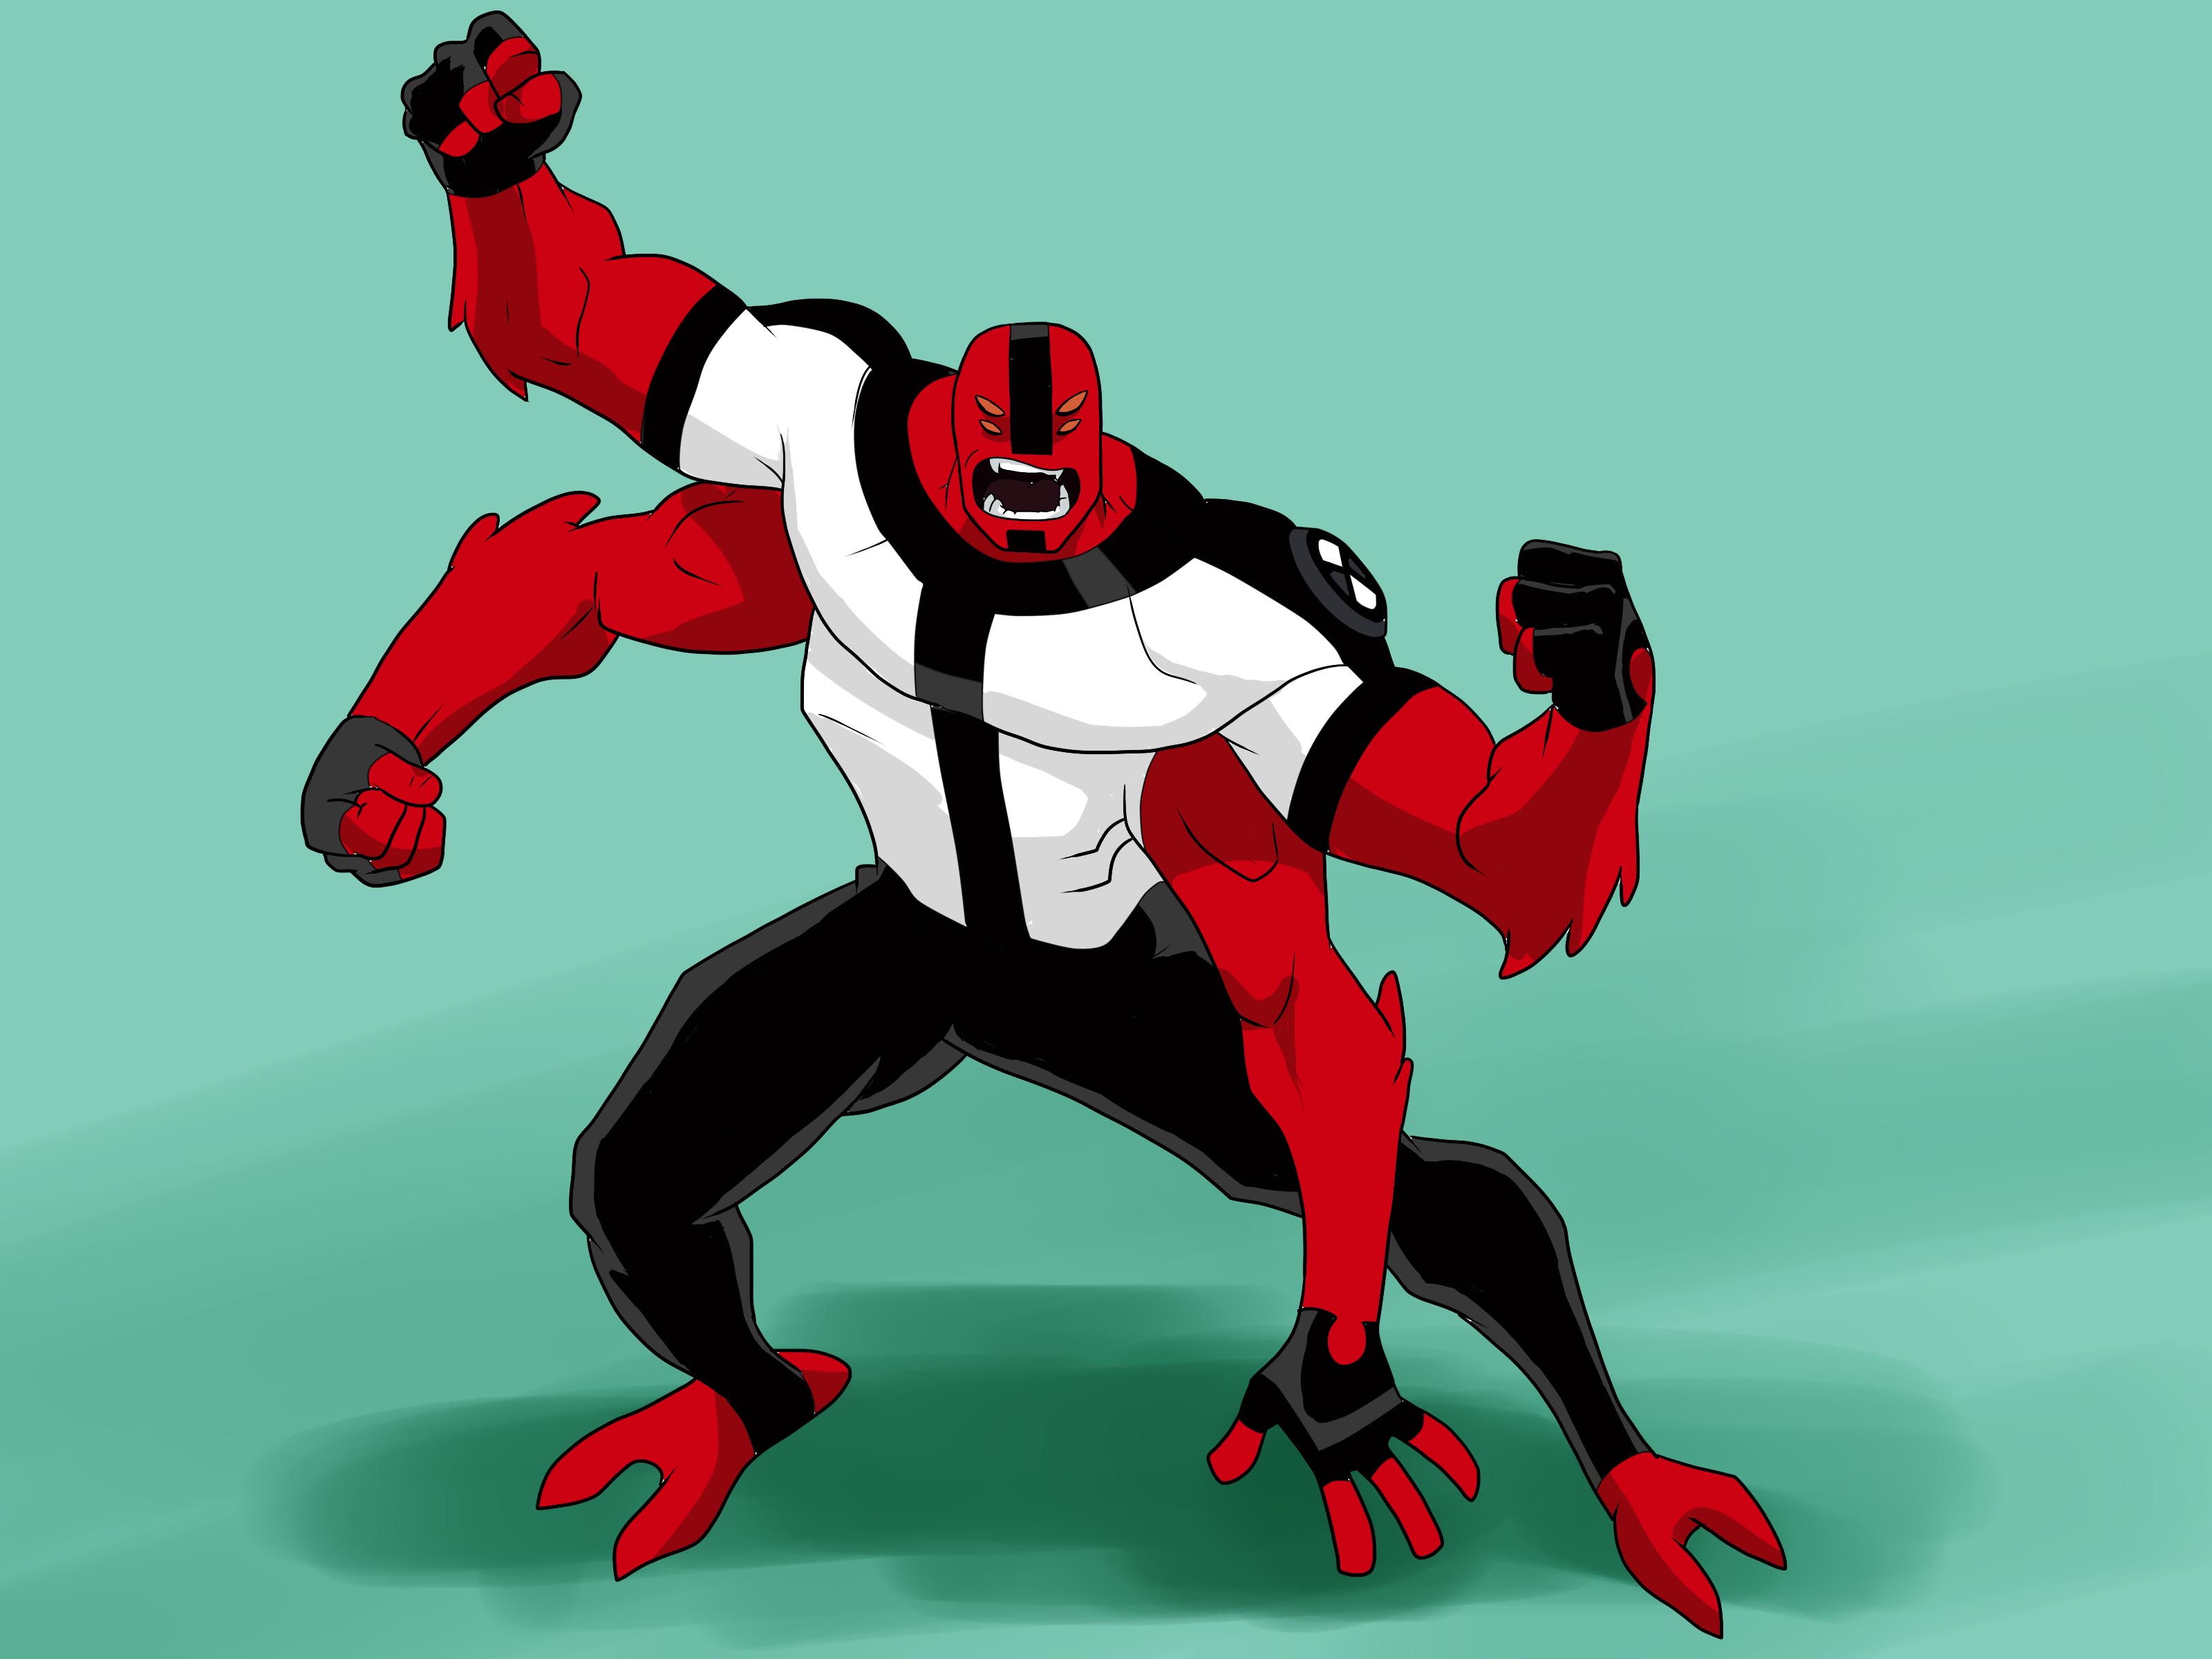
Learning how to draw Ben 10 aliens is one of the most entertaining ways to practice cartoon character design. You get fire creatures, crystal warriors, speed demons, four-armed powerhouses, bug-like flyers, and enough weird anatomy to make a science teacher quietly close the textbook.
The secret is not trying to copy every tiny detail immediately. Ben 10 alien designs are built around bold silhouettes, clear shapes, exaggerated proportions, and recognizable powers. Heatblast should look hot before you color him. Four Arms should look powerful before you draw a single muscle line. Diamondhead should read as sharp and crystalline even if your pencil is having a dramatic day.
This guide breaks down the process of drawing Ben 10 aliens in a beginner-friendly way. You will learn how to use simple construction shapes, create dynamic poses, add clean line art, use color effectively, and make your fan art look more confident without turning your sketchbook into an alien crime scene.
Start by Understanding Ben 10 Alien Design
Before drawing any alien, take a moment to study what makes the character recognizable. Most successful cartoon character designs can be understood through a few visual ingredients: silhouette, shape language, body proportions, facial features, pose, costume details, and color placement.
Ben 10 aliens are especially useful for drawing practice because each one has a strong visual identity. Their designs are not random collections of spikes, armor, and glowing green symbols. Every feature supports the alien’s power or personality.
- Heatblast uses flame-like shapes, rocky surfaces, and a tall, energetic body.
- Four Arms uses a broad torso, huge hands, thick limbs, and a powerful stance.
- Diamondhead relies on angular crystal forms, sharp shoulders, and a clean geometric silhouette.
- XLR8 looks fast because of his streamlined helmet shape, crouched posture, and long curved body lines.
- Stinkfly combines insect features, wings, claws, and a body shape that feels ready to launch into the air.
When you understand the design logic, drawing becomes much easier. You are no longer trying to memorize a thousand details. You are building a character from visual clues.
Gather the Right Drawing Supplies
You do not need a secret Omnitrix-powered art kit. A pencil, eraser, paper, and black fineliner are enough to begin. Colored pencils, markers, or a drawing tablet can help later, but they are optional.
Traditional Drawing Tools
- HB pencil for light sketching
- 2B pencil for darker lines and shadows
- Soft eraser or kneaded eraser
- Black fineliner or gel pen for clean outlines
- Colored pencils or alcohol markers for coloring
Digital Drawing Tools
For digital Ben 10 fan art, use any drawing app with layers. Keep your rough sketch on one layer, place cleaner line art above it, and add flat colors underneath. This makes mistakes much less terrifying because you can adjust parts without accidentally deleting your entire alien civilization.
How to Draw Ben 10 Aliens Step by Step
The best way to draw Ben 10 aliens is to follow a construction process. Start simple, then gradually add complexity. Professional-looking character art usually begins with circles, boxes, cylinders, and loose action lines. Fancy details come later.
Step 1: Choose One Alien and One Pose
Do not begin with a giant group drawing featuring every alien, a spaceship, explosions, villains, and possibly a dramatic sunset. Choose one character first. Heatblast, Four Arms, Diamondhead, and XLR8 are great beginner choices because their silhouettes are easy to recognize.
Pick a pose that matches the alien’s abilities. Draw Heatblast throwing a fireball. Draw Four Arms smashing the ground. Draw XLR8 leaning forward as if he is about to sprint. Draw Diamondhead creating crystal spikes from the floor.
A good pose tells viewers what the character can do before they even see the name.
Step 2: Draw the Line of Action
The line of action is a curved or straight guideline that shows the energy of the pose. Think of it as the invisible spine of the drawing. A running alien may have a long forward curve. A jumping alien may have an upward arc. A character landing with force may have a strong downward line.
Keep this first line loose. Do not worry about anatomy yet. You are designing motion, not filing an alien tax form.
Step 3: Build the Body with Simple Shapes
Use basic forms to establish the body. Circles are useful for heads and joints. Boxes work well for chests, armor, and mechanical parts. Cylinders help with arms and legs. Triangles can suggest claws, flames, spikes, and crystal points.
For example, when drawing Four Arms, begin with a wide box for the chest, a smaller block for the pelvis, four long cylinders for the arms, and thick leg cylinders. For Diamondhead, use angular boxes and triangles instead of soft rounded forms. For Heatblast, use a narrow torso, longer limbs, and flame-shaped guides around the head and shoulders.
This stage should look rough. That is normal. Every great character drawing begins life as a collection of shapes that looks slightly suspicious.
Step 4: Check Proportions Before Adding Details
Pause and compare the major parts of the body. Is the head too large? Are the arms too short? Does the character look balanced? Are both feet capable of standing on the same planet?
Silhouette matters more than small details at this stage. Squint at your drawing or view it from a distance. If you can recognize the alien from the outer shape alone, you are on the right track.
Step 5: Add the Head, Face, and Omnitrix Symbol
The face gives your alien personality. Some Ben 10 aliens have narrow eyes, others have large expressive eyes, and some use unusual head shapes that require less traditional facial structure. Keep the eyes aligned with the direction of the head. If the face turns, the eye line should curve around the head form.
Place the Omnitrix symbol carefully, usually on the chest, wrist, or another central visible area depending on the alien form. Treat it as an important design accent rather than a random green sticker. It should be readable, but it does not need to be enormous enough to receive its own postal code.
Step 6: Refine the Anatomy and Costume Shapes
Once the construction looks solid, turn your basic shapes into recognizable forms. Add muscles to Four Arms, crystal planes to Diamondhead, lava-rock textures to Heatblast, and sleek armor-like surfaces to XLR8.
Focus on the largest forms first. A character with strong major shapes will look better than one covered in tiny details but built on awkward proportions. Large chest shapes, shoulders, hips, hands, feet, and head forms should all work together before you add wrinkles, texture lines, or glow effects.
Step 7: Create Clean Line Art
Use darker, more confident lines over your rough sketch. Vary the line weight slightly. Thicker lines can help show the outer contour of the body or parts closer to the viewer. Thinner lines work well for interior details, facial features, texture marks, and costume seams.
Do not trace every sketch line like it is a legal document. Choose the strongest line for each shape. Clean line art feels intentional because it simplifies the drawing instead of repeating every uncertain pencil mark.
Step 8: Add Flat Colors and Simple Shadows
Color is one of the most recognizable parts of Ben 10 alien art. Begin with flat base colors. Then choose one light direction, such as light coming from the upper left. Add simple shadows on the opposite side of the body.
For Heatblast, use warm reds, oranges, yellows, and dark rocky tones. For Diamondhead, use teal or blue-green crystal colors with darker angular shadows. For Four Arms, use red skin, dark costume areas, and strong highlights on the upper muscles. For XLR8, use cool blues, dark armor sections, and bright highlights that suggest speed.
Keep shading simple. Cartoon art often looks stronger with clear shadow shapes than with overly blended realism.
How to Draw Popular Ben 10 Aliens
How to Draw Heatblast
Start Heatblast with a tall oval head and a narrow upper body. His overall silhouette should feel like a living flame. Build the torso from a slim rectangle or tapered box. Use long limbs, pointed fingers, and uneven rocky plates across the chest and arms.
The head flame is the star of the design. Draw flame shapes that flow upward and outward. Avoid making every flame point identical. Vary the direction and size, just as real fire flickers in unpredictable ways. Add rock-like cracks across darker body sections, then color the flames with yellow near the center and orange or red around the edges.
How to Draw Four Arms
Four Arms is a lesson in strength and balance. Begin with a huge chest shape, a compact waist, and thick legs. Place the upper pair of arms near the shoulder area and the lower pair slightly below the chest. Keep the arm spacing believable so they do not look like someone accidentally pasted extra limbs onto a regular body.
Use large hands and exaggerated forearms. His head should remain smaller than the massive torso, which makes the body look stronger. A wide-legged stance, clenched fists, and angled shoulders will make the pose feel powerful.
How to Draw Diamondhead
Diamondhead is easier to draw when you think like a geometry teacher with superpowers. Use triangles, diamonds, sharp angles, and flat planes. Avoid soft curves unless they are necessary for the pose.
Start with a diamond-shaped head and a broad angular chest. Build the arms and legs from faceted crystal forms. Add highlights to one side of each crystal plane and darker shadows to the other. This contrast creates the illusion of reflective crystal without requiring you to render every surface like a luxury chandelier.
How to Draw XLR8
XLR8 needs speed, even while standing still. Start with a forward-curving action line and build the body from sleek, aerodynamic shapes. The head should feel helmet-like, and the limbs should be long and streamlined.
Draw the legs bent as though he is ready to launch. Add curved motion lines behind the body, but do not overuse them. Two or three well-placed speed lines are exciting. Fifty speed lines look like the character is trapped inside a spaghetti tornado.
Use Reference Images the Smart Way
Reference images are not cheating. They are tools for understanding design, anatomy, proportions, colors, and poses. Study official artwork, screenshots, toy designs, animation stills, and licensed character references. Look for the shapes behind the finished art.
Try this practice method: first copy one alien pose carefully. Then put the reference away and redraw the alien from memory. Finally, create a new pose using what you learned. This process helps you move from copying details to understanding the character.
For original fan art, avoid tracing finished artwork and presenting it as your own. Build the pose, construction, line art, and coloring yourself. You will learn more, and your final drawing will have more personality.
Common Mistakes When Drawing Ben 10 Aliens
Adding Details Too Early
Many artists begin by drawing the Omnitrix symbol, face details, costume patterns, and tiny cracks. Then they discover the head is too large and the legs are pointing toward different dimensions. Build the body first. Details should support the design, not rescue it.
Ignoring the Silhouette
If an alien looks like a generic superhero when filled in as a black shape, revisit the major design elements. Make Four Arms broader. Make Diamondhead sharper. Make Heatblast more flame-like. Make XLR8 lean forward with speed and direction.
Drawing Stiff Poses
Aliens with superpowers should not look as though they are waiting for a school photo. Use a line of action, tilt the shoulders and hips, bend the knees, and push one part of the body forward. Even a simple standing pose becomes more interesting when the weight shifts naturally.
Using Too Many Colors
Strong cartoon designs usually rely on controlled color palettes. Stick to the character’s main colors, darker shadows, lighter highlights, and small green Omnitrix accents. Too many unrelated colors can make the design look muddy.
A Simple Seven-Day Ben 10 Drawing Challenge
Practice improves faster when you give yourself small, specific goals. Try this one-week challenge to build confidence.
- Day 1: Draw ten quick alien silhouettes.
- Day 2: Practice heads and facial expressions for one alien.
- Day 3: Draw hands, claws, feet, and action poses.
- Day 4: Draw Heatblast using simple shapes and flat colors.
- Day 5: Draw Four Arms in a powerful action pose.
- Day 6: Draw Diamondhead or XLR8 from a new angle.
- Day 7: Create an original Ben 10-inspired alien transformation using your own design ideas.
Keep each practice session manageable. Thirty focused minutes can teach you more than three exhausted hours spent fighting one elbow. Save your sketches, even the awkward ones. Comparing old art with new art is one of the best ways to notice real progress.
Extended Drawing Experience: What Practicing Ben 10 Aliens Can Teach You
Drawing Ben 10 aliens can feel like simple fan art at first, but the experience teaches several important art skills at the same time. The first lesson is that recognizable character design is often about decisions, not complexity. A character does not need hundreds of details to feel memorable. A sharp silhouette, a clear pose, a strong color palette, and one or two unusual traits can do most of the heavy lifting.
Many artists begin with Heatblast because he looks exciting. Flames are fun, glowing colors are dramatic, and rocky body textures make the character feel powerful. The challenge appears when you try to keep the fire shape readable. If every flame point looks identical, the character becomes stiff. If the flames go in every direction, the head becomes confusing. Over time, you learn that even wild-looking effects need structure. Fire still has flow, direction, and visual rhythm.
Four Arms provides a different kind of challenge. He teaches you how to organize anatomy. Drawing one pair of arms is already tricky for beginners. Drawing two pairs forces you to think about shoulder placement, chest structure, arm overlap, and body balance. The first few attempts may look like a muscular coat rack escaped from the gym. That is completely normal. With practice, you begin to understand that each arm needs a clear connection to the torso and a purpose within the pose.
Diamondhead teaches patience with geometry. Beginners sometimes draw crystal characters as smooth people with a few random triangles attached. A more convincing approach is to build the entire body from planes. The head, shoulders, arms, torso, and legs should feel carved rather than soft. This helps you understand light as well. When one crystal plane faces the light, it becomes brighter. When another plane turns away, it becomes darker. Suddenly, shading feels less mysterious because the shapes explain where the shadows belong.
XLR8 is useful for learning motion. A speed-based character cannot rely on costume details alone. His body must lean, stretch, curve, and point toward a destination. Drawing him helped many artists realize that action does not come from adding more speed lines. It comes from body language. The head, shoulders, hips, and legs should all agree about where the character is going. When they do, even a simple sketch can feel fast.
Another valuable experience is learning to accept rough drafts. Early sketches are supposed to look unfinished. They are planning tools, not public monuments. An artist who allows messy construction lines often improves faster than one who tries to create a perfect final drawing on the first attempt. Rough sketches make it easier to test poses, fix proportions, and explore new angles before committing to clean line art.
Ben 10 alien fan art also encourages creative experimentation. After drawing several official-style aliens, many artists begin asking interesting questions: What would an aquatic transformation look like? What kind of alien would control sound, shadows, plants, magnets, ice, or gravity? What shape language would fit those powers? Would a sound-based alien use circular forms? Would a gravity alien look heavy and blocky? Would an ice alien use sharp crystal shapes or soft snowy forms?
That is the moment when fan art becomes design practice. You are no longer only recreating a character. You are learning how visual choices communicate abilities and personality. Keep drawing, keep experimenting, and let your sketchbook become a safe place for strange anatomy, bold poses, imperfect lines, and aliens that may or may not need their own theme song.
Note: This article is an independently written drawing guide based on official character-reference study and established cartoon, gesture, anatomy, perspective, silhouette, and character-design practices. Ben 10 and its related characters are owned by their respective rights holders; create and share fan art respectfully.