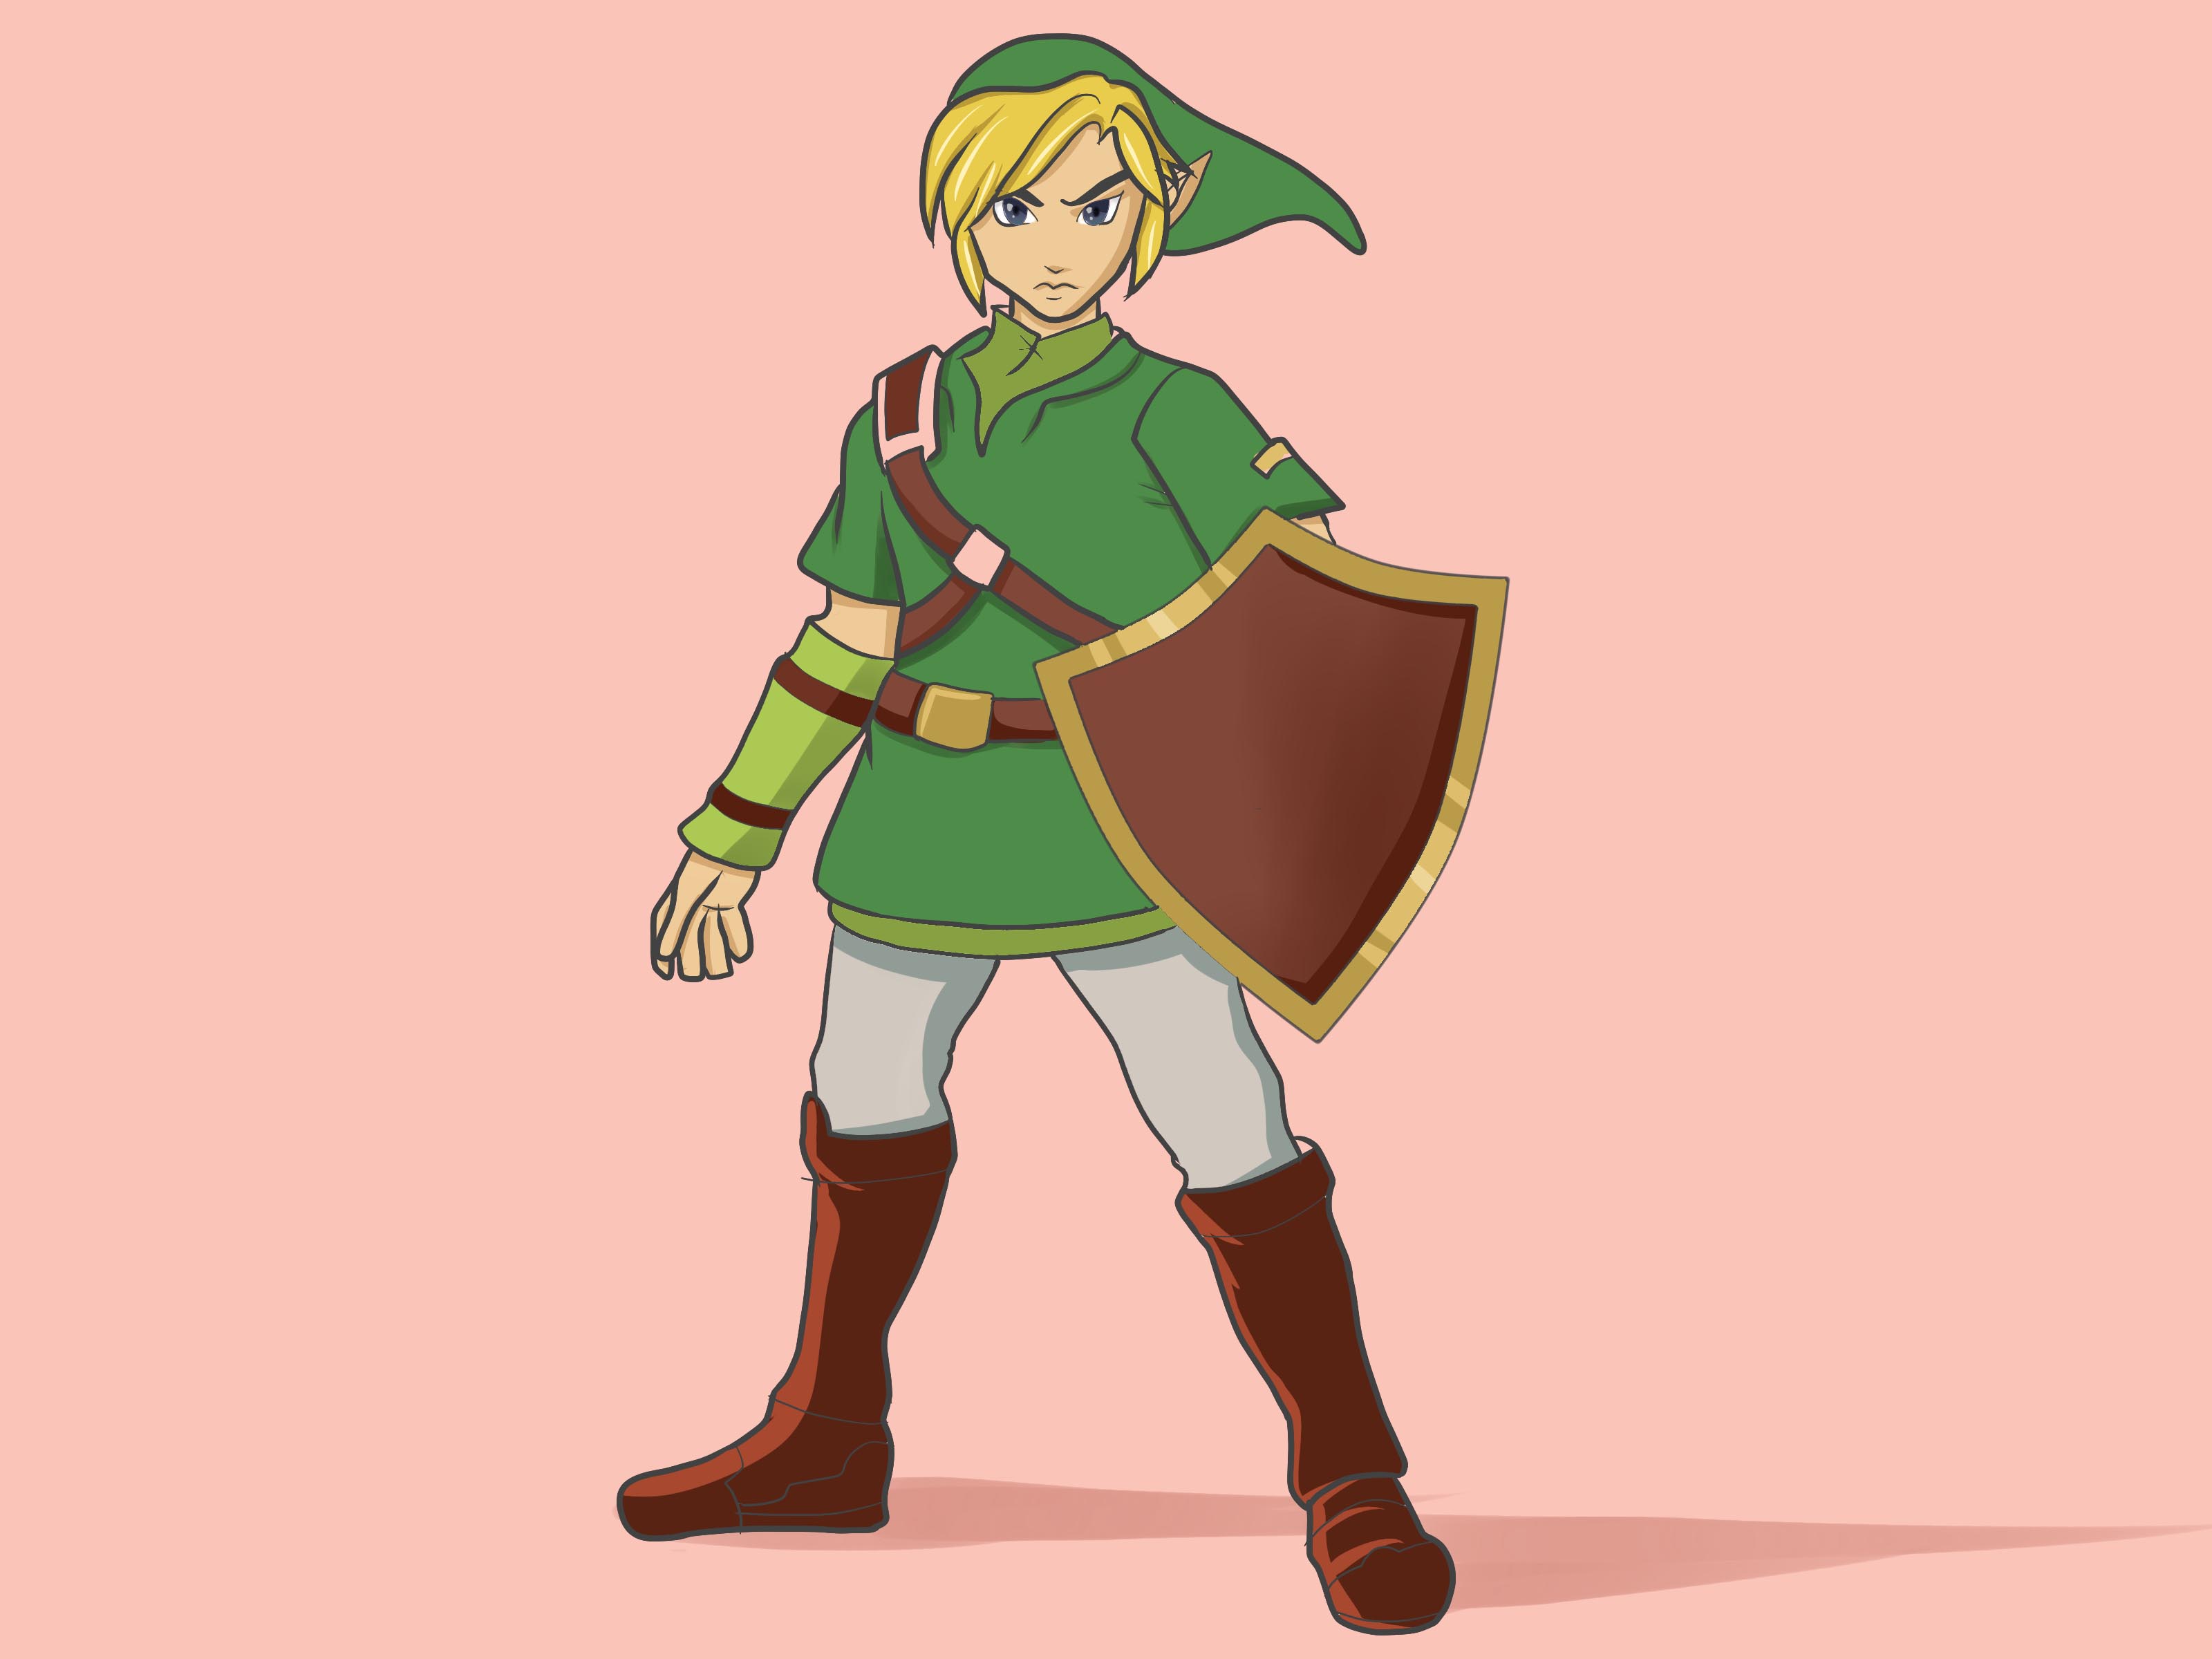
Learning how to draw Link is a little like beginning a new adventure in Hyrule. At first, the blank page looks peaceful and harmless. Five minutes later, you are fighting an oddly shaped ear, a rebellious sword, and hair that appears to have been styled during a windstorm.
Fortunately, Link becomes much easier to draw when you stop thinking of him as a complicated video game hero and start seeing him as a collection of simple shapes. His head begins as an oval, his torso as a tapered box, and his limbs as flexible cylinders. Once those foundations are in place, you can add the recognizable details: pointed ears, layered blond hair, a tunic, boots, belts, a sword, and a shield.
This step-by-step Link drawing tutorial focuses on his classic heroic appearance, including the iconic green tunic. However, the same construction method can be adapted for his blue Champion’s Tunic, traveling clothes, armor sets, or other designs from The Legend of Zelda series.
What You Need to Draw Link
You do not need a legendary collection of art supplies. A few basic tools are enough for a clean pencil drawing or a fully colored illustration.
- A pencil, preferably HB or 2H for the initial sketch
- An eraser, including a kneaded eraser if available
- Drawing paper or a sketchbook
- A ruler for checking the sword and shield
- A black fineliner or ink pen for clean outlines
- Colored pencils, markers, watercolor, or digital brushes
- A clear reference image showing the version of Link you want to draw
Digital artists can use any illustration program that supports layers. Keep the construction sketch, clean line art, flat colors, shadows, and highlights on separate layers. This makes corrections much easier, especially when you discover that Link’s sword is pointing directly through his own hat.
Understand Link’s Most Recognizable Features
Before drawing, study the visual elements that make the character immediately recognizable. Exact details change across the games, but several traits appear repeatedly.
Pointed Hylian Ears
Link’s long, pointed ears create a distinctive silhouette. They extend outward from the sides of his head and taper to narrow tips. Avoid making them perfectly horizontal. A slight upward angle usually looks more natural and energetic.
Layered Blond Hair
His hair is generally divided into large, pointed locks rather than hundreds of individual strands. The bangs frame his face, while thicker sections spread around the ears and back of the neck. Think in clumps first and strands second.
Adventurer’s Clothing
The classic design includes a tunic, undershirt, belt, fitted pants, gloves or arm guards, and tall boots. More recent versions may feature a blue tunic, belts for equipment, layered fabrics, armor, or a hood.
Sword and Shield
Link is strongly associated with a sword and shield. These accessories help communicate his role even when the costume is simplified. They also provide plenty of opportunities to practice straight lines, symmetry, perspective, and quiet artistic frustration.
How to Draw Link Step by Step
Step 1: Choose a Pose and Draw the Gesture
Begin with a light gesture drawing that captures the direction and energy of the pose. Draw a small oval for the head, a curved line for the spine, a short line for the shoulders, and longer lines for the arms and legs.
For a simple standing pose, angle one shoulder slightly higher than the other and place most of the body’s weight over one leg. This prevents the character from looking like a cardboard display in a game store.
For an action pose, lean the torso forward, bend the knees, and allow the arms to move in different directions. Imagine what Link is doing. Is he preparing to swing a sword, raising his shield, drawing a bow, or running away from a chicken he should not have bothered?
Step 2: Build the Body With Simple Forms
Turn the gesture into a three-dimensional mannequin. Use a rounded box or egg shape for the rib cage and a smaller block for the pelvis. Connect them with a short waist. Build the arms and legs from tapered cylinders, then indicate the joints with small circles.
A youthful version of Link often has a relatively large head, narrow shoulders, slim limbs, and compact hands and feet. An older or more realistic version can have broader shoulders and longer limbs. Measure proportions from your chosen reference rather than assuming every Link uses the same anatomy.
Keep these lines light. Construction marks are temporary scaffolding, not sacred inscriptions carved into the Temple of Time.
Step 3: Construct the Head
Draw an oval for the skull and narrow the lower half into a soft jawline. Add a vertical centerline that follows the direction of the face. Then draw a horizontal eye guideline approximately halfway down the head.
If Link is facing three-quarters to the side, curve both guidelines around the form. The centerline should shift toward the far side of the face, helping you place the nose, mouth, and chin correctly.
Add the neck beneath the jaw. Keep it relatively slim, but make sure it supports the head. A neck that is too thin can make the hero of Hyrule look as though one enthusiastic nod would end the adventure.
Step 4: Draw Link’s Ears
Place the base of each ear near the eye and nose region. Extend the outer contour into a long triangular point, then connect it back to the side of the head. Add one or two curved interior lines to suggest the ear’s structure.
In a three-quarter view, the nearer ear will appear larger and more visible. The far ear may be partially covered by hair. Check the angle carefully because mismatched ears can make the head appear twisted.
Step 5: Add the Facial Features
Draw the eyes along the horizontal guideline. Link’s eyes are usually large enough to remain expressive but not so enormous that he resembles a surprised mascot. Add upper eyelids with slightly stronger lines and keep the lower edges lighter.
Place the eyebrows above the eyes. Angled eyebrows create determination, while relaxed curves produce a calmer expression. Draw the nose with a short bridge or simple angular mark, depending on the style. Position the mouth between the nose and chin.
For a heroic expression, keep the mouth neutral or slightly firm. Avoid exaggerating every feature at once. A character can look focused without appearing furious at breakfast.
Step 6: Draw Link’s Hair
Start by sketching the overall mass of the hair around the skull. Do not attach each lock directly to the head outline. Hair has volume and should sit slightly above the skull.
Divide the hair into several major sections:
- Large bangs sweeping across the forehead
- Side locks framing the cheeks and ears
- Layered sections behind the ears
- Shorter pointed locks around the neck
Vary the size and direction of the shapes. Perfectly repeated spikes look mechanical. Use a few smaller strands only after the major hair masses are working.
Step 7: Sketch the Hat or Hair Silhouette
For classic Link, draw the long cap beginning near the top of the head. Let it bend backward and gradually taper to a point. The cap should respond to gravity and movement rather than sticking out like a rigid traffic cone.
If you are drawing a version without the traditional cap, refine the back of the hair instead. Modern designs often expose more of Link’s layered hairstyle and add equipment around the shoulders.
Step 8: Draw the Tunic and Undershirt
Use the body construction as a guide rather than drawing clothing as a separate flat symbol. Sketch the neckline first, followed by the shoulders and sleeves. The tunic should overlap the chest and widen slightly toward the hips.
Add a belt around the waist. Depending on the design, Link may also have a diagonal strap crossing his torso. Show the strap following the curve of the rib cage so it feels attached to the body.
Place clothing folds where fabric is compressed, stretched, or supported. Useful locations include the armpits, elbows, waist, hips, and knees. A few purposeful folds look more convincing than dozens of random zigzags.
Step 9: Refine the Arms, Gloves, and Hands
Build the forearms from tapered forms, then draw gloves, bracers, or sleeves over them. Hands can be simplified into mitten shapes during the sketch stage. After the pose is correct, separate the thumb and fingers.
When Link grips a sword, wrap the fingers around the handle rather than drawing them as parallel lines placed on top of it. The thumb generally crosses the grip from the opposite side.
Hands are famously difficult, so use your own hand as a reference. Hold a pen, ruler, or similar object and observe how the knuckles overlap. Your hand may not be destined to hold the Master Sword, but it remains a very cooperative model.
Step 10: Draw the Legs and Boots
Refine the thighs and lower legs over the construction cylinders. Link’s pants are often close-fitting, so the knee and calf shapes may remain visible. Add only enough folds to show bending and tension.
Draw the boots as solid three-dimensional forms. Establish the ankle, heel, sole, and toe direction before adding straps or decorative seams. Both feet should rest on the same ground plane unless Link is jumping.
Step 11: Add the Sword
Draw a straight guideline through the center of the sword. Build the blade symmetrically around it, tapering toward the tip. Add the guard, grip, and pommel as separate shapes.
Check the blade’s width from top to bottom. A sword that becomes wider and narrower without a design reason will look bent. Use a ruler for the initial structure if needed, then soften or stylize the edges during cleanup.
When the sword points toward or away from the viewer, use perspective. The blade will appear shorter, and the nearer parts will look larger. This technique is called foreshortening and may require several attempts.
Step 12: Construct the Shield
Begin with a vertical centerline and mark the shield’s height and width. Draw one half of its outline, then mirror the general shape on the opposite side. The result does not need mathematical perfection, but it should feel balanced.
Add a border inside the outer contour. Then place the main symbols and decorative shapes using the centerline as a guide. If the shield is angled, the far side should appear narrower.
Do not begin with the tiny decorations. Establish the overall shield first. Otherwise, you may create a magnificent emblem surrounded by a shape resembling a dented pizza box.
Step 13: Clean Up the Line Art
Reduce the opacity of a digital sketch or lightly erase a pencil sketch. Trace the final contours with confident strokes. Use thicker lines around the outer silhouette and thinner lines for facial features, fabric seams, hair details, and interior decorations.
Allow some lines to stop before they meet. This prevents the drawing from feeling overly outlined and helps suggest light. Rotate the paper or canvas whenever doing so creates a more comfortable stroke.
Before inking every detail, zoom out or hold the page at arm’s length. Link should remain readable as a complete figure. If the silhouette is confusing, more tiny belt buckles will not save it.
Step 14: Apply the Base Colors
For the classic design, begin with a green tunic and cap, a light undershirt, brown boots and belts, blond hair, and natural skin tones. Keep each area flat and separate during the first color pass.
Other versions may use a blue tunic, darker trousers, metal armor, patterned fabric, or weathered equipment. Sample colors from a reference if accuracy matters, but adjust them slightly when necessary to maintain visual contrast.
Step 15: Add Shadows and Highlights
Choose one light direction and apply it consistently. Add shadows beneath the hair, chin, sleeves, belt, tunic, equipment, and overlapping limbs. Use broader shadow shapes before painting small details.
Place highlights along upward-facing surfaces, including the hair, shoulders, sword edges, shield border, and boots. Metal should generally have sharper highlights than cloth. Leather can use smaller, softer highlights, while fabric usually benefits from broad and restrained lighting.
Common Mistakes When Drawing Link
Starting With Details Too Soon
Drawing the eyes, shield emblem, or sword decoration before checking the pose often creates a beautifully detailed character with broken anatomy. Finish the gesture and major forms first.
Making Both Sides Perfectly Symmetrical
Natural poses contain subtle differences. One shoulder may rise, one arm may bend more, and the hair may fall unevenly. Controlled asymmetry makes the drawing feel alive.
Drawing Hair as Individual Strands
Hundreds of thin lines can turn Link’s hair into dry grass. Establish large locks and use small strands only for accents.
Ignoring the Body Beneath the Clothing
Clothing must wrap around a believable figure. Construct the torso and limbs before adding the tunic, belts, gloves, and boots.
Using Random Clothing Folds
Folds should radiate from compression and tension points. Study where the body bends and where belts or straps pull against the fabric.
Making the Accessories Too Small
Link’s equipment contributes strongly to his silhouette. A tiny sword or shield may make the design less recognizable. Compare accessory size with the torso, arms, and head.
How to Make Your Link Drawing More Dynamic
Once you can draw a standing version, experiment with stronger movement. Curve the torso, rotate the shoulders against the hips, and bend the limbs at different angles. Overlap forms to create depth.
You can also use Link’s equipment to strengthen the composition. A raised shield can frame his face, while a sword creates a strong directional line. Flowing hair, clothing, grass, dust, or magical effects can reinforce the action.
Expressions matter as much as anatomy. Narrowed eyes and lowered eyebrows communicate focus. Raised eyebrows and an open mouth suggest surprise. A subtle head tilt can make a quiet pose more thoughtful or alert.
Ways to Practice Drawing Link
- Draw only Link’s head from front, side, and three-quarter views.
- Practice five small poses without adding clothing details.
- Draw the sword and shield separately using basic perspective.
- Compare classic, cartoon-styled, and realistic versions of Link.
- Redraw the same pose after one week and compare the results.
- Create a silhouette challenge using only solid black shapes.
- Design an original outfit while preserving Link’s recognizable features.
Short, focused exercises usually produce faster improvement than spending six hours polishing one drawing. Repetition builds confidence, and confidence produces cleaner lines.
The Drawing Experience: What You Learn From Practicing Link
The first attempt at drawing Link often reveals an important lesson: recognizing a character is not the same as understanding the character’s design. Many people can picture his green clothing, sword, shield, pointed ears, and blond hair. Yet when the pencil touches the page, those familiar features suddenly become surprisingly complicated. The experience teaches artists to observe rather than rely entirely on memory.
A common early challenge is the head. The face may look acceptable until the ears and hair are added. Then the proportions begin competing with one another. The ears become too long, the hair covers the eyes, or the jaw grows wider with every correction. The most useful response is not to erase furiously. Instead, return to the centerline, eye guideline, and skull shape. These simple construction marks act like a map when the facial features wander off course.
The costume creates another useful learning experience. Beginners frequently draw the tunic as a flat green shape placed over the body. It looks recognizable but lacks weight. Studying how the belt compresses the fabric and how folds form beneath the arms immediately improves the result. The artist begins to understand that clothing is affected by anatomy, gravity, movement, and material thickness. That lesson applies to nearly every clothed character, not just Link.
Drawing the sword and shield usually produces a different kind of difficulty. Organic shapes allow a little flexibility, but geometric equipment exposes every crooked line. A slightly uneven shield may be charming; a severely tilted centerline makes the entire object look melted. Using guidelines can initially feel like cheating, but it is simply good planning. Architects use measurements, and even heroes probably prefer swords with straight blades.
Another experience shared by many artists is the temptation to keep correcting the same drawing forever. One eye is adjusted, which makes the nose appear misplaced. The nose is moved, which makes the mouth look too low. Soon the paper resembles an archaeological site containing seventeen previous versions of Link. At that point, beginning a fresh sketch is often more productive than continuing to repair the old one.
Repeated practice also changes what the artist notices. During the first drawing, attention goes to obvious features such as the cap and sword. During later drawings, subtler relationships become visible: the angle of the shoulders, the size of the hands, the rhythm of the hair shapes, and the way equipment affects the silhouette. Progress is not only improved hand control. It is improved seeing.
Perhaps the most satisfying stage occurs when the drawing begins to feel like Link before every detail is finished. A rough silhouette with pointed ears, a compact heroic pose, and recognizable equipment can communicate the character immediately. That moment proves that successful character drawing depends less on decorative complexity than on clear shapes, proportion, gesture, and visual storytelling.
The experience also encourages experimentation. After copying an official pose, an artist may create an original scene: Link resting near a campfire, exploring a ruined temple, preparing to fight a monster, or proudly holding a cooking pot after producing something only technically edible. These personal variations turn a practice exercise into a piece of storytelling.
Most importantly, drawing Link teaches patience without requiring perfection. Each attempt solves a different problem. One drawing may have a strong pose but weak hands. Another may have excellent colors but a crooked shield. Instead of judging the whole attempt as good or bad, identify the part that improved and the part to practice next. Artistic growth works much like progressing through an adventure: one challenge, one tool, and one small victory at a time.
Conclusion
To draw Link successfully, begin with gesture, proportion, and simple three-dimensional forms. Construct the head and body before adding pointed ears, layered hair, clothing, equipment, line art, and color. Work from large shapes toward small details, and use a clear reference for the specific version you want to create.
Your first Link drawing does not need to look ready for an official game cover. Concentrate on making the pose readable and the major features recognizable. With repeated practice, cleaner lines, stronger anatomy, and more convincing equipment will follow. Even the Hero of Hyrule had to begin somewhere.