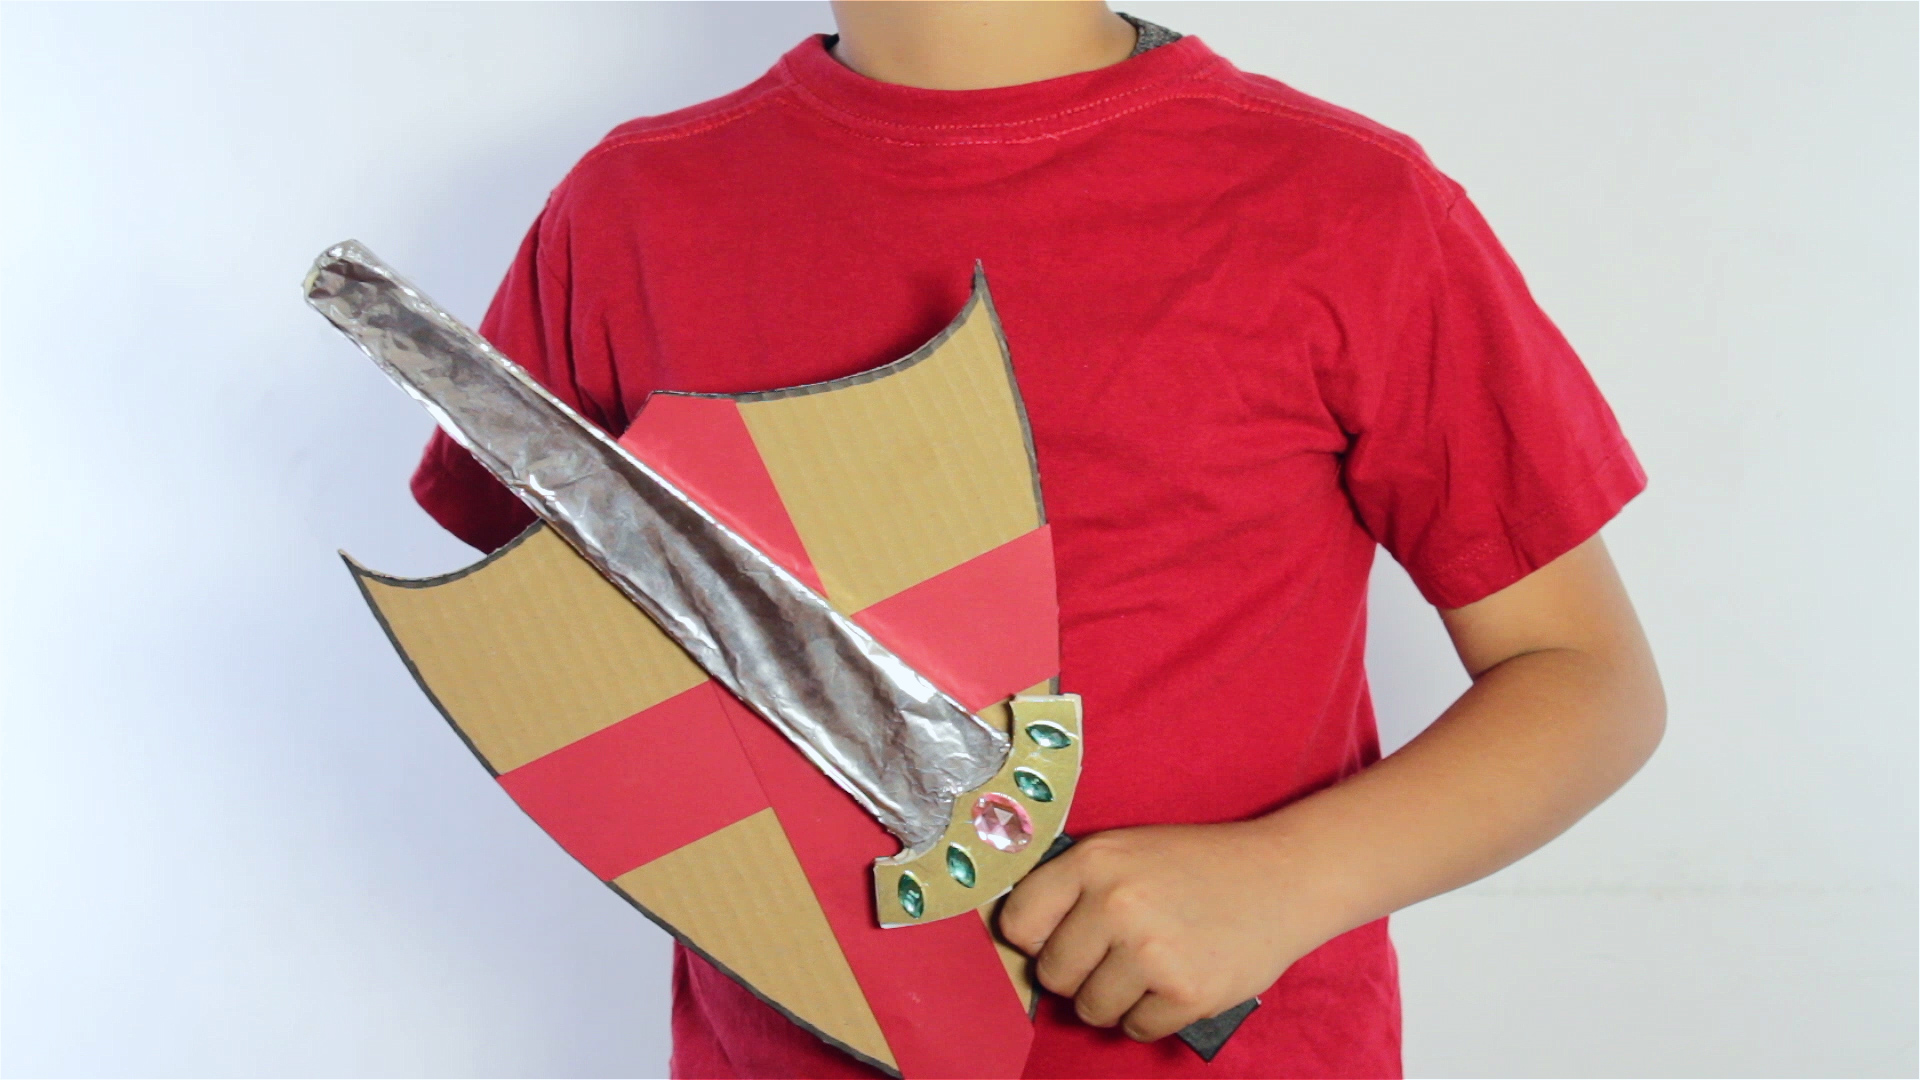
A cardboard sword is one of those magical crafts that proves you do not need a workshop, a royal armory, or a suspiciously expensive costume store to make something awesome. With a clean cardboard box, a little tape, some foil, and a heroic amount of imagination, you can build a lightweight pretend-play sword for costumes, school projects, theater props, birthday parties, Halloween outfits, or rainy-day adventures at home.
This simple craft guide walks you through how to make a cardboard sword that looks cool, feels sturdy, and stays safe for creative play. The goal is not to create a weapon. The goal is to create a fun prop that can survive dramatic castle speeches, pirate poses, backyard quests, and at least one child declaring, “Behold, my legendary blade!” before lunch.
Why Make a Cardboard Sword?
Learning how to make a cardboard sword is more than just cutting a sword shape from an old box. It is a hands-on DIY craft that teaches design, measuring, symmetry, layering, problem-solving, and safe tool use. Kids get to practice fine motor skills, while adults get the rare joy of turning recycling into something more exciting than a flattened shipping box.
Cardboard is also forgiving. If the first blade looks too short, make another. If the hilt looks crooked, cover it with tape and call it “battle-worn.” If the foil wrinkles, congratulations: your sword now has ancient dragon-forged texture. That is the beauty of cardboard crafts. Perfection is optional. Creativity is not.
Best Uses for a DIY Cardboard Sword
A homemade cardboard sword works well as a costume accessory, a classroom history prop, a pretend-play toy, a theater decoration, a party craft, or a fantasy-themed project. It can become a knight sword, pirate cutlass, Viking blade, Roman-style short sword, Minecraft-inspired sword, or magical fantasy sword depending on the shape and decorations you choose.
Materials You Will Need
Before you begin, gather everything in one place. A clean table, floor mat, or covered workspace helps keep the project organized and keeps glue from becoming a permanent member of your furniture family.
- Sturdy corrugated cardboard from a clean shipping box
- Pencil or marker
- Ruler or yardstick
- Scissors for thin cardboard
- Craft knife or box cutter for thick cardboard, adult use only
- Cutting mat or thick scrap cardboard for protecting the table
- Masking tape, duct tape, or packing tape
- School glue, glue stick, or hot glue, depending on age and supervision
- Aluminum foil for a shiny blade
- Paper towel tube or toilet paper tube for the handle, optional
- Acrylic paint, markers, stickers, gems, yarn, or string for decoration
Step 1: Choose Your Sword Style
Start by deciding what kind of sword you want to make. A classic knight sword is the easiest option because it uses straight lines, a simple pointed or rounded blade, a cross guard, and a handle. A pirate sword can have a curved blade. A fantasy sword can be wide, dramatic, and slightly ridiculous in the best possible way. A pixel-style sword uses blocky squares and is great for video-game-inspired costumes.
For beginners, choose a straight sword about 24 to 30 inches long. This size is large enough to look impressive but small enough to handle without accidentally knocking over a lamp, a snack bowl, or a sibling’s tower of blocks.
Beginner-Friendly Measurements
A good starter design is about 24 inches long, with an 18-inch blade and a 6-inch handle. Make the blade about 3 inches wide near the base and narrow it gradually toward a rounded tip. The cross guard can be 8 to 10 inches wide and 2 inches tall. These measurements do not need to be exact, but they help keep the sword balanced and comfortable.
Step 2: Draw the Sword Outline
Lay your cardboard flat with the corrugation lines running from the handle toward the tip. This matters because cardboard is stronger when the inner ribs run along the length of the blade. If the ribs run sideways, the sword may bend like a tired noodle after five minutes of heroic posing.
Use a ruler to draw a long center line. This helps keep the blade symmetrical. Sketch one side of the sword first, then mirror it on the other side. Do not make the tip sharp. A rounded or slightly blunt tip is safer and still looks great once wrapped in foil or tape.
Design Tip
If drawing freehand feels intimidating, fold a sheet of paper in half, draw half the sword, cut it out, and unfold it to create a symmetrical template. Then trace the template onto cardboard. This trick saves time and prevents the blade from looking like it was designed during an earthquake.
Step 3: Cut Out Two Matching Sword Shapes
Cut out the first sword shape carefully. For thin cardboard, scissors may work fine. For thick corrugated cardboard, an adult should use a craft knife on a protected surface. Slow, shallow cuts are safer and cleaner than trying to slice through everything at once.
Once the first sword shape is cut, place it on another piece of cardboard and trace around it. Cut out the second shape. Two layers make the sword much stronger than one. If you want an extra durable cardboard sword, cut a third narrow blade piece and place it between the outer layers as a center support.
Why Two Layers Matter
A single cardboard sword may look fine at first, but it can bend near the handle or crease along the blade. Layering two matching pieces gives the sword more thickness, better structure, and a cleaner finished edge. It also gives you a chance to hide tape, support strips, and reinforcement inside.
Step 4: Reinforce the Blade
Place one sword shape flat on the table. Add a long strip of cardboard down the center of the blade, starting near the tip and extending into the handle. This inner spine helps reduce bending. If you are making the sword for decoration only, cardboard reinforcement is enough.
Some craft builders use a wooden dowel, yardstick, or sturdy tube inside the sword for extra support. If you choose this method, make sure both ends are fully covered with tape and padding so nothing pokes through. For children’s pretend play, cardboard-only reinforcement is usually the safer option.
Best Reinforcement for Kids
For younger children, use folded cardboard strips instead of wood. Glue or tape the strips into the center of the blade and handle. This keeps the sword lightweight and flexible while still giving it enough strength for costume use and gentle role-play.
Step 5: Glue and Tape the Layers Together
Apply glue to the inside of one sword shape, especially around the blade, handle, and edges. Press the second sword shape on top, lining up the edges as closely as possible. Use books or another flat weight to hold the pieces together while the glue dries. If you are using hot glue, an adult should apply it in small sections so the glue does not cool before the layers are aligned.
After the glue sets, wrap tape around the edges. Masking tape is easy to paint over. Duct tape is stronger and creates a clean border. Packing tape works in a pinch, though it can be slippery when painted. Tape the handle especially well because that is where the most stress happens.
Edge-Smoothing Trick
If the edges look rough, cover them with strips of masking tape. Fold each strip evenly over the edge, half on the front and half on the back. This hides ragged cardboard, adds strength, and makes the sword more comfortable to hold.
Step 6: Make the Cross Guard
The cross guard is the horizontal piece between the blade and the handle. It gives the sword its classic shape and makes the project look much more finished. Cut a rectangle of cardboard about 8 to 10 inches long and 2 inches wide. Round the corners if you want a softer look.
Cut a slot in the center just wide enough for the blade to slide through. Slide the guard down to the base of the blade and tape or glue it in place. If the slot is too loose, add small folded cardboard wedges underneath and cover them with tape.
Creative Guard Shapes
Try a straight knight-style guard, a curved pirate guard, a diamond-shaped fantasy guard, or a blocky video-game guard. This small detail can completely change the personality of the sword. Yes, cardboard swords have personalities. Some are noble. Some are dramatic. Some look like they demand their own theme music.
Step 7: Build a Comfortable Handle
A good handle makes the sword easier to carry and more fun to use. You can keep the cardboard handle as part of the original cutout, or you can wrap it with a toilet paper tube, paper towel tube, foam sheet, or layers of tape. The handle should fit comfortably in the hand and should not have sharp cardboard corners.
Wrap the handle with masking tape or duct tape. For a leather-like look, use brown tape, black tape, yarn, or strips of paper. Spiral the material around the handle from top to bottom. Add a small cardboard circle or oval at the end to create a pommel.
Handle Fit Tip
If the sword is for a child, check the handle size before gluing everything permanently. A handle that is too wide can be awkward to hold. A handle that is too thin may bend. The best handle feels sturdy but not bulky.
Step 8: Wrap the Blade in Foil
Aluminum foil gives a cardboard sword an instant metal effect. Tear off a piece of foil slightly longer than the blade. Smooth it gently over one side, fold it around the edges, and tape it on the back. Repeat for the other side if needed.
A glue stick can help foil lie flat without making big bumps. Avoid using too much wet glue because it can soften the cardboard. If the foil wrinkles, do not panic. Real swords in stories always have mysterious scratches, ancient marks, and dramatic shine. A few wrinkles add character.
Alternative Blade Finishes
Instead of foil, you can paint the blade silver, cover it with silver duct tape, use metallic poster board, or leave it plain and decorate it with runes, stars, lightning bolts, or royal patterns. For younger kids, markers and stickers are the easiest mess-free option.
Step 9: Decorate Your Cardboard Sword
Now comes the fun part: turning a plain cardboard shape into a legendary prop. Paint the guard gold, brown, black, or red. Add sticker gems to the pommel. Draw lines down the blade to create a beveled effect. Wrap string around the handle for texture. Add a name to the blade if you want maximum drama.
Popular sword names include “Dragon Spark,” “The Snack Defender,” “Thunder Slice,” “Sir Wiggleblade,” and “The Homework Vanquisher.” Naming the sword makes the craft more memorable and gives kids a storytelling prompt after the project is finished.
Decoration Ideas by Theme
- Knight sword: Silver blade, gold guard, brown handle, jewel stickers.
- Pirate sword: Curved blade, black handle, red ribbon, skull sticker.
- Viking sword: Wide blade, simple guard, leather-look handle, carved-style marker designs.
- Fantasy sword: Large guard, bright colors, foil details, magical symbols.
- Pixel sword: Square edges, blocky colors, paper squares glued to the blade.
Step 10: Test for Safety and Strength
Before the sword is used for a costume or pretend play, check the whole project. Make sure the tip is rounded, the edges are taped, the handle is secure, and no support piece can poke through. Wiggle the blade gently. If it bends too much near the handle, add more tape or another cardboard strip along the base.
The sword should be used for posing, storytelling, photos, performances, and gentle play. It should not be used for rough sword fighting, hitting people, or attacking furniture. Chairs may look like castle guards, but they have done nothing wrong.
Common Mistakes to Avoid
Using Weak Cardboard
Thin cereal-box cardboard can work for small decorations, but it is usually too flimsy for a full-size sword. Use corrugated cardboard from a shipping box for better structure.
Making the Tip Too Sharp
A sharp cardboard tip can bend, tear, or poke. Keep the end rounded or blunt. It will still look like a sword once decorated.
Skipping Reinforcement
The area where the blade meets the handle is the first place to fail. Reinforce it with extra cardboard, glue, and tape.
Painting Before Taping
Tape first, then paint. Paint does not always stick well to dusty cardboard edges, and tape can pull paint off if added later.
Forgetting Dry Time
Glue needs time to set. If the sword is played with too soon, the layers may slide apart. Give it enough drying time before decorating heavily or using it as a prop.
How to Make the Sword Stronger
If you want a sturdier cardboard sword for a costume parade or school play, add more layers. Three layers of cardboard are stronger than two, especially when the middle layer is slightly narrower than the outer layers. This creates a raised center ridge that looks more realistic and helps the blade resist bending.
You can also add thin cardboard strips along both sides of the blade to imitate a beveled edge. Glue them down evenly, let them dry, and cover the edges with tape. This gives the sword a three-dimensional look without adding much weight.
Lightweight Is Better
Do not overbuild the sword until it becomes heavy. A cardboard sword should be easy to carry. The best version is sturdy enough to hold its shape but light enough for comfortable pretend play.
How to Make a Cardboard Sword Without Foil
No foil? No problem. Paint the blade gray or silver, or cover it with white paper and shade the edges with a pencil. You can also use silver wrapping paper, metallic tape, or recycled snack packaging with a shiny inside. For a rustic look, leave the cardboard visible and decorate it with bold marker lines.
A no-foil cardboard sword is often better for classrooms or large group crafts because it reduces mess and keeps the supply list simple. Markers, crayons, tape, and stickers are enough to make each sword unique.
How to Turn This Into a Group Craft
This project works beautifully for birthday parties, summer camps, school lessons, and family craft days. To save time, adults can pre-cut the sword shapes and guards before the activity begins. Kids can then assemble, tape, decorate, and name their swords.
Set up stations for handles, foil wrapping, coloring, and stickers. Add a “royal naming ceremony” at the end where each child introduces their sword. This turns a simple cardboard craft into a storytelling activity, and it usually produces names that are far better than anything adults could invent.
Experience Section: What Making a Cardboard Sword Actually Teaches You
The first time you make a cardboard sword, you may think the project is mostly about cutting out a cool shape. Then, about ten minutes in, you realize it is secretly a lesson in engineering, patience, and accepting that tape has a personality of its own. Cardboard may look simple, but it behaves differently depending on thickness, grain direction, folds, dents, and whether the box once carried books, shoes, or a mysterious kitchen appliance.
One of the biggest lessons is that the handle matters more than expected. A blade can look amazing, but if the handle is too thin, too wide, or poorly reinforced, the sword feels awkward. The handle is where the project becomes real because it is the part someone actually holds. When making a cardboard sword with kids, it helps to stop before decorating and let them test the grip. Ask, “Can you hold it comfortably?” and “Does it feel too wobbly?” These small checks make the final sword much better.
Another useful experience is learning that cardboard direction matters. When the corrugated lines run along the blade, the sword holds up better. When the lines run across the blade, the sword is more likely to fold in the middle like it has lost confidence. This is a simple detail, but it makes the craft feel smarter and more successful. It also gives kids a practical look at how materials have structure, even when they seem ordinary.
Decoration is where personalities really appear. Some makers want a clean silver knight sword. Others cover the whole thing in stickers, lightning bolts, flames, jewels, and possibly a drawing of a cat. Let that happen. The best cardboard sword is not always the neatest one. It is the one the maker is excited to carry around. Creative ownership matters, especially for children who may not care whether the guard is historically accurate but deeply care that the blade has “lava power.”
If you are crafting with a group, expect different speeds. Some kids finish fast and want to make a shield. Others spend twenty minutes choosing the exact marker color for the handle. Prepare extra cardboard shapes, small decorations, and a simple cleanup plan. Tape scraps multiply quickly. Foil pieces migrate. Markers hide under paper. This is normal. Craft chaos is not a failure; it is usually proof that people are engaged.
The most satisfying part is the transformation. A plain box becomes a prop. A prop becomes a story. A story becomes a full adventure involving knights, pirates, dragons, space warriors, or someone defending the couch kingdom from invisible goblins. That is why cardboard crafts continue to be popular. They are inexpensive, flexible, and powered by imagination rather than batteries.
From experience, the best advice is to keep the project simple at first. Make one basic sword before trying advanced shapes. Use rounded tips. Reinforce the handle. Cover the edges. Let the maker decorate freely. And most importantly, remember that the goal is not to create a museum-quality prop. The goal is to create something fun, safe, and memorable from materials that might otherwise have gone straight into the recycling bin.
Conclusion
Making a cardboard sword is a simple, affordable, and surprisingly rewarding craft. With sturdy cardboard, smart layering, safe cutting, a reinforced handle, and creative decoration, you can build a DIY cardboard sword that works beautifully for costumes, pretend play, school projects, or themed parties. The process is easy enough for beginners but flexible enough for ambitious makers who want to add guards, pommels, raised blade details, or fantasy designs.
The real secret is balance: keep it sturdy, keep it lightweight, and keep it safe. Once the blade is taped, the handle is comfortable, and the decorations are complete, your homemade cardboard sword is ready for photos, storytelling, and gentle adventures. Not bad for something that started as a box.