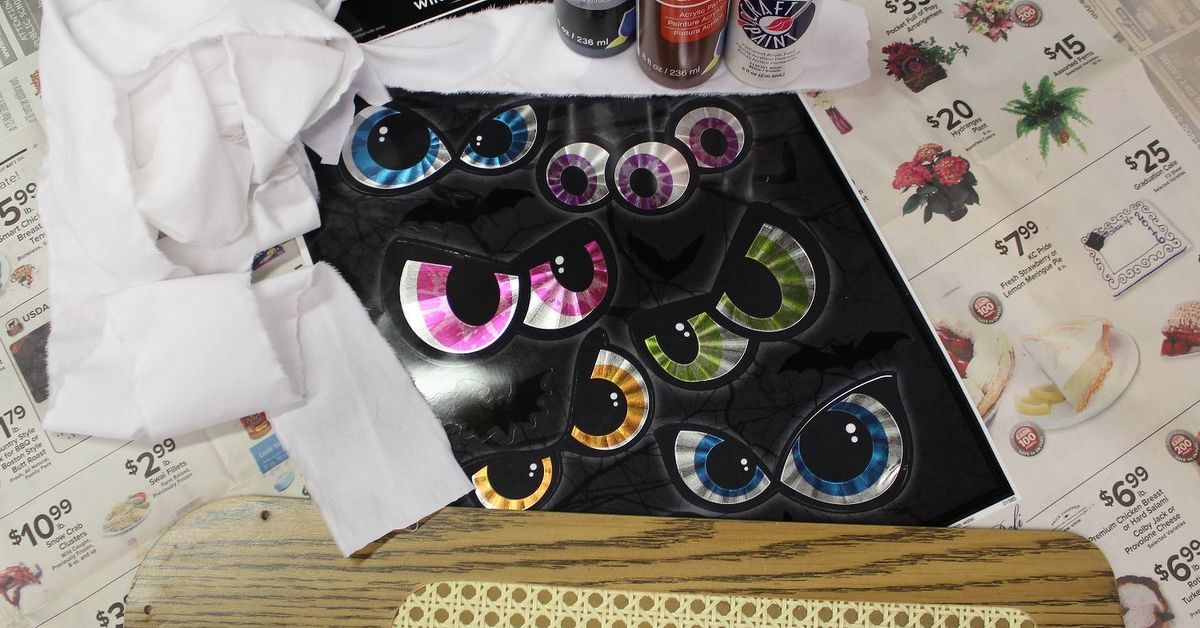
An old ceiling fan blade may look like the least exciting object in the garage. It is flat, slightly dusty, and shaped like a canoe paddle that has given up on adventure. Add paint, fabric strips, and a pair of suspicious-looking eyes, however, and that forgotten blade becomes a wonderfully strange Halloween mummy.
This recycled Halloween craft is inexpensive, lightweight, easy to personalize, and large enough to make an impression on a front door, porch wall, mantel, or party display. Better still, the blade already provides a long mummy-shaped body and usually includes mounting holes that can be reused for hanging.
The following tutorial explains how to prepare different blade surfaces, create convincing mummy bandages, add an expressive face, protect the finished decoration, and avoid the common mistakes that make painted fan blades peel, warp, or look more like wrapped burritos than ancient monsters.
Important Safety Rule Before You Begin
Use only a completely detached, retired ceiling fan blade. Never paint, wrap, glue, or attach objects to a blade that is still installed on a working fan. Decorations change the blade’s weight and balance, creating a serious risk if the fan is operated.
If you are removing blades from an installed ceiling fan, switch off the power at the circuit breaker before touching the fixture. A wall switch alone is not a reliable electrical safeguard. Support each blade as you remove its screws, and ask an electrician or experienced installer for help when the fan itself must be disconnected.
Once a blade has been transformed into Halloween décor, treat it as a craft object. Do not reinstall it on a ceiling fan.
Why a Ceiling Fan Blade Makes Such a Good Mummy
A typical fan blade is long, narrow, and gently curved, which gives it an instant character-like silhouette. Depending on its shape, the broad end can become the mummy’s head while the tapered end forms the body. Turning it upside down creates a different personality, so test both orientations before reaching for the paint.
This project also supports practical upcycling. Instead of sending an outdated blade directly to the trash, you turn it into reusable seasonal décor. One discarded fan can provide four or five blades, enough for an entire family of mummies, ghosts, pumpkins, monsters, or argumentative skeletons.
Materials and Tools
Essential supplies
- One detached ceiling fan blade
- Screwdriver for removing brackets and hardware
- Mild dish soap, water, and clean cloths
- 150- to 220-grit sanding sponge or sandpaper
- Bonding primer or primer suitable for wood, MDF, or laminate
- Off-white, cream, ivory, or light-gray craft paint
- Black, brown, and gray acrylic paint
- Foam brush, small paintbrush, or mini foam roller
- Cheesecloth, cotton gauze, muslin, or torn fabric strips
- Strong craft adhesive or low-temperature hot-glue gun
- Ribbon, jute cord, picture wire, or sturdy string
- Drop cloth and disposable gloves
Optional embellishments
- Large googly eyes, wooden circles, or painted bottle caps
- Coffee or watered-down brown paint for aging fabric
- Clear matte sealer for added protection
- Plastic spiders, faux moss, raffia, or miniature bats
- Battery-powered micro LED lights
- Wood filler for damaged edges or unused holes
Step 1: Choose the Best Side and Orientation
Lay the blade on a table and examine both sides. Many fan blades have faux wood grain on one face and a solid color on the other. Either side can work, but the smoothest face will usually require less repair.
Rotate the blade vertically. The wider end generally makes a friendly, round-headed mummy, while the narrower end creates a lankier and slightly creepier figure. Decide where the eyes will sit and check whether the existing mounting holes can serve as hanging points.
If the blade has a decorative bracket attached, remove it with a screwdriver. Save the screws and metal hardware for another project rather than gluing bandages over a mysterious lump.
Step 2: Clean the Blade Thoroughly
Ceiling fan blades collect more than ordinary dust. They may carry cooking grease, furniture polish, smoke residue, or years of airborne grime. Paint applied over that invisible film can peel surprisingly fast.
Wash the blade with mild dish soap and a damp cloth. Avoid soaking it, especially if it is made from MDF, particleboard, or another engineered wood product. Excess water can swell the edges and cause the surface layer to lift.
Wipe away the soap with a second damp cloth and allow the blade to dry completely. Inspect the edges for chips, bubbles, or loose laminate. Trim loose material carefully and fill deeper damage with a small amount of sandable wood filler.
Step 3: Scuff-Sand Without Destroying the Surface
Most fan blades have a glossy factory finish that does not welcome paint with open arms. Light sanding removes the shine and gives primer a slightly textured surface to grip.
Use approximately 150-grit paper for a durable glossy coating or 180- to 220-grit paper for a thin laminate. Sand gently and evenly. The goal is to dull the finish, not grind through the decorative layer and discover the crumbly board underneath.
Round any rough edges while you work. Then remove every trace of sanding dust with a vacuum, tack cloth, or barely damp lint-free cloth. Dust left behind becomes tiny bumps in the paint, which is an authentic ancient texture only when it is intentional.
Step 4: Prime the Fan Blade
Apply a thin coat of primer suited to the blade’s material. A bonding primer is especially helpful on laminate or slick factory finishes. For bare or exposed MDF, choose a primer designed to seal engineered wood without causing the fibers to swell.
A mini foam roller creates a smooth finish on the broad surface, while a small brush reaches the edges and mounting holes. Work in thin layers and smooth out drips before they begin to dry.
Prime the front, edges, and back. Painting both sides helps create a finished appearance and reduces uneven moisture absorption. Keep any holes intended for hanging clear by running a toothpick through them before the primer hardens.
Follow the drying instructions on the product label. When the primer feels rough, lightly sand it with fine-grit paper and remove the dust before painting.
Step 5: Paint the Mummy’s Base Color
Paint the blade with one or two thin coats of ivory, warm white, beige, or pale gray. Brilliant refrigerator white can look too new, while a warmer shade immediately suggests dusty linen and archaeological trouble.
Use long, even strokes from one end of the blade to the other. Let each coat dry fully before adding the next. Rushing this stage can pull up partially dried paint and produce wrinkles in places where the mummy did not request them.
For a weathered background, blend a tiny amount of gray or tan into the final coat. Keep the variation subtle. Most of the aging will come from the fabric and shadows added later.
Step 6: Create the Mummy’s Eyes
Position the eyes before attaching any bandages. Place them near the upper third of the blade rather than directly at the top. This leaves room for several wraps above the face and makes the proportions feel more natural.
You can paint two white or yellow ovals and add black pupils, glue on large googly eyes, or use painted wooden circles for a dimensional effect. Uneven pupils produce a silly mummy; narrow, angled pupils create a more sinister one.
Add dark brown or black paint around the eyes to form a recessed opening. Do not worry about perfect edges because the fabric will cover part of the outline. A little asymmetry helps the face look expressive rather than factory-stamped.
Step 7: Prepare the Mummy Bandages
Cut or tear gauze, cheesecloth, muslin, or thin cotton fabric into strips of different widths. Torn edges are better than perfectly cut ones because loose threads create a worn, ancient appearance.
For instant aging, lightly stain the strips before attaching them. Dip them briefly in diluted coffee, weak tea, or very thin brown acrylic paint, then spread them flat to dry. Use several concentrations so the finished mummy has natural variation instead of one uniform beige blanket.
Keep some strips clean and pale. The contrast between light fabric, stained edges, and dark recesses gives the wrapping depth.
Step 8: Wrap and Glue the Blade
Begin near the bottom and angle the first strip across the blade. Apply small dots or thin lines of adhesive to the back of the fabric rather than covering the entire surface with glue. Excess adhesive can soak through gauze and leave shiny patches.
Continue overlapping strips as you move upward. Alternate the direction and width of each bandage. Some pieces should cross diagonally, while others can run almost horizontally. Leave narrow gaps where the painted base shows through.
When you reach the eyes, frame them with shorter strips. Cover part of one eye for a classic mummy expression, but avoid hiding both unless your decoration is participating in a very unsuccessful game of hide-and-seek.
Wrap fabric around the edges and secure the ends on the back. Keep the back fairly flat so the finished decoration can rest against a door or wall. Leave the hanging holes accessible.
How much fabric should you use?
Stop before the blade becomes bulky. A successful mummy suggests layers without becoming a padded object. Five to ten strategically placed strips often look better than wrapping the entire blade like a medical emergency.
Step 9: Add Shadows, Dirt, and Ancient Character
Once the adhesive is dry, use a nearly dry brush to add gray, brown, or muted olive paint beneath selected bandage edges. This creates shadows and makes the strips appear layered.
Concentrate darker tones around the eyes, along the outer edges, and near the bottom of the blade. Dab paint rather than brushing solid lines. A cosmetic sponge or crumpled paper towel also works well for mottled stains.
For extra personality, add a crooked painted mouth, a tiny plastic spider, frayed threads, or a patch of faux moss. Restraint matters. One spider looks intentional; twenty-seven spiders suggest the mummy has lost control of its apartment.
Step 10: Make a Secure Hanger
Thread ribbon, picture wire, jute, or strong cord through two existing mounting holes. Tie secure knots on the back and test the hanger over a padded surface before displaying the mummy.
If the blade has only one usable hole, create a loop with wire and a washer on the back, or attach suitable picture-hanging hardware. Drilling a new hole is possible, but support the blade carefully and use eye protection. Engineered wood can split or fray if drilled too close to an edge.
Choose a wall hook, nail, screw, or removable hanging product rated for more than the decoration’s actual weight. Follow the hanging-product instructions, including surface cleaning, curing time, and location restrictions. Avoid placing the mummy above a bed, crib, valuable object, or heavily traveled doorway.
Step 11: Seal It for Porch Display
An indoor mummy usually does not require a topcoat. For a sheltered porch, apply a compatible clear matte sealer to the painted blade before attaching absorbent fabric. You can also mist the completed decoration lightly if the chosen sealer is safe for paint, adhesive, and cloth.
Test the sealer on a leftover strip first. Some products darken fabric, dissolve certain adhesives, or leave gauze stiff and shiny.
Even after sealing, this is not an all-weather yard decoration. Bring it indoors during heavy rain, strong wind, or prolonged damp weather. MDF and particleboard can swell when moisture enters through holes, edges, or scratches.
Creative Variations
Cute cartoon mummy
Use oversized googly eyes, a smiling mouth, bright white bandages, and an orange ribbon. This version works well for classrooms, family parties, or front doors visited by younger trick-or-treaters.
Ancient tomb mummy
Choose tea-stained fabric, heavy shadows, muted green accents, and tiny imitation cracks painted around exposed areas. Add a small gold symbol or faux scarab for an archaeological-fantasy look.
Glowing mummy
Hide a short strand of battery-powered micro lights beneath loose gauze. Keep the battery pack accessible on the back and use only cool-running lights intended for decorative use. Never use candles or open flames near fabric, wood, paint, or adhesive.
Mummy family display
Use several blades from the same fan to make characters with different eyes, expressions, and bandage colors. Arrange them at varied heights beside pumpkins or a handmade sign reading “Welcome, Mortals.”
Common Problems and Easy Fixes
The paint scratches off
The blade was probably not cleaned, scuff-sanded, or primed adequately. Remove loose paint, dull the glossy surface, apply bonding primer, and repaint in thin coats.
The fabric looks too clean
Dry-brush diluted brown and gray paint along the edges. Concentrate color where strips overlap instead of covering the entire mummy uniformly.
The bandages keep lifting
Use smaller amounts of stronger adhesive and hold each end in place until it grips. Clips or painter’s tape can temporarily secure stubborn areas while the glue dries.
The blade will not hang straight
Move the knots, shorten one side of the hanger, or add a second attachment point. Heavy decorations glued to one edge can shift the center of gravity.
The surface has swollen edges
Allow the blade to dry completely, sand the raised fibers carefully, seal the damaged area with an appropriate primer, and avoid adding more water. Severe swelling may not be repairable.
How to Store Your Halloween Mummy
After Halloween, remove dust with a soft brush and make sure the decoration is completely dry. Wrap it loosely in acid-free tissue paper or place it in a clean plastic storage bin with nothing heavy resting on top.
Store it flat in a climate-controlled closet or on a shelf. Hot attics and damp basements can weaken adhesive, warp engineered wood, and encourage fabric to absorb moisture. Label the container clearly so no one mistakes your mummy for a strangely bandaged replacement fan part.
Experience-Based Lessons for a Better Fan-Blade Mummy
The most important practical lesson is that preparation affects the finished decoration more than artistic skill. A carefully painted face cannot rescue paint that is separating from a greasy laminate surface. Cleaning, light sanding, dust removal, and primer may feel less entertaining than designing monster eyes, but these steps determine whether the mummy survives one evening or returns for many Halloween seasons.
A first attempt often uses too much of everything: too much paint, too much glue, too much fabric, and enough brown aging color to make the mummy resemble a dropped kitchen towel. Thin layers are easier to control. Two light paint coats dry more evenly than one heavy coat, and a few small glue dots hold gauze without soaking through it.
Orientation also makes a surprisingly large difference. Before painting, photograph the blade with each end facing upward. Looking at the photos side by side makes it easier to recognize which arrangement resembles a head and body. It also helps with eye placement. Eyes positioned too high leave no room for forehead bandages, while eyes placed at the center can make the mummy look like a wrapped bowling pin.
Bandage texture improves when several materials are mixed. Cheesecloth creates delicate threads, muslin provides broad opaque strips, and narrow cotton tape makes crisp accent layers. Using only one width can appear mechanical. Combining wide, medium, and narrow strips creates a more convincing pattern while requiring less fabric overall.
Another useful lesson is to stain the fabric before gluing it down. Wet coffee or diluted paint applied directly to the finished decoration can reactivate water-based adhesive, spread into the painted face, or soak into exposed MDF edges. Pre-stained strips give better control. They can be arranged by color, from pale cream to dark brown, before the first piece is attached.
It is also wise to finish the eyes earlier than feels necessary. Once gauze surrounds the face, painting detailed pupils becomes awkward. Complete the eyes, allow them to dry, and then use the fabric to hide any imperfect outlines. The bandages become a decorative frame and an excellent accomplice in covering artistic evidence.
When the mummy is intended for a door, check clearance before adding thick decorations. Large plastic eyes, bulky knots, or a battery box can cause the blade to knock against the wall whenever the door moves. Flat painted eyes and a low-profile hanger are usually better for active entryways. Dimensional embellishments work best on stationary walls or porch displays.
The final lesson is to stop while the design still looks readable. The long outline of the fan blade is part of the charm. Completely burying it under fabric makes the recycled material impossible to recognize and adds unnecessary weight. Leave glimpses of paint, preserve the tapered silhouette, and let a few loose threads provide movement. A good upcycled mummy should look spooky from across the room and reveal its clever ceiling-fan origin when someone steps closer.
Conclusion
Making a Halloween mummy from a ceiling fan blade turns an awkward household leftover into memorable seasonal décor. The project does not require advanced woodworking or expensive supplies. Careful cleaning, gentle sanding, the correct primer, layered paint, expressive eyes, and irregular fabric strips do most of the work.
Customize the mummy to suit your display, from cheerful and child-friendly to ancient and unsettling. Protect it from harsh weather, hang it with properly rated hardware, and store it carefully after the holiday. Next October, your recycled mummy will be ready to rise againwithout needing a motor, a remote control, or an electrician.