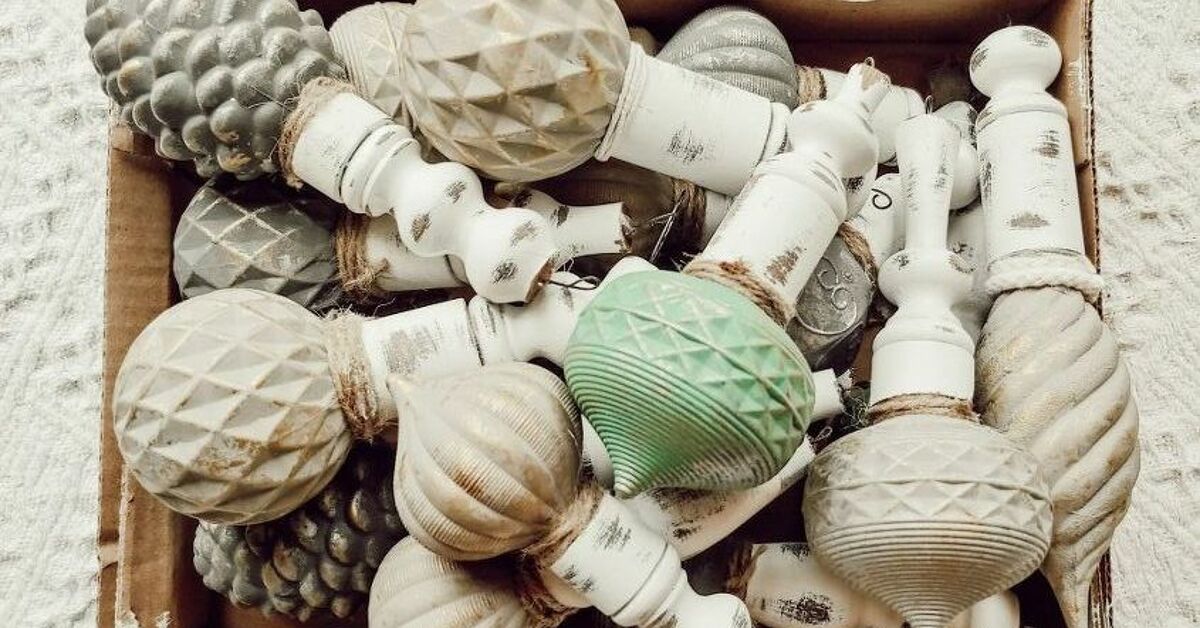
There is something wonderfully magical about vintage Christmas ornaments. They look like they were rescued from a charming attic, wrapped in tissue paper by someone’s grandmother, and guarded by a very opinionated cat. The soft metallic shine, faded colors, speckled mercury-glass effect, frosted finish, velvet ribbons, and tiny imperfections all say, “I have holiday stories.” The good news? You do not need to raid an antique mall or spend your cocoa budget on rare collectibles. With a few affordable craft supplies, you can make faux vintage Christmas ornaments DIY-style right at home.
This guide walks you through several beginner-friendly methods for creating old-fashioned ornaments that look collected, not freshly unpacked from aisle seven. You will learn how to create faux mercury glass ornaments, matte painted baubles, decoupage paper ornaments, aged metal caps, and heirloom-style details using simple materials like clear glass or plastic ornaments, acrylic paint, baking soda, mirror-effect spray paint, Mod Podge, paper napkins, glitter, ribbon, and a little patience. Patience is the secret ingredient, right after snacks.
Why Faux Vintage Christmas Ornaments Are So Popular
Vintage-inspired Christmas decor has made a major comeback because it brings warmth, personality, and nostalgia to modern homes. Instead of a perfectly matched tree that looks like it was styled by a committee of snowflakes, faux vintage ornaments feel personal. They mix beautifully with heirloom pieces, thrifted finds, handmade garlands, bottle brush trees, brass bells, velvet bows, and even newer ornaments.
Classic midcentury ornaments often feature jewel tones, soft pastels, mercury-glass shine, flocked texture, hand-painted details, and playful shapes. Faux vintage DIY ornaments borrow those design cues without requiring you to hunt down fragile antiques. You get the charm without the panic of accidentally breaking something that survived 70 years only to be defeated by your living room rug.
Materials You Will Need
You do not need every item on this list. Choose supplies based on the finish you want. For the best results, start with simple round ornaments and experiment before moving on to shaped ornaments, finials, bells, stars, or teardrops.
Basic Supplies
- Clear glass or plastic fillable ornaments
- Acrylic craft paint in muted vintage colors
- Baking soda for a chalky matte texture
- Foam brushes or soft paintbrushes
- Mirror-effect spray paint for faux mercury glass
- White vinegar and water in a spray bottle
- Mod Podge or another decoupage medium
- Paper napkins, vintage-style wrapping paper, sheet music, or book pages
- Fine glitter, mica flakes, or gold leaf-style flakes
- Rub ’n Buff, metallic wax, or antique gold paint
- Ribbon, twine, lace, velvet trim, or ornament hooks
- Disposable cups, gloves, paper towels, and cardboard for drying
Best Vintage-Inspired Color Palette
For a believable aged look, avoid colors that are too neon or glossy. Try dusty rose, champagne gold, faded mint, antique silver, soft ivory, muted cranberry, powder blue, sage green, warm bronze, and pale blush. These colors feel nostalgic without screaming, “I was made five minutes ago while someone watched a holiday movie.”
Method 1: Faux Mercury Glass Christmas Ornaments
Faux mercury glass is one of the easiest ways to create vintage-style Christmas ornaments. Real antique mercury glass has a silvery, spotted, slightly mysterious look. The DIY version uses mirror-effect spray paint and a vinegar-water mist to create that beautifully imperfect patina.
Step-by-Step Instructions
- Remove the metal cap from each clear ornament.
- Mix equal parts white vinegar and water in a small spray bottle.
- Working outside or in a very well-ventilated area, lightly mist the inside of the ornament with the vinegar-water solution.
- Spray a small amount of mirror-effect paint inside the ornament.
- Rotate the ornament slowly so the paint coats the interior unevenly.
- Let it sit for a few minutes, then blot or swirl gently with a paper towel if you want larger distressed spots.
- Repeat with light layers until you like the aged silver finish.
- Let the ornament dry completely before replacing the cap.
The trick is to avoid perfection. Vintage ornaments should look softly worn, not like they were inspected by a tiny quality-control elf with a clipboard. If the finish is patchy, cloudy, or uneven, congratulationsyou are doing it right.
Pro Tip
Spray paint lightly. Heavy coats can drip, pool, or make the ornament look too modern. Several thin layers create more depth and a more authentic mercury-glass effect.
Method 2: Matte Painted Vintage Baubles
If you love the look of old Shiny Brite-style ornaments but prefer a softer, modern farmhouse twist, matte painted ornaments are perfect. Mixing acrylic paint with baking soda creates a ceramic-like texture that feels aged and handmade.
Step-by-Step Instructions
- Remove the ornament cap and clean the outside of the ornament with a dry cloth.
- Mix two parts acrylic paint with one part baking soda.
- Brush the mixture onto the ornament in thin, even strokes.
- Let the first coat dry completely.
- Add a second coat for full coverage.
- Once dry, lightly buff raised areas with a soft cloth or fine sanding sponge.
- Add metallic highlights around the top, bottom, or textured areas.
This method works especially well on plastic ornaments because the textured paint disguises seams and gives inexpensive supplies a more elevated look. It is the craft equivalent of putting a blazer on a plain T-shirt.
Design Ideas
- Use ivory paint and antique gold wax for a French country look.
- Try sage green with champagne glitter for a soft woodland theme.
- Paint ornaments dusty pink and add velvet ribbon for a romantic vintage tree.
- Add tiny hand-painted stars, stripes, or scallops for a retro feel.
Method 3: Decoupage Faux Vintage Ornaments
Decoupage is a wonderful option if you love patterned ornaments. Thin paper napkins, old sheet music, wrapping paper, vintage postcards, book pages, and printed botanical designs can all create an heirloom look.
Step-by-Step Instructions
- Choose a paper design with small-scale patterns, florals, angels, holly, bells, or script lettering.
- Separate printed napkin layers so you are using only the thin top layer.
- Tear or cut the paper into small pieces.
- Brush a small area of the ornament with Mod Podge.
- Press one piece of paper onto the wet surface and smooth gently.
- Continue overlapping pieces until the ornament is covered.
- Seal the entire surface with another thin coat of Mod Podge.
- Let dry, then add glitter, metallic wax, or ribbon.
Small pieces are easier to smooth around curved ornaments than large sheets. If wrinkles appear, do not panic. Wrinkles on faux vintage Christmas ornaments are texture. Wrinkles on people are wisdom. Wrinkles on wrapping paper are evidence that someone tried their best.
Best Papers for an Antique Look
Sheet music gives ornaments a classic Christmas carol feel. Book pages create a cozy literary style. Floral napkins feel Victorian. Kraft paper with red or green print looks rustic. For a delicate finish, use translucent tissue paper and seal it with a satin topcoat.
Method 4: Aged Gold and Tarnished Silver Ornament Caps
One small detail can make or break the vintage illusion: the ornament cap. Bright new silver caps can look too shiny, so aging them helps the whole ornament feel more authentic.
How to Age Ornament Caps
- Remove the caps and place them on cardboard.
- Dry-brush them with antique gold, bronze, or pewter paint.
- Let some of the original metal show through.
- For extra age, dab on a tiny amount of dark brown paint and wipe most of it away.
- Let dry before reattaching.
You can also replace standard caps with velvet ribbon, twine loops, lace, or thin metallic cord. A beautiful hanger makes even a simple ornament look intentional.
Method 5: Glittered and Frosted Vintage Ornaments
Old Christmas ornaments often have a frosty sparkle that feels softer than modern glitter explosions. The goal is shimmer, not “craft table crime scene.”
How to Add Subtle Vintage Sparkle
- Brush a thin line of glue or Mod Podge around the ornament.
- Sprinkle fine glitter or mica flakes over the wet area.
- Tap off the excess immediately.
- Let dry fully before handling.
- Seal lightly if the ornament will be stored with other decorations.
Try glittering only the top third, bottom edge, or raised pattern. Partial sparkle looks more expensive and less like the ornament fell into a disco and came out emotionally changed.
How to Make New Ornaments Look Truly Old
The secret to realistic faux vintage Christmas ornaments is layering. Real vintage pieces rarely have one flat finish. They show depth, wear, color variation, tarnish, and tiny flaws. Combine techniques for the best results.
Layering Formula for a Vintage Finish
- Start with a muted base color.
- Add texture using baking soda paint or decoupage.
- Highlight edges with antique gold or silver.
- Add light distressing with a cloth or sanding sponge.
- Finish with velvet ribbon, lace, twine, or aged hooks.
For example, paint a plastic ornament dusty blue, let it dry, dry-brush champagne gold around the cap, add a few tiny white stars, and hang it with a narrow velvet ribbon. Suddenly it looks like something discovered in a charming old holiday box labeled “Do Not Throw Away,” which is exactly the energy we want.
Safety Tips for DIY Ornament Making
Crafting should be joyful, not dramatic. When using spray paint, always work outdoors or in a well-ventilated area. Wear gloves, protect your work surface, and keep paint away from flames, heaters, pets, and children. Let ornaments dry completely before bringing them indoors or packing them away.
If you are crafting with kids, choose plastic ornaments, washable acrylic paint, stickers, paper, ribbon, and non-toxic glue. Save spray paint, glass ornaments, and sharp tools for adult-only crafting. Children are excellent at adding charm, but less excellent at understanding why wet spray paint should not become hand lotion.
Common Mistakes to Avoid
Using Too Much Paint
Heavy paint coats can hide detail and cause drips. Use thin layers and let each coat dry. Vintage charm comes from depth, not thickness.
Choosing Colors That Are Too Bright
Modern red, neon green, and high-gloss silver can look too new. Soften colors by mixing in ivory, gray, brown, or champagne tones.
Skipping Dry Time
Dry time is boring, yes. But rushing can lead to fingerprints, smears, and ornaments that stick to the table like they have developed emotional attachment.
Overdecorating
Pick one or two focal details. A matte finish with a ribbon may be enough. A decoupage ornament with glitter and gold wax can be beautiful. A decoupage ornament with glitter, rhinestones, bells, feathers, lace, seven bows, and a tiny plastic deer may need a nap.
Ways to Display Faux Vintage Christmas Ornaments
Of course, you can hang your ornaments on a Christmas tree, but do not stop there. Faux vintage ornaments look beautiful in bowls, glass cloches, garlands, wreaths, place settings, gift toppers, and mantel displays.
Creative Display Ideas
- Fill a vintage bowl with mercury-glass ornaments for a coffee table centerpiece.
- Tie small ornaments onto wrapped gifts instead of using disposable bows.
- Wire ornaments into a greenery garland for the mantel.
- Hang ornaments from cabinet knobs, window latches, or a chandelier.
- Create a themed mini tree using only handmade faux vintage ornaments.
- Group ornaments under a glass dome with battery candles.
Mixing handmade ornaments with real vintage finds creates the most natural look. Your guests will not know which ones are antique and which ones were made last Thursday while you were wearing fuzzy socks. That is the victory lap.
Budget-Friendly Tips
DIY faux vintage ornaments are ideal for budget holiday decorating. Clear plastic ornaments are often sold in multipacks, and thrift stores frequently have old ornaments that can be repainted or refreshed. Leftover ribbon, wrapping paper scraps, old greeting cards, broken jewelry, lace trim, buttons, and fabric remnants can become beautiful embellishments.
Before buying new supplies, shop your own home. Look for damaged ornaments, unused craft paint, old books, brown paper bags, sheet music, or ribbon saved from past gifts. The best vintage-style projects often come from repurposed materials. Also, using what you already have gives you permission to feel both creative and financially responsible. A rare holiday combination.
of Experience: What Actually Works When Making Faux Vintage Christmas Ornaments
After making several batches of faux vintage Christmas ornaments, one lesson becomes clear very quickly: the ornaments that look best are usually the ones you stop fussing with earlier than you want to. There is a strong temptation to keep adding details. A little gold here. More glitter there. Maybe some lace. Maybe a bow. Maybe another bow because the first bow looks lonely. But vintage-inspired decor works best when it feels collected and gently aged, not overloaded.
The easiest beginner project is the matte baking soda paint ornament. It is forgiving, inexpensive, and works on both glass and plastic. If the first coat looks streaky, the second coat usually fixes it. If the texture looks rough, that can actually help. I have found that ivory, sage, dusty blue, and muted cranberry are the most reliable colors. Bright red can work, but it looks more vintage when mixed with a drop of brown or cream. Pure white can look stark, while warm ivory feels softer and more antique.
Faux mercury glass is slightly trickier but very rewarding. The key is using less paint than you think you need. The first time many people try this method, they spray too much mirror paint inside the ornament and end up with a solid silver ball. Pretty? Yes. Vintage? Not quite. A lighter hand gives that mottled, timeworn shine. The vinegar-water mist helps create irregular spots, but the magic happens when you allow the finish to be imperfect. If one side looks darker or more speckled, place that side facing outward on the tree.
Decoupage ornaments are relaxing, but they require patience. Thin napkins tear easily, especially when wet with glue. The best approach is to use small torn pieces instead of large cutouts. Torn edges blend better than sharp scissor lines. If you want an old-world look, choose cream paper, faded florals, antique script, or muted holiday illustrations. Once dry, a touch of gold wax around the top makes the ornament look finished rather than merely glued.
One surprisingly important detail is the hanger. A standard shiny hook can make a beautiful ornament look store-bought. Swapping it for velvet ribbon, thin twine, tea-stained lace, or aged metallic cord instantly improves the final result. I also recommend aging the ornament caps in batches. Lay them on cardboard, dry-brush them with antique gold or bronze, and let them dry while you work on the ornaments. It takes only a few minutes but makes a big difference.
Storage matters too. Handmade ornaments should be wrapped gently in tissue paper or stored in divided boxes. Avoid packing painted ornaments while they still feel tacky, even slightly. They may stick together, and then next December you will open the box and discover one large ornament family reunion. Let everything cure for at least a day before storing.
The best part of this DIY project is that every ornament turns out a little different. That is not a flaw. That is the whole point. Faux vintage Christmas ornaments should feel like they have lived a tiny, festive life before arriving on your tree. When the lights hit the matte paint, tarnished gold, soft paper, and speckled silver, the result is cozy, nostalgic, and wonderfully personal.
Conclusion
Learning how to make faux vintage Christmas ornaments DIY is an easy way to bring nostalgic charm, handmade warmth, and budget-friendly beauty into your holiday decorating. Whether you prefer mercury-glass sparkle, matte painted baubles, decoupage patterns, frosted glitter, or aged metallic details, the best ornaments come from layering simple techniques and embracing imperfection.
These ornaments do not need to look factory-perfect. In fact, they are better when they do not. A slightly uneven finish, a softened color, a tarnished cap, or a wrinkled bit of paper can make each piece feel like a tiny heirloom. Make a few for your tree, a few for gifts, and a few just because crafting during the holidays is cheaper than therapy and comes with more ribbon.