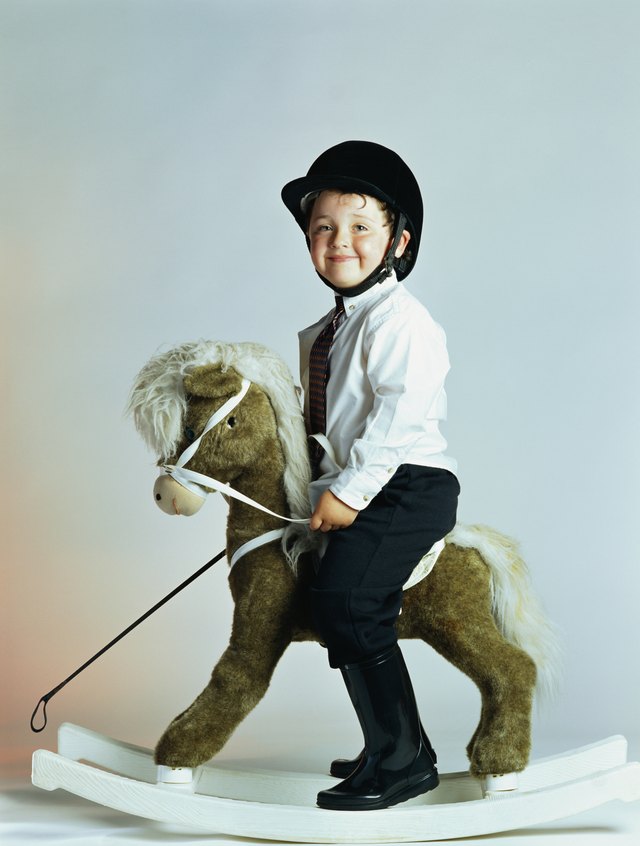
If your rocking horse looks amazing except for one tragic detailits mane and tail now resemble a haunted mopdon’t worry. Making new hair out of yarn is one of the easiest and most satisfying ways to restore, customize, or upgrade a rocking horse. It’s affordable, beginner-friendly, and surprisingly customizable. You can make it neat and classic, shaggy and storybook-style, or braided like a tiny equestrian influencer.
In this guide, you’ll learn how to make yarn hair for a rocking horse using a few proven methods adapted from doll-hair techniques, tassel-making tricks, and real rocking horse restoration projects. We’ll cover what yarn works best, how to measure the right length, how to attach the mane and tail securely, and how to make the finished result look polished (instead of “craft-night chaos”). Whether you’re fixing a thrift-store find or building a handmade heirloom, this tutorial will help you get a durable, good-looking rocking horse yarn mane and tail.
Why Yarn Works So Well for Rocking Horse Hair
Yarn is a smart choice for rocking horse hair because it’s soft, inexpensive, easy to shape, and easy to replace later. It can be cut, looped, braided, brushed, or stitched into strips (wefts), which gives you a lot of freedom depending on your horse’s design and age. Want a chunky, fluffy mane? Easy. Want a traditional braided tail? Also easy. Want “my child will absolutely test this thing like a quality-control engineer” durability? We can work with that too.
Another big advantage is that yarn comes in different textures and thicknesses. Medium/worsted yarn is a common choice for a classic look, while chunky or soft blended yarns can create a fuller, more realistic mane. Some crafters also like variegated yarn for natural-looking color variation without having to mix multiple colors by hand.
What You’ll Need
Materials
- Yarn (worsted weight or chunky are the most common starting points)
- Strong thread (upholstery thread or another durable sewing thread)
- Optional: non-fraying trim/twill tape (for making a stapled mane strip)
- Optional: wood glue (only for certain non-visible reinforcement steps, not as the main hair attachment)
- Optional: matching embroidery floss or cord for decorative wraps/braids
Tools
- Scissors
- Cardboard or foam board (for measuring and wrapping yarn bundles)
- Tapestry needle or hand-sewing needle
- Staple gun and short staples (if using a staple attachment method)
- Screwdriver/drill (if your horse has screw-on access panels or trim strips)
- Small pliers (for removing old staples)
- Brush (pet brush or any brush) for fluffing yarn ends if desired
- Sandpaper (for smoothing rough wood around the mane/tail attachment area)
How to Choose the Best Yarn for a Rocking Horse Mane and Tail
If you’ve ever stood in the yarn aisle holding two skeins and whispering, “Which one looks more horse-ish?” you’re asking the right question. Here’s what matters most:
1) Weight (Thickness)
Yarn weight refers to thickness, not how heavy the ball feels. For a rocking horse, a medium/worsted yarn is usually the easiest place to start because it balances fullness and control. Chunky yarn can work beautifully for a plush look, but it may need fewer strands and more trimming. Very fine yarn can work too, but you’ll need more strands to avoid a sparse mane.
2) Fiber and Texture
Soft acrylic or acrylic blends are popular because they’re budget-friendly and easy to replace. Cotton can look tidy, but it may hang differently and feel less “hair-like” depending on the yarn. Fluffy or halo yarns look fun, but they can tangle more easily if the rocking horse is for active play.
3) Color Strategy
Don’t limit yourself to one flat color. Mixing two or three similar shades often creates a more natural mane. A variegated yarn can also add depth without extra work. If you want a vintage toy look, choose muted tones. If you want a fantasy pony vibe, this is your moment.
Before You Start: Remove the Old Hair Safely
Many rocking horses use staples, small nails, screws, or tucked-in knots to hold the mane and tail. Remove the old hair slowly, and watch for exposed staples or sharp fasteners. Use pliers to lift staples, and don’t yank hard on the yarn firstyou want to see how it was attached before you commit to demolition mode.
Tip: Save a few strands of the original mane/tail if you can. Fold one strand in half to estimate the finished hair length. This gives you a fast template when cutting your new yarn.
Method 1: The Easy Bundle-and-Staple Mane (Great for Restorations)
This is one of the most practical methods for a DIY rocking horse mane, especially when the original horse had stapled hair. It’s fast, sturdy, and easy to refresh later.
Step 1: Make Yarn Bundles
Wrap yarn around your hand or a piece of cardboard a little longer than your desired finished hair length (remember: folded yarn becomes half the loop length once cut and attached). For consistent bundles, use the same wrapping form for every section.
Tie a small piece of yarn tightly around one side of the looped bundle, then cut the opposite side. You’ll end up with a mini ponytail-style bundle. Repeat until you have enough bundles for the mane.
Step 2: Test Spacing and Fullness
Lay the bundles along the mane line before attaching anything. Check for gaps. A rocking horse mane usually looks better with slightly more fullness than you thinkbecause trimming and brushing will reduce the volume visually.
Step 3: Attach the Bundles
Staple each bundle securely into the original mane channel or attachment area. Use short staples that won’t poke through the wood. If the wood is older or prone to splitting, pre-drilling pilot holes is smart if you’re using screws for trim strips or retainer pieces.
For some horses, a cleaner approach is to staple bundles onto a strip of non-fraying trim or twill tape first, then staple or screw that strip onto the horse. This makes replacement easier later and can look neater on long mane lines.
Step 4: Trim and Shape
Once attached, trim the mane in stages. Don’t try to nail the final shape in one cut. Start long, sit the horse upright, and trim gradually until the silhouette looks balanced from both sides.
Method 2: Make a Sewn Yarn Weft (Best for a Neat, Even Mane)
If you want a more polished finish, make a yarn “weft” first (basically a strip of yarn hair sewn together), then attach that to the horse. This technique is borrowed from rag doll hair methods and works beautifully for rocking horses.
Step 1: Wrap Yarn Around Cardboard
Cut a piece of cardboard to the finished hair length you want (or slightly longer so you can trim). Wrap yarn around the cardboard until you reach your desired thickness.
Step 2: Create the Weft
Slide the wrapped yarn off the cardboard and sandwich it between two pieces of paper (printer paper works fine). Sew a straight line down the center through the paper and yarn. Then tear away the paper. You’ll have a tidy sewn strip of yarn hair.
This method is especially helpful if you want a smooth, continuous mane instead of multiple visible bundles.
Step 3: Attach the Weft to the Horse
You can staple the sewn weft directly into the mane channel, hand-stitch it onto a fabric strip first, or secure it under a decorative trim piece. If hand sewing onto fabric, use small, tight stitches and strong thread for durability.
Step 4: Secure the Front and Back Edges
Borrow a trick from doll-hair sewing: once the mane is attached, add a few discreet securing stitches at the front and back edges so the hair lies where you want it and doesn’t flip around when kids play with it.
Method 3: Braided Yarn Tail (Classic Look, Very Durable)
A braided tail is the easiest way to make the tail look intentional and stay tangle-resistant.
Step 1: Cut Long Strands
Cut strands at least double the finished tail length (more if you want to fold and attach at the center). Mix colors if you want depth. Group the yarn into three equal sections for braiding.
Step 2: Attach First, Then Braid (or Braid First)
You can either:
- Attach first: Secure the folded strands into the tail hole/channel, then braid.
- Braid first: Make a braid off the horse and attach it as one unit.
Attaching first often gives a more natural spread at the base. Braiding first is easier for beginners who want a clean, controlled result.
Step 3: Tie and Trim
Tie off the end tightly with matching yarn or cord. Leave a tassel end for a playful look or trim it blunt for a tidy finish.
How to Make the Yarn Look More Like Real Hair
This is where the magic happens. And by “magic,” I mean trimming carefully and resisting the urge to do dramatic scissors work too early.
- Brush the ends: A pet brush or soft brush can fluff fibers and soften the look.
- Separate plies: Some chunky yarns can be split into smaller strands for a wavier/curlier texture.
- Layer your cuts: Trim in small sections to create a natural mane shape.
- Mix textures: One smooth yarn + one slightly fuzzy yarn can look more realistic than either alone.
- Add a top braid or forelock: A small braid at the top can hide attachment points and add style.
Safety and Durability Checklist (Especially if Kids Will Ride It)
A restored rocking horse is adorable. A restored rocking horse with loose staples, weak thread, or detachable decorations is a hard pass. Use this checklist before calling the project finished:
- Remove or fully set all exposed staples, nails, and sharp fasteners.
- Use strong thread if sewing any part of the mane/tail assembly.
- Avoid small detachable embellishments (buttons, beads, charms) on toys for young children.
- Check that no small parts can come loose and create a choking hazard.
- Trim very long yarn strands if the toy is for younger kids, especially if they may wrap or chew them.
- Inspect the mane and tail attachment after the first few play sessions and tighten anything that shifts.
If you’re using glue anywhere in the build (for trim, plugs, or reinforcementnot as the primary hair attachment), follow the manufacturer’s clamp/dry-time guidance and let it cure fully before play.
Common Mistakes to Avoid
Using the Wrong Staple Length
Too short and the mane pulls out. Too long and you risk poking through. Test on scrap wood first.
Cutting Everything to Final Length Too Soon
Yarn always looks different after attachment. Leave it longer, install it, then trim.
Skipping a Test Bundle
Make one bundle or a short mini-weft first. It’ll tell you if your yarn choice is too thin, too fluffy, or just right.
Overloading the Mane Line
More yarn is not always better. Too much bulk can make the mane stick up awkwardly and show staple points.
Ignoring Wood Condition
Old wood can split near edges. If you’re adding screws or retainer strips, pilot holes can prevent cracks and save your project from a very dramatic final chapter.
Care and Maintenance for a Yarn Mane and Tail
Once your yarn rocking horse hair is installed, maintenance is simple:
- Brush gently with fingers or a soft brush.
- Spot-clean dust with a dry cloth (or lightly damp cloth if the yarn allows it).
- Re-trim straggly ends every few months if needed.
- Re-braid the tail after enthusiastic “grooming sessions.”
- Check attachment points during routine toy cleaning.
Conclusion
Learning how to make hair out of yarn for a rocking horse is one of those DIY wins that looks impressive without requiring a professional workshop or a mysterious old-world toy-maker apprenticeship. The key is choosing the right yarn, measuring carefully, and using an attachment method that matches your horse’s construction.
If you want speed, go with the bundle-and-staple method. If you want a cleaner finish, make a sewn yarn weft. If you want a classic look that stands up to play, braid the tail and shape the mane in layers. No matter which method you use, a little patience (and one cautious trimming session) can turn a worn-out rocking horse into a charming keepsake again.
And if the first version comes out a little wild? Congratulations. You have successfully recreated authentic “stable energy.” Trim, tweak, and call it character.
Practical Experiences and Lessons Learned (Extended 500-Word Section)
One of the most useful things to know before starting this project is that the “right” yarn often becomes obvious only after you make a test bundle and hold it against the horse. On paper, many crafters assume they want a smooth, medium-weight yarn in a single color. In practice, the horse’s paint color, scale, and style can completely change that decision. A glossy painted horse may look better with a matte yarn. A rustic wooden horse may look better with mixed-color strands that create depth. This is why a small test bundle can save time and money: you can immediately see whether the yarn looks elegant, too synthetic, too flat, or surprisingly perfect.
Another very common experience is underestimating how much trimming affects the final look. A freshly attached mane usually looks chaotic at firstuneven lengths, flyaway strands, and volume in strange places. That’s normal. The best results usually come from a slow process: attach, step back, trim a little, brush, then step back again. Many people who are unhappy with their first attempt didn’t actually choose the wrong yarnthey simply cut too aggressively before the mane settled into place. The fix is easy: leave more length than you think you need and shape gradually.
Durability also becomes a bigger priority the moment a child interacts with the rocking horse. Adults may style the mane neatly and admire the finish. Kids often conduct “field testing” by grabbing the mane, hugging the head, and pulling the tail during imaginative play. Because of this, attachment strength matters just as much as appearance. Crafters who report the best long-term results usually combine methods: they staple or secure the main hair assembly firmly, then add a few extra stitches or wraps to keep the outer edges from shifting. That extra five minutes of reinforcement makes a big difference over time.
A fun and surprisingly helpful experience is involving the child (if age-appropriate) in choosing the yarn colors. Even when the adult handles the actual tools and installation, letting a child choose between “classic brown,” “silver pony,” or “rainbow parade horse” often makes the finished toy feel even more special. It also helps explain why some restored rocking horses become emotional keepsakes: the repair itself becomes part of the toy’s story.
Finally, many people discover this project is less about perfection and more about personality. Tiny asymmetries, slightly uneven layers, or a playful braid at the top can make the rocking horse feel handmade in the best way. The project teaches a practical DIY lesson too: restoration doesn’t always require exact factory replacement parts. With yarn, basic tools, and a thoughtful approach, you can create a mane and tail that look great, hold up well, and give an old rocking horse a second life.