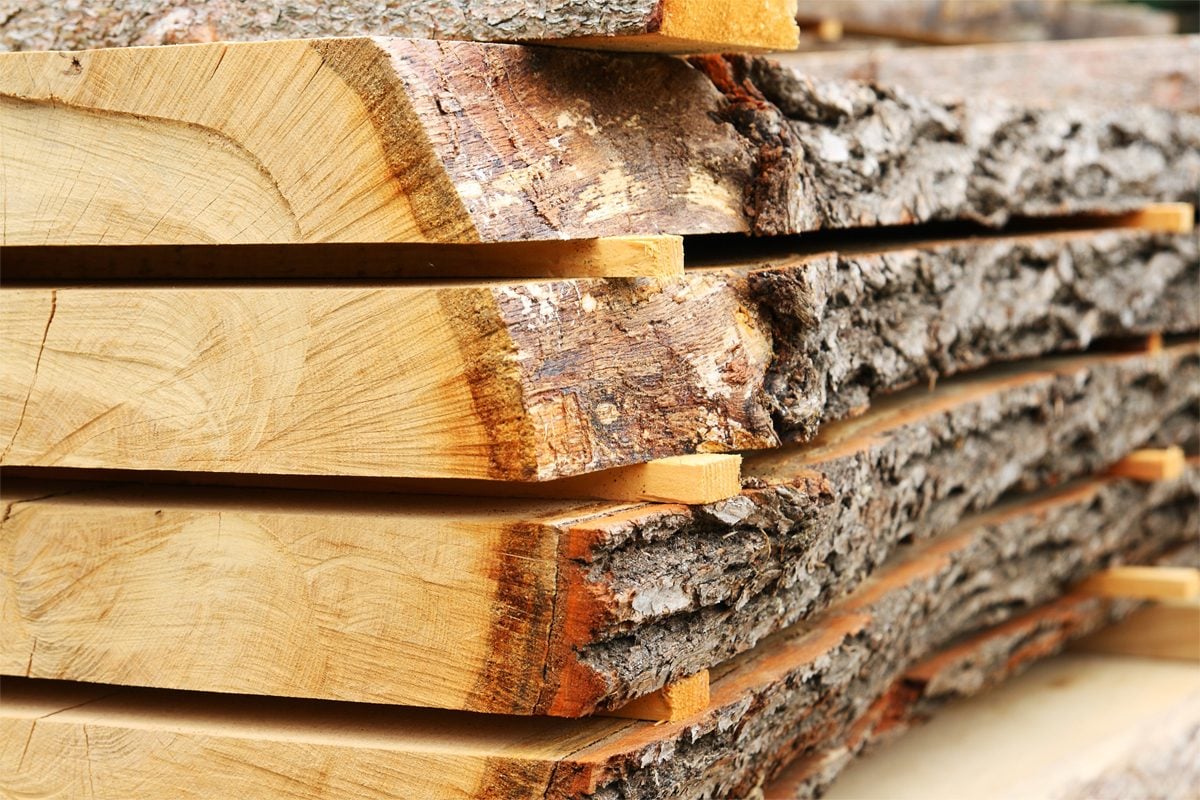
Turning a fallen tree into usable boards is one of the most satisfying forms of DIY woodworking. One morning, you have a log occupying half the yard. Months later, that same log may become a dining table, a workbench, built-in shelves, or enough hardwood flooring to make your neighbors suspiciously jealous.
However, milling lumber is not simply a matter of pushing a saw through a tree and waiting for the boards to become furniture-ready. Logs must be selected, cleaned, measured, secured, cut, stacked, protected, dried, monitored, and finally conditioned for their intended environment. Skip one of those steps and your beautiful boards may twist into wooden propellers, split at the ends, grow mold, or remain wet in the center long after the surfaces feel dry.
This DIY guide explains how to mill and dry lumber yourself using a portable bandsaw mill, chainsaw mill, or hired sawyer. It also covers air drying, solar and dehumidification kilns, moisture testing, common defects, and practical lessons that can save both wood and frustration.
Why Mill Your Own Lumber?
DIY lumber milling lets you use trees that might otherwise become firewood, mulch, or landfill material. Storm-damaged trees, trees removed during construction, and logs harvested from managed woodland can contain valuable lumber unavailable at an ordinary home-improvement store.
Home-milled wood may also have character that commercial boards lack. Wide slabs, unusual grain, spalting, crotch figure, knots, color variation, and natural edges can transform a routine woodworking project into a one-of-a-kind piece.
That does not mean every log is a treasure chest wearing bark. Small, crooked, rotten, deeply cracked, or heavily branched logs may produce little usable lumber. Milling also requires equipment, space, physical labor, and patience. Trees are generous, but they rarely provide free furniture on a convenient schedule.
Choose the Right Log Before You Start
Identify the species
Determine the tree species before deciding how to mill and dry it. Walnut, cherry, maple, oak, ash, cedar, pine, poplar, and other species behave differently during sawing and drying. Some dry quickly with relatively few problems, while dense hardwoods such as oak require slower, more carefully controlled drying to reduce checking, honeycombing, and internal stress.
Species also affects the best final use. Cedar may be ideal for outdoor projects, while hard maple can produce durable work surfaces. White oak is useful where moisture resistance matters, and walnut is often worth saving for furniture-grade boards.
Inspect for defects and hidden hazards
Look for rot, hollow areas, severe sweep, branching, embedded rocks, and large cracks. Trim soil-covered ends and remove as much dirt from the bark as practical. Sand and grit can dull a bandsaw blade astonishingly quickly.
Urban and yard trees deserve special caution because they may contain nails, screws, fencing, clothesline hardware, concrete, or other metal. A metal detector can help, but it cannot guarantee that a log is clear. When you find staining, scars, or suspicious bumps, assume the tree may be hiding something sharp and expensive.
Mill logs promptly
Freshly cut logs should generally be milled as soon as practical. Long storage increases the risk of end checking, insect damage, fungal staining, and decay. If immediate milling is impossible, keep logs off the soil, shade them where practical, and seal the freshly cut ends with a commercial log-and-lumber end coating.
End grain loses moisture much faster than the sides of a log. Sealing it slows that loss and reduces the deep splits that can consume several inchesor several feetof otherwise useful lumber.
Tools and Equipment for DIY Lumber Milling
Your setup will depend on the size and number of logs, the desired boards, and your budget. Common equipment includes:
- A portable bandsaw mill, chainsaw mill, or local portable-sawmill service
- A chainsaw with a sharp chain for bucking and trimming
- Cant hooks, peaveys, ramps, winches, or mechanical loading equipment
- Log clamps, dogs, and properly maintained mill guards
- A tape measure, lumber crayon, square, and notebook
- Extra blades, fuel, lubricants, wedges, and basic maintenance tools
- Dry, uniform stickers for stacking boards
- Foundation timbers or concrete blocks for the drying stack
- End-grain sealer and a brush or roller
- A quality pin-type or pinless moisture meter
A portable bandsaw mill is usually faster and more efficient than a chainsaw mill because its thinner kerf converts more of the log into boards instead of sawdust. A chainsaw mill is slower and wastes more material, but it can be practical for occasional slabs, oversized logs, or remote locations.
Hiring a portable sawyer is often the most economical choice when you have only a few logs. You gain access to suitable equipment and experience without buying, storing, and maintaining an entire sawmill.
Make Safety the First Cut
Logs can roll without warning, machinery can grab loose clothing, and exposed blades are not known for forgiveness. Wear eye and hearing protection, sturdy boots, close-fitting clothing, and any additional personal protective equipment required by the equipment manufacturer. Chainsaw work calls for chainsaw chaps, appropriate head protection, gloves, and proper training.
Keep bystanders outside the work zone. Stabilize every log before cutting, use mechanical assistance instead of trying to prove your strength, and never stand downhill from an unsecured log. Shut equipment down before adjusting, clearing, refueling, or servicing it. Guards and clamps should remain installed and functional.
Tree felling is a separate high-risk skill. When a standing tree is near buildings, roads, power lines, fences, or other people, use a qualified tree professional. The woodworking project becomes significantly less enjoyable when it begins with an emergency-services visit.
Plan Your Boards Before Milling
Decide what you want from the log before starting the saw. Furniture boards, beams, siding, turning blanks, flooring, and live-edge slabs require different cutting plans.
Allow extra thickness
Green lumber shrinks as it dries and may need jointing and planing to become flat and smooth. Cut boards thicker than their intended finished dimension. The exact allowance depends on species, board width, drying method, mill accuracy, and the amount of distortion expected, but leaving roughly 1/8 to 1/4 inch of extra thickness is common for many woodworking boards.
Wide slabs may need more allowance because they can cup, twist, or develop uneven surfaces during drying. It is far easier to remove extra material later than to ask a board to become thicker through positive thinking.
Choose a sawing pattern
Live sawing, also called through-and-through sawing, cuts consecutive boards across the log. It is efficient, produces wide boards, and requires minimal log handling. Grain orientation varies across each board.
Plain sawing produces the familiar cathedral grain seen in many hardwood boards. It offers good yield and is commonly used for general woodworking.
Quarter sawing positions the growth rings more nearly perpendicular to the board faces. Quarter-sawn lumber is generally more dimensionally stable across its width and may reveal striking ray fleck in species such as white oak. The process requires more log handling and typically produces narrower boards with lower overall yield.
Rift sawing creates relatively straight grain and consistent ring orientation, but it is labor-intensive and produces more waste. It is often reserved for premium furniture, cabinetry, and architectural work.
How to Mill Lumber Step by Step
1. Prepare a firm, level milling area
Set up the mill on stable ground with enough room to load logs, remove slabs, handle boards, and keep people clear of the blade path. Level the track according to the manufacturer’s instructions. A twisted or poorly supported track can produce boards that vary in thickness from one end to the other.
2. Buck and clean the log
Cut the log slightly longer than the finished boards you need so damaged ends can be trimmed later. Remove loose bark, dirt, stones, and protruding branch stubs. Seal freshly cut ends promptly, particularly on species prone to checking.
3. Load and secure the log
Use ramps, a winch, tractor, loader, or the mill’s hydraulic system. Keep hands and feet out of pinch points. Once loaded, clamp the log firmly so it cannot rotate or shift during a cut.
4. Establish the first flat face
The initial cut removes a slab and creates a flat reference surface. On a chainsaw mill, a ladder-style guide or rigid first-cut rail is commonly used to establish this plane. On a portable bandsaw mill, the log supports and cutting head must be adjusted carefully to create a straight first face.
5. Rotate the log and form a cant
Rotate the log so the first flat face rests securely against the mill supports. Make additional cuts to create a squared or partially squared cant. Watch the grain and defects as they appear; changing the cutting plan can help isolate rot, knots, cracks, or valuable figure.
6. Saw the boards
Set the desired thickness, including the allowance for shrinkage and surfacing. Maintain a steady feed rate. Forcing a dull blade through the cut may cause wandering, wavy boards, overheating, and unnecessary strain on the mill.
Measure boards periodically rather than assuming every cut is perfect. Blade condition, track alignment, feed pressure, log tension, and sawdust buildup can all affect accuracy.
7. Seal, label, and stack immediately
Reseal exposed board ends as needed. Mark the species, cutting date, thickness, log number, and any special characteristics. Begin stacking the lumber promptly. Leaving green boards in a loose pile encourages stain, mold, uneven drying, and warp.
How to Air-Dry Lumber Correctly
Build a solid foundation
Choose a well-drained site with good natural airflow. Raise the stack well above the groundoften at least 12 inchesto reduce moisture exposure and allow air beneath the pile. Use durable beams or blocks arranged in straight, level rows.
The foundation must support the lumber without sagging. Any error in the base can be copied upward through the entire stack, turning a small dip into a large collection of bowed boards.
Use dry, uniform stickers
Stickers are narrow spacers placed between each layer of lumber. They create channels through which air can move across the board surfaces. Stickers around 3/4 inch thick are common, although dimensions may be adjusted for the stack and drying conditions.
Use straight, dry, uniform, nonstaining material. Place stickers approximately 12 to 24 inches apart, with closer spacing providing more support for thin or warp-prone boards. Most importantly, align every sticker directly above the one below it. Misaligned stickers create concentrated pressure and may cause permanent bends.
Stack boards by thickness
Keep boards of similar thickness in the same stack when possible. Position the thickest, longest, and heaviest boards where they provide stable support. Leave small gaps between adjacent boards if the stack design and climate call for lateral airflow.
Place lower-grade boards on the outside of the stack when practical, where drying conditions may be harsher. High-value boards generally benefit from the most uniform environment near the center.
Protect the top without wrapping the pile
Cover the stack with a rigid roof that extends beyond the lumber to shed rain and shield the top boards from direct sun. Leave the sides open so air can circulate. Plastic wrapped tightly around the entire pile traps moisture and can create a miniature mold resort.
Add evenly distributed weight or secure straps across the top. Downward pressure helps limit cupping and warping, especially in the upper courses.
How Long Does Lumber Take to Air-Dry?
The traditional rule of thumbabout one year per inch of thicknessis only a rough planning estimate. Actual drying time depends on species, thickness, board width, starting moisture content, climate, season, airflow, stack design, and the desired final moisture level.
Fast-drying species and thin boards may reach their air-dry limit in a matter of months. Thick oak slabs can require years. The outside surfaces always dry before the center, so appearance and touch are unreliable indicators.
Air-dried lumber commonly stabilizes somewhere around 12% to 20% moisture content, depending on the local climate and season. That may be appropriate for sheds, barns, outdoor furniture, or other unconditioned uses. It is generally too wet for furniture, cabinetry, flooring, and millwork destined for a heated or air-conditioned home.
Measure Moisture Instead of Guessing
A moisture meter is one of the most valuable tools in the process. A pin-type meter measures electrical resistance between probes inserted into the wood, while a pinless meter scans beneath the surface without leaving holes.
Follow the meter manufacturer’s instructions and apply species and temperature corrections when required. Test multiple boards in several parts of the stack, including boards near the center. Take readings at different points along each board rather than relying on a single convenient spot.
For most indoor furniture and cabinetry, a final moisture content near 6% to 8% is commonly targeted. Framing lumber is usually dried to a higher level. More important than chasing one universal number is matching the wood to the equilibrium moisture content of the environment where the finished project will live.
Finish Drying with a Kiln
Solar kiln
A solar kiln uses a glazed collector, dark heat-absorbing surfaces, insulation, vents, and fans to warm and circulate air through a stickered lumber stack. It can dry wood below typical outdoor equilibrium levels while operating more gently than many conventional kilns.
Solar kilns are attractive to DIY woodworkers because they can be relatively inexpensive and simple to operate. Nevertheless, collector area, airflow, venting, stack volume, and species-specific drying behavior must be considered. More heat is not automatically better; uncontrolled drying can damage the wood before the center has a chance to respond.
Dehumidification kiln
A dehumidification kiln circulates warm air through the stack and condenses moisture out of the air. Small commercial units are popular with custom sawyers and serious home woodworkers because they offer controlled drying without the complexity of a steam kiln.
Professional kiln service
For a small quantity of valuable lumber, paying a professional kiln operator may be safer and more economical than building a kiln. A professional can select an appropriate drying schedule, reduce the moisture content to an interior-use level, and apply a heat treatment when insect control is required.
Air drying alone does not reliably kill insects or their eggs. Avoid bringing questionable lumber directly into a home or finished workshop. Ask a kiln operator about heat-treatment capability and the appropriate schedule for your species and board thickness.
Prevent Common Milling and Drying Defects
End checking and splits
Seal ends quickly, avoid prolonged log storage, and keep lumber out of intense sun and wind during early drying. Trim severe checks after drying rather than building them into a finished component.
Surface checking
Surface checks occur when the exterior dries and shrinks too quickly while the interior remains wet. Slow the initial drying of check-prone species, maintain moderate airflow, and follow an established kiln schedule.
Cupping, bowing, and twisting
Begin with a level foundation, use closely spaced aligned stickers, stack similar thicknesses together, and apply top weight. Reaction wood, irregular grain, and growth stress can still distort boards, so allow enough thickness for later flattening.
Sticker stain and fungal discoloration
Use clean, dry stickers and stack green lumber promptly. Warm, humid weather increases staining risk, particularly in pale species such as maple. Good airflow is essential, but excessive airflow may cause checking in sensitive hardwoods.
Casehardening and honeycombing
These defects are commonly associated with drying too aggressively. The surface may become stressed while the wetter core remains restrained, or internal cracks may develop where they are invisible until the board is cut. Use conservative, species-appropriate kiln schedules and monitor moisture throughout the load.
Condition and Store the Dried Lumber
After drying, move the boards into a protected space similar to the environment where they will be used. Keep them stickered until moisture readings stabilize. This acclimation period lets the lumber adjust before final machining.
Joint and plane boards in stages when possible. Remove material from both faces rather than taking everything from one side. Boards containing residual stress may move after the first machining session, so allowing them to rest before final dimensioning can improve accuracy.
Store dry lumber flat, supported, and protected from rain, concrete floors, plumbing leaks, and major humidity swings. Dry wood continues to exchange moisture with the surrounding air. A finish can slow that exchange, but it does not stop wood movement forever.
DIY Milling and Drying Experiences: Lessons From the Lumber Stack
The first lesson most DIY sawyers learn is that the sawing itself is only one part of the project. Milling a log may take an afternoon; handling the boards, stacking them correctly, cleaning the site, managing slabs, and monitoring the drying pile can continue for months or years. Plan the drying area before the first cut. A stack built in a hurried, inconvenient location will become a long-term monument to poor decision-making.
Another practical lesson is to prepare more stickers than calculations suggest. A surprisingly large number disappears into even a modest pile. All stickers should be cut before milling begins so wet boards can go directly from the mill to the stack. Searching for scrap strips while green maple sits in the sun is a reliable way to discover how quickly stain and checking can begin.
Blade maintenance also affects far more than productivity. A sharp, properly tensioned blade produces straighter boards and requires less feed pressure. When a blade begins wandering, slowing down may help temporarily, but continuing to force the cut can turn valuable lumber into tapered boards. Changing a blade early is usually cheaper than sacrificing a wide walnut slab.
Log orientation deserves patience. Before making the first cut, study the end grain, sweep, knots, cracks, and crotches. A few minutes of planning can place defects near board edges, preserve wide clear faces, or expose decorative figure. The best cutting pattern is not always the one that produces the greatest number of boards; it is the one that creates boards suitable for actual projects.
Recordkeeping becomes more useful as the pile grows. Write the species, milling date, board thickness, source tree, and stack location in a notebook or spreadsheet. Mark boards with lumber crayon or durable tags. After a year, “the stack beside the other stack” is not a dependable inventory system.
Do not rely on drying folklore. Two 1-inch boards milled on the same day can dry at different rates because one contains heartwood, one contains sapwood, and each occupies a different position in the stack. Moisture-meter readings often reveal that the boards near the pile’s exterior are ready while center boards still contain significantly more moisture.
Wide slabs require additional restraint and realistic expectations. Even with perfect stacking, some movement is normal. Cut them generously thick, seal the ends, support them closely, and postpone flattening until drying is complete. Flattening a green slab creates a wonderfully smooth surface that may become wonderfully curved a few weeks later.
Finally, expect the project to produce more material than finished lumber. Bark, slabs, sawdust, offcuts, defective boards, and trimmed ends must go somewhere. Slabs can become firewood, rustic siding, garden structures, or small craft stock. Sawdust may have appropriate uses depending on tree species and contamination, but it should never be allowed to accumulate around hot engines or moving machinery.
The reward arrives when the first finished project leaves the shop. Knowing the tree’s origin, deciding how it was sawn, watching it dry, and building with the resulting boards creates a connection that store-bought lumber rarely offers. The process is slower than purchasing kiln-dried boards, but speed is not the only measure of value. Sometimes the story inside the table begins years before the table has legs.
Conclusion
Learning how to mill and dry lumber yourself requires more than a saw. Successful results come from choosing sound logs, planning the cutting pattern, leaving machining allowance, sealing the ends, stacking boards on aligned stickers, protecting the pile, and measuring moisture throughout the drying process.
Air drying is economical and useful as a first stage, but lumber intended for indoor furniture, cabinetry, flooring, or millwork usually needs kiln drying to reach a stable interior-use moisture content. Whether you build a solar kiln, use a dehumidification unit, or hire a professional, controlled drying protects the time and effort already invested in the log.
Note: Lumber milling, tree work, chainsaw operation, and log handling involve serious hazards. Follow the instructions for your specific equipment, wear appropriate protective gear, keep bystanders clear, and obtain professional assistance for tree felling, unstable logs, unfamiliar machinery, or structural lumber that must meet local grading and building-code requirements.