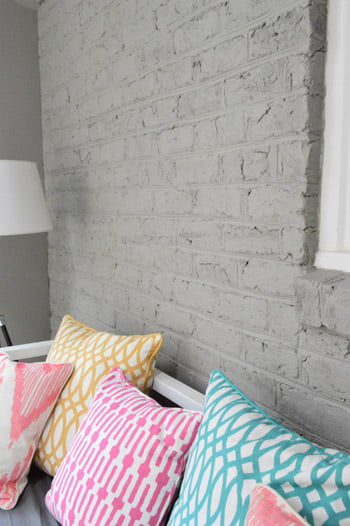
Painting a brick wall can completely change a room, a fireplace surround, a garden wall, or even the whole personality of a house. It can make old brick feel cleaner, brighter, calmer, bolder, or a whole lot less “1978 basement rec room.” But brick is not drywall with a rough attitude. It is porous, textured, moody about moisture, and very good at exposing sloppy prep work. In other words, if you want a painted brick wall that looks crisp instead of chaotic, preparation is not the boring part. Preparation is the project.
The good news is that painting brick is absolutely doable for a DIYer. The trick is to clean it properly, solve any moisture issues first, use the right primer and paint, and apply it in a way that reaches all those little pits, grooves, and mortar joints. Done right, the finish can look rich and intentional. Done wrong, it can peel, trap problems, and make you say words that are not suitable for a family-friendly home improvement blog.
This guide walks you through exactly how to paint a brick wall, from deciding whether you should paint it at all to choosing products, prepping the surface, and getting a smooth, durable result.
Should You Paint A Brick Wall At All?
Before you open a paint can, pause for one important reality check: painting brick is usually a long-term design decision. Bare brick has a natural texture and variation that many people love. Once it is painted, going back to the original look is difficult, messy, and often expensive. So if your goal is only to soften the color while keeping the character of the brick visible, you may want to consider alternatives like limewash or whitewash instead of full-coverage paint.
That said, there are plenty of reasons to paint brick. Maybe the wall is dark and makes the room feel smaller. Maybe the brick is stained, mismatched, dated, or covered in patchy repairs. Maybe the exterior needs a cleaner, more unified look. Paint can absolutely solve those problems. You just want to go in knowing that this is not a “let’s see how we feel by next Tuesday” project.
When painting brick makes sense
- The brick is purely decorative and you want a cleaner, updated style.
- The surface has cosmetic stains or uneven coloring that cleaning alone will not fix.
- You want a solid, opaque finish for an interior accent wall, fireplace wall, or exterior facade.
- You are prepared for future touch-ups and maintenance.
When you should slow down
- The brick has moisture problems, crumbling mortar, or white powdery residue.
- The wall is historic or part of older masonry that may need a breathable finish.
- You are not sure whether the brick has been sealed, glazed, or previously coated.
- You really love the natural brick look and are just having a temporary design crisis.
What You Need To Paint A Brick Wall
You do not need a truck full of pro gear, but you do need the right tools for a textured, porous surface. Brick will happily eat weak rollers, cheap brushes, and your patience if you go in underprepared.
- Drop cloths and painter’s tape
- Safety glasses, gloves, and a dust mask
- Stiff nylon or masonry brush
- Mild detergent or brick-safe cleaner
- Bucket, sponge, and clean water
- Vacuum or shop vac for dust and debris
- Masonry patch or mortar repair product, if needed
- Masonry primer or sealer
- Masonry paint, acrylic latex paint, or another brick-appropriate coating
- Angled brush for edges and mortar lines
- Thick-nap roller for textured surfaces
- Extension pole for easier wall coverage
If you are painting a large exterior brick wall, a paint sprayer can speed things up. But many DIYers still back-brush or back-roll afterward to push the paint into the texture and even out coverage. Brick has a lot going on, and it is rude enough to show every missed spot.
Step 1: Inspect The Brick Before You Paint
This is the step that separates a nice finish from a future peeling disaster. Look over the wall carefully. You want to know whether the brick is sound, dry, and ready to hold paint.
Check for cracked bricks, loose mortar, mildew, greasy residue, soot, flaking old paint, or efflorescence. Efflorescence is the chalky white powder that appears when moisture moves through masonry and leaves salt deposits behind. If you see it, do not just paint over it and hope for emotional closure. That white stuff is a warning sign that water is traveling through the wall, and paint will not magically fix that.
Also check whether the brick is glazed or sealed. A slick, shiny surface does not accept coatings the same way raw absorbent brick does. If water beads up instead of soaking in, the surface may need abrasion or a specialty primer to help the coating stick.
Step 2: Clean The Brick Thoroughly
Brick loves to collect dust, soot, grease, cobwebs, and mystery grime from the last decade. Paint does not love bonding to that. So give the wall a serious cleaning before you think about priming.
For most interior brick walls, start by vacuuming loose dust and cobwebs. Then scrub the surface with warm water, mild detergent, and a stiff brush. Rinse with clean water and let the brick dry completely. If the wall is greasy, grimy, or near a fireplace, you may need a stronger brick-safe cleaner and a little more elbow grease.
For exterior brick, use a gentle but effective cleaning method. That may mean a hose, scrub brush, or careful pressure washing if the masonry is in good condition. The goal is to remove dirt and residue without blasting out mortar like you are auditioning for a demolition show.
Most importantly, let the brick dry fully. Because brick is porous, drying time matters. A surface that looks dry on the outside may still be holding moisture inside, and trapped moisture is one of the biggest reasons paint fails later.
Step 3: Make Repairs Before Priming
If mortar is loose, crumbling, or missing in spots, repair it before you paint. The same goes for small cracks, chips, or damaged areas. Paint is a finish, not a structural therapist. It can make the wall look prettier, but it cannot stabilize brick that is already having a rough time.
Use an appropriate masonry patch or mortar repair product and follow the label directions for drying and curing. Once repairs are done, brush away dust and make sure the surface is clean again.
If the wall has a recurring moisture problem, fix that before doing anything else. That might mean addressing leaking gutters, failed caulk, cracked caps, bad flashing, poor drainage, or open joints. Painting over water issues is like putting lipstick on a leak. It may look optimistic for a moment, but the wall will not be fooled.
Step 4: Choose The Right Primer And Paint
This is where a lot of brick projects go sideways. Regular wall paint is not automatically the best option for masonry. Brick is porous and alkaline, and it needs a product system designed to bond well and hold up over time.
Best primer for brick
Use a masonry primer, masonry conditioner, or high-adhesion sealer recommended for brick, concrete, or stucco. The primer helps reduce uneven absorption, improve adhesion, and give you a more consistent finish. It also helps with problem areas like patched spots and older, dusty masonry.
Best paint for a brick wall
For most interior brick walls, a quality acrylic latex paint or masonry paint works well. For exterior brick, choose a high-quality exterior masonry paint or another coating specifically recommended for vertical brick and masonry surfaces. If the wall needs to release moisture vapor, a breathable coating matters. That is especially important for older exterior brick and walls with a history of moisture movement.
What finish should you use?
Flat and low-sheen finishes are popular on brick because they soften the texture and hide surface imperfections better. Satin or eggshell can work indoors if you want a slightly more wipeable surface. Semi-gloss is easier to clean, but it will call extra attention to every bump, pit, and mortar ridge. Brick has enough texture already. It does not need a spotlight.
What color works best?
White, warm white, greige, soft taupe, charcoal, and muted black are popular choices because they modernize the wall while still letting texture do the talking. In a small room, light colors can brighten the space. Outdoors, choose a shade that works with your roof, trim, stone, landscaping, and any unpainted elements that are staying put. Brick painting is not just about the wall. It is about the whole visual conversation around it.
Step 5: Prime The Brick Wall
Once the wall is clean, repaired, and dry, tape off adjacent surfaces and lay down drop cloths. Start by using a brush to cut in around edges, corners, trim, outlets, or anything else that should not be painted. Then use your roller to apply primer across the brick faces.
Work the primer into the mortar joints and recessed spots. A thick-nap roller helps, but it will not reach every little crevice, so keep your brush nearby for touch-ups. Work in sections and keep an eye on drips, especially on heavily textured or uneven brick.
Allow the primer to dry according to the product instructions. Do not rush this step just because the wall is starting to look respectable. Primer needs time to do its job, and rushing can sabotage the finish coats that come next.
Step 6: Paint The Brick Wall
Now for the fun part. Stir the paint thoroughly and pour it into a tray or sprayer reservoir, depending on your method. Use an angled brush to cut in first, then roll paint onto the brick in manageable sections. Start at the top and work downward so drips do not land on areas you have already finished.
Apply the first coat evenly, making sure you cover the mortar lines and textured pockets. Brick rarely behaves like a smooth wall, so expect the first coat to look patchy in places. That is normal. It is not the wall mocking you. It is just brick being brick.
Let the first coat dry fully. Then apply a second coat for even coverage and better durability. Two coats are typically what gives painted brick that intentional, polished look instead of a “weekend experiment” vibe. Inspect the wall from different angles as it dries so you can catch missed recesses or thin areas.
Brush, roller, or sprayer?
- Brush: Best for detailed work, small walls, mortar joints, and touch-ups.
- Roller: Great for most DIY brick wall projects and easier to control indoors.
- Sprayer: Fast for large areas, but requires masking and follow-up attention for full coverage.
Common Mistakes To Avoid
If you want a painted brick wall that stays pretty longer than a carton of takeout leftovers, avoid these mistakes:
- Painting dirty brick: Dust, soot, and grease kill adhesion.
- Ignoring efflorescence: White powder usually points to moisture movement that needs attention.
- Skipping repairs: Loose mortar and cracks do not improve under paint.
- Using the wrong products: Brick needs masonry-friendly primers and coatings.
- Painting damp masonry: Moisture trapped under paint leads to peeling and bubbling.
- Rushing between coats: Brick absorbs a lot, and dry time matters.
- Forgetting maintenance: Painted brick is easier to color-control, but it is no longer a zero-maintenance surface.
Interior Vs. Exterior Brick Walls
The basic process is similar, but exterior brick needs extra caution. Outdoor walls deal with rain, sun, temperature swings, and more opportunities for water to sneak in where it should not. If you are painting an exterior brick wall or whole brick house, be especially thorough about moisture inspection, surface preparation, weather conditions, and product selection.
Interior brick walls are usually simpler. They are easier to clean, easier to dry, and easier to paint without battling wind, pollen, and surprise weather drama. Still, the same rules apply: clean well, prime properly, and do not skip the second coat.
How To Keep A Painted Brick Wall Looking Good
Once the paint cures, maintenance is fairly simple. Dust interior walls occasionally and wipe them with a soft cloth or mild cleaner when needed. For exterior painted brick, inspect the wall seasonally for cracks, peeling, mildew, or signs of moisture problems. The earlier you catch a problem, the easier it is to fix.
If you notice small chips or thin areas, touch them up before they spread. Keep gutters, drainage, flashing, and caulk in good shape so water is not constantly testing your paint job like an uninvited inspector.
Experiences And Lessons Learned From Painting A Brick Wall
One of the most common experiences people have with painting brick is underestimating how long the prep takes and overestimating how fast the paint part will go. On a smooth drywall wall, you can roll like the wind and feel very productive. On brick, every little crater, mortar line, and uneven edge slows things down. The first time I watched someone paint brick, they said, “This should only take an hour or two.” That was adorable. Three coffee breaks and one existential stare at a roller tray later, they had finished half the wall.
Another lesson is that color looks different on brick than it does on a paint swatch. Brick texture creates shadows, and those shadows affect the final look. A bright white can feel softer and more architectural once it settles into the grooves. A gray can read warmer or cooler depending on the brick tone underneath, the room lighting, and the amount of natural light in the space. That is why sample testing matters. Paint a small area first and look at it in morning light, afternoon light, and evening light before committing to the whole wall.
People also learn very quickly that brick is unbelievably thirsty. The first coat often disappears into the wall like the wall has been emotionally neglected for years and is suddenly soaking up attention. That does not mean the paint failed. It usually means the brick is absorbing primer and paint exactly as porous surfaces do. The second coat is where the transformation really shows up.
There is also a big emotional difference between painting interior brick and exterior brick. Interior brick can feel exciting and creative. You tape things off, queue up a playlist, and suddenly your dated fireplace wall starts looking modern and intentional. Exterior brick feels more serious, because it is tied to curb appeal, long-term maintenance, and the identity of the whole house. People tend to spend more time second-guessing exterior color choices, and honestly, that is wise. A bold black accent wall inside the house is easy to love. A whole exterior in the wrong undertone can become a neighborhood conversation piece for all the wrong reasons.
Another real-world experience: the final 10 percent of the job takes 40 percent of the patience. That is when you circle back for missed mortar lines, dab hidden recesses with a brush, catch drips, remove tape, and do the unglamorous cleanup that makes the whole project look professional. It is not the dramatic makeover moment people post online, but it is the reason the wall looks finished instead of merely painted.
And finally, nearly everyone who paints brick learns one timeless DIY truth: prep work never gets enough credit, but it always collects the trophy. The projects that hold up best are not the ones with the fanciest color names. They are the ones where the wall was cleaned properly, dried fully, repaired carefully, primed correctly, and painted patiently. Brick has standards. Once you respect them, it can reward you with a finish that looks custom, classic, and incredibly satisfying every time you walk into the room.
Final Thoughts
If you have been wondering how to paint a brick wall, the answer is simple in theory and detail-heavy in practice: inspect, clean, repair, prime, and paint with the right products. That order matters. So does patience. Brick can absolutely be painted beautifully, but it rewards careful prep and punishes shortcuts with almost theatrical enthusiasm.
Whether you are refreshing an indoor brick accent wall, updating a fireplace surround, or giving an exterior wall a whole new personality, the best result comes from treating masonry like masonry, not like ordinary drywall. Choose the right coating system, allow enough drying time, and work methodically. Do that, and your painted brick wall can look intentional, durable, and stylish for years.
Note: This article is written for general informational purposes and is based on current best practices for painting brick and masonry surfaces. Always check the label directions for the specific primer, paint, and repair products you choose.