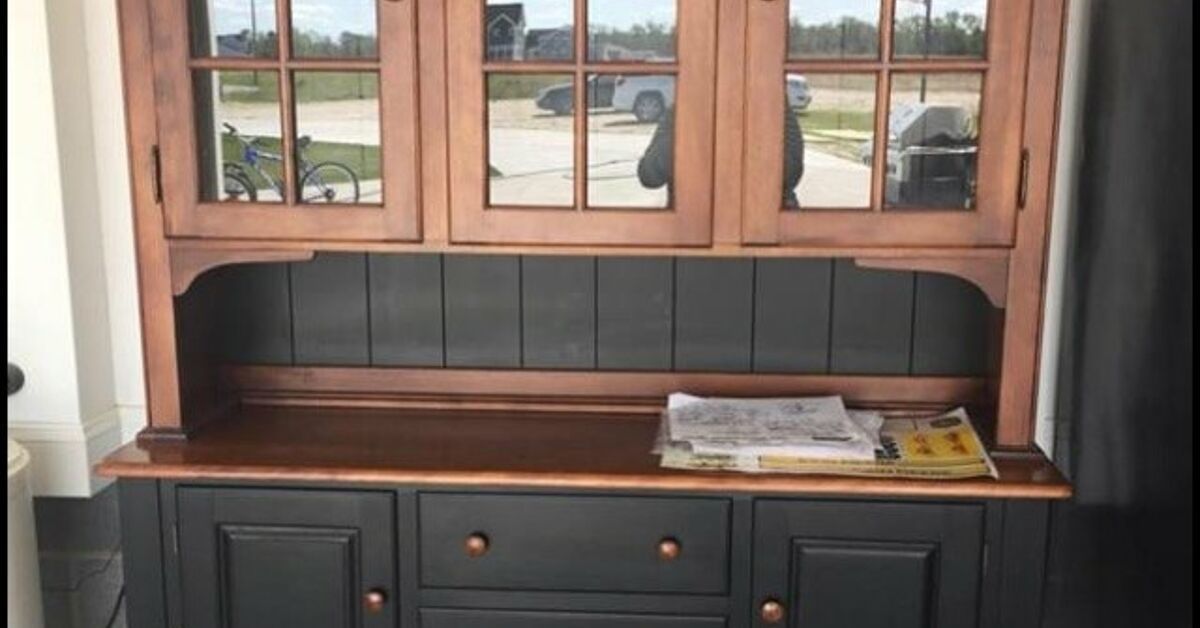
An old hutch can be many things: a dining room centerpiece, a display cabinet for heirloom dishes, or a very large wooden reminder that glossy orange-brown furniture once ruled the earth. Fortunately, you do not need to replace a sturdy piece just because its finish looks dated. A thoughtful farmhouse hutch makeover can turn it into attractive, useful storage with paint, basic tools, and a reasonably patient attitude.
The secret is not a mysterious brand of paint or an advanced brush technique known only to professional furniture whisperers. It is preparation. Cleaning, repairing, sanding, priming, and applying thin coats will usually produce a stronger and smoother finish than rushing directly to the fun part. This guide explains how to paint a farmhouse hutch step by step, including color choices, distressing techniques, hardware updates, sealing options, and practical lessons that help prevent common DIY disasters.
Choose a Farmhouse Look Before Opening the Paint
Farmhouse furniture does not have to be white, heavily distressed, and decorated with a sign that says “Gather.” Modern farmhouse style can be clean and restrained, while traditional farmhouse furniture may show more texture, visible wood, aged hardware, and natural imperfections.
Before buying supplies, decide whether you want your painted hutch to feel rustic, modern, vintage, coastal, or cottage-inspired. This decision affects the color, sheen, hardware, and finishing technique.
Popular Farmhouse Hutch Color Ideas
Warm white remains a classic choice because it brightens a large cabinet without looking overly stark. Cream, ivory, putty, mushroom, greige, charcoal, muted sage, dusty blue, and nearly black are also excellent farmhouse paint colors. Satin and low-luster finishes are practical for furniture because they are easier to clean than completely flat paint while avoiding the plastic-like shine of high gloss.
For additional contrast, consider painting the exterior one color and the back panel another. A creamy white hutch with a natural wood interior feels warm and traditional. A deep green exterior with a light oak back creates a moodier modern farmhouse look. You can also stain the shelves or top while painting the frame.
Test Your Color in the Room
Paint a sample board rather than judging a color from a tiny paper chip. Place it near the hutch and observe it during the morning, afternoon, and evening. Nearby flooring, wall colors, curtains, and artificial lighting can make a neutral shade appear unexpectedly yellow, pink, blue, or gray.
Supplies for a Farmhouse Hutch Makeover
- Degreasing cleaner or mild dish soap
- Clean cloths and lint-free rags
- Screwdriver or drill
- Painter’s tape and labels
- Drop cloths or plastic sheeting
- Wood filler and a putty knife
- 120-, 150-, 180-, and 220-grit sandpaper or sanding sponges
- Shop vacuum or soft brush attachment
- Bonding or stain-blocking primer
- Furniture, cabinet, enamel, mineral, milk, or chalk-style paint
- Quality angled brush
- Four-inch foam or microfiber mini roller
- Paint tray and stir sticks
- Clear topcoat or furniture wax, when required
- Respirator or suitable dust mask, eye protection, and gloves
- New knobs, pulls, hinges, or decorative hardware if desired
Step 1: Inspect the Hutch Carefully
Begin with a structural inspection. Check the legs, shelves, doors, back panel, trim, and drawer joints. Tighten loose screws and repair unstable joints before painting. Paint can disguise a dated color, but it cannot persuade a wobbly leg to become responsible.
Look for veneer damage, swollen particleboard, peeling laminate, deep scratches, missing molding, or evidence of pests. Small chips and dents are usually repairable. Severely swollen engineered wood may need replacement rather than cosmetic treatment.
If the hutch has an unknown old painted finish, especially one that may date from before 1978, avoid immediately sanding or scraping it. The U.S. Environmental Protection Agency recommends determining whether lead-based paint may be present and using lead-safe work practices to control dust and protect household members.
Step 2: Photograph, Label, and Remove the Hardware
Take several photographs before disassembly. Remove doors, drawers, knobs, pulls, hinges, shelf supports, and magnetic catches whenever practical. Place each hardware set in a labeled bag. If the hinges are not interchangeable, mark their exact positions with painter’s tape.
Label doors and drawers in hidden locations so they return to the same openings. Older hutches are not always perfectly square, and swapping two nearly identical doors can turn reassembly into an unwanted geometry examination.
If you plan to replace the hardware, measure the distance between existing screw holes. Choosing pulls with the same center-to-center measurement can eliminate extra drilling and filling.
Step 3: Clean Every Surface
Clean the hutch before sanding. Furniture polish, kitchen grease, candle residue, dusting spray, hand oils, and smoke residue can interfere with adhesion. General Finishes warns that wax, oil soaps, and silicone-containing dusting products can cause finish problems, making careful cleaning especially important on older furniture.
Wash the surfaces with a suitable degreaser or mild dish-soap solution, working from the top downward. Pay special attention to handles, door edges, shelf fronts, and the areas surrounding knobs. Rinse away cleaner residue with a clean damp cloth and allow the wood to dry completely.
Do not soak veneer, MDF, particleboard, or unfinished edges. Excess water can cause swelling and permanent damage.
Step 4: Repair Holes, Cracks, and Damage
Fill unwanted hardware holes, dents, gouges, and small cracks with wood filler. Apply slightly more filler than needed because some products shrink while drying. Once cured, sand the repair flush with the surrounding surface. Minwax recommends inspecting wood carefully and completing repairs before the final preparation and finishing process.
Reattach loose trim with wood glue and clamps. Replace missing shelf pins, reinforce weak drawer bottoms, and repair split corners. If you are changing the position of the hardware, drill the new holes after the old ones have been filled and sanded.
Step 5: Sand for Better Paint Adhesion
Most hutches do not need to be stripped to bare wood. The usual goal is to remove loose finish, smooth damaged areas, and dull glossy surfaces so the primer can grip. Benjamin Moore summarizes good surface preparation with three useful conditions: clean, dry, and dull.
Use 120- or 150-grit sandpaper on rough repairs, peeling areas, or damaged finish. Use 180- or 220-grit paper for general scuff sanding. Sand flat areas with a sanding block or orbital sander, but work carefully around thin veneer, raised edges, carved trim, and corners. These areas can be sanded through surprisingly quickly.
Sand in the direction of the wood grain where it is visible. A sanding sponge works well around molding, grooves, spindles, and detailed door frames. Sherwin-Williams and This Old House both recommend lightly sanding existing furniture finishes and removing all dust before priming or painting.
Vacuum the entire hutch, including corners and shelf-pin holes. Follow with a clean, slightly damp lint-free cloth when compatible with your chosen products. Allow the piece to dry before continuing.
Step 6: Select the Right Primer
Primer improves adhesion, creates a more uniform surface, and can block stains from knots, tannins, old finishes, watermarks, or previous repairs. Use a bonding primer on slick varnish, laminate, or glossy factory finishes. Use a stain-blocking primer when painting mahogany, cedar, knotty pine, or furniture that has already shown brown, pink, or yellow discoloration through a light test coat.
Laminate and particleboard require products specifically designed to bond to nonporous surfaces. Benjamin Moore recommends a waterborne bonding primer for laminate or particleboard shelving, while Sherwin-Williams similarly advises using a high-adhesion primer on laminate furniture.
Apply primer with an angled brush in corners, around trim, and inside detailed areas. Use a mini roller on broad side panels, doors, shelves, and the hutch top. This combination provides control in tight spaces while reducing brush marks on flat surfaces.
After the primer dries according to its label, inspect it for rough grain, drips, or dust. Lightly sand imperfections with 220-grit paper, remove the residue, and apply another primer coat where stains remain visible.
Step 7: Paint the Hutch in Thin Coats
Stir the paint thoroughly without whipping air into it. Begin with the interior corners, trim, door frames, and narrow edges. Then roll the larger flat areas. Work in manageable sections and maintain a wet edge so overlapping areas blend smoothly.
Apply paint in thin, even coats. A heavy coat may appear to save time, but it is more likely to sag, wrinkle, remain soft, or collect in corners. Multiple light coats generally produce a smoother finish than one thick coat.
On visible wood grain, finish your brush strokes in the direction of the grain. Do not repeatedly brush paint as it begins to dry; overworking partially set paint can create ridges and drag marks. Allow each coat to dry for the full period specified by the manufacturer.
After the first coat, evaluate the surface under side lighting. Lightly sand obvious bumps with fine sandpaper if the product permits it, then remove every trace of dust. Most color changes require two coats, while strong contrasts may need three.
Painting the Shelves
Shelves receive more abrasion than decorative side panels. Use a durable cabinet or furniture enamel and give the shelves extra curing time. Painting both sides helps create a finished appearance, but avoid painting the small contact points that fit tightly into grooves unless sufficient clearance is available.
Painting Glass Doors
Remove glass panels when the construction allows it safely. Otherwise, mask both sides carefully with painter’s tape and paper. Run a sharp utility knife lightly along the paint edge before removing cured tape so the finish does not tear.
Step 8: Add Farmhouse Character
Once the paint is dry, decide how polished or aged you want the hutch to appear. Farmhouse distressing should imitate natural wear rather than a random encounter with an angry sanding block.
Subtle Distressing
Use a fine or medium sanding sponge on corners, door edges, raised molding, shelf fronts, and areas around knobs. These are the places where furniture naturally receives contact. Start gently and step back frequently to check the balance. This Old House recommends concentrating faux wear on edges, corners, and areas surrounding hardware.
Two-Color Distressing
Apply a contrasting base coat before the final color. When the top layer is dry, sand selected areas until the lower color becomes visible. A charcoal base beneath cream creates dramatic age, while warm brown beneath sage green produces a softer vintage effect.
Keep Some Natural Wood
For a less painted appearance, strip and stain the top, shelves, drawer fronts, or back panel while painting the rest. Always test stain and clear finish in an inconspicuous location because different woods, veneers, and previous coatings can produce uneven color.
Step 9: Protect the Painted Finish
Whether the hutch needs a separate topcoat depends on the paint, color, and expected use. Some cabinet and furniture enamels are designed to perform without an additional clear layer. Chalk-style and milk-style finishes may require wax or a compatible clear coat.
For a display-only hutch, a low-luster wax may provide enough protection. For shelves that will hold dishes, serving pieces, or frequently moved décor, a durable water-based topcoat may be more practical. Rust-Oleum describes protective topcoat as a way to add durability while preserving the matte appearance of chalk-style paint.
Be cautious when applying clear finishes over white or pale paint. Some clear coats can amber or react with wood stains and tannins. General Finishes specifically advises testing clear topcoats over light colors because yellowing or bleed-through may occur.
When using furniture wax, spread a thin coat over the painted surface and remove the excess with a lint-free cloth. Wax may feel dry relatively quickly but can require substantially more time to cure fully, so treat the surface gently during that period.
Step 10: Update the Hardware and Reassemble
Fresh hardware can make the makeover feel intentional rather than merely repainted. Black iron pulls create a strong farmhouse contrast. Antique brass adds warmth, while brushed nickel offers a cleaner transitional appearance. Ceramic knobs can introduce a cottage influence without overwhelming the piece.
Clean reusable hardware with a method appropriate for its material. Replace damaged screws and hinges, but do not overtighten fasteners into old wood. Rehang doors gradually, adjust their alignment, and use felt pads or clear bumpers where painted surfaces touch.
Wait until the finish has developed adequate hardness before loading the shelves. Dry paint and cured paint are not the same thing. A surface may feel dry while remaining vulnerable to scratches, fingerprints, stuck décor, and the unforgettable outline of a serving platter placed too soon.
Practical Experience: Lessons From Farmhouse Hutch Makeovers
The most common lesson from furniture makeovers is that the piece usually looks worse immediately before it looks better. Once the doors are removed, filler is scattered across the surface, and the old finish has been scuffed into a cloudy mess, it is easy to wonder whether the hutch should have been left alone. That awkward middle stage is normal. Preparation is not photogenic, but it is doing most of the work.
Another practical lesson is to paint removable doors horizontally whenever possible. Vertical doors are convenient to access, but horizontal painting reduces the likelihood of sags around recessed panels. Support each door on painter’s pyramids or small blocks so the edges remain reachable. Finish one side, allow it to dry thoroughly, and then flip it. Trying to complete both sides in rapid succession often ends with fingerprints in a highly visible location.
Interior corners also deserve more attention than expected. A large brush can deposit too much paint where the shelf meets the back panel, creating thick lines and slow-drying pockets. A smaller angled brush provides better control. Brush the corners first, remove excess paint, and then roll the open areas. This simple order makes the finished interior look cleaner.
Color choice can change after the first coat, and that does not always mean the selection was wrong. Primer, incomplete coverage, and the original wood tone can distort an early impression. Evaluate the color only after full coverage has dried. Warm white over a dark hutch may look dingy after one coat but balanced after the second or third.
Distressing is another area where restraint usually wins. It is tempting to sand every edge because the process is oddly satisfying. However, uniformly distressed corners can look manufactured rather than naturally aged. Concentrate wear around handles, drawer edges, protruding molding, and lower corners. Leave quieter areas mostly intact. The contrast makes the worn spots more convincing.
Hardware placement should be tested before drilling. Use removable putty or painter’s tape to temporarily position knobs and pulls, then view the hutch from across the room. A handle that looks centered from twelve inches away may appear noticeably low when seen with the entire cabinet. A paper template helps keep matching pulls level and evenly spaced.
The final lesson is to allow more curing time than enthusiasm thinks is necessary. Shelves, dishes, and decorative objects apply pressure to the paint. Loading the cabinet too early can create dents or cause objects to stick. Leave doors open when practical, maintain ventilation, and follow the product’s curing instructions. The makeover will be far more satisfying when the finish survives its first week without acquiring the texture of a lace table runner.
Common Farmhouse Hutch Painting Mistakes
- Painting over furniture polish: Residue can cause peeling, craters, and poor adhesion.
- Skipping repairs: Paint highlights loose trim, dents, and deep scratches rather than hiding them.
- Using the wrong primer: Slick laminate and stain-prone wood need different primer properties.
- Applying thick coats: Heavy paint is more likely to sag and remain soft.
- Ignoring the back: A visible unfinished back panel can make the makeover feel incomplete.
- Over-distressing: Too many bare patches can make the hutch appear damaged instead of aged.
- Loading shelves too soon: Dry-to-touch does not mean fully cured.
- Forgetting a test area: Products may react differently with old finishes, tannins, veneer, or previous wax.
Conclusion
A successful farmhouse hutch makeover depends on a sensible sequence: inspect, disassemble, clean, repair, sand, prime, paint, protect, and patiently reassemble. The transformation can be dramatic, but the technique is approachable for beginners. Choose a color that suits the room, use products compatible with the existing surface, and keep decorative aging subtle. With careful preparation and adequate curing time, an outdated hutch can become a durable focal point instead of an oversized candidate for the curb.
Note: Product formulas and drying conditions vary. Follow the exact safety, ventilation, application, recoating, and curing instructions printed on the primer, paint, wax, or topcoat you select.