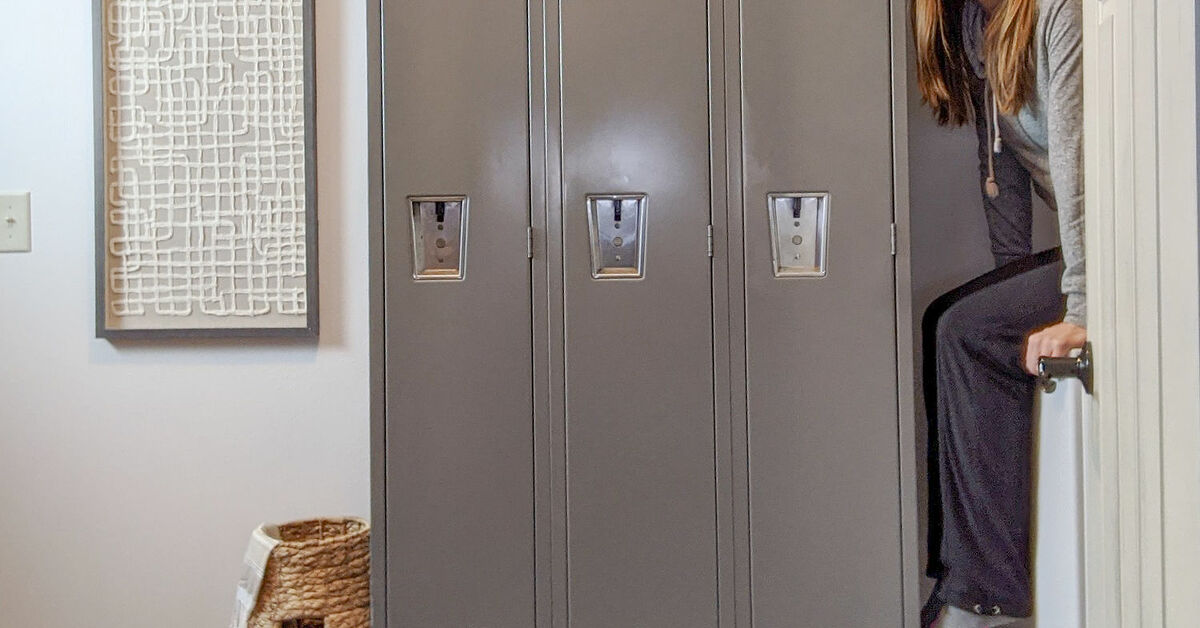
Old metal lockers have a special talent for looking hopeless. They arrive covered in scratches, mystery stickers, rusty corners, and at least one dent that appears to have been made by an angry bowling ball. Fortunately, underneath all that institutional gray or faded green is a sturdy steel cabinet waiting for a second career.
Learning how to paint old metal lockers is not complicated, but the project rewards patience. The final coat is only as good as the cleaning, rust removal, sanding, and priming underneath it. Skip those steps, and your beautiful new finish may peel faster than a sunburned tourist.
This DIY guide explains how to restore vintage school lockers, gym lockers, factory cabinets, and similar steel storage units. It covers safety, surface preparation, rust treatment, primer selection, spray-painting techniques, brush-and-roller alternatives, curing, reassembly, and the practical lessons that make the job easier.
Why Old Metal Lockers Are Worth Restoring
Vintage metal lockers are useful well beyond schools and locker rooms. A restored unit can become mudroom storage, a garage cabinet, a pantry, a toy organizer, an entryway closet, or an industrial-style wardrobe. Narrow locker compartments are especially helpful when several family members need separate spaces for shoes, bags, coats, sports equipment, or backpacks.
Older lockers are often made from durable sheet steel and can survive decades of use. Their cosmetic damage may look dramatic, but chipped paint and surface rust do not automatically mean the cabinet is beyond repair. If the doors still operate, the frame is reasonably straight, and corrosion has not eaten through major structural areas, refinishing is usually worthwhile.
Inspect the Lockers Before Buying Paint
Do not begin by choosing a color. Begin by deciding whether the lockers are structurally sound and identifying what type of preparation they need.
Check the Frame and Doors
Open every door and examine the hinges, latches, vents, shelves, feet, and back panel. Look for sharp edges, missing fasteners, broken welds, deep corrosion, and doors that rub against the frame. Minor dents and bent corners can often be improved, but severely twisted cabinets may never close correctly.
Surface rust usually appears as orange staining, rough patches, or light flaking. More serious corrosion creates holes, weak seams, or metal that crumbles when pressed. Small holes can sometimes be repaired with a metal-compatible filler, but large structural failures may require welding or replacement panels.
Consider the Age of the Existing Finish
Very old painted lockers may have coatings that contain lead or other hazardous materials. Because a used locker may have been repainted several times, its current topcoat does not reveal what lies underneath.
When the age and coating history are unknown, consider testing the finish before aggressive sanding or scraping. Keep children, pets, food, and household belongings away from the work zone. If testing indicates lead-based paint, follow lead-safe work practices or hire a qualified professional. Avoid creating clouds of dry dust with uncontrolled power sanding.
Look for Oil, Wax, and Chemical Residue
School and office lockers may mainly contain dust and adhesive residue. Factory or garage lockers can carry oil, silicone, wax, cleaners, or lubricants. These contaminants interfere with paint adhesion, so they must be removed rather than politely painted over.
Tools and Materials
The exact supply list depends on the lockers’ condition and the coating system you choose. Most projects require the following:
- Safety glasses and chemical-resistant gloves
- Protective clothing and suitable respiratory protection
- Drop cloths, plastic sheeting, or cardboard
- Screwdrivers, pliers, sockets, and labeled containers
- Vacuum with an appropriate fine-dust filter
- All-purpose cleaner or paint-compatible degreaser
- Clean rags, sponges, and buckets
- Plastic scraper and adhesive remover
- Wire brush or wire wheel used with proper safety precautions
- Sandpaper in coarse, medium, and fine grits
- Metal filler for minor dents or holes, if needed
- Painter’s tape and masking paper
- Rust-inhibiting metal primer
- Paint formulated for metal surfaces
- Optional foam rollers, brushes, or spray-can trigger handle
Read every product label before beginning. Primer and paint should be compatible with each other, suitable for the metal involved, and appropriate for indoor or outdoor use. Mixing unrelated products because their cans happen to look friendly is not a reliable coating strategy.
How to Paint Old Metal Lockers Step by Step
1. Choose a Safe Work Area
Whenever possible, work in a sheltered outdoor area or a dedicated, well-ventilated workshop. Protect floors, walls, vehicles, and nearby objects from sanding debris and overspray. Spray mist is adventurous and will travel farther than expected.
Avoid spraying near flames, pilot lights, sparks, heaters, or smoking materials. Follow the coating manufacturer’s temperature and humidity limits. Excessive heat can make paint dry before it levels, while cold or damp conditions can slow curing and leave the finish soft.
2. Photograph and Disassemble the Lockers
Take several photographs before removing anything. The pictures provide a useful reference when it is time to reinstall hinges, handles, number plates, hooks, shelves, and latch parts.
Remove doors and hardware when practical. Taking the doors off allows easier access to edges, jambs, vents, and interior corners. Place screws and small components in labeled bags. If the fasteners are rusty or unusually shaped, do not assume replacements will be waiting at the nearest store with open arms.
Hardware can be cleaned and painted separately, left with its original patina, or replaced. Mask functional lock cylinders, hinge pins, threads, and moving latch surfaces instead of coating them heavily.
3. Remove Stickers and Adhesive
Lift paper labels with a plastic scraper. A hair dryer may soften stubborn adhesive, but excessive heat should not be used when the existing coating’s composition is unknown. Apply a compatible adhesive remover to residue, allow it to work, and wipe the area thoroughly.
Cleaner residue can cause fisheyes, craters, or poor adhesion in the new paint. Wash treated areas again before sanding or priming.
4. Wash and Degrease the Entire Cabinet
Clean every surface, including the top, back, bottom, door edges, shelves, vents, and interior corners. Oils from hands and old maintenance products can remain even when the metal looks clean.
Use a paint-compatible degreaser or mild detergent according to its instructions. Rinse when required and allow the lockers to dry completely. Trapped moisture around seams and folded edges can encourage rust beneath the new coating.
5. Remove Loose Paint and Rust
Scrape away peeling paint and brush off loose rust. Sand rough areas until the remaining coating is firmly attached and the transition between bare metal and old paint feels gradual. The objective is not necessarily to strip every square inch to shiny steel. It is to remove unstable material and create a clean, dull surface that can hold primer.
Begin with a more aggressive abrasive only where rust or peeling paint requires it. Follow with a finer grit to feather edges and reduce deep scratches. Lightly scuff glossy areas that remain intact.
Be especially careful around stamped vents and thin door panels. Heavy pressure can distort the metal. A small hand brush, sanding sponge, or folded piece of sandpaper gives better control in detailed areas.
6. Repair Dents and Imperfections
Minor dents can sometimes be pushed out from behind with a block of wood and gentle taps. Locker doors are thin, so enthusiastic hammering may exchange one dent for six smaller dents.
For cosmetic damage that cannot be reshaped, apply a filler designed to bond to metal. Use thin applications, allow the material to cure, and sand it level. Do not fill drainage openings, vents, hinge clearances, or seams that need to move.
7. Remove All Sanding Dust
Vacuum the lockers carefully, paying attention to louvers, corners, and horizontal ledges. Wipe the surfaces with a clean cloth using the final-cleaning method recommended by the primer manufacturer.
The surface should be clean, dry, dull, and free from loose rust, grease, dust, wax, and peeling paint. Bare steel can begin developing new oxidation quickly, especially in humid conditions, so prime cleaned areas promptly.
8. Mask Areas That Should Not Be Painted
Mask identification plates, lock openings, threads, hinges, rubber bumpers, and any original details you want to preserve. Place paper behind vent openings if the locker interior will remain a different color.
Press tape edges down firmly but avoid stretching the tape around corners. Remove masking at the time recommended by the coating manufacturer; waiting until the finish is rock hard can cause jagged edges.
9. Apply the Correct Metal Primer
A rust-inhibiting primer is a sensible choice when the lockers have bare steel, repaired rust, or mixed areas of old paint and exposed metal. Some direct-to-metal paints can be used without a separate primer under specific conditions, but their surface-preparation requirements still apply.
Use a primer intended for the metal you are painting. Traditional steel, galvanized metal, and aluminum do not always use the same products. When the substrate is uncertain, consult the product manufacturer rather than guessing.
Apply an even coat without flooding vents, seams, or corners. Spot-prime repaired areas when the existing coating is otherwise sound, or prime the full cabinet when corrosion is widespread, the color change is dramatic, or uniform adhesion is a concern.
10. Sand the Primer When Necessary
After the primer has dried for its specified recoat period, inspect the surface under good lighting. Dust nibs, rough filler edges, and runs will become more obvious beneath the finish coat, not less obvious.
Lightly sand imperfections with fine-grit paper if the product permits it. Remove the resulting dust before applying paint. Do not sand through the primer on corners and door edges unless you plan to spot-prime those areas again.
11. Apply Several Light Coats of Paint
Spray paint is popular for metal lockers because it reaches vents, narrow edges, and recessed areas without leaving brush marks. Shake the can for the full period stated on the label, test the pattern on scrap cardboard, and hold it at the recommended distance.
Start each pass just beyond the locker, sweep across the surface at a steady speed, and release the nozzle after passing the opposite edge. Slightly overlap each pass. Keep the can moving and maintain a consistent distance.
Two or more light coats are generally safer than one heavy coat. Heavy spraying encourages runs, solvent trapping, wrinkling, and soft paint around louvers. Begin with difficult edges and recessed areas, then cover the large flat panels.
For a brush-and-roller finish, use a small high-density foam roller on broad surfaces and a compatible brush around vents and corners. Work in manageable sections and avoid repeatedly rolling paint after it has begun to set.
12. Respect the Recoat Window
Dry-to-touch time, recoat time, handling time, and full-cure time are different things. A door may feel dry while the coating underneath remains vulnerable.
Apply additional coats within the label’s recommended recoat window. Some enamels allow another coat within a short period or only after a much longer curing interval. Recoating during the wrong period can cause lifting or wrinkling.
13. Let the Finish Cure Before Reassembly
Leave the doors and cabinet undisturbed until they can be handled without fingerprints or impressions. Waiting longer before attaching hardware helps prevent screws, washers, and hinges from twisting through soft paint.
When reinstalling doors, tighten fasteners gradually and test alignment before final tightening. Add thin protective pads where doors contact the frame. Lubricate moving mechanisms carefully without spreading lubricant across newly painted surfaces.
Choosing the Best Finish for Metal Lockers
Satin
Satin is forgiving, easy to clean, and less likely than gloss to advertise every dent and sanding mark. It works well in bedrooms, mudrooms, craft rooms, and offices.
Semi-Gloss
Semi-gloss provides a durable, washable surface with a more traditional enameled-cabinet appearance. It is a practical choice for busy entryways, workshops, and children’s storage.
Gloss
Gloss creates a bold, polished look and is easy to wipe clean, but it reflects light strongly. Any dent, ripple, drip, or uneven repair may become the star of the show.
Hammered or Textured Finishes
Textured metal coatings can visually soften pitting and minor imperfections. They suit industrial and garage designs, although their surface can be harder to touch up invisibly later.
Common Locker-Painting Mistakes
Painting Over Dirt or Silicone
Paint cannot create a durable bond through grease, polish, adhesive residue, or silicone contamination. Clean before sanding and clean again afterward.
Leaving Loose Rust in Place
Rust converters and specialty primers have specific uses, but they are not permission to ignore heavily flaking corrosion. Remove loose material and follow the selected product’s directions.
Using One Thick Coat
A heavy coat may look efficient for approximately nine seconds. It then begins to sag around vents, collect along edges, and remain soft in corners. Light coats are slower but far less dramatic.
Painting Hinges and Latches Shut
Keep excessive paint away from moving joints and close-fitting parts. Operate doors carefully during the appropriate stage of drying when required to ensure they have not bonded to the frame.
Putting the Lockers Into Service Too Soon
Fresh enamel may be dry enough to touch but not hard enough for baskets, shoes, hangers, or heavy equipment. Allow adequate curing before loading shelves or closing doors for extended periods.
How to Maintain Refinished Metal Lockers
Clean the finish with a soft cloth and mild cleaner. Avoid abrasive pads that can dull the surface or expose primer on raised edges. Dry wet umbrellas, boots, and sports equipment before storing them whenever possible.
Inspect hinges, bottoms, and door edges periodically. These high-contact areas usually chip first. Clean and touch up small defects before moisture reaches the steel and forms a larger rust patch.
Keep indoor lockers away from persistent leaks, damp concrete, and high-humidity areas unless the complete coating system is rated for those conditions. Small furniture feet or a raised base can help prevent the cabinet bottom from sitting in moisture.
Practical Experience: What a Locker Makeover Is Really Like
The most surprising part of a metal locker restoration is how little time is spent applying the final color. The glamorous spraying stage may occupy an afternoon, while preparation quietly consumes most of the weekend. That imbalance is normal. A durable finish is built during the unphotogenic hours involving scrub brushes, sandpaper, and the discovery of gum that apparently became part of the locker during the previous century.
Imagine a typical three-door school locker purchased from a salvage sale. From ten feet away, it appears solid but dusty. Up close, the bottom edge has surface rust, two doors carry layers of stickers, and the original gray paint is polished smooth around the handles. One latch sticks, and somebody has written “MATT” inside a door in permanent marker. Matt has moved on. His artistic legacy remains.
The first useful lesson is to disassemble less than you think but more than you initially want. Removing the doors makes sanding and spraying easier, but dismantling a complicated latch assembly without photographs can turn reassembly into an archaeological investigation. Labeling hardware by door and taking close-up pictures saves considerable frustration.
The second lesson is that cleaning may change the restoration plan. After degreasing, what looked like widespread paint failure may prove to be dirt, while a seemingly harmless brown stain may reveal active corrosion. Cleaning before sanding prevents oils from being ground into the surface and provides an honest view of the cabinet’s condition.
The sticker-removal stage tests patience. Scraping too aggressively can gouge the old coating, while painting over adhesive creates raised shadows that remain visible through several coats. Slow removal followed by another wash produces a much cleaner result. Permanent marker may also bleed through some coatings, so a compatible stain-blocking or sealing treatment may be needed after testing a small area.
Sanding the locker creates another important realization: every panel does not require the same treatment. The rusty bottom may need a wire brush and coarse abrasive, while sound door faces need only a light scuff. Treating the entire cabinet as if it were heavily corroded wastes time and may thin the original coating unnecessarily.
Primer is where the project finally begins to look encouraging. A uniform primer coat reduces the visual chaos of bare steel, filler, rust stains, and old paint. It also exposes flaws. A dent that seemed insignificant may suddenly become obvious, and a rough paint edge may cast a visible shadow. Correcting those problems before color is easier than trying to pretend they add “industrial character” later.
During spraying, the vent louvers are usually the trickiest feature. Attacking them with a heavy direct blast causes paint to collect along their lower edges. Better results come from light passes at slightly different angles, followed by broad coats across the door. Beginning with the interiors and backs also provides a chance to improve spraying rhythm before tackling the most visible surfaces.
The first coat may look uneven and disappointing. That does not mean the project has failed. A light first coat often functions as a foundation. Trying to force complete coverage immediately is how runs appear. The second controlled coat normally creates the dramatic transformation people expect from the first.
The final lesson is to wait. Reinstalling handles into barely cured paint can leave circular impressions. Closing doors too soon may make painted contact points stick together. Loading shelves with baskets can create permanent marks. Giving the coating additional curing time is emotionally difficult when the lockers look finished, but it is one of the easiest ways to protect all the work already invested.
Once completed, the restored lockers rarely look factory-newand that is part of their appeal. A softened dent or faint ripple hints at their history, while the new finish makes them useful again. The goal is not to erase every sign of age. It is to stabilize the metal, create a durable surface, and turn a battered storage cabinet into something worthy of the room.
Conclusion
Painting old metal lockers successfully comes down to preparation and restraint. Inspect the cabinet, address safety concerns, remove contamination and loose rust, scuff glossy paint, use a compatible metal primer, and build the finish with controlled coats. Then allow the coating to cure before reinstalling hardware or filling the lockers.
The process takes longer than pointing a spray can at a cabinet, but the payoff is substantial. A neglected locker can become attractive, durable storage with a fraction of the waste and expense involved in buying a comparable new cabinet. Better still, you get to choose a color that never appeared in a school hallwayunless your school was unusually enthusiastic about coral pink or deep navy.