Adding a video to PowerPoint can turn a perfectly respectable slide deck into something people actually remember. Used well, video can demonstrate a product, introduce a customer story, explain a tricky process, or give everyone a brief break from bullet points that have been working overtime since 2007.
The good news is that putting a video in a PowerPoint presentation is not difficult. The slightly less-good news is that there are several ways to do it, and each one behaves differently when you present, share the file, or discover that the conference room Wi-Fi has the personality of a sleepy turtle.
This guide explains how to insert a video from your computer, embed an online video, control playback, fix common problems, make your presentation more accessible, and avoid the classic “Why is there a black rectangle on my slide?” moment.
Why Add a Video to a PowerPoint Presentation?
A video can do something that text-heavy slides struggle to do: show instead of tell. Rather than writing six bullets about how a machine works, you can play a 20-second clip of the machine doing its thing. Instead of describing a customer testimonial, you can let the customer speak for themselves.
Video is especially useful for training presentations, sales pitches, classroom lessons, product demonstrations, internal communications, onboarding sessions, event presentations, and portfolio slideshows. It can also help break up a long presentation so your audience does not begin mentally planning dinner halfway through slide 14.
Still, video should support the message, not become the message. A clip that is too long, too loud, too unrelated, or too dramatic can make a presentation feel like a movie trailer for a product nobody asked to see. Keep each video purposeful, short, and connected to the point of the slide.
Before You Insert a Video in PowerPoint
Take a minute to prepare the video before dragging it into your presentation. That tiny bit of planning can save you from technical chaos later.
Use a Compatible Video Format
The safest choice for a PowerPoint video is usually an MP4 file encoded with H.264 video and AAC audio. This format works reliably across modern Windows and Mac versions of PowerPoint and is generally the best option when you need to share your file with someone else.
Other formats, such as MOV and WebM, may work in some situations, but compatibility can vary depending on the device, operating system, PowerPoint version, and installed codecs. In plain English: an unusual video format may behave beautifully on your laptop and then refuse to cooperate five minutes before your presentation.
Keep a Copy of the Original Video
Before inserting anything, save the original video in a clearly named folder. Do not rely on a mystery file called final_video_new_FINAL_reallyfinal2.mp4 sitting somewhere in Downloads. Use practical names such as:
- product-demo-30-seconds.mp4
- customer-testimonial-jane-smith.mp4
- sales-training-intro.mp4
Keeping your media organized makes it easier to edit, replace, share, and troubleshoot later.
Trim the Video Before Adding It
Most presentation videos should be short. A useful rule is to include only the part that earns its spot on the slide. If a three-minute video has one excellent 25-second moment, use the 25 seconds. Your audience will appreciate the efficiency, and your presentation file will appreciate not becoming the size of a small planet.
You can trim some local videos directly in desktop PowerPoint, but editing the clip beforehand in a video editor often gives you more control. Remove long pauses, setup screens, unrelated intros, awkward camera shakes, and the part where someone says, “Are we recording?”
How to Insert a Video From Your Computer in PowerPoint
Embedding a local video is usually the most reliable option when you are presenting in person, traveling, or working in a location with questionable internet access.
Step 1: Choose the Right Slide
Open your PowerPoint presentation and select the slide where you want the video to appear. Think about why the video belongs there. It should either introduce an idea, demonstrate an idea, reinforce an idea, or provide a useful transition between sections.
A video on a slide should not feel like a random surprise guest. If your slide is about customer satisfaction, use a customer testimonial. If the slide is about a new mobile app feature, show the feature in action.
Step 2: Insert the Video File
In desktop PowerPoint, go to the Insert tab on the Ribbon. Select Video, then choose This Device or Video on My PC, depending on your version of PowerPoint.
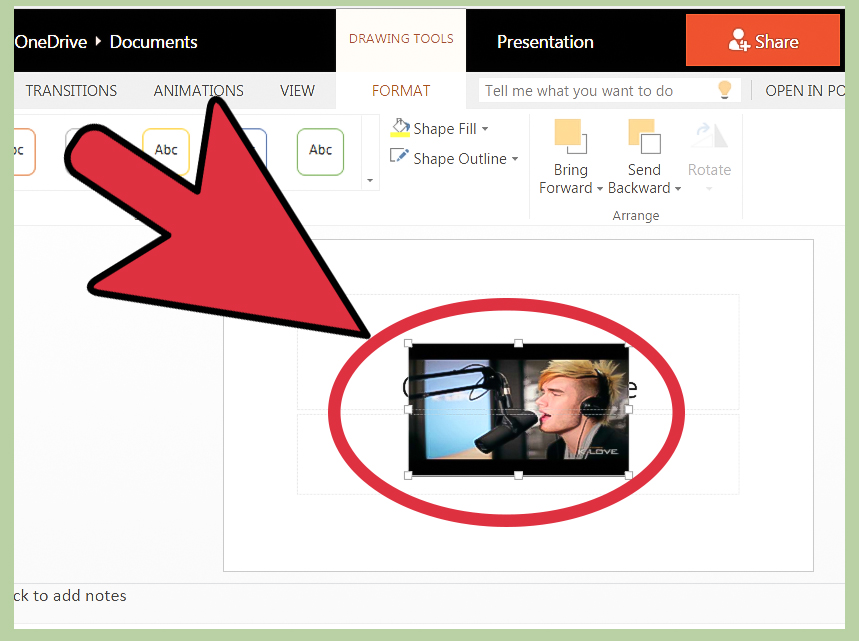
Browse to the video file, select it, and click Insert. PowerPoint will place the video on the slide as a movable object.
In PowerPoint for the web, the process is similar: select the slide, choose Insert, select Video, choose This Device, and upload the video file.
Step 3: Resize and Position the Video
Click the video once to select it. Drag the corner handles to resize it while keeping the proportions intact. Avoid stretching the video from the side because it can turn people into suspiciously wide superheroes.
Place the video where it supports the slide layout. For a clean look, you can make it large enough to dominate the slide. For a comparison slide, you might place the video on one side and a short explanation on the other.
Leave enough visual breathing room around the video. Crowding it with text boxes, arrows, decorative shapes, and six tiny logos can make the slide look like a yard sale held inside a spreadsheet.
How to Add an Online Video to PowerPoint
Online videos are useful when you want to display content from YouTube, Vimeo, Microsoft Stream, or another supported platform without downloading the file first.
Insert a Video Using a Link
To add an online video, find the video in your web browser and copy the page URL from the address bar. Then return to PowerPoint and select the slide where you want the video.
Go to Insert > Video > Online Video. Paste the URL into the available field and select Insert.
PowerPoint will place a video frame on your slide. You can resize and reposition it just as you would an image or chart.
Use an Embed Code When Needed
Some video platforms provide an embed code instead of a simple URL. On the video platform, choose the sharing option, look for Embed, and copy the iframe embed code. In PowerPoint, choose Insert > Video > Online Video, then paste the code into the embed field.
Be careful not to copy the wrong thing. A regular URL and an embed code are not always interchangeable. If PowerPoint rejects the video, return to the source and confirm that you copied the actual embed code rather than a link that merely looks important.
Remember That Online Videos Need Internet Access
An online video plays from the hosting website, not from inside your PowerPoint file. That means you need a stable internet connection during the presentation.
This is where many otherwise confident presenters discover the emotional importance of a backup plan. If the video is essential, consider downloading a legal local copy when allowed, or prepare screenshots and a short explanation in case the internet fails.
How to Control Video Playback in PowerPoint
Once your video is inserted, select it and open the Playback tab. This is where you decide how the video behaves during Slide Show mode.
Choose When the Video Starts
You can usually choose one of three common playback options:
- In Click Sequence: The video starts when you advance to it during the presentation.
- Automatically: The video begins as soon as the slide appears.
- When Clicked On: The video starts only when you click the play button.
For a live presentation, “When Clicked On” is often safest because it gives you control. For a timed presentation or kiosk display, “Automatically” may be the better choice.
Trim the Video Inside PowerPoint
If you are using a local video in desktop PowerPoint, you may be able to select the video, open the Playback tab, and choose Trim Video. This lets you set new start and end points without changing the original media file.
Use trimming to skip a boring introduction, avoid a long logo animation, or start exactly where the useful information begins. It is one of the easiest ways to make your deck feel more professional without spending an afternoon becoming a part-time film editor.
Set the Video to Play Full Screen
If the video is the main event on the slide, select it and choose Play Full Screen in the playback settings. When the video starts during Slide Show mode, it fills the screen and returns to the presentation when it finishes.
This works especially well for product launches, emotional customer stories, safety demonstrations, brand videos, and training clips where small details matter.
Adjust Volume and Loop Settings
Use the playback controls to set the volume. You may choose low, medium, high, or mute, depending on the content. Test the audio in the actual room whenever possible because speakers that sound gentle at your desk can become a surprise concert venue in a conference room.
You can also choose to loop a video until stopped. This works well for short background clips at trade shows, lobby screens, product kiosks, or event waiting areas. It is less useful for a formal meeting unless you want your coworkers to hear the same six seconds of music 47 times.
How to Make Video Slides Look Better
A video frame dropped onto a plain slide will work, but a little design attention makes it feel intentional.
Add a Clean Poster Frame
A poster frame is the image viewers see before the video starts. You can select a frame from the video or use a custom image that explains what people are about to watch.
For example, instead of showing a random blurry freeze-frame of someone mid-blink, use a clean thumbnail with text such as “Watch: 30-Second Product Demo” or “Customer Story: How Acme Cut Setup Time by 40%.”
Use a Short Video Caption
Include a brief caption near the video that tells viewers why it matters. Good captions create context before the video begins.
Examples include:
- “See the installation process in under one minute.”
- “Watch how the new dashboard reduces manual reporting.”
- “A customer explains the impact in their own words.”
A useful caption can be more effective than saying, “Okay, now we are going to watch a video,” which is technically true but not exactly a marketing masterpiece.
Do Not Add Competing Motion
A video already contains movement. Avoid adding spinning icons, bouncing titles, flashing transitions, and animated confetti around it. Your audience should know where to look.
Keep the rest of the slide simple. Let the video do its job, then return to your main presentation structure.
How to Add Captions and Make PowerPoint Videos Accessible
Captions make video content easier to understand in noisy rooms, quiet offices, virtual meetings, classrooms, and situations where viewers cannot hear the audio clearly. They also improve accessibility for people who are deaf or hard of hearing.
For local videos in supported desktop versions of PowerPoint, select the video, choose Playback, then select Insert Captions. Add a properly formatted caption file, such as a WebVTT file, to provide synchronized captions.
Online videos may not support PowerPoint’s built-in caption insertion tools, so check whether captions are available on the hosting platform. For important presentations, also provide a transcript or summary of the video’s key message.
Think beyond captions, too. If the video includes important visual information, explain that information in your spoken presentation or accompanying slide text. Someone should not have to decode a silent chart, tiny on-screen label, or fast-moving demonstration without guidance.
How to Fix Common PowerPoint Video Problems
The Video Will Not Insert
If PowerPoint refuses to insert your video, convert it to MP4 with H.264 video and AAC audio. This is the most reliable format for modern PowerPoint presentations.
You can use a trusted video converter to create a compatible copy. Keep the original file just in case you need to return to it later.
The Video Does Not Play on Another Computer
First, make sure the video is embedded rather than linked. Embedded videos travel with the PowerPoint file, while linked videos depend on an external file path. If you link a video and then move the presentation to another computer, PowerPoint may start looking for the original file in a folder that exists only on your laptop.
If you must use a linked file, keep the PowerPoint file and video file in the same folder before transferring them.
The Video Has No Sound
Check the video’s volume settings in PowerPoint, your computer’s system volume, the projector or television volume, and the speaker connection. Yes, that sounds obvious. Yes, it is still responsible for a shocking number of presentation emergencies.
Also test whether the original video file has audio outside of PowerPoint. If it does not, the issue may be with the video itself rather than the presentation.
The PowerPoint File Is Too Large
Large embedded videos can make your presentation difficult to email, upload, or open quickly. Compress your media from the File menu in desktop PowerPoint, or reduce the size of the original video before inserting it.
For many business presentations, a 720p video is often more than enough. A gigantic 4K clip may look impressive, but it can also turn a modest slide deck into a file that takes longer to send than it took to create.
The Online Video Will Not Play
Confirm that your internet connection works, the video is still publicly available, and the hosting site allows embedding. Some creators disable embedding, remove videos, set videos to private, or limit playback by region.
Always test online videos in Slide Show mode before presenting. A preview in edit mode is helpful, but it is not the same as testing the actual presentation environment.
Best Practices for Using Video in a PowerPoint Presentation
- Use video only when it helps explain, demonstrate, or strengthen your message.
- Keep most clips short and focused.
- Use MP4 files with H.264 video and AAC audio for dependable compatibility.
- Test your slide deck on the device, projector, speakers, and network you will actually use.
- Prepare a backup plan for essential online videos.
- Add captions or transcripts whenever possible.
- Use a clear poster frame so the video looks polished before playback begins.
- Compress large media files before sharing the presentation.
- Avoid autoplay unless the timing truly improves the presentation.
- Practice the transition into and out of the video so it feels natural.
Real-World Experience: What Actually Works When Presenting Videos in PowerPoint
Knowing the steps for how to put a video in PowerPoint is helpful. Knowing what happens in a real meeting room is even more useful. In real life, presentations are not always delivered from the same desk where they were built. They happen in classrooms with ancient projectors, conference rooms with mysterious cables, hotel ballrooms with dramatic lighting, and virtual meetings where someone inevitably asks, “Can everyone hear that?”
The most reliable approach is to treat video like an important guest. Do not invite it at the last minute and hope it behaves. Test it before the event. Open the PowerPoint file on the computer you will use. Connect to the actual display. Check the audio. Run the slide show from the beginning. Then test the video again after a short break, because technology sometimes waits until you feel confident before becoming creative.
For an in-person sales presentation, local embedded video is often the safest option. A short MP4 product demo can play without depending on the venue’s internet connection. This is especially helpful when you are showing a new app, explaining a manufacturing process, or presenting a customer case study. The video should be stored inside the presentation whenever possible, not sitting in a separate folder that may disappear during file transfers.
For webinars and online meetings, online video can be convenient, but screen sharing creates extra variables. The presenter may need to share computer sound, and the audience may experience a delay. In these situations, it is smart to have a second option: send attendees the video link in the chat, provide a screenshot on the slide, or summarize the key points verbally if playback becomes unreliable.
Another lesson from real presentations is that the first frame matters. When a video appears as a random blurry still image, it can make even excellent content feel accidental. A custom poster frame with a readable title gives the audience a moment to understand what they are about to see. It also makes your deck look intentional when someone reviews it later without running Slide Show mode.
Timing also matters more than people expect. Do not introduce a video with a long speech, then make the audience wait while you find the play button. Set up the context in one or two sentences, start the clip, and return immediately to the takeaway. A simple transition might sound like this: “We have discussed the challenge. This 25-second clip shows how the new workflow removes the manual step.” Then play the video. When it ends, say what the audience should notice.
That final step is crucial. Never assume everyone interpreted the video the same way. After the clip, reinforce the point. You might say, “The key detail is that the technician completed the setup without switching systems,” or “Notice how the customer found the report in two clicks instead of ten.” The video supplies evidence; your explanation supplies meaning.
Finally, remember that fewer videos can be stronger than many. One well-chosen 30-second clip can wake up a presentation. Five unrelated clips can make the deck feel like someone handed the remote control to a caffeinated raccoon. Choose carefully, test thoroughly, and let each video earn its screen time.
Final Thoughts
Putting a video in a PowerPoint presentation is simple once you understand the difference between embedded files, linked files, and online videos. The best choice depends on where you are presenting, whether internet access is reliable, how large your presentation file can be, and how important the video is to your message.
For the safest experience, use a short MP4 video with H.264 encoding and AAC audio, embed it into the deck, test it in Slide Show mode, and keep a backup ready. Add captions, use a clean poster frame, and make sure the video serves the story instead of stealing the spotlight.
Do that, and your next PowerPoint video slide will feel smooth, professional, and far less likely to make you negotiate with a projector in front of 40 people.