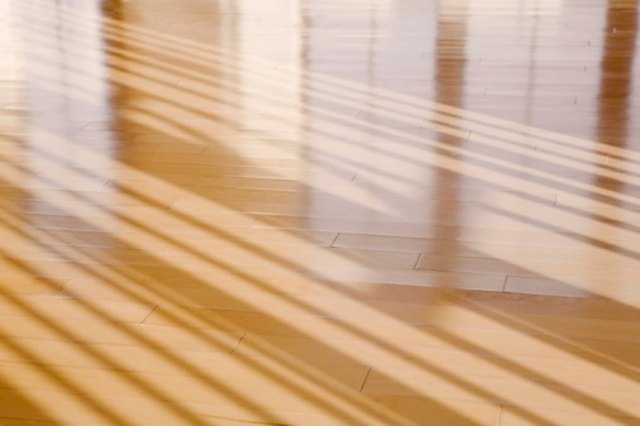
A blonde wood finish is the interior-design equivalent of opening the curtains on a gloomy room: suddenly everything feels calmer, brighter, and a little more expensive. Whether you are reviving a dated oak table, rescuing a thrifted dresser, or trying to stop a maple cabinet from looking suspiciously orange, refinishing wood to a blonde finish can make a dramatic difference without hiding the grain.
The trick is not simply “sand it and slap on some clear coat.” A successful blonde wood finish requires a little detective work. You need to identify the wood, remove the old finish evenly, decide whether the wood itself needs lightening, and choose a topcoat that will not slowly turn your pale project into a bottle of amber syrup.
This guide walks through the full process, from assessing old furniture to applying a modern natural-look finish. It also covers common mistakes, wood bleaching options, whitewash techniques, and the real-world lessons that make the second project much less dramatic than the first.
What Is a Blonde Wood Finish?
A blonde finish is a light, natural-looking wood treatment that keeps the grain visible while reducing yellow, orange, red, or dark brown tones. It is often associated with Scandinavian interiors, mid-century furniture, pale oak floors, modern farmhouse cabinetry, and airy coastal spaces.
The final color can range from nearly raw wood to softly whitewashed. The goal is usually a pale beige, creamy maple, light wheat, washed oak, or subtle white oak appearance. Unlike paint, a blonde finish should still let the wood look like wood. The grain remains visible. Knots remain charming. Tiny imperfections remain evidence that the furniture was once a tree and not a plastic prop from a furniture showroom.
Common Blonde Finish Styles
- Natural blonde: Bare wood protected with a clear, non-yellowing water-based finish.
- Whitewashed blonde: A light white or pale gray wash that settles gently into the grain.
- Pickled wood: A more traditional pale finish, especially popular on oak and ash.
- Bleached wood: Wood that has been chemically lightened before clear coating.
- Scandinavian-style finish: Light wood with a matte, low-sheen, natural appearance.
Before You Start: Identify What You Are Refinishing
Before reaching for a sander, inspect the piece carefully. Solid wood, veneer, laminate, and engineered wood may look similar from a polite distance, but they react very differently once sanding begins.
Solid Wood
Solid wood is the easiest material to refinish because you can sand deeper when necessary. Oak, maple, ash, birch, pine, cherry, and walnut are common furniture woods. Solid wood can usually be stripped, sanded, bleached, stained, and sealed with relatively predictable results.
Wood Veneer
Veneer is a thin layer of real wood attached to a core material. It can look beautiful, but it does not tolerate aggressive sanding. Sand through veneer, and the project can go from “Scandinavian dining chair” to “mysterious plywood experiment” in about forty-five seconds.
Check edges, undersides, drawer fronts, and damaged corners. If the grain pattern changes suddenly at an edge or you see a thin wood layer over a different material, assume the piece is veneered. Use hand sanding, light pressure, and fine grits.
Laminate or Printed Wood Grain
Laminate is not real wood and cannot be refinished into a true blonde wood finish through sanding or bleaching. It can be cleaned, primed, and painted, but it will not reveal beautiful grain underneath because there is no grain underneath. That is not a failure. It is simply laminate being laminate.
Choose Your Blonde Finish Strategy
The best method depends on the starting color of the wood and the final look you want. A pale unfinished maple table may only need sanding and clear water-based polyurethane. A dark red oak dresser may need stripping, bleaching, a whitewash stain, and a clear matte topcoat.
Option 1: Clear Coat Over Bare Wood
This is the easiest route when the bare wood already looks pale and attractive. Maple, birch, white oak, ash, pine, and some light-colored oak can look excellent with little or no stain. The most important decision is choosing a clear finish that will preserve the light tone instead of adding amber color.
Water-based polyurethane, waterborne acrylic finishes, and modern natural-look topcoats are often good choices because they tend to remain clearer than traditional oil-based finishes. Oil-based polyurethane can add warmth, which is lovely on walnut or cherry but often unwelcome when you are chasing a pale Scandinavian look.
Option 2: Whitewash or Pickling Stain
A whitewash stain adds a soft white pigment while allowing grain to remain visible. It works especially well on oak, ash, and other open-grain woods because the pigment settles into pores and highlights texture.
For a subtle blonde effect, use a light hand. Apply the whitewash evenly, wipe away excess promptly, and stop before the piece begins to resemble a snowdrift with drawer pulls. Several thin applications are easier to control than one enthusiastic, irreversible coat.
Option 3: Two-Part Wood Bleach
Two-part wood bleach is used when the wood itself is too dark, reddish, or unevenly colored. It is designed to lighten the natural color of the wood rather than simply remove surface dirt or old stain.
Commercial two-part wood bleach products commonly use a sodium hydroxide component and a hydrogen peroxide component. These are strong materials, so use gloves, eye protection, ventilation, and the manufacturer’s instructions exactly as written. Do not improvise chemical mixtures, and do not assume household bleach will create the same result. Household bleach is not a substitute for a professional wood bleaching system.
Option 4: Oxalic Acid for Dark Water Stains
Oxalic acid wood bleach is different from two-part wood bleach. It is often used for dark water marks, rust stains, tannin stains, and black discoloration caused by moisture. It can improve blotchy areas without necessarily changing the overall color of the wood.
Use it when you have localized dark stains rather than when the entire piece is naturally too dark. A water ring on a tabletop may need oxalic acid treatment. A deeply red cherry dresser that you want to become pale blonde may require a different approach.
Tools and Materials for Refinishing Wood Blonde
- Drop cloth or protective work surface
- Screwdriver for removing hardware
- Degreasing cleaner or mild soap solution
- Wood stripper, if needed
- Plastic scraper
- Sandpaper in several grits
- Orbital sander for large, solid-wood surfaces
- Sanding sponge for curves and edges
- Vacuum with brush attachment
- Lint-free cloths
- Wood conditioner, especially for blotch-prone woods
- Whitewash or pickling stain, if desired
- Commercial two-part wood bleach, if needed
- Water-based clear topcoat in matte, satin, or low sheen
- High-quality synthetic brush, foam applicator, or microfiber applicator
- Gloves, eye protection, and appropriate ventilation
Step 1: Clean the Furniture Thoroughly
Refinishing starts with cleaning because dust, furniture polish, kitchen grease, wax, and mystery residue can interfere with sanding, stripping, staining, and adhesion. Old furniture has lived a full life. It may have hosted holiday meals, plants, candle wax, pets, and at least one mysterious sticky substance.
Use a mild cleaner suitable for wood and wipe the surface thoroughly. Let the piece dry completely before continuing. Remove knobs, handles, hinges, drawer pulls, and detachable hardware whenever possible. This makes sanding easier and helps avoid the classic “beautifully refinished drawer front with one weird dark ring around the handle” problem.
Step 2: Remove the Existing Finish
You need to remove old varnish, polyurethane, lacquer, paint, stain, or tinted finish before the wood can become truly blonde. The method depends on how thick and stubborn the old finish is.
Sanding Off the Old Finish
For lightly finished furniture, sanding may be enough. Start with a grit that can remove the old finish without gouging the wood. On many solid wood pieces, that may mean starting around 80 or 100 grit for stubborn areas, then progressing through 120, 150, 180, and possibly 220 grit.
Always sand in the direction of the grain. Sanding across the grain can leave scratches that may become painfully obvious after stain or clear finish is applied. The wood has an excellent memory for scratches, especially when it is trying to embarrass you in direct sunlight.
Using a Chemical Stripper
A chemical stripper can be useful when the finish is thick, detailed, carved, layered, or difficult to sand away evenly. Stripper is especially helpful on turned legs, ornate trim, grooves, and small corners where a power sander would make a mess.
Apply the product according to its label, allow it to soften the old coating, and use a plastic scraper to remove loosened finish. Avoid metal scrapers when possible because they can scratch or gouge the wood. Work in a well-ventilated area and use proper protective equipment.
After stripping, allow the piece to dry fully before sanding. Stripping removes much of the old coating, but sanding is still needed to level the surface and reveal fresh wood.
Step 3: Sand the Wood in Stages
Sanding is the backbone of a convincing blonde wood finish. The goal is to remove old color and scratches while leaving the wood smooth enough for a clean finish. Do not skip grits just because you are eager to see the final result. Woodworking is full of shortcuts that become visible later.
A Practical Sanding Sequence
- 80 to 100 grit: Use only when you need to remove stubborn finish, deep scratches, or heavy color from solid wood.
- 120 grit: Smooths the rough scratches left by coarse sanding.
- 150 grit: Creates a more even surface before staining or bleaching.
- 180 grit: Useful for many furniture pieces before applying a clear topcoat.
- 220 grit: A good final sanding level for many water-based stains and clear finishes.
Do not over-sand wood until it feels like polished marble. Extremely fine sanding can burnish the surface and reduce how evenly a stain or wash absorbs. For blonde finishes, the goal is smooth, not sealed shut.
Use an orbital sander on broad, flat surfaces, but switch to hand sanding near edges, carvings, veneer, and corners. Power sanders are efficient, but they have no emotional attachment to your furniture.
Step 4: Remove Dust Like It Is Your Job
Dust can ruin an otherwise beautiful finish. Vacuum the entire piece, including seams, drawer openings, decorative grooves, and undersides. Then wipe with a clean lint-free cloth or a slightly damp cloth if compatible with your chosen finish system.
Let the wood dry completely before applying any stain, bleach, conditioner, or topcoat. A clean surface helps the finish look intentional instead of looking like it was applied during a windstorm in a flour factory.
Step 5: Decide Whether the Wood Needs Bleaching
Once you have sanded to bare wood, pause and inspect the true color. This is the moment of truth. Some woods become beautifully blonde after sanding. Others reveal a stubborn orange, red, gray, or chocolate tone that needs more help.
When Bleaching Makes Sense
- The wood is naturally much darker than your desired finish.
- Old stain has penetrated unevenly into the grain.
- There are large color differences between boards or sections.
- The piece has dark oxidation, red undertones, or deep yellow patches.
- You want a pale oak, washed maple, or bleached walnut effect.
When Bleaching May Not Be Worth It
- The piece is thin veneer with limited sanding tolerance.
- The wood has sentimental or antique value and should be professionally assessed.
- The wood species naturally darkens with age, such as cherry.
- The desired color would require an extreme transformation from dark brown to nearly white.
Bleaching can lighten wood dramatically, but it cannot turn every species into white oak. Walnut will still have personality. Cherry may still want to be cherry. Wood is cooperative, but it is not a blank sheet of paper.
Step 6: Apply Wood Conditioner When Needed
Wood conditioner is especially helpful on pine, birch, maple, alder, and other woods that tend to absorb stain unevenly. It helps reduce blotchiness and gives whitewash or light stain a more controlled appearance.
Use a conditioner compatible with your stain type. Water-based stains and water-based conditioners should generally stay within the same finishing system. Oil-based stains usually require an oil-compatible conditioner. Read the product labels carefully, because finishing products are like guests at a dinner party: not every combination gets along.
Step 7: Create the Blonde Color
Method A: Keep It Natural
If the wood looks pale and even after sanding, skip stain entirely. Apply a clear water-based finish with a matte, flat, or satin sheen. This approach is excellent for maple, ash, white oak, birch, and other naturally light woods.
A low-sheen finish is often best for a modern blonde look because gloss can make pale wood appear more artificial or plasticky. Matte and satin finishes tend to feel more relaxed, more natural, and less like the furniture is preparing for a photo shoot.
Method B: Apply a Whitewash Stain
For a pale washed effect, apply a whitewash or pickling stain. Use a brush, cloth, or foam applicator and work in manageable sections. Wipe off excess product in the direction of the grain until you reach the level of coverage you want.
Test the process on scrap wood first. The same whitewash can look soft and creamy on oak, grayish on maple, and surprisingly bold on pine. A test board is much cheaper than a regret-filled dining table.
Method C: Use a Pale Beige, Gray, or Wheat-Toned Stain
Not every blonde finish needs white pigment. A pale natural stain in beige, wheat, sand, taupe, weathered oak, or light gray can neutralize orange tones while preserving warmth. This is often a good option for red oak furniture that you want to make lighter without making it look chalky.
Apply stain evenly, wipe away excess in the direction of the grain, and allow it to dry fully before adding a protective topcoat. Build color gradually. It is much easier to deepen a light stain than to explain why your “blonde” dresser now looks like a cappuccino.
Step 8: Protect the Blonde Finish With a Clear Topcoat
The clear topcoat determines how the finished wood will age, feel, and perform. For a blonde wood finish, choose a clear product designed to remain as colorless as possible. Water-based polyurethane, acrylic polyurethane, and waterborne natural-look finishes are popular choices because they tend to preserve a lighter appearance.
Apply thin, even coats in the direction of the grain. Do not shake the can aggressively, because trapped bubbles can show up in the finish. Stir gently if the manufacturer recommends stirring.
Recommended Topcoat Schedule
- Apply the first thin coat of clear finish.
- Allow it to dry according to the product label.
- Sand very lightly with fine sandpaper, often around 220 to 320 grit.
- Remove all sanding dust.
- Apply a second coat.
- Add a third coat for tabletops, cabinets, shelves, or high-use furniture.
Use light pressure when sanding between coats. You are only smoothing raised grain or tiny imperfections, not trying to sand the project back to the Stone Age.
Best Sheen for Blonde Wood
For most blonde wood furniture, matte or satin is the safest choice. These sheens reduce glare, make minor flaws less noticeable, and preserve a natural appearance. Semi-gloss can work for cabinets, trim, and traditional furniture, but it may emphasize every brush mark, dust speck, and suspiciously shaped fingerprint.
- Matte: Best for a raw, Scandinavian, contemporary look.
- Satin: Best all-around option for furniture, cabinets, and family-friendly surfaces.
- Semi-gloss: More durable-looking and reflective, but less natural.
- Gloss: Usually too shiny for a soft blonde finish unless you are restoring a specific vintage style.
How Different Woods Respond to Blonde Finishes
Oak
Oak is one of the best woods for blonde refinishing because its open grain looks beautiful with whitewash, pickling stain, and matte clear coats. Red oak may need a pale neutral or gray-toned wash to reduce orange undertones. White oak naturally leans more beige and gray, making it a favorite for modern blonde finishes.
Maple
Maple is naturally light and can look excellent with a clear water-based finish. However, maple can blotch when stained, so use conditioner and test your color carefully. A simple clear matte topcoat is often the best way to preserve its creamy appearance.
Pine
Pine can become beautifully blonde, but it is famous for uneven stain absorption. Conditioner is strongly recommended before applying whitewash or light stain. Pine also has knots, which may remain darker than the surrounding wood. That contrast can look rustic and charming when embraced.
Birch
Birch can be pale and attractive but may stain unevenly. Use a light touch with stain and avoid heavy pigment. A clear finish or softly tinted wash usually works better than trying to force birch into a dramatic white oak imitation.
Cherry
Cherry naturally darkens over time when exposed to light and oxygen. You can lighten it temporarily, but it may gradually warm again. If you want a stable blonde look, cherry is not the easiest candidate. It is like trying to persuade a golden retriever to stop being friendly: technically possible in theory, but not really the point.
Walnut
Walnut is naturally dark, and a blonde walnut effect usually requires bleaching. It can create a beautiful pale brown or smoky taupe result, but it will rarely become as light as maple or white oak. Expect a softened, lighter walnut rather than a truly pale blonde finish.
Common Blonde Wood Refinishing Mistakes
Using an Ambering Topcoat
The most common mistake is applying a yellowing or amber-toned topcoat over freshly lightened wood. The wood may look perfect after sanding, then turn noticeably warmer after the finish cures. Choose a clear water-based topcoat when preserving a pale color matters.
Skipping the Test Board
Wood species, sanding level, existing stain, and finish chemistry all affect the final color. Test your full process on scrap wood or a hidden area before committing to the visible surface. Test the bleach, stain, whitewash, and topcoat together, not separately.
Over-Sanding Veneer
Veneer can look like solid wood until the moment it does not. Use gentle sanding near edges and avoid power sanding thin surfaces too aggressively.
Applying Too Much Whitewash
A blonde finish should brighten the wood, not erase it. If the grain disappears completely, you may be closer to painted furniture than a true washed wood look. Wipe back excess whitewash and build color gradually.
Rushing the Drying and Curing Process
Dry to the touch is not the same as fully cured. Give the piece time before heavy use, stacking objects on it, or returning it to daily life. A beautiful tabletop deserves more than being immediately covered with coffee mugs, homework, and a suspiciously sweating houseplant.
Blonde Finish Experience: What Happens at the Workbench
The most valuable experiences in blonde wood refinishing usually happen after the first coat, when the project finally reveals what it wants to become. Before that point, bare wood can be misleading. A tabletop may look beautifully pale after sanding but suddenly show orange undertones when it gets wet with a water-based finish. A whitewash stain may look subtle in the can, then settle into open oak grain with the confidence of a permanent marker.
One common experience is discovering that the old finish was not the only source of darkness. Many older furniture pieces have stain that penetrated deeply into the wood fibers. Sanding removes the glossy top layer, but the color remains in pores, grain lines, and softer sections of the board. This is especially common with oak, pine, and red-toned woods. At that point, sanding harder is not always the answer. More aggressive sanding can flatten details, round crisp edges, or damage veneer. A bleaching step or a pale wash may solve the color problem more gracefully.
Another lesson is that lighting changes everything. A blonde finish can look warm and creamy in a garage, gray and modern in a bright kitchen, and unexpectedly yellow next to a cool white wall. Test samples should be viewed in the room where the furniture will live. Look at them in daylight, in evening lamp light, and near nearby flooring or cabinets. The goal is not to find the perfect color in isolation. The goal is to find a color that behaves well in its future habitat.
Many refinishing projects also teach the importance of restraint. The first instinct is often to add more stain, more whitewash, more coats, or more sanding because the piece does not look finished immediately. Blonde finishes reward patience. A subtle wash can deepen slightly under a clear coat. A matte finish can look cloudy while wet and become clearer as it dries. A light sanding between coats can transform a rough surface into something that feels professionally finished.
It is also normal for the first attempt to be more “pleasantly pale” than perfectly Scandinavian. That is not a problem. A blonde finish does not need to look identical to a showroom oak table. Real wood has darker grain, mineral streaks, knots, sapwood, and old stories hidden in the surface. Those variations are often what make the piece look authentic rather than factory-made.
The biggest practical lesson is to stop judging the project too early. Let stain dry. Let bleach fully develop. Let the first clear coat settle. Let the furniture cure before deciding whether you love it. Blonde wood refinishing is less about forcing timber into one exact shade and more about guiding it toward its brightest, most natural-looking version.
Note: Always test your complete refinishing system on scrap wood or a hidden area first. Wood species, previous coatings, room lighting, and product compatibility can change the final color significantly. Follow all manufacturer safety, drying, and curing instructions for the products you choose.