An old shower tile border can date a bathroom faster than avocado-green fixtures and a fuzzy toilet-seat cover. Perhaps the border features tiny sailboats, metallic diamonds, or a color last seen in a 1990s food court. Whatever its particular offense, replacing it may refresh the shower without requiring a complete demolition.
The project is more delicate than ordinary tile removal, however. The goal is to remove one narrow band while preserving the surrounding tile, the wall substrate, andmost importantlythe shower’s waterproofing system. One enthusiastic hammer swing can turn a cosmetic update into a full shower rebuild.
This guide explains how to remove an old shower tile border safely, prepare the exposed area, install a new accent strip, and recognize problems that should be handed to a professional.
Can You Remove Only the Decorative Tile Border?
In many showers, yes. A decorative border is commonly installed as a horizontal row between larger field tiles. If the surrounding tile is secure and the wall has no signs of water damage, individual border pieces can often be removed and replaced.
The job becomes more complicated when the border is mounted on mesh, embedded deeply in a thick mortar bed, or installed directly over a waterproof membrane. Older showers may also have drywall, cement board, plaster, mortar, or another backing material behind the tile. You may not know which one you have until the first piece comes out.
Good candidates for border-only replacement
- The tiles above and below the border feel solid.
- Grout cracking is limited and does not suggest wall movement.
- There is no musty odor, persistent staining, or soft wall material.
- The replacement tile fits the existing opening with reasonable grout joints.
- You know how the shower was waterproofed or can identify the system after opening a small test area.
Warning signs that call for professional help
- Tiles move when pressed or sound hollow across a large area.
- The substrate crumbles, flexes, or appears swollen.
- You discover mold, damp insulation, rotted framing, or corroded fasteners.
- The waterproof membrane is extensively torn or cannot be repaired according to its manufacturer’s instructions.
- Plumbing lines run directly behind the border.
- The installation contains an unknown adhesive or backing material that may require hazardous-material testing.
Tools and Materials You Will Need
Tile removal rewards patience more than horsepower. A compact collection of controlled tools is usually more useful than the largest hammer in the garage.
Removal and preparation tools
- Safety glasses or sealed goggles
- Cut-resistant work gloves
- Long sleeves and hearing protection
- A properly fitted particulate respirator suitable for the dust produced
- Carbide grout saw or oscillating multi-tool with a grout blade
- Utility knife with fresh blades
- Small cold chisel, narrow masonry chisel, or stiff putty knife
- Light hammer
- Diamond drill bit or ceramic-tile bit
- HEPA-filtered vacuum
- Plastic sheeting, painter’s tape, and drop cloths
- Scraper or margin trowel
- Straightedge and level
Replacement materials
- New border tile or mosaic sheets rated for shower walls
- Setting mortar compatible with the tile and waterproofing system
- Grout appropriate for the tile and joint width
- Color-matched 100% silicone sealant for changes of plane
- Tile spacers or wedges
- Waterproofing repair materials approved for the existing system
- Grout float, notched trowel, sponge, and clean buckets
Safety Checks Before Removing Shower Tile
Ceramic, porcelain, stone, mortar, and grout can create sharp fragments and fine mineral dust. Isolate the bathroom from the rest of the house, ventilate appropriately, and use dust-control methods. When compatible with the task and electrical safety, light misting can reduce airborne dust. Collect debris with a HEPA-filtered vacuum instead of dry sweeping it around like extremely unhealthy confetti.
Cover the shower drain securely so fragments cannot enter the plumbing. Protect the shower pan or bathtub with a padded drop cloth topped by a piece of plywood or rigid board. A falling tile chip can damage acrylic, enamel, or fiberglass surprisingly easily.
If the house or tile installation is old and you encounter unknown adhesive, backing, or painted surfaces, stop before grinding or aggressively disturbing them. Older building materials may require testing for asbestos or lead-related hazards. A laboratory or qualified inspection professional can identify materials that cannot be judged reliably by appearance.
How To Remove an Old Shower Tile Border Step by Step
1. Choose the replacement before demolition
Measure the existing border’s total height, including the grout joints above and below it. Shop for replacement tile before removing anything. Mosaic sheets can often be trimmed to fit, while metal or stone profiles may help disguise a small difference in height.
Do not assume that a nominal four-inch tile is exactly four inches. Dry-lay a section of the new border with spacers and verify the finished dimension. Discovering a half-inch gap after demolition is the remodeling version of realizing the parachute instructions are still on the airplane.
2. Protect the shower and isolate the work area
Remove shampoo bottles, curtains, detachable showerheads, and anything else capable of collecting dust. Cover the drain, fixtures, shower base, and nearby glass. Tape plastic over the bathroom doorway and, if possible, direct ventilation outdoors without spreading dust through the house.
Turn off electrical power to outlets or fixtures close to the work area if water will be used for dust suppression. If plumbing locations are uncertain, examine the opposite side of the wall or use an appropriate scanner before drilling.
3. Remove caulk and isolate the border from surrounding tile
Cut away any silicone sealant that touches the border. Then remove the grout joints immediately above and below the decorative row. Also clear the vertical joint at each end.
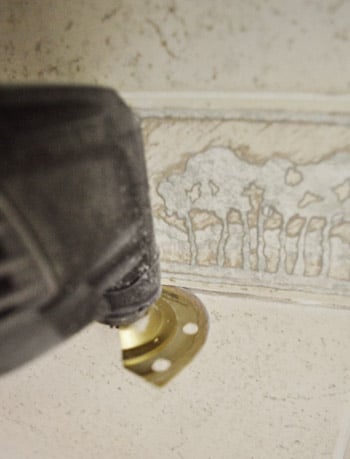
This is one of the most important steps. Grout connects neighboring tiles, so striking a border tile while the joints remain intact can transfer force into the field tile you want to save. Use a manual grout saw for maximum control or an oscillating tool at low speed. Keep the blade centered and stop before it reaches the substrate.
4. Start with one sacrificial tile
Select a tile near the center of the border rather than one at a corner or beside a plumbing fixture. The first opening is usually the hardest; after it is created, the remaining pieces can be approached from their exposed edges.
Use a diamond or ceramic bit to make several shallow holes through the face of the tile. Mark the desired depth on the bit and avoid plunging into the backing. Connect the holes carefully with a small chisel, breaking the tile inward toward its center rather than levering against neighboring pieces.
Remove small fragments until you expose a section of adhesive. Keep your face out of the line of flying chips, even though safety glasses make everyone feel briefly invincible.
5. Work outward with shallow, controlled pressure
Once the first tile is gone, position a narrow chisel or stiff putty knife behind the next border piece. Keep the tool nearly parallel to the wall. Tap gently and direct the force into the empty space.
A steep chisel angle can puncture the substrate or waterproofing membrane. Aggressive prying can also crack the tiles above and below the border. If a piece refuses to release, break it into smaller sections instead of increasing force.
Continue in both directions, vacuuming loose debris as you go. Mesh-mounted mosaics may peel away in clusters, but do not pull hard if the mesh is bonded to a surface membrane.
6. Remove adhesive without destroying the wall
After the tiles are gone, examine the remaining mortar. Your goal is a flat, stable surfacenot archaeological perfection. If a thin, firmly bonded layer can be incorporated into the new setting bed without creating a bulge, leaving it may be safer than scraping down to the membrane.
Use a sharp scraper or chisel at a shallow angle to remove high spots. Avoid power grinding unless you have confirmed that it will not damage the waterproofing and you have suitable dust controls. A grinder is fast, but so is a runaway shopping cart.
7. Inspect and repair the waterproofing system
Tile, grout, and setting mortar are not substitutes for a waterproof membrane. If a sheet or liquid-applied membrane is visible, inspect it under bright light for cuts, punctures, peeling, or areas pulled away with the old mortar.
Repair the membrane only with products and methods approved by its manufacturer. Some sheet systems require patches with a minimum overlap; liquid systems may require cleaning, reinforcing, multiple coats, and a specified curing period. Do not improvise with household caulk behind the tile.
If the shower uses an older system behind cement board or a traditional mortar bed, a localized surface patch may not recreate the original drainage design. Consult a qualified tile installer when the assembly is unclear or damage extends beyond the narrow border opening.
8. Dry-fit the new shower border
Lay out the replacement pieces on a clean surface. Plan cuts so tiny slivers do not end up at the most visible corner. If using mosaic sheets, trim the mesh with a utility knife and adjust individual pieces to maintain consistent spacing.
Place the tile in the opening without mortar. Use wedges to center it between the existing rows and check that its face sits flush withor intentionally aligned tothe surrounding tile. A border that sticks out slightly can look deliberate; a border that waves in and out looks seasick.
9. Set the replacement tile
Mix the manufacturer-approved mortar in small batches. Waterproofing manufacturers commonly specify a particular class of thinset, so follow the requirements for the complete assembly. Do not assume that a premixed adhesive is suitable for a continuously wet shower or for bonding over a waterproof membrane.
Spread mortar with the appropriately sized notched trowel. For narrow strips or small mosaics, flatten the ridges so mortar does not squeeze excessively through the joints. Press the tile into place with gentle side-to-side movement and use spacers or wedges to hold alignment.
Remove mortar from the grout joints while it is fresh. Check the border with a straightedge, then leave it undisturbed for the full curing time stated by the mortar manufacturer.
10. Grout, seal the transitions, and allow proper curing
Apply grout to ordinary joints between tiles, working diagonally with a rubber float. Remove excess material and shape the joints with a damp sponge after the grout begins to firm. Avoid over-washing, which can weaken the surface or create uneven color.
Where the border reaches an inside corner or another change of plane, use a flexible 100% silicone sealant suitable for wet tile installations rather than rigid grout. Movement occurs where walls meet, and silicone accommodates it more effectively.
Observe every listed curing period for mortar, grout, membrane repairs, and sealant. Do not use the shower simply because the surface feels dry. The least glamorous part of this project is waiting, but it is cheaper than repeating the entire performance.
Common Problems and Practical Solutions
The new tile is thinner than the old border
Build out the opening with an approved patching or setting material, applied in suitable lifts and allowed to cure as directed. Another option is a thicker tile or a profile designed to frame the accent. Do not compensate with random blobs of excessive mortar; uneven support can leave small tiles vulnerable to cracking.
The replacement is slightly shorter than the opening
Center the border and use proportional joints above and below it, provided the joint widths remain appropriate for the selected grout or sealant. A pencil liner or narrow trim piece may also fill the difference attractively.
A surrounding tile cracks during removal
Stop and remove the grout around the damaged tile before attempting to extract it. Replace it using the same controlled center-out method. If several surrounding tiles begin cracking or loosening, the substrate may be weak, and continuing could enlarge the repair rapidly.
The wall is damp or soft
Do not cover the problem with new tile. Identify and correct the source of moisture, remove damaged material, and allow the assembly to dry. Visible mold, extensive deterioration, or moisture inside the wall may require professional remediation and a broader shower rebuild.
Alternatives to Removing the Tile Border
If removal poses too much risk, consider refinishing the border with a coating specifically designed for ceramic tile. Proper cleaning, surface preparation, ventilation, and curing are essential. Paint intended for ordinary walls will not tolerate shower exposure.
Some homeowners install a thin decorative layer over an existing border. This may work outside direct water exposure, but it can create awkward edges and water traps in a shower. Any overlay product must be approved for wet areas and must not interfere with movement joints or drainage.
A complete professional refinishing treatment is another option when the entire shower is structurally sound but visually outdated. It changes the appearance without disturbing the underlying waterproofing, although the resulting surface has different maintenance and durability characteristics from fired tile.
Experience-Based Lessons From Shower Border Projects
The most common lesson from successful border replacements is that preparation takes longer than demolitionand that is a good thing. Homeowners often expect the tiles to require hours of pounding. In practice, carefully clearing the surrounding grout may consume more time than removing the decorative row. Once each piece is isolated, many tiles release with modest tapping.
One typical scenario involves a mesh-backed glass mosaic installed between two rows of porcelain field tile. The glass cracks easily, but the mesh holds the fragments together. Pulling the mesh seems convenient until it begins lifting mortar and membrane with it. Cutting the mesh into small sections and removing one cluster at a time is slower but reduces damage. The experience teaches an important rule: when resistance increases, reduce the size of the piece rather than increasing the force.
Another frequent surprise is discovering that the old border and replacement border have different thicknesses. A sample may look perfect at the store but sit noticeably recessed during the dry fit. Experienced installers check thickness before mixing mortar and create a flat, properly cured buildup when needed. Trying to float a thick bed of wet mortar behind tiny mosaics often results in crooked pieces and mortar squeezing through every joint.
Layout decisions also matter more than expected. Starting at one end can leave an unattractive sliver at the other. A better approach is to locate the visual center of each wall and balance the cuts. On a short shower wall, shifting a mosaic sheet by half a tile may transform two awkward end cuts into two nearly full pieces. Nobody compliments the arithmetic, but everyone notices when the pattern looks calm and intentional.
Dust control is another hard-earned lesson. A five-minute session with an uncontained power tool can distribute fine dust through a bathroom, hallway, and adjoining bedroom. Closing the door is not containment. Plastic barriers, drain protection, localized HEPA vacuuming, and frequent cleanup make the project far more manageable. They also prevent sharp chips from hiding in towels and bath mats, waiting to introduce themselves to a bare foot.
Waterproofing discoveries determine whether the job remains cosmetic. In one common type of repair, most tiles release cleanly, but a chisel makes a small cut in a visible sheet membrane. The correct response is not panic or a decorative smear of silicone. Work stops, the membrane is identified, and an approved patch is installed with the overlap required by that system. If there is not enough intact membrane around the opening to make a compliant repair, the project must expand or go to a professional.
Finally, experienced renovators respect curing times. A border may look finished after grout cleanup, yet the materials behind it still need time to develop strength and water resistance. Showering too early can discolor grout, compromise sealant, or introduce moisture before the assembly is ready. Waiting an extra day feels tedious; removing the same border twice feels considerably worse.
Frequently Asked Questions
Can I remove a tile border without breaking the surrounding tiles?
Usually, provided the grout around the border is removed completely and each border tile is broken inward. There is always some risk, so keep spare field tiles available if possible.
What is the best tool for removing a shower tile border?
A manual grout saw or oscillating tool isolates the border, while a small hammer and narrow chisel remove the tile. The best tool is the one that allows precise control near the substrate and surrounding finish.
Can I use construction adhesive for the replacement tile?
Use only a setting product approved for the tile, substrate, waterproofing system, and shower environment. A compatible thinset mortar is commonly specified. General-purpose construction adhesive is not an appropriate substitute.
Do I need to waterproof the exposed strip?
The waterproofing must remain continuous. If removal damages an existing membrane, repair it according to the membrane manufacturer’s instructions before installing the new tile. Grout alone will not waterproof the opening.
How long should I wait before using the shower?
Follow the longest curing requirement among the mortar, grout, membrane repair, and silicone products used. Depending on the system and room conditions, this may be several days. Product instructions take priority over a generic schedule.
Conclusion
Removing an old shower tile border is a realistic DIY project when the surrounding installation is sound and the work proceeds slowly. Isolate the decorative row by removing its grout, create an opening in the center of one tile, and work outward with shallow, controlled pressure. Protecting the substrate and waterproofing is far more important than saving a few minutes.
Plan the replacement dimensions before demolition, use materials approved for wet-area tile assemblies, and treat membrane damage as a technical repair rather than a cosmetic detail. With careful layout and a little restraint around the hammer, that dated accent strip can disappear without taking the rest of the shower with it.