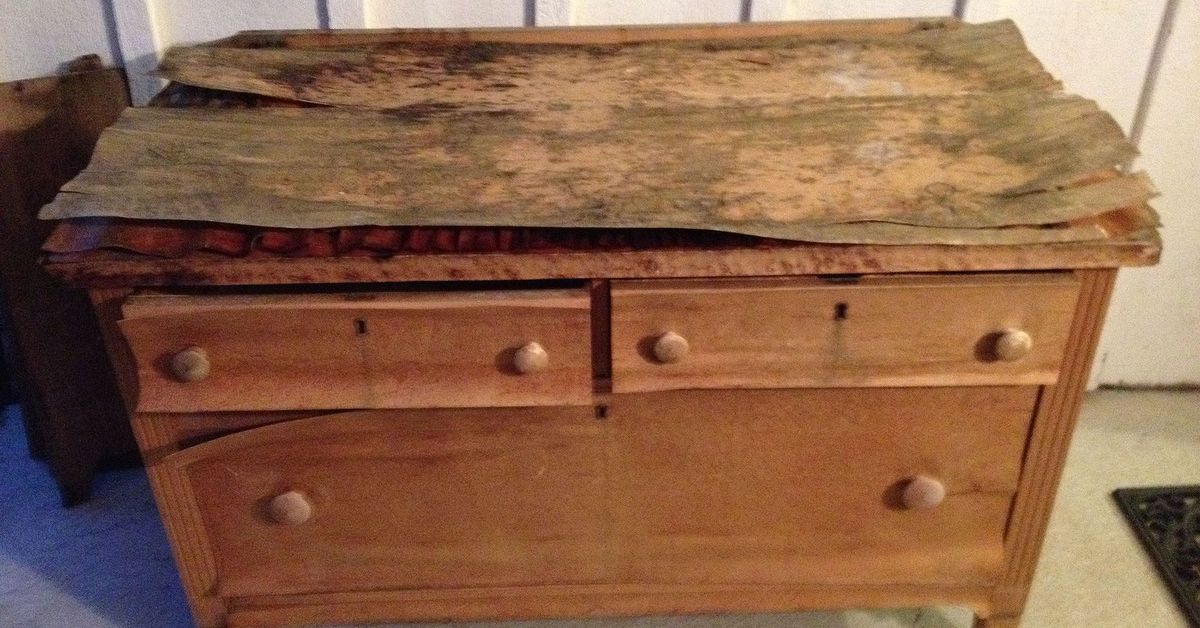
Some home projects begin with a bold vision. Others begin with you staring at a sad, peeling surface and whispering, “Well… that’s unfortunate.” If you have old veneer that’s bubbling, chipped, lifting, or just looking like it lost a fight with time, you are not stuck with it. You can remove the damaged veneer, repair the surface underneath, and use wallpaper to cover the scars with style instead of shame.
This approach is especially handy for tired furniture, cabinet sides, built-ins, paneling, and other flat surfaces that are structurally sound but cosmetically rough. In other words, if the bones are good but the face is a mess, wallpaper can be your design-savvy cover story. The trick is doing the prep work right. Wallpaper is fabulous, but it is also a little dramatic. Put it over a lumpy, greasy, crumbling surface, and it will absolutely expose your shortcuts like a gossip-loving neighbor.
In this guide, you’ll learn how to remove old veneer without trashing the base underneath, how to smooth and prime the surface, and how to choose wallpaper that actually hides flaws instead of highlighting every dent like a spotlight. We’ll also cover the common mistakes that turn a makeover into a muttered life lesson.
Why This Combo Works So Well
Removing old veneer and switching to wallpaper is one of those smart, budget-friendly fixes that looks more expensive than it is. Veneer often fails in patches, especially on older furniture and wood-paneled surfaces exposed to heat, moisture, or years of questionable cleaning products. Once it starts lifting, cracking, or missing chunks, painting straight over it usually gives you a surface that still looks tired. Beautifully tired is one thing. “I covered a problem and hoped for the best” is another.
Wallpaper gives you a fresh decorative layer that can disguise repaired areas, soften visual imperfections, and add pattern, texture, or even a faux material look. Think grasscloth-inspired prints, embossed designs, linen-look papers, vintage florals, modern geometrics, or wood-look patterns that fake the charm without asking you to become a master woodworker on a Saturday afternoon.
Better yet, wallpaper can turn a damaged piece into a design feature. A dresser side can become an accent panel. A cabinet back can look custom. A built-in with a rough interior can suddenly look intentional, polished, and suspiciously expensive.
When to Remove Veneer and When to Leave It Alone
Remove veneer if it is:
- lifting in multiple places
- bubbled from moisture damage
- missing large sections
- badly chipped at edges and seams
- too uneven to disguise with filler alone
Do not rush to remove veneer if it is:
- only loose at one edge
- otherwise intact and easy to reglue
- part of a valuable antique or heirloom piece
- attached to a fragile substrate that may tear apart during removal
If the veneer is mostly sound, repairing it may be smarter than stripping it all off. But if the surface already looks like a topographic map, complete removal is often the cleaner long-term choice. You are going for smooth and stable, not heroic and miserable.
Tools and Materials You’ll Want Nearby
- putty knife or scraper
- household iron or heat gun
- work gloves, eye protection, and a dust mask or respirator
- screwdriver for removing hardware
- degreaser or mild cleaner
- wood filler or patching compound
- sandpaper in coarse, medium, and fine grits
- tack cloth or damp microfiber cloth
- primer suited to the surface
- wallcovering primer if using wallpaper
- lining paper if the surface is imperfect
- wallpaper, paste if needed, smoothing tool, utility knife, and straightedge
Step 1: Remove Hardware and Clean the Surface First
Before you start prying at anything, remove knobs, pulls, hinges, outlet covers, trim pieces, and anything else that will get in the way. Then clean the surface. This may sound annoyingly responsible, but grease, wax, and dust can make the whole process harder. If you are working on cabinets or paneling, degreasing is not optional. Kitchen grime is sneaky and has ruined more makeover dreams than bad paint colors ever could.
Once the surface is clean and dry, inspect where the veneer is already lifting. Those weak spots are your entry points. Never begin by trying to gouge under firmly bonded veneer like you are excavating treasure. That is how you damage the substrate and create extra repair work you did not need.
Step 2: Use Heat to Loosen the Adhesive
Old veneer often releases best with heat. A dry household iron can soften some adhesives, and a heat gun can also help loosen finish or stubborn bonding layers. Work in small sections rather than trying to tackle the whole piece at once. Warm the area just enough to soften the glue, then begin lifting the edge gently with a putty knife or scraper.
Go slowly. This is a “coax it off” moment, not a “rip it off and hope for personal growth” moment. If the veneer resists, apply more heat and keep working under it gradually. Pulling too fast can tear chunks out of particleboard, plywood, or other substrate materials underneath. That turns a manageable repair into a crater field.
If there is finish, paint, or adhesive residue left behind, you may need additional scraping, sanding, or a suitable remover. Ventilation matters here. So does protective gear. If the piece has old paint on it and dates back to the pre-1978 era, be especially cautious and assume lead-safe practices are necessary until you know otherwise.
Step 3: Scrape Off Old Glue and Flatten the Damage
Once the veneer is off, the surface underneath will probably not look ready for its close-up. That is normal. You may have leftover glue, rough fibers, dents, gouges, and low spots. The goal now is to make everything boringly smooth.
Scrape away old glue residue carefully. If the substrate is fuzzy or swollen in spots, trim or shave down the roughest fibers first. Then fill chips, holes, and divots with wood filler or patching compound. Let it dry completely. Not “probably dry.” Actually dry. Half-cured filler and sandpaper are sworn enemies.
After that, sand the surface in stages. Start with a coarser grit if the surface is rough, move to medium grit, and finish fine. Sanding smooths filler, removes remaining residue, and helps create the even base wallpaper needs. Wipe away all dust afterward. Wallpaper and primer do not like dust. They pretend to tolerate it, then punish you later with poor adhesion and bumps.
Step 4: Decide Whether You Need Primer, Lining Paper, or Both
This is the step many people skip, right before they ask the internet why their wallpaper bubbled, shifted, or revealed every repair underneath like an x-ray.
If the base is wood, paneling, or another sealed surface, prime it first. A proper wallcovering primer helps wallpaper adhere better, reduces bubbling, and makes positioning easier during installation. On sealed wood or glossy paneling, an adhesion-promoting primer is especially useful because wallpaper does not love slick surfaces.
If the surface is patched but still slightly uneven, add lining paper before your decorative wallpaper. Lining paper acts like a peace treaty between your flawed substrate and your finish layer. It softens ridges, bridges minor texture differences, and gives thin wallpaper a better foundation. If you are using a delicate or thin paper, lining paper can save your project from telegraphing every bump underneath.
Step 5: Pick Wallpaper That Hides Flaws Instead of Framing Them
Not all wallpaper is equally forgiving. If your goal is to hide repaired areas, choose patterns and finishes that help camouflage the surface.
Best wallpaper choices for hiding flaws:
- Embossed wallpaper: great for disguising minor damage because the raised texture distracts the eye
- Vinyl wallpaper: durable, easier to clean, and useful in harder-working spaces
- Busy prints: florals, botanicals, and geometrics break up the eye line
- Textural looks: linen, grasscloth-inspired, plaster-look, or woven effects help hide patchy areas
- Medium-value colors: not too dark, not too shiny, and not too pale
Wallpaper choices that can betray you:
- super-thin papers
- high-gloss finishes on uneven surfaces
- very light solid colors over heavily patched areas
- papers meant only for perfectly smooth walls
If you are using wallpaper on furniture or cabinetry, focus on flat or low-abrasion surfaces. Vertical panels, cabinet backs, shelf interiors, and side faces are ideal. A heavily used tabletop is a tougher environment, so wallpaper there needs extra protection and may still wear faster than a hard finish.
Step 6: Hang the Wallpaper Like You Respect Geometry
Measure carefully and cut each strip with a little extra length for trimming. If your wallpaper has a repeat, pay attention before you cut, not after. That sounds obvious until a pattern mismatch turns your chic makeover into abstract confusion.
Apply adhesive according to the wallpaper type. Some papers are paste-the-paper. Some are paste-the-wall. Some are peel-and-stick. Whatever you use, follow the manufacturer’s method instead of assuming wallpaper is one-size-fits-all.
As you place each strip, smooth from the center outward to remove bubbles and creases. Use a smoothing tool with a gentle hand. You are guiding the paper, not trying to erase it from existence. Trim excess neatly at edges with a sharp utility knife and a wide putty knife or straightedge. Wipe off extra paste before it dries.
If you used lining paper, let it dry completely before hanging the decorative layer. Patience here makes a visible difference. Rushing this step is how seams shift and bubbles throw a party.
Common Mistakes That Make the Finish Look Worse
- Removing veneer too aggressively: This damages the base and creates bigger repairs.
- Skipping degreasing: Especially on cabinets, this can wreck adhesion.
- Using wallpaper on an unsanded surface: The bumps will show. Wallpaper is not magic spackle.
- Ignoring primer: This often leads to poor sticking, bubbling, and frustrating repositioning.
- Choosing the wrong pattern: Thin, shiny, or ultra-light papers can highlight flaws instead of hiding them.
- Not testing a sample first: One small test can save a lot of regret.
Where This Technique Works Best
This veneer-removal-and-wallpaper strategy works beautifully on:
- old dressers with damaged side panels
- cabinet backs and built-in interiors
- bookcase back panels
- wood paneling that needs a facelift
- drawer fronts or cabinet inserts
- closet accents and decorative nooks
It is less ideal for constantly wet areas, crumbling substrates, or fine antiques where preservation matters more than style refresh. In those cases, a more traditional restoration approach may make more sense.
A Few Specific Style Ideas
For a vintage dresser
Remove damaged veneer from the side panels, fill and sand smooth, then use a botanical or Art Deco wallpaper to create a statement side profile. Paint the drawer fronts a solid coordinating color so the piece looks intentional, not patched together from emotional resilience.
For dated wood paneling
Patch the grooves, sand lightly, prime, and apply lining paper before hanging wallpaper. A subtle textured paper can keep the room from feeling flat while still covering the old panel look.
For built-in shelves
Wallpaper the back panels only. This draws the eye inward and hides flaws where they are most visible, while keeping the face frame simple and clean.
Experience Notes From the DIY Trenches
If you talk to enough people who have tackled old veneer, you start hearing the same story in different paint-splattered dialects. The project almost always begins with confidence. Someone sees a peeling dresser, a battered cabinet side, or a wall of dated paneling and thinks, “How hard can it be?” The answer, of course, is that it is not impossible, but it definitely has opinions.
The first surprise is usually how uneven old veneer damage really is. From a distance, it can look like a couple of small blisters. Up close, it becomes a whole landscape of lifted edges, glue ridges, swollen spots, and mystery dents that suggest the furniture may once have survived both humidity and a small household riot. People often discover that the veneer is only half the problem. The substrate underneath tells the real story.
Another common experience is learning that heat is helpful, but patience is the real power tool. Many DIYers start out trying to pull the veneer off in big, satisfying sheets. Then the substrate chips, the scraper digs in, and everyone has a personal moment. The better experience comes from slowing down, warming small areas, and lifting gradually. It is less dramatic, but much kinder to the surface.
Then comes the filler stage, which is where optimism returns. Once the damaged areas are patched and sanded, the piece starts looking salvageable again. This is also the point where people realize how much sanding affects the final result. A project that feels only “pretty smooth” before wallpaper often looks noticeably flawed after wallpaper. A project that feels annoyingly over-prepped usually ends up looking great. That is one of the rude truths of DIY.
Wallpaper itself tends to be the emotional reward. After all the scraping, dust, and muttered commentary, applying pattern and texture finally feels like decorating instead of repair work. Many people are surprised by how effectively wallpaper can disguise old sins. A repaired panel that looked suspicious under primer can suddenly disappear under an embossed print or a softly textured design. It is one of those makeover moments that makes you forgive the sanding dust in your socks.
There is also a strong practical lesson people mention again and again: wallpaper hides flaws best when you stop expecting it to perform miracles. It can blur, soften, distract, and beautify. It cannot fix a greasy surface, a crumbling base, or a hump the size of a sandwich. The most successful projects happen when the prep work and the wallpaper choice work together.
And finally, there is the most satisfying experience of all: watching something that looked ready for the curb become a conversation piece. That is the charm of this project. You are not just covering damage. You are editing the story of the piece. And sometimes all it takes is removing one bad layer, smoothing out the chaos, and giving the surface a stylish second chance.
Conclusion
Removing old veneer and using wallpaper to hide flaws is one of the smartest ways to rescue a surface that is structurally sound but cosmetically rough. The success of the project comes down to three things: careful removal, obsessive prep, and wallpaper selection that works with the surface instead of against it.
Take your time with the removal. Sand more than you think you need to. Prime like a grown-up. Use lining paper when the surface is questionable. Then choose a wallpaper that brings pattern, texture, and forgiveness to the party. Done right, this method can turn a battered piece or outdated panel into something stylish, practical, and proudly no longer embarrassing.