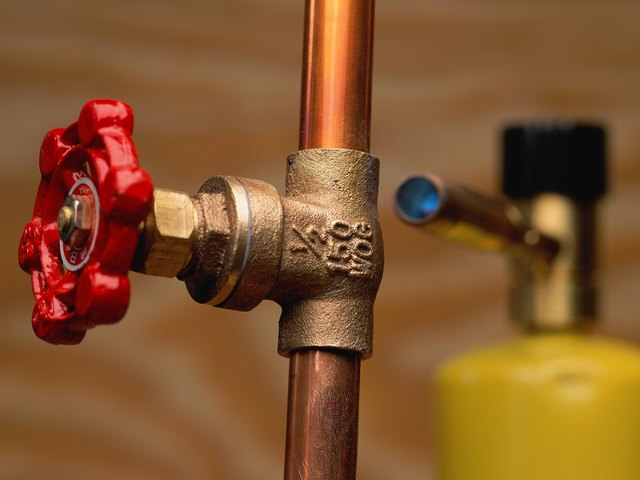
Trying to solder iron to copper in plumbing sounds like a simple weekend victory: grab the torch, melt a little solder, admire your shiny handiwork, and tell the house, “You’re welcome.” Unfortunately, plumbing has a way of laughing softly from inside the wall. The important truth is this: in normal residential plumbing, you do not directly solder iron pipe to copper pipe. The proper method is to solder the copper side to an approved copper-alloy or dielectric transition fitting, then connect that fitting to the threaded iron or galvanized steel pipe.
That may feel like a technicality, but it is the difference between a durable repair and a future leak wearing a tiny villain cape. Copper and iron are dissimilar metals. When they touch in a water system, galvanic corrosion can attack the less noble metal, usually the steel or galvanized pipe. Also, plumbing solder is designed to flow into clean copper or copper-alloy joints by capillary action, not magically bond raw iron to copper like a superhero glue stick.
This guide explains how to connect iron or galvanized steel pipe to copper in plumbing, what tools and fittings you need, what mistakes to avoid, and how to test the finished joint without turning your basement into a surprise indoor fountain.
First, What Does “Solder Iron to Copper” Really Mean?
In plumbing language, “iron pipe” often refers to galvanized steel pipe, black iron pipe, or old threaded steel water lines. Copper plumbing, on the other hand, is usually joined with soldered sweat fittings, press fittings, compression fittings, or threaded adapters.
So when homeowners ask how to solder iron to copper, the real project is usually one of these:
- Connecting new copper water pipe to old galvanized pipe.
- Replacing a corroded steel-to-copper connection near a water heater.
- Transitioning from threaded iron pipe to copper tubing during a repair.
- Removing a leaking mixed-metal joint that was installed incorrectly years ago.
The safest, code-aware answer is: use an approved transition fitting. Common choices include a dielectric union, a brass or copper-alloy threaded adapter, or a manufacturer-approved press transition fitting. The copper tubing is soldered, brazed, flared, or press-connected to the copper side. The iron or galvanized side is joined with standard pipe threads.
Why You Should Not Directly Solder Iron Pipe to Copper Pipe
1. Solder Does Not Work the Same Way on Iron
A proper copper solder joint is not made by piling solder on the outside like cake frosting. The pipe and fitting are cleaned, fluxed, heated, and joined so molten solder is drawn into the narrow space between them. That capillary action creates a strong, water-tight joint when the materials and clearances are correct.
Iron and galvanized steel are different. Their surfaces oxidize differently, they do not accept common plumbing solder the same way copper does, and threaded iron pipe is not manufactured with the tight solder-cup clearances used in copper sweat fittings. If you try to “solder” copper directly onto iron pipe, you may get a shiny blob, but shiny blobs are not plumbing. They are decorative leaks with ambition.
2. Copper and Iron Can Create Galvanic Corrosion
When copper and galvanized steel touch in the presence of water, they can form a small electrochemical cell. In plain English, your pipes can act like a sad little battery. Over time, the steel side may corrode faster, causing rust, restricted flow, or leaks.
A dielectric union or approved transition fitting helps interrupt that electrical path. Brass or copper-alloy transition fittings are also commonly used where allowed by local code. Always check your local plumbing requirements, because code language and inspector preferences can vary by jurisdiction.
3. Heat Can Damage Nearby Components
Soldering requires a torch. Dielectric unions often contain rubber or plastic insulating parts that can be damaged by heat. That means you usually remove the gasket or solder the copper-side component before final assembly. If you heat the assembled union like it owes you money, you may destroy the part that makes it useful.
Tools and Materials You Will Need
Before starting, gather everything. Soldering is not the ideal time to discover your pipe wrench is “somewhere in the garage,” which is homeowner code for “gone forever.”
Tools
- Tubing cutter for copper pipe
- Pipe wrenches for threaded iron or galvanized pipe
- Adjustable wrench or pliers
- Propane or MAP-Pro torch
- Emery cloth, sand cloth, or copper cleaning brush
- Fitting brush sized for the copper fitting
- Deburring tool or reamer
- Flux brush
- Fire-resistant heat shield
- Spray bottle, fire extinguisher, and good ventilation
Materials
- Lead-free plumbing solder for potable water systems
- Approved plumbing flux
- Dielectric union or approved brass/copper-alloy transition fitting
- Copper pipe and copper coupling or adapter
- Thread seal tape or approved pipe thread sealant
- Replacement gasket if the union gasket is old or damaged
For drinking-water plumbing, use only lead-free solder, lead-free flux, and fittings approved for potable water. Older homes may contain lead solder or old galvanized piping, so take water safety seriously. If the pipe is badly corroded, do not simply polish the outside and hope for the best. Rusty pipe has a sense of humor, and it is not kind.
Step-by-Step: How to Connect Iron to Copper the Right Way
Step 1: Shut Off the Water and Drain the Line
Turn off the water supply to the area you are repairing. Open a faucet below or near the work area to drain pressure from the line. If you are working near a water heater, turn off power or gas according to the manufacturer’s instructions before draining or disconnecting anything.
Water inside the pipe is the enemy of soldering. Even a little moisture can absorb heat and prevent solder from flowing. If the joint refuses to get hot enough, do not blame the torch immediately. The pipe may still be wet inside, quietly sabotaging your confidence.
Step 2: Remove the Old Connection
If you are replacing a failed steel-to-copper joint, cut the copper pipe with a tubing cutter and unscrew the old fitting from the iron or galvanized pipe using two pipe wrenches. One wrench holds the existing pipe steady; the other turns the fitting. This matters because twisting old galvanized pipe inside a wall can create a new problem with a much worse personality.
Inspect the threaded iron pipe. If the threads are badly rusted, thin, cracked, or packed with mineral buildup, a simple transition fitting may not be enough. At that point, replacing more of the old pipe is often smarter than trying to save a failing section.
Step 3: Choose the Correct Transition Fitting
For copper to galvanized steel or iron pipe, common approved options include:
- A dielectric union with a sweat copper side and threaded steel side.
- A brass or copper-alloy adapter where local code allows it.
- A press transition coupling designed for the exact pipe materials.
A dielectric union is especially common around water heaters and mixed-metal repairs. It separates the metals with an insulating barrier, helping reduce galvanic corrosion. A brass fitting can also serve as a transition in many plumbing systems, but local code controls what is acceptable.
Step 4: Prepare the Copper Pipe
Cut the copper pipe square. Remove burrs inside and outside the cut end. This is not just for neatness. Burrs can create turbulence, collect debris, and interfere with proper fit. Clean the outside of the copper pipe with emery cloth until it is bright and shiny. Clean the inside of the copper fitting with a correctly sized wire brush.
Clean copper looks almost too pretty to hide inside a wall. Admire it for two seconds, then continue. Plumbing rewards focus.
Step 5: Apply Flux Lightly
Brush a thin, even coat of approved plumbing flux on the cleaned copper pipe and inside the copper fitting. Flux helps remove oxides, protects the metal from re-oxidizing during heating, and encourages solder to flow into the joint.
More flux is not better. Excess flux can remain inside the pipe and contribute to corrosion over time. Think of flux like hot sauce: useful in the right amount, regrettable when poured with reckless optimism.
Step 6: Solder the Copper Side Before Final Assembly
If you are using a dielectric union, separate the union and remove any rubber or plastic gasket before heating. Solder only the copper-side piece to the copper pipe. Heat the fitting evenly, not the solder directly. Touch the solder to the joint on the side opposite the flame. When the copper and fitting reach the proper temperature, the solder should melt and be drawn into the joint.
For small residential copper pipe, a ring of solder around the joint is usually enough. Do not keep feeding solder until it drips like a metal candle. Overheating can burn the flux, discolor the pipe, and create a weak joint.
Step 7: Let the Joint Cool Naturally
Allow the soldered copper joint to cool without moving it. Do not splash it with water to speed things up. Forced cooling can stress the joint. Once it is cool, wipe away excess flux with a damp rag. Flux residue left on the pipe can be corrosive, and it also makes your work look like it lost a fight with mustard.
Step 8: Thread the Iron Side
Wrap the male iron pipe threads with thread seal tape or apply an approved pipe thread sealant. Thread the steel or iron side of the union or adapter onto the pipe. Tighten it securely with a pipe wrench, but do not crush the fitting. Plumbing has a sweet spot between “snug” and “I have created modern sculpture.”
Step 9: Reassemble the Union
Replace the gasket or insulating ring in the dielectric union after the soldered side has cooled. Bring the two halves together and tighten the union nut. Make sure the gasket is seated properly. A pinched gasket can leak immediately or wait until you have put away every tool, because plumbing enjoys drama.
Step 10: Restore Water and Test for Leaks
Turn the water back on slowly. Watch the joint while pressure returns. Dry the connection with a towel and inspect for beads of water. Check again after several minutes, then again after the system has gone through hot and cold cycles if it serves a water heater or hot-water line.
If you see a leak at the threaded side, shut off the water, disassemble, and reseal the threads. If the soldered joint leaks, it usually must be reheated, disassembled, cleaned, refluxed, and soldered again. Adding solder to a dirty leaking joint rarely works well.
Common Mistakes to Avoid
Using Leaded Solder on Drinking-Water Pipes
Never use leaded solder on potable water plumbing. Modern drinking-water systems require lead-free solder and flux. If you find old solder in an older home, do not assume it is safe. Older plumbing materials may contain lead, and repairs should be made with approved modern products.
Forgetting the Dielectric Barrier
Connecting copper directly to galvanized steel may work for a while, but it invites galvanic corrosion. The connection can rust, clog, or leak. Use an approved transition fitting and follow the manufacturer’s instructions.
Heating the Solder Instead of the Fitting
The pipe and fitting should melt the solder, not the torch flame. If the solder melts only because the flame is blasting it, it may sit on the surface instead of flowing into the joint.
Soldering With Water in the Pipe
Water inside the line absorbs heat and prevents the joint from reaching soldering temperature. Drain the pipe thoroughly. For stubborn drips, some plumbers use temporary methods such as a pipe plug or dry bread inside the pipe, but those tricks require judgment and must not leave debris in valves, fixtures, or appliances.
Overtightening Threaded Fittings
Threaded pipe needs a secure seal, but too much force can crack fittings or damage old pipe. Use proper support and two-wrench technique.
When to Call a Licensed Plumber
DIY plumbing can be satisfying, but some situations deserve a professional. Call a licensed plumber if the galvanized pipe is severely corroded, the connection is inside a wall, the job affects a water heater or main supply line, local permits are required, or you are unsure whether the pipe carries potable water, gas, or hydronic heating fluid.
Also call a pro if you see old lead pipe, suspect lead solder, or notice rusty water and low flow throughout the home. In many older houses, a single copper-to-galvanized repair is just one chapter in a longer story titled, “The Galvanized Pipes Are Retiring, Whether You Planned It or Not.”
Better Alternatives to Soldering
Soldering is reliable when done correctly, but it is not the only option. Press fittings are popular because they make fast, consistent joints without an open flame. Some systems include transition couplings for copper, steel, stainless steel, or PEX, depending on the manufacturer and application.
Compression fittings and push-to-connect fittings may also be allowed in certain accessible locations, but they must be rated for the pipe material, pressure, temperature, and local code. Do not bury questionable fittings behind finished walls unless the product is specifically approved for that use. Future-you deserves kindness.
Field Experience: Practical Lessons From Iron-to-Copper Plumbing Repairs
One of the most useful lessons from mixed-metal plumbing repairs is that the visible leak is rarely the whole story. A homeowner may notice a drip at a copper-to-galvanized connection and think, “Great, one fitting.” Then the old galvanized nipple comes off and reveals threads that look like they were chewed by a rusty beaver. At that point, the repair becomes less about soldering and more about making a smart transition from old material to new material without disturbing half the house.
In real-world repairs, preparation usually takes longer than soldering. Cutting copper is quick. Cleaning copper is quick. The slow part is draining the line, protecting nearby framing, removing the old fitting without twisting hidden pipe, and making sure the replacement fitting lines up without stress. Pipe alignment matters. If you force the copper into position, the joint may hold during the first pressure test but fail later from vibration or thermal expansion.
Another practical tip is to solder away from sensitive components whenever possible. If a dielectric union has a gasket, take it apart before applying heat. Better yet, solder the copper adapter on a workbench or in an open area, let it cool, clean it, and then make the threaded connection. This keeps heat away from washers, insulation, plastic parts, painted surfaces, and wood framing. A torch in a tight cabinet is not a test of bravery. It is a test of fire insurance.
Many leaks happen because the installer rushes the cleaning step. Copper must be bright, and the inside of the fitting must be clean all the way to the stop. Old pipe can have paint, mineral deposits, oxidation, or oil from previous work. If solder beads up and refuses to flow, the usual causes are dirt, water, burned flux, or uneven heat. The fix is not more solder. The fix is to stop, cool the joint, take it apart if needed, clean it properly, reflux it lightly, and heat it evenly.
Threaded iron pipe brings its own personality. Old galvanized pipe may be restricted internally even if the outside looks acceptable. When connecting copper to an old galvanized system, improved flow in the new copper section may not solve low pressure elsewhere because the old pipe can be narrowed by rust inside. In that case, a beautiful transition fitting is still worthwhile, but it will not turn a clogged 70-year-old pipe into a new one.
A good final habit is to test patiently. After restoring pressure, wipe the joint dry and watch. Touch a paper towel around the threaded side, the union nut, and the solder cup. A tiny wet mark on paper reveals leaks before they become visible drops. Then check again after the line has warmed up and cooled down. Plumbing materials expand and contract, and a joint that is quiet when cold may complain after a hot-water cycle.
The best iron-to-copper repair is not the flashiest one. It is clean, supported, code-appropriate, lead-free for potable water, protected from galvanic corrosion, and easy to inspect. In other words, it is the kind of repair nobody notices because nothing leaks. In plumbing, boring is beautiful.
Conclusion
Learning how to solder iron to copper in plumbing starts with correcting the phrase itself. You generally do not solder iron directly to copper. You connect iron or galvanized steel to copper with an approved transition fitting, then solder the copper side correctly and thread the iron side correctly. That approach respects the different metals, reduces corrosion risk, and creates a repair that can survive real household water pressure.
Use clean copper, light flux, lead-free solder, proper heat, and a dielectric or copper-alloy transition fitting where required. Protect gaskets from torch heat, support old pipe carefully, test for leaks slowly, and check local plumbing code before closing up the work. The result may not win a beauty contest, but if it stays dry for years, it deserves a tiny trophy.