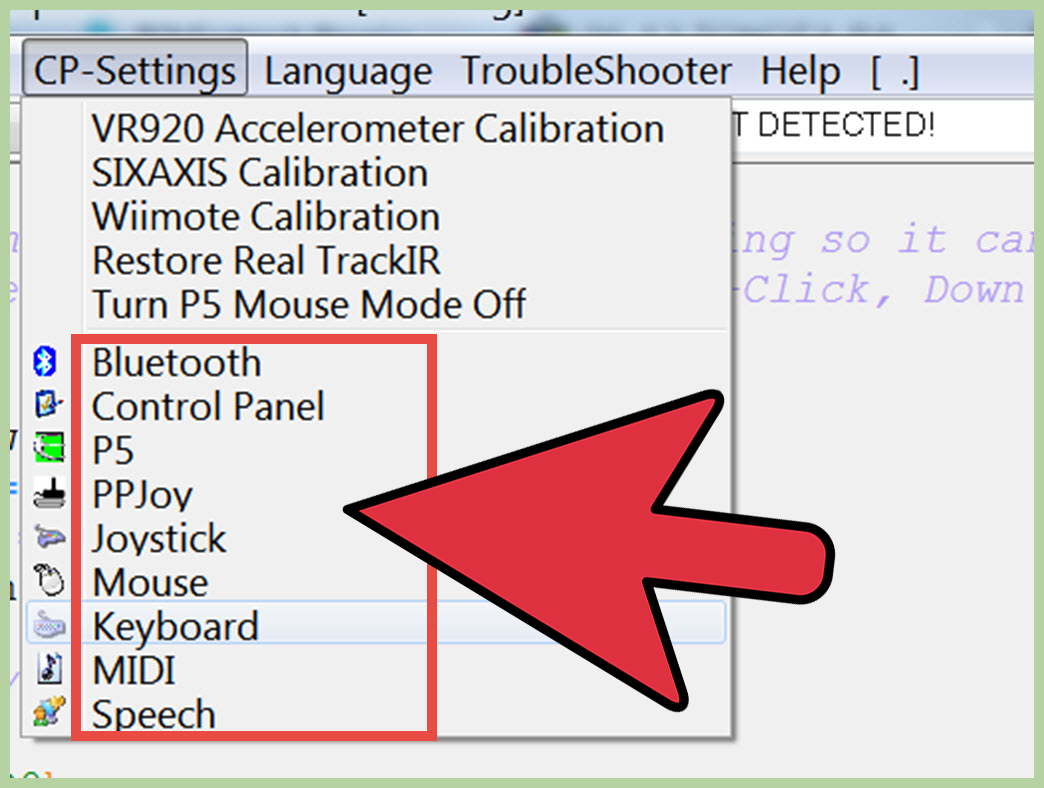
Turning a Wii Remote into a Windows mouse sounds like the kind of project you discover at 1:13 a.m. and immediately decide is “absolutely necessary.” Maybe you want to control a media center from the couch. Maybe you are building a classroom demo. Maybe you simply looked at an old Wii Remote in a drawer and thought, “You, tiny plastic wand, still have a purpose.” Good news: with Bluetooth, the right software, and a little patience, a Wii Remote can work as a pointer-style mouse on a Windows PC.
This guide explains how to use your Wii Remote as a mouse on Windows in 12 practical steps. The easiest modern route is usually a Windows app such as Touchmote or a hardware adapter such as the Mayflash DolphinBar. Both options translate Wii Remote input into something Windows understands, such as mouse movement, clicks, keyboard input, or touch-style gestures. The process is not quite as plug-and-play as connecting a regular wireless mouse, but it is very doable if you follow the steps carefully.
Before you begin, one important reality check: the Wii Remote was designed for the Nintendo Wii, not Windows. It communicates through Bluetooth HID-style input, but Windows does not automatically treat it like a normal mouse. That is why you need mapping software or a dedicated adapter. Think of the software as a friendly translator standing between your Wii Remote and your PC, saying, “When this button is pressed, Windows, please act like the left mouse button was clicked.”
What You Need Before Starting
To use a Wii Remote as a mouse on Windows, gather the following items first. Having everything ready prevents the classic setup spiral where you successfully pair the remote, then realize your batteries died, your Bluetooth adapter is missing, and your sensor bar is still in a box labeled “miscellaneous cables from 2012.”
- A Nintendo Wii Remote or Wii Remote Plus
- A Windows 10 or Windows 11 PC with Bluetooth
- Fresh AA batteries for the Wii Remote
- A Wii Sensor Bar, USB sensor bar, wireless sensor bar, or infrared light source
- Touchmote, a similar Wii Remote mapping tool, or a Mayflash DolphinBar
- Administrator access on Windows if software installation is required
The sensor bar is especially important if you want pointer-style control. The name “sensor bar” is a little misleading because the bar does not sense the remote. Instead, it gives off infrared points that the Wii Remote’s IR camera can see. The remote uses those IR points to understand where it is pointing. Without an IR source, you may still map buttons or motion, but the “point at the screen like a mouse” experience will be much weaker.
Step 1: Check Your Windows Bluetooth Setup
Start by confirming that Bluetooth is working on your Windows computer. Open Settings, go to Bluetooth & devices, and make sure Bluetooth is turned on. If your desktop PC does not have built-in Bluetooth, use a USB Bluetooth adapter. For the best results, plug the adapter directly into the PC rather than into a crowded USB hub.
Windows can sometimes be picky with older Bluetooth devices, and the Wii Remote is definitely from the “vintage but still charming” category. If the remote does not appear during pairing, update your Bluetooth drivers, restart Windows, and try again. On some Windows 11 systems, changing device discovery settings to show more Bluetooth device types can also help.
Step 2: Install a Wii Remote Mapping Tool
Windows needs help turning Wii Remote signals into mouse input. Touchmote is one of the most popular tools for this purpose because it was designed to let users control Windows with a Wii Remote, including pointing, tapping, swiping, and scrolling. It can also start with Windows and reconnect when you press a button on the remote.
Download mapping software only from the official project website, the developer’s GitHub page, or another trusted source. Avoid random “driver bundle” downloads that promise magical one-click results. If a website looks like it was assembled by a pop-up ad wearing a trench coat, leave immediately.
Step 3: Place Your Sensor Bar Correctly
Position the sensor bar above or below your monitor, just as you would place it near a TV for a Wii console. If you are using a USB sensor bar, connect it to a USB port for power. If you are using the original Wii sensor bar, it normally needs power from a Wii console, so many PC users prefer a USB or battery-powered replacement.
For accurate pointer movement, sit or stand far enough from the display that the Wii Remote can see both infrared points. If you are too close, the cursor may jump around like it drank six espressos. If you are too far away, tracking may become weak or inconsistent. A comfortable living-room distance usually works well.
Step 4: Put the Wii Remote in Pairing Mode
Open the battery cover on the back of the Wii Remote and find the red SYNC button. Press and release it. The blue player LEDs on the front of the remote should start blinking. On many Wii Remotes, you can also press and hold the 1 and 2 buttons together to make the remote discoverable.
If nothing lights up, check the batteries and battery contacts. Old Wii Remotes sometimes sit unused for years, and weak batteries are a very common reason pairing fails. Use fresh AA batteries before blaming Windows, Bluetooth, the moon, or your life choices.
Step 5: Pair the Wii Remote With Windows
On Windows, open Settings > Bluetooth & devices > Add device, then choose Bluetooth. Look for a device name such as Nintendo RVL-CNT-01 or a similar Nintendo controller label. Select it.
If Windows asks for a PIN, try choosing the option that lets you pair without a code if available. Some Windows setups may not show a clear “skip PIN” option. In that case, pairing through older Control Panel device settings may work better than the modern Settings app. The exact behavior depends on your Windows version, Bluetooth adapter, and Wii Remote model.
Step 6: Open Touchmote or Your Mapping Program
Once the Wii Remote is paired, launch Touchmote or your preferred mapping tool. The program should detect the Wii Remote and show connection status. If it does not, press a button on the remote to wake it, then restart the application. Some setups require the app to be opened before pairing; others work better after pairing. Annoying? A little. Normal? Also yes.
Inside the software, look for profiles or input settings. A profile tells the program how to translate Wii Remote actions into Windows actions. For example, pointing at the screen can become mouse movement, the A button can become left-click, the B trigger can become right-click, and the D-pad can become arrow keys or scrolling.
Step 7: Map the Wii Remote Buttons to Mouse Controls
A simple beginner-friendly button layout looks like this:
- A button: Left mouse click
- B trigger: Right mouse click
- Plus button: Scroll up or zoom in
- Minus button: Scroll down or zoom out
- Home button: Open a menu, pause input, or return to desktop
- D-pad: Arrow keys, scrolling, or media navigation
This layout feels natural because your index finger rests on the B trigger and your thumb can easily reach A. For media center control, you may prefer mapping the D-pad to volume and playback controls. For presentations, map A to left-click, B to right-click, Plus to next slide, and Minus to previous slide. The best profile depends on how you plan to use the remote.
Step 8: Calibrate Pointer Movement
Now test the pointer. Aim the Wii Remote at the screen and move it slowly from side to side. If the cursor moves in the opposite direction, look for an invert axis option. If the cursor moves too fast, lower the sensitivity. If the cursor feels sluggish, increase sensitivity slightly.
Calibration is where a decent setup becomes enjoyable. Do not expect perfection in the first 30 seconds. Try small adjustments and test them in real situations, such as opening a browser tab, clicking a desktop icon, or scrolling through a web page. The goal is not to turn the Wii Remote into a professional design mouse. The goal is to make it accurate enough that you can control Windows without accidentally launching three apps and closing the one you actually needed.
Step 9: Test Clicks, Scrolling, and Dragging
Open a safe test area such as Notepad, File Explorer, or a browser window. Try moving the pointer, left-clicking, right-clicking, scrolling, and dragging. If dragging is difficult, change the click-and-hold behavior in your mapping tool. Some users prefer using A for click and B for “hold,” while others prefer trigger-based clicking.
For couch control, scrolling is often more useful than precise dragging. If you mainly want to browse streaming apps, control slides, or navigate large menus, focus on smooth pointer movement and reliable clicks. If you want to edit spreadsheets from across the room with a Wii Remote, please know that this is technically possible but spiritually questionable.
Step 10: Save Your Profile
Once your mappings feel comfortable, save the profile in your software. Give it a clear name such as “Wii Remote Mouse,” “Presentation Mode,” or “Couch Browser.” If the program supports auto-start, enable it only if you plan to use the Wii Remote regularly. Otherwise, leaving it manual keeps Windows startup cleaner.
Saving profiles is useful because you may want different controls for different situations. A media profile might prioritize volume, play, pause, and scroll. A presentation profile might prioritize next slide, previous slide, and laser-pointer-style movement. A gaming profile may use keyboard keys or controller emulation instead of mouse movement.
Step 11: Try a DolphinBar for an Easier Setup
If Bluetooth pairing feels too unreliable, consider a Mayflash DolphinBar. It combines a sensor bar and Bluetooth connection hardware into one USB device. Many users like it because it can work as a keyboard and mouse adapter, and it is also popular for Wii Remote use with PC emulation.
The biggest benefit is convenience. Instead of fighting with Windows Bluetooth pairing, you connect the DolphinBar by USB, pair the Wii Remote to the bar, and choose the mode that matches your use case. For people who want fewer software headaches, this can be the smoother path. The tradeoff is that it requires buying extra hardware.
Step 12: Troubleshoot Common Problems
The Wii Remote Does Not Appear in Windows
Make sure Bluetooth is turned on, the remote is in pairing mode, and the batteries are fresh. Try pressing the SYNC button again. If needed, restart Bluetooth from Windows settings or reboot the PC.
Windows Keeps Asking for a PIN
Use any available option to pair without a code. If the modern Bluetooth menu does not allow it, try adding the device from Control Panel’s classic Devices and Printers area. Some Bluetooth adapters handle old Wii Remotes better than others.
The Cursor Jumps Around
Check sensor bar placement, reduce sensitivity, remove bright infrared interference, and make sure the Wii Remote can see the bar clearly. Sunlight, reflective surfaces, and awkward distance can all cause shaky tracking.
The Remote Connects but Does Nothing
Open your mapping software and confirm that the Wii Remote is detected. Pairing alone is not enough. Windows needs the mapping layer to turn Wii Remote input into mouse actions.
The Connection Drops
Replace the batteries, move closer to the Bluetooth adapter, avoid USB 3.0 interference near cheap Bluetooth dongles, and reconnect the remote. If the issue continues, try a different Bluetooth adapter or a DolphinBar.
Best Uses for a Wii Remote Mouse on Windows
A Wii Remote mouse is not ideal for everything. It is not the best choice for graphic design, competitive gaming, or filling out tax forms unless you enjoy unnecessary drama. However, it can be surprisingly useful in the right situations.
For a home theater PC, the Wii Remote works nicely as a couch controller. You can point at the screen, click streaming apps, pause videos, and scroll through menus. For teachers and presenters, it can become a wireless presentation clicker with bonus pointer movement. For hobbyists, it is a fun way to learn about Bluetooth HID devices, infrared tracking, input mapping, and creative repurposing of old hardware.
It is also a great example of why older technology still has value. The Wii Remote was clever when it launched, and its design remains interesting today. It combines buttons, motion sensing, Bluetooth communication, and infrared tracking in a compact controller. With the right setup, Windows can borrow that cleverness for desktop control.
Safety and Practical Tips
Use the wrist strap if you are waving the Wii Remote around. Yes, even at your desk. The internet has seen enough flying-controller incidents for one lifetime. You do not need to swing hard to move a cursor. Gentle wrist movement is enough.
Also, be careful with old software. Some Wii Remote tools from the Windows 7 and Windows 8 era may still be discussed online, but not all are maintained. Avoid unsigned drivers unless you understand the risks, and never install random driver packs from suspicious download sites. For most users, Touchmote or a DolphinBar-style solution is simpler and safer than digging through abandoned utilities.
Real-World Experience: What It Feels Like to Use a Wii Remote as a Mouse
The first time you successfully move a Windows cursor with a Wii Remote, it feels a little ridiculous in the best possible way. There is a tiny moment of magic when the old controller wakes up, the blue LEDs blink, and the pointer finally responds. It is not as silky as a modern wireless mouse, but that is not really the point. The charm is in taking a controller built for bowling, tennis, and party games and convincing it to open File Explorer.
In everyday use, the experience depends heavily on your setup. With a clean sensor bar position and a stable Bluetooth connection, the Wii Remote can be comfortable for simple navigation. It works well when you are sitting back from the screen and making broad, relaxed movements. Opening apps, playing videos, clicking large buttons, browsing media libraries, and controlling presentations all feel natural after a short learning period.
Precision tasks are more challenging. Small checkboxes, tiny close buttons, and detailed editing can become frustrating if sensitivity is too high or the sensor bar angle is off. This is where calibration matters. Lowering pointer speed and mapping buttons thoughtfully makes the experience much better. A good rule is to design your controls around the task. For a media PC, large gestures and simple buttons are perfect. For productivity, you may want slower cursor movement and a reliable right-click.
Battery life is another real-world detail people forget. A Wii Remote with weak batteries may pair one minute and disconnect the next. If your setup becomes unpredictable, replace the batteries before changing every setting on your PC. It sounds too simple, but it solves many problems.
The most enjoyable use case is controlling a living-room PC from the couch. A normal mouse needs a surface. A Wii Remote needs only your hand, a sensor bar, and a little open space. It makes a computer feel more like a TV interface. You can point, click, pause, scroll, and search without leaning over a coffee table. It is not perfect, but it is fun, and sometimes fun is the entire reason to try a project like this.
For presentations, the Wii Remote can be surprisingly practical. Map one button to advance slides, another to go back, and use pointer movement when you need to highlight something. It is not as polished as a dedicated presentation remote, but it has personality. People notice it. Someone will ask, “Is that a Wii Remote?” and you get to say, “Yes, and it controls my laptop.” That is a small but undeniable victory.
The biggest lesson from using a Wii Remote as a Windows mouse is that old hardware often has more life left than we assume. It may take a few extra steps, but the result is useful, educational, and weirdly satisfying. If you enjoy tinkering, this project is absolutely worth trying. If you just want the smoothest possible mouse, buy a mouse. If you want your computer to feel like it was briefly invited to a Nintendo-themed science fair, grab the Wii Remote and start pairing.
Conclusion
Using your Wii Remote as a mouse on Windows is a fun, practical project that combines Bluetooth pairing, input mapping, and infrared pointer control. The basic process is simple: prepare Bluetooth, install a mapping tool, set up a sensor bar, pair the remote, map the buttons, calibrate movement, and troubleshoot as needed. For the easiest setup, a DolphinBar can reduce pairing headaches. For a software-focused setup, Touchmote remains a popular option for turning Wii Remote input into Windows-friendly controls.
The Wii Remote will not replace a high-quality mouse for serious desktop work, but it can be excellent for couch browsing, media control, presentations, hobby projects, and pure tech nostalgia. With patience and the right settings, that old controller can become a surprisingly capable Windows pointer. Not bad for a device many people last used to bowl a perfect game in their living room.