A living room can have a beautiful sofa, carefully chosen lighting, and enough decorative pillows to stock a small hotelyet still feel unfinished. The missing ingredient is often architectural character. That is where living room wainscot earns its keep.
Wainscoting adds depth, rhythm, and a sense of craftsmanship to ordinary walls. It can make a newly built room feel established, help a historic home retain its personality, and protect high-traffic surfaces from shoes, toys, vacuum cleaners, and furniture that occasionally forgets where the wall begins. Better still, it works with styles ranging from traditional Colonial interiors to streamlined modern spaces.
The secret is not simply attaching strips of wood to drywall and celebrating with pizza. Successful wainscoting depends on proportion, panel spacing, material selection, paint finish, and thoughtful coordination with the room’s furniture and architectural features. This guide explains how to get those details right.
What Is Living Room Wainscot?
Wainscot, or wainscoting, is decorative paneling installed on an interior wall. Traditionally, it covers the lower portion of the wall and is finished with a chair rail or cap molding. Early versions helped insulate rooms and protect plaster, but modern wainscoting is primarily valued for visual interest and surface protection.
Although wood remains a classic material, today’s installations may use medium-density fiberboard, plywood, PVC, polyurethane molding, or trim applied directly over painted drywall. That means homeowners can achieve the paneled appearance without commissioning a team of eighteenth-century cabinetmakers.
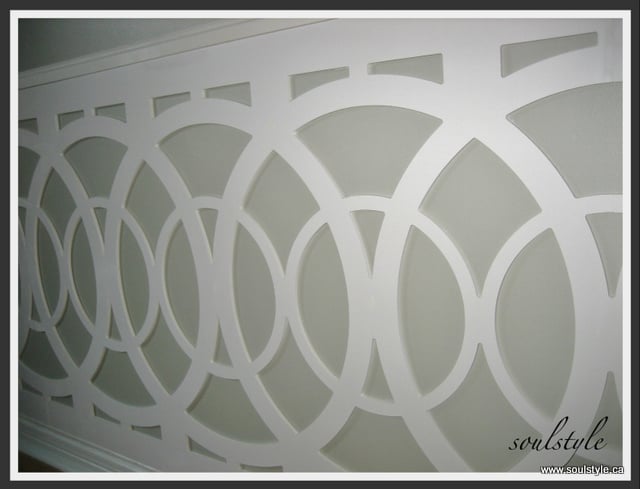
The term covers several designs, including raised panels, recessed panels, beadboard, board and batten, picture-frame molding, and contemporary geometric treatments. Some projects use actual sheets or boards, while others create the illusion of panels with applied molding.
Why Wainscoting Works Especially Well in a Living Room
It Gives Plain Walls Architectural Structure
Many contemporary homes have large stretches of drywall with few built-in details. Wainscoting divides those blank surfaces into organized sections, creating shadows and visual movement. Even when painted the same color as the upper wall, the molding adds enough dimension to make the room feel more considered.
It Helps Define an Open Floor Plan
In an open-concept home, wainscot can visually identify the living area without constructing a new wall. Wrapping paneling around the seating zone creates a subtle boundary while maintaining an open flow into the dining room, hallway, or kitchen.
It Protects Busy Walls
Living rooms receive more physical contact than their elegant photographs admit. Chair backs scrape, pets investigate corners, children launch mysterious objects, and vacuum handles leave their signatures. A durable painted wainscot is generally easier to clean and touch up than a large expanse of flat-finish wall paint.
It Can Bridge Traditional and Modern Decor
Wainscoting is not limited to formal rooms filled with antique furniture and portraits of stern relatives. Clean rectangular panels can complement a modern sofa, while dark board-and-batten walls can make a media room feel dramatic and contemporary. Designers frequently refresh traditional paneling through bold color, simplified profiles, unusual heights, and monochromatic paint schemes.
Best Wainscoting Styles for Living Rooms
Raised-Panel Wainscoting
Raised-panel wainscoting features beveled center panels framed by rails and stiles. It is one of the most formal choices and works particularly well in Colonial, Georgian, Victorian, and traditional interiors.
This style looks convincing when the panel dimensions align with doors, windows, fireplace surrounds, and built-in cabinetry. It also involves more pieces and more precise carpentry than simpler treatments. Raised panels are therefore an excellent choice for a formal living room, but perhaps not the ideal first project for someone who recently discovered which end of the nail gun the nails come out of.
Recessed or Flat-Panel Wainscoting
Flat-panel designs have clean centers surrounded by rails and stiles. They provide traditional structure without the heavier ornament of raised panels. This makes them suitable for transitional living rooms that combine classic architecture with contemporary furniture.
A simplified version can be made by installing vertical and horizontal trim directly over smooth drywall. Once everything is caulked and painted together, the existing wall becomes the apparent center of each panel.
Picture-Frame Molding
Picture-frame molding uses narrow trim to create rectangular boxes on the wall. It is relatively affordable, visually light, and adaptable to both low and tall installations. Because it requires less material than full paneling, it is a popular DIY approach for giving a basic living room a customized appearance.
Large rectangles create a calm, tailored effect, while numerous small boxes appear more ornate. The best layouts repeat consistent gaps between frames, corners, door casings, and adjacent moldings.
Board-and-Batten Wainscoting
Board and batten uses wide vertical sections divided by narrower battens. Its strong vertical lines can make a living room ceiling appear taller, especially when the treatment extends halfway or two-thirds up the wall.
Traditional board and batten has farmhouse associations, but thin battens, wider spacing, and saturated paint colors can make it look crisp and modern. Common materials include solid wood, plywood, and MDF.
Beadboard Wainscoting
Beadboard consists of narrow vertical planks or panels separated by rounded grooves. It brings relaxed cottage, coastal, farmhouse, and Craftsman character to a living room.
The vertical pattern adds texture without requiring complicated panel calculations. Sheet beadboard is usually faster to install than individual tongue-and-groove boards, although seams must be positioned carefully so they disappear behind trim or furniture.
Fluted or Slatted Wainscot
Fluted and narrow-slat treatments offer a contemporary alternative. Repeated vertical grooves create subtle shadows and can introduce warmth when finished in oak, walnut, or another natural wood tone.
This approach is especially effective behind a console, reading chair, or media cabinet. Because a heavily fluted treatment can compete with artwork and shelving, it is often strongest on one focal wall or within a clearly defined section of the room.
How High Should Living Room Wainscoting Be?
The traditional guideline is approximately one-third of the total wall height, including the cap molding. In a room with a nine-foot ceiling, that often means a finished height near three feet. Classic installations commonly fall between 32 and 42 inches, but the correct number depends on the room rather than a universal commandment carved into a chair rail.
Low wainscoting creates a traditional, understated effect and leaves generous space for artwork. A height between 42 and 54 inches feels more substantial and may work better behind sofas, sideboards, and larger chairs. Two-thirds-height paneling creates a dramatic library or lounge atmosphere, especially in rooms with high ceilings.
Avoid automatically placing the cap at exactly half the wall height. A perfect horizontal split can make the room feel visually static. Before choosing a height, consider:
- The ceiling height and overall room proportions
- The height of window sills and fireplace mantels
- The backs of sofas, chairs, and console tables
- Light switches, outlets, thermostats, and wall vents
- The size and placement of artwork
Use painter’s tape to mark the proposed top line around the room. Leave it in place for a day and view it while standing, sitting, and entering from adjacent rooms. This low-cost experiment can prevent an expensive episode of “Why does the wall look like it is wearing its belt under its armpits?”
Planning Panel Width and Spacing
Balanced spacing matters more than forcing every panel to have an identical width. Start by measuring each uninterrupted wall section between corners, door casings, windows, built-ins, and fireplace trim. Treat those architectural interruptions as natural boundaries.
For applied molding or board-and-batten layouts, subtract the combined width of the stiles or battens from the total wall width. Divide the remaining distance by the desired number of openings. Adjust the number until the panels look proportional and the end sections are not awkwardly narrow.
Panel layouts should appear intentional around outlets and switches. Whenever possible, place electrical devices entirely inside a panel rather than allowing molding to run directly into them. Moving an outlet may require an electrician, but it can produce a much cleaner result.
On visible focal walls, center the panel arrangement on the entire wall, fireplace, or main furniture grouping. A well-composed layout may require slightly different panel widths on separate walls, and that is perfectly acceptable. The human eye notices awkward slivers far more quickly than it notices a two-inch variation between distant panels.
Choosing the Right Material
Solid Wood
Solid wood provides authentic grain, crisp profiles, and excellent durability. It is a natural choice for stained wainscoting or high-end painted millwork. However, it costs more than engineered products and can expand or contract as humidity changes.
Medium-Density Fiberboard
MDF is smooth, stable, and affordable, making it popular for painted rails, stiles, and picture-frame molding. It cuts cleanly with the proper blade and produces a furniture-like painted finish. Its main weaknesses are moisture sensitivity, heavy dust during cutting, and edges that need careful priming.
Plywood and Hardboard Panels
Plywood and hardboard are practical for beadboard sheets or flat backing panels. They cover large areas quickly and can reduce the number of individual components required. Thin sheets may reveal wall irregularities, so the surface behind them should be reasonably flat.
PVC and Synthetic Trim
PVC, polyurethane, and similar products resist moisture and insects. They are most useful in bathrooms, basements, and mudrooms, but they can also work in a living room when durability is a priority. For a dry interior space, wood or MDF generally offers a more natural appearance and broader profile selection.
Whatever material you choose, allow wood-based panels and boards to acclimate inside the room before installation. Lowe’s recommends approximately 48 hours for many paneling products, helping the material adjust to indoor temperature and humidity.
Living Room Wainscot Colors and Finishes
Classic White
White wainscoting remains popular because it highlights shadows, coordinates with trim, and keeps detailed millwork from feeling heavy. Pair warm white paneling with beige, taupe, muted green, pale blue, or patterned wallpaper above it.
Dark and Dramatic
Navy, charcoal, forest green, oxblood, and near-black paneling can turn an ordinary living room into a sophisticated retreat. Dark colors work especially well with brass lighting, warm wood furniture, leather upholstery, and light artwork.
In a small living room, dark wainscot does not automatically make the room feel cramped. Keeping the upper wall lighter, providing layered lighting, and repeating the dark tone in smaller accessories can make the contrast feel deliberate.
Monochromatic Color
Painting the wainscot and upper walls the same color creates a quieter, more contemporary result. Use different sheens to emphasize the architecture: an eggshell or matte finish above and satin or semi-gloss on the paneling. The slight change in reflectivity reveals the molding without introducing another color.
Higher-sheen finishes are commonly used on trim because they are easier to clean and make profiles more visible. However, glossy paint also emphasizes dents, seams, and imperfect caulking, so careful preparation is essential.
Wallpaper Above the Wainscot
Wainscoting provides a visual foundation for patterned wallpaper. Botanical prints, grasscloth, subtle geometrics, and scenic murals become easier to manage when they occupy only the upper portion of the wall. Keep the lower section relatively simple so the two surfaces cooperate rather than competing for custody of the living room.
Coordinating Wainscot With Living Room Features
Fireplaces
Decide whether the chair rail should meet the fireplace surround, stop at the mantel structure, or continue behind a projecting surround. Aligning horizontal elements usually creates the cleanest transition. On a fireplace focal wall, panels can be centered symmetrically on either side.
Windows and Doors
Chair rails should terminate neatly against door and window casings. When moldings have different thicknesses, use a return, backband, or carefully shaped transition block rather than leaving a blunt edge exposed.
Artwork
Low wainscot leaves room for a conventional gallery wall. Taller installations can incorporate artwork within large panels or support a picture ledge along the cap. Keep frames from appearing trapped between the chair rail and ceiling by testing the arrangement with paper templates first.
Televisions and Media Units
A television wall benefits from restrained detailing. Simple flat panels or widely spaced battens create structure without adding visual noise around the screen. Paint the paneling a deep color to reduce contrast with a black television, or use symmetrical panels to frame built-in cabinetry.
Basic Installation Process
- Inspect the walls. Repair loose drywall, major dents, and water damage before covering anything.
- Remove obstacles. Take off outlet covers, switch plates, and baseboards that will be replaced.
- Mark the height. Establish a level reference line while accounting for floors that may not be level.
- Create a full layout. Mark every stile, panel, outlet, door casing, and corner before cutting.
- Locate studs. Fasten structural rails and heavier components into framing whenever possible.
- Cut and dry-fit pieces. Check joints before applying adhesive or nails.
- Install panels and trim. Work from the most visible focal area toward less noticeable corners.
- Fill and caulk. Fill nail holes, caulk small seams, and sand rough areas.
- Prime and paint. Prime bare MDF, wood, filler, and repaired surfaces before applying finish coats.
Older homes may have sloping floors and uneven ceilings. In those rooms, measuring every component from the floor can create a visibly wandering chair rail. Establish a visually level top line, then scribe or trim lower pieces to accommodate floor variation. Installation guides from This Old House, Lowe’s, HGTV, and Family Handyman emphasize careful measurement and surface preparation as the foundation of a convincing result.
How Much Does Living Room Wainscot Cost?
Cost depends on room size, panel style, material, local labor rates, and the condition of the existing walls. Simple DIY picture-frame molding can be relatively inexpensive, while custom hardwood raised panels require substantially more material and skilled labor.
According to Angi’s 2026 estimates, professional wainscoting projects commonly cost about $5 to $40 per square foot, with an average total near $1,325. Complex layouts, premium hardwood, wall repair, and custom finishing can push the total higher. Prices change by market, so obtain itemized local estimates before setting a final budget.
Budget for more than visible molding. Adhesive, finish nails, primer, paint, caulk, filler, sandpaper, replacement baseboards, outlet extensions, tools, and waste material can meaningfully increase the total.
Common Living Room Wainscoting Mistakes
Choosing the Height Without Testing It
A standard measurement may conflict with your sofa, windows, fireplace, or artwork. Tape the proposed line on every wall before buying materials.
Creating Tiny Panels at Corners
Starting with a fixed panel width and marching around the room often leaves narrow leftovers. Lay out each wall independently and prioritize balanced end panels.
Ignoring Existing Trim
Thin door casings may look undersized beside thick rails. Plan transitions and consider upgrading casings when necessary.
Using Too Many Decorative Profiles
Wainscot, crown molding, ornate window trim, wallpaper, carved furniture, and a dramatic ceiling can all be beautiful. They do not all need to audition for the leading role at once.
Skipping Caulk and Surface Preparation
Paint does not magically erase open joints, nail holes, or rough MDF edges. In fact, shiny trim paint may introduce those flaws to everyone who visits. Proper filling, sanding, priming, and caulking separate custom-looking work from trim that appears to have been installed during a power outage.
Experience-Based Lessons From Living Room Wainscot Projects
Real-world wainscoting projects tend to teach the same lesson: the installation itself is rarely the hardest part. The difficult work happens before the first board is attached. A homeowner may spend hours calculating ideal panel widths, only to discover that a light switch occupies the exact location of a vertical stile. Another may choose a textbook 36-inch height and later realize the chair rail disappears behind the sofa, leaving only a mysterious strip visible near the armrests.
One of the most valuable practical habits is creating a full-size mockup. Painter’s tape can represent the top rail and vertical trim, while cardboard strips can imitate molding thickness. When the layout is viewed from the doorway, the center of the sofa, and an adjacent hallway, problems become obvious. Panels that looked balanced on graph paper may seem crowded beside the fireplace or oddly stretched behind a bookcase.
Uneven walls are another recurring surprise. Drywall may bow, plaster may ripple, and corners that appear square may have quietly abandoned geometry decades ago. Flexible caulk can close small gaps, but it should not be used to disguise major layout errors. On older walls, slightly wider trim can provide more room for scribing and adjustment. It is also wise to cut important pieces individually rather than assuming every section with the same written measurement is truly identical.
Painting usually takes longer than expected. Applied molding creates numerous inside edges where paint can collect or leave thin spots. Pre-painting certain components can reduce awkward brushwork, although nail holes and seams will still require a final finish coat. Homeowners often find that satin paint provides a practical balance: enough sheen for cleaning, but not so much that every sanding mark receives its own spotlight.
Furniture placement can change after installation. A room that originally needed more character may need fewer accessories once the paneling is complete. Large artwork, busy curtains, and multiple decorative tables can suddenly feel excessive because the walls are already contributing texture. Editing the decor after the project often produces a more polished result than immediately adding more objects.
Families with children or pets frequently appreciate the practical side of wainscot as much as its appearance. Scuffed lower walls can be wiped clean or repainted without refinishing the entire room. Darker mid-tone colors are particularly forgiving, while bright white reveals every muddy paw print with the enthusiasm of a forensic investigator.
Finally, successful projects usually include extra material. Molding can split, a miter can be cut in the wrong direction, and one supposedly simple outlet notch can turn a perfect board into an educational souvenir. Purchasing approximately 10 percent extra materialsometimes more for complicated layoutsreduces last-minute store trips and helps ensure replacement pieces match the original profile.
The broader experience is encouraging: living room wainscot can look highly customized without requiring a complete renovation. Careful planning, modest carpentry skills, and patient finishing often matter more than expensive materials. When the proportions suit the room, the paneling feels as though it has always belonged there.
Conclusion
Living room wainscot is one of the most effective ways to transform plain drywall into meaningful architecture. It can make a formal room feel richer, give a modern room greater depth, define an open living area, and protect walls from everyday wear.
Choose a style that supports the home’s architecture, test the height before installation, and design the panel spacing around permanent features rather than arbitrary formulas. Use durable materials, prepare every joint carefully, and select a paint finish that can handle regular cleaning. Most importantly, let the wainscot complement the room instead of overpowering it.
Done well, the finished treatment will not look like decoration attached as an afterthought. It will look like part of the houseonly with fewer blank walls and considerably more personality.