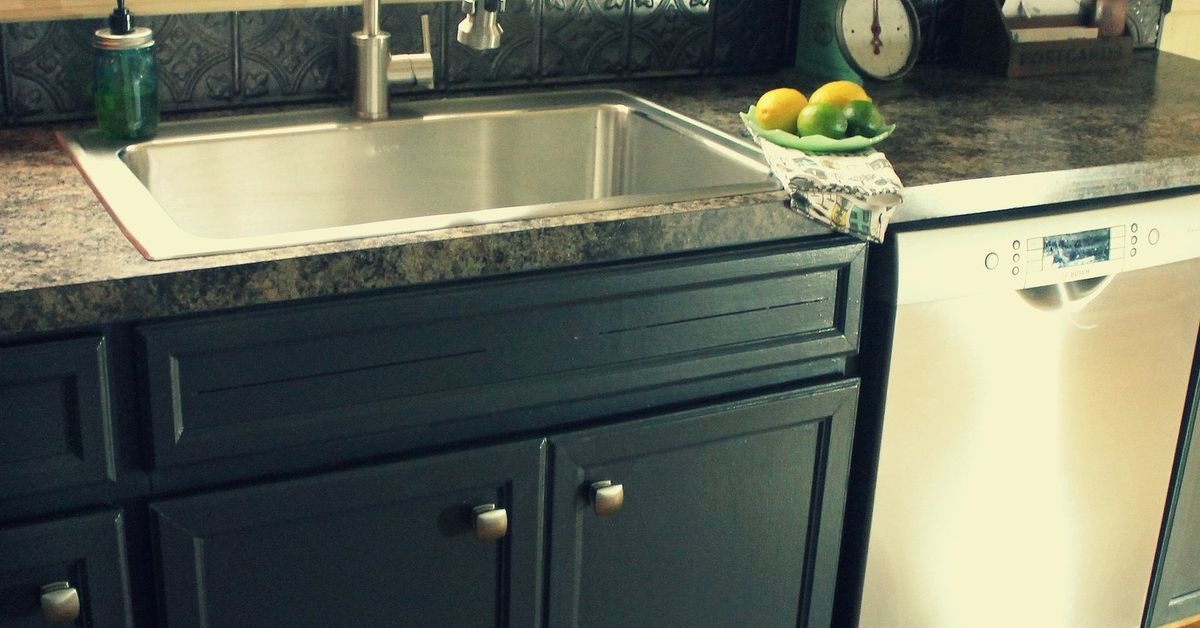
There are two types of people in this world: those who think kitchen cabinets are “fine,” and those who suddenly notice
every fingerprint, chip, and mystery drip the second the sun hits them at 4:17 p.m. If you’re here, congratulations
you’ve joined the second group. The good news? A painted kitchen cabinet makeover can deliver a jaw-dropping “wait… is
this a new kitchen?” reveal without the “wait… why is my bank account crying?” aftermath.
This guide walks you through a real-world, paint-it-like-you-mean-it cabinet transformation: how to plan, prep, prime,
paint, and protectplus the little pro moves that separate a smooth, durable finish from a sticky, chip-prone heartbreak.
We’ll also cover color strategy, timeline realities, and the sneaky spots that make or break the final reveal.
Why Painted Cabinets Feel Like a Whole New Kitchen
Cabinets take up a massive amount of visual real estate. When you change them, you change the “background” of the entire
roommeaning your counters, backsplash, lighting, and hardware all look upgraded without actually being replaced.
Painting is also flexible: you can go classic (warm white), cozy (greige), moody (charcoal), or bold (deep green, navy).
If you’re craving a dramatic before-and-after, cabinets are the main character.
The “Reveal” Starts Before You Open a Paint Can
The best makeover reveals aren’t accidents. They’re planned. Here’s what to decide upfront so you don’t end up
repainting a door at midnight while whispering “I regret everything.”
1) Pick a Finish That Matches Your Lifestyle
- Satin: A sweet spotcleanable, not too shiny, forgiving of tiny imperfections.
- Semi-gloss: Very wipeable and durable, but it can highlight dents and brush marks if prep is sloppy.
If your kitchen is high-traffic (kids, pets, roommates, a midnight snack schedule like a raccoon), lean toward a
durable cabinet/trim enamel and a sheen that cleans easily.
2) Choose a Cabinet-Friendly Paint (Not Just “Wall Paint with Confidence”)
Cabinets get handled constantly, so you want a coating that levels nicely and cures hard. Many DIYers do well with
waterborne alkyds or urethane trim enamels designed for doors/trim/cabinets. These are built to resist sticking and
stand up to repeated cleaning.
3) Decide Your “Reveal Moment” Details
This is where the makeover turns from “painted cabinets” into “whoa.” Choose one or two upgrades that elevate the final
look without spiraling:
- New hardware (matte black, brushed brass, classic nickel) for instant polish.
- Soft-close bumpers so the new finish doesn’t get abused on day one.
- Under-cabinet lighting to make the paint color glow at night.
- Two-tone (uppers light, lowers moody) or a painted island for contrast.
Before You Start: Is Painting the Right Move?
Painting is a glow-up, not a miracle. If your cabinet boxes are crumbling, water-damaged, or badly warped, paint won’t
fix structural issues. But if your cabinets are basically solid and just look tired, painting is a smart renovation
shortcut.
Quick “Yes, Paint Them” Checklist
- Doors close properly (or can be adjusted).
- Boxes are sturdy (no major swelling, rot, or delamination).
- Layout works (you don’t hate where everything lives).
- You can commit to prep (because prep is the real paint).
Tools & Materials: What You Actually Need
You don’t need a full workshop, but you do need the right basics to avoid brush marks and adhesion problems.
- Degreaser/cleaner, microfiber cloths, and clean water for rinsing
- Sanding sponges/paper (often 180–220 grit for scuff-sanding)
- Vacuum + tack cloth (or a clean, lint-free wiping system)
- Painter’s tape and masking paper/plastic
- High-adhesion primer (bonding or stain-blocking as needed)
- Cabinet/trim enamel paint (brush/roll or spray)
- High-quality angled brush + foam/mohair roller (or sprayer if you’re comfortable)
- Wood filler, putty knife, caulk (paintable), and a sanding block
- Labeling tape + marker (future-you will thank you)
- Drying racks or painter’s tripods for doors
Step-by-Step: How to Paint Kitchen Cabinets for a Real “Reveal” Finish
Step 1: Set Up Your Work Zone Like a Calm, Organized Adult
Pick a dust-controlled area to paint doors and drawersgarage, basement, spare roomanywhere you can create a
“do not touch” zone. Lay down drop cloths, set up a table or sawhorses, and plan airflow for ventilation.
Step 2: Remove Doors, Drawers, and Hardware (And Label Everything)
Take off doors and drawer fronts, remove knobs/pulls, and bag hardware. Label each door and its matching location.
This prevents the classic DIY plot twist: “Why does this door fit like it’s from a different kitchen?”
Step 3: Clean Like You’re Trying to Impress a Petty Houseguest
Kitchen cabinets collect oils, grease, and cooking residue that paint absolutely hates. Clean thoroughly, especially
around handles and near the stove. Rinse if your cleaner requires it, and let everything dry completely.
Step 4: Repair the “Little Things” That Become Huge After Painting
Fill old hardware holes (if you’re changing pulls), dents, and dings. Sand smooth. If you have gaps where cabinet trim
meets panels, a thin bead of paintable caulk can help the cabinets look more “built-in” and finishedjust don’t caulk
where doors need movement.
Step 5: Scuff Sand for Adhesion (This Is Not Optional, It’s the Deal)
Most cabinet refinishing doesn’t require stripping down to raw wood, but it does require scuffing the surface to give
primer something to grab. Sand enough to dull the sheen. Vacuum thoroughly and wipe away dust so you’re not painting
“dust confetti” into the finish.
Step 6: Prime for the Surface You Actually Have
Primer is your adhesion insurance. Use a bonding primer for slick, previously finished surfaces. If you’re dealing with
tannin bleed (common with certain woods) or stubborn stains, choose a stain-blocking primer appropriate for that issue.
Apply in thin, even coatsno drips pooling in corners.
After primer dries, lightly sand to smooth out texture and remove tiny nibs. Wipe clean again. This one step is a big
reason some DIY cabinets look factory-smooth and others look “handcrafted… with stress.”
Step 7: Paint Cabinets in a Smart Order
A clean system keeps the project from turning into chaos:
- Cabinet frames/boxes first (so you can close the kitchen sooner if needed).
- Door backs next, then door fronts after the backs are dry enough to flip.
- Drawer fronts last (they’re the easiest to store flat and dust-free).
Step 8: Use Thin Coats and the Right Tools to Minimize Marks
For brush-and-roll, use a quality angled brush for profiles and corners, then a small foam or fine-nap roller for flat
areas to keep the texture tight. Feather your edges and avoid overworking paint as it starts to setthis is how you get
drag marks.
If you spray, keep consistent distance and overlap, and aim for multiple light passes rather than one heavy coat.
Spraying can produce an ultra-smooth finish, but it also magnifies poor prep and dust control.
Step 9: Respect Dry Time and Recoat Time
Paint has “dry to touch” time and “ready for another coat” time, and they are not the same thing. Many cabinet-friendly
paints want longer recoat windows than wall paint. Follow the manufacturer’s recoat guidance, and when in doubt, wait.
Your finish will level better and harden stronger.
Step 10: Reassemble Carefully (Soft Hands, No Rage-Tightening Screws)
Give the final coat enough time before reinstalling hardware and hanging doors. Add bumpers to protect the finish. When
installing pulls/knobs, tighten snuglybut don’t overdo it. Fresh paint can be damaged by slipping tools and excessive
pressure.
What Makes the Reveal Look “Professional” (Not Just “Painted”)
Leveling + Smoothness
A pro-looking cabinet finish usually comes from (1) sanding between coats when needed, (2) thin coats, and (3) a paint
that levels well. If your first topcoat feels slightly gritty, don’t paniclightly sand once it’s ready, wipe clean,
and apply the next coat.
Hardware That Matches the Vibe
Upgrading hardware is like putting a blazer on your kitchen. Even inexpensive cabinets look custom with consistent,
well-placed pulls and hinges. If you’re switching from knobs to pulls, use a drilling template to keep everything lined
up (crooked hardware is the fastest way to ruin your own reveal photos).
Color That Plays Nice With Your Kitchen’s Fixed Elements
Cabinets don’t exist in a vacuum. Consider your countertop undertone, backsplash, flooring, and lighting temperature.
A soft warm white can make a kitchen feel larger and brighter, while a deep lower-cabinet color can ground the space and
hide scuffs better than pure white on high-touch base cabinets.
Common Cabinet Painting Mistakes (And How to Avoid Them)
- Skipping cleaning: Paint won’t bond to grease. Clean thoroughly and let it dry.
- Not labeling doors: Reassembly becomes a puzzle with missing pieces.
- Rushing recoat: Traps softness and leads to dents, drag marks, or peeling.
- Heavy coats: Cause runs and a “gummy” feel that takes longer to harden.
- Painting in a dusty area: Dust nibs love fresh paint like it’s their favorite hobby.
- Ignoring cure time: Even if it feels dry, it may not be fully hardened yet.
A Realistic Timeline for a DIY Painted Cabinet Makeover
Could you do it in a weekend? Technically, yes… the way you can technically run a marathon after watching one inspirational
video. A more realistic plan:
- Day 1: Remove doors/hardware, clean, dry, minor repairs.
- Day 2: Sand, dust removal, prime.
- Day 3: Sand primer lightly, first coat of paint.
- Day 4: Second coat (and maybe a third on high-wear areas or dark colors).
- Day 5+: Reassemble carefully, then baby the finish as it continues to harden.
Reveal Ideas: How to Style the “After” Without Buying a Whole New Kitchen
Want the makeover photos to look magazine-worthy? Try these small upgrades:
- Swap a dated faucet for a simple modern one.
- Add two open shelves (or just style the counters like you own fewer appliances).
- Replace one light fixture over the sink or island.
- Use matching jars/containers for pantry staples (it’s organization… but make it aesthetic).
- Introduce one warm wood element (stool, cutting board, tray) to soften painted cabinetry.
How to Care for Newly Painted Cabinets
For the first couple of weeks, treat your cabinets like a fresh manicure: functional, beautiful, and not ready for a
cage match. Avoid harsh scrubbing. Use gentle soap and water, and wipe spills quickly. Add bumpers if you haven’t
alreadyyour future paint job will stay prettier longer.
Extra: Real Experiences From the “Painted Cabinet Makeover” Trenches (What I’d Do Againand What I’d Never Do)
Let’s talk about the part most tutorials skip: the emotional roller coaster of painting kitchen cabinets. The internet
shows the reveal, not the moment you realize you labeled Door #7 but forgot where Door #7 lives. So here are the
lived-in lessons that make the difference between a makeover you brag about and a makeover you mention like a veteran
who has “seen things.”
First: cleaning takes longer than you think. Not because it’s complicated, but because kitchens are
basically grease museums. The cabinet area near the stove is always the worstthere’s invisible residue that feels like
it should pay rent. The biggest “aha” is that paint doesn’t fail dramatically at first; it fails later, when you bump a
door with a pot and the paint chips off like a sticker. That’s why the cleaning step feels boring but pays dividends.
Second: your sanding strategy matters more than your sanding speed. When I rushed sanding, the primer
didn’t lay as smoothly, and the finish looked slightly pebbled in certain light. When I slowed down and focused on
“dulling the sheen evenly” (not grinding to bare wood), the next sections looked noticeably more professional. Light,
consistent scuffing is the secret handshake of cabinet painting.
Third: thin coats are the whole game. The temptation is to load up the brush/roller and “get it done.”
But thick paint likes to pool in profile corners and around door details. Thin coats dry more evenly, level better, and
feel harder sooner. The best cabinets I’ve painted were the ones where I accepted that I was going to do two solid
coats (sometimes three) and stopped trying to win the project in one heroic pass.
Fourth: dust control is not a myth. I used to think “a little dust won’t matter.” Reader, the dust
mattered. Tiny specks show up as bumps in glossy light, especially on dark colors. A vacuum, a wipe-down, and a
no-sweeping rule in the paint zone made an immediate difference. Also: pets are adorable, but their hair has a
supernatural ability to teleport into wet paint. If you have pets, plan accordingly.
Fifth: the reveal isn’t just colorit’s the details. The moment everything looked “finished” wasn’t
when the paint dried; it was when the doors went back on straight, the hardware lined up perfectly, and bumpers were
installed so the cabinets closed gently. That’s when the kitchen crossed the line from “recently painted” to “freshly
updated.” If you want that wow factor, spend extra care on alignment and hardware placement.
Finally: give yourself grace on timing. The biggest regret is rushing reassembly because you’re tired
of living in a semi-chaos kitchen. It’s worth waiting. Even high-quality cabinet paint can feel dry but still be in the
process of hardening. If you slam doors, stack dishes aggressively, or scrub too soon, you can dent the finish and
create sticky spots that take longer to stop feeling tacky. The real flex is patienceannoying, yes, but powerful.
The best part? The reveal sticks. When you walk in and see a brighter, cleaner-looking kitchen that you didn’t have to
demolish to achieve, it’s wildly satisfying. Painted cabinets are one of those rare DIY projects that can deliver
maximum impact for the effortespecially when you treat prep and dry time like non-negotiable steps instead of
optional side quests.
Conclusion
A painted kitchen cabinet makeover is equal parts design upgrade and patience training. When you clean thoroughly, scuff
sand smartly, prime correctly, and respect dry/recoat time, you get a finish that looks smooth, feels durable, and
delivers a true “reveal” moment every time you walk into the kitchen. Choose a cabinet-friendly paint, keep coats thin,
and finish strong with aligned hardware and bumpersthen enjoy the best kind of renovation: the one that makes your
space feel new without starting a long-term relationship with a contractor.