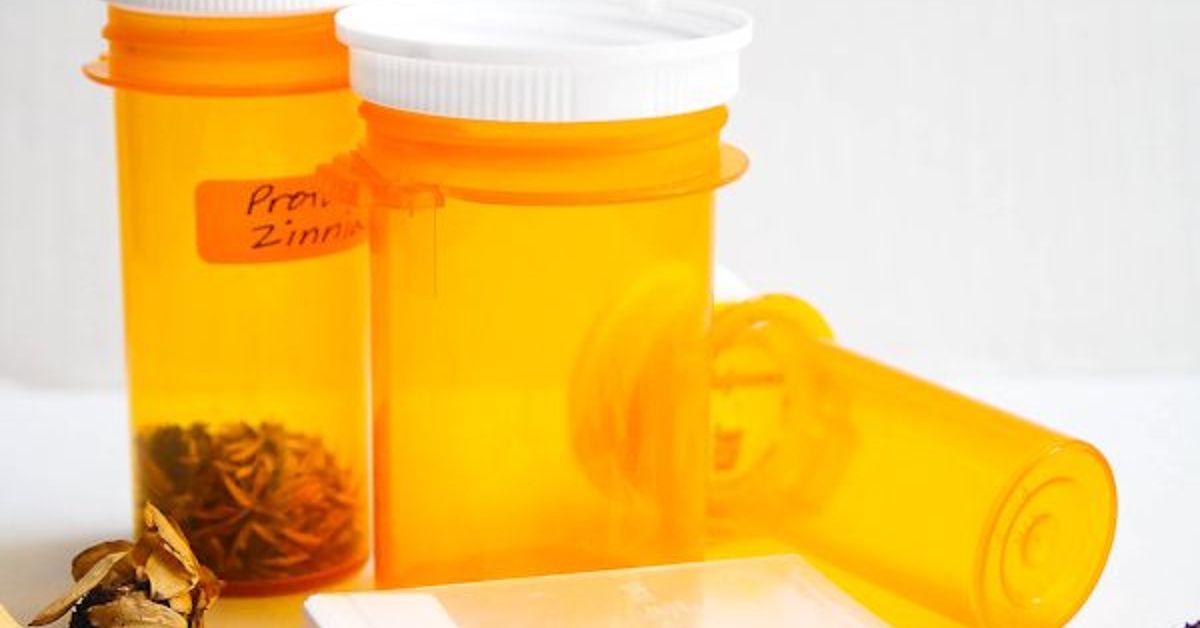
Empty prescription bottles have an odd talent for multiplying in bathroom cabinets. They are too sturdy to feel disposable, too small for most household leftovers, and apparently designed to make us say, “I might need this someday.” Fortunately, gardeners can give suitable bottles a practical second career as compact seed containers.
Prescription bottles are especially useful for organizing small quantities of flower, herb, and vegetable seeds. Their rigid walls resist crushing, their lids help limit humidity changes, and their amber-colored plastic reduces light exposure. They also stack neatly without spilling carrot seeds into the junk drawera gardening event commonly followed by several minutes of quiet reflection.
However, successful seed storage involves more than pouring seeds into the nearest empty container. The bottle must be appropriate, completely clean, thoroughly dry, clearly labeled, and stored under stable conditions. This guide explains how to make seed containers from prescription bottles safely while protecting seed viability.
Why Prescription Bottles Work for Seed Storage
Seeds may appear inactive, but they are living structures containing plant embryos and stored energy. Even during dormancy, environmental conditions influence how quickly they deteriorate. Heat and moisture are the two major enemies of long-term seed viability, while light and temperature fluctuations can add further stress.
A suitable prescription bottle offers several advantages:
- Rigid protection: The bottle shields delicate seeds from crushing, tearing, and curious insects.
- Compact organization: Small containers prevent a modest supply of basil seeds from disappearing inside an oversized jar.
- Reduced light exposure: Amber plastic helps keep seeds dark, although it does not make a sunny windowsill an acceptable storage location.
- Secure closure: A properly fitting cap reduces exposure to humid air.
- Easy labeling: The flat exterior provides room for the variety name, collection date, and planting notes.
- Low cost: Reusing a bottle already in the household costs practically nothing.
Prescription bottles are best for small and medium-sized seeds such as lettuce, tomato, pepper, basil, dill, marigold, zinnia, radish, and carrot. Large collections of beans, peas, corn, or squash seeds usually need bigger airtight containers.
Safety Comes Before Upcycling
Not every medicine container belongs in the garden cabinet. Use only a completely empty bottle that held ordinary dry tablets or capsules and that can be cleaned without leaving residue or odor. Containers from liquid medications, hazardous drugs, chemotherapy treatments, specialty compounds, or products with persistent residue should not be casually repurposed. Ask a pharmacist about proper disposal when there is any doubt.
Unused or expired medicine should never be dumped out merely to obtain the bottle. A drug take-back program is the preferred disposal option for most medicines. Follow the medication label and current federal or local disposal guidance. Never flush medication unless its official instructions specifically permit it.
Protect Personal Information
Remove the prescription label or make every piece of personal and medical information unreadable. Names, prescription numbers, pharmacy records, and medication details should not remain visible. Soaking the bottle in warm, soapy water often loosens a paper label. Adhesive residue can usually be rubbed away after the bottle dries.
Keep Seed Bottles Separate From Medicine
A seed-filled prescription bottle can still look like medicine, especially to a child or visitor. Cover the original label area with a large garden label and write SEEDSNOT MEDICINENOT FOR EATING prominently on the container.
Store the finished seed collection in a gardening box, refrigerator bin, or cabinet separate from all medicines and food. Keep it out of reach of children and pets. Child-resistant caps are useful, but they are not a substitute for responsible storage.
How to Prepare Prescription Bottles for Seeds
1. Inspect the Bottle and Cap
Choose a bottle without cracks, warping, punctures, sticky areas, or stubborn odors. Examine the cap and rim carefully. The lid should close evenly and firmly without spinning loosely. Prescription caps vary, and not every design creates a truly airtight seal, so reject questionable containers.
2. Wash the Container
Remove the cap and wash both pieces with warm water and ordinary dish soap. Clean the threads, corners, and underside of the lid. Rinse repeatedly until no soap, dust, adhesive, or visible residue remains.
A bottle that continues to smell like medicine after washing should not be used for seeds. Do not try to defeat a mystery residue with an enthusiastic chemistry experiment involving bleach, vinegar, and optimism. Choose another bottle.
3. Dry It Completely
Moisture trapped inside a closed bottle can encourage mold, premature sprouting, and rapid loss of viability. Shake out excess water and place the bottle and cap separately on a clean towel. Allow them to air-dry for several days in a low-humidity room.
Inspect the bottom, cap threads, and inner rim under bright light before use. If you see condensation or feel any dampness, continue drying. “Almost dry” is the seed-storage equivalent of “almost waterproof.” It rarely ends well.
4. Create a Durable Label
At minimum, record the plant name, variety, and harvest or purchase year. A more useful label includes:
- Common plant name
- Specific cultivar or variety
- Year collected or purchased
- Source of the seeds
- Flower color or fruit characteristics
- Whether the plant was open-pollinated, heirloom, or hybrid
- Special treatments such as cold stratification
Place a second paper label inside the bottle as a backup. Exterior ink can fade or rub off, while gardeners have been known to forget whether a tiny brown seed is kale, cabbage, or an ambitious speck of dirt.
Prepare Seeds Before Filling the Bottles
A clean bottle cannot rescue seeds that were stored while immature or damp. Seeds collected from the garden should reach full maturity before harvest. Dry seed heads, pods, and capsules generally need to become brown or papery. Seeds from fleshy fruits may require washing, fermentation, or another crop-specific cleaning method before drying.
Spread cleaned seeds in a single layer on an uncoated paper plate, screen, or coffee filter. Place them in a dry, shaded location with good air circulation. Avoid sealing them until they are thoroughly dry. Drying time varies with seed size, humidity, and the way the seed was harvested.
Do not bake seeds or place them in a hot oven. Excessive heat can damage the embryo while producing seeds that look perfectly normal. They may later respond to planting with the botanical equivalent of leaving your message on read.
Separate Seed Types Within the Bottle
Although one bottle can hold several paper packets, loose varieties should not be mixed. Store each variety in a small labeled paper envelope when possible, then place the envelope inside the bottle. Paper helps organize tiny seeds and makes them easier to pour during planting.
Mixing different cultivars saves space for approximately five minutes and creates confusion for an entire growing season.
Control Moisture Without Overcomplicating It
Low humidity is essential for conventional dry-seed storage. If the seeds and bottle are thoroughly dry, the closed container may be sufficient for ordinary home use. In humid climates, a small fresh silica-gel packet can provide additional protection.
Keep desiccant packets intact and separate from direct contact with seeds. Label the container so nobody mistakes the packet for fertilizer or a snack. Replace a packet if it becomes damaged or saturated. Avoid pouring loose desiccant material into the bottle.
Some extension recommendations describe using powdered milk or similar moisture absorbers inside larger storage jars. That method requires the material to be securely wrapped and separated from the seed. A compact silica packet is generally less messy in a prescription bottle. The goal is dry storage, not transforming the container into a tiny breakfast cereal.
Where to Store Your Seed Bottles
A Cool Interior Closet
For seeds that will be planted within the next season, a consistently cool, dark, and dry interior closet may be adequate. Avoid garages, sheds, attics, cars, and windowsills. Those locations experience large swings in temperature and humidity.
The Refrigerator
A refrigerator is often the most practical place for longer seed storage because it provides a cool, relatively stable environment. Group labeled bottles inside a larger sealed box or bag so they remain organized and protected from refrigerator humidity.
When removing a cold seed bottle, let the closed container reach room temperature before opening it. Opening it immediately can allow warm, moist air to condense on the cold seeds. That tiny weather system inside the bottle is exactly what careful storage was designed to prevent.
The Freezer
Freezing can extend the storage life of certain properly dried seeds, but it is less forgiving. Seeds must be sufficiently dry, the container must resist moisture exchange, and repeated thawing should be avoided. For most home gardeners saving seeds for one or two seasons, refrigeration is simpler.
Some species produce seeds that do not tolerate conventional drying or freezing. Research the requirements of unusual native plants, tropical species, nuts, and woody plants before applying general vegetable-seed storage rules.
Build an Organized Prescription-Bottle Seed Bank
A collection becomes much easier to use when bottles are arranged by category. Place them upright in a shallow box, drawer organizer, or divided craft case. Group vegetables, herbs, annual flowers, perennial flowers, and native plants separately.
Numbering the caps provides quick identification from above. Match each number to a simple paper or digital inventory containing planting depth, germination temperature, expected days to sprout, and the amount of seed remaining.
A first-in, first-out system is also helpful. Place older seeds at the front so they are planted before newer batches. Color-coded labels can identify seed age at a glancefor example, blue for the current year, green for the previous year, and orange for anything old enough to remember a different phone.
How Long Will Stored Seeds Last?
Seed longevity depends on species, initial quality, maturity, moisture level, and storage conditions. Even within the same bottle, two varieties may age differently.
Onion, parsnip, parsley, and some corn or pepper seeds are commonly considered relatively short-lived. Properly stored tomato, cucumber, melon, squash, cabbage-family, radish, and lettuce seeds may remain useful for several years. These estimates are guidelines rather than expiration dates.
A seed can germinate yet produce a weak seedling, so germination percentage does not tell the entire story. Nevertheless, a home germination test is an excellent practical check before planting.
Perform a Simple Germination Test
- Count 10 seeds from the bottle.
- Place them on a dampbut not drippingpaper towel.
- Fold the towel and place it in a reusable container or plastic bag.
- Label it and keep it at the recommended germination temperature.
- Check periodically for the normal germination period of that crop.
- Count the seeds that develop roots.
If eight of 10 seeds sprout, the approximate germination rate is 80 percent. Plant slightly more heavily than you would with fresh seed. If only a few germinate, replacement seed may save time and garden space.
Common Mistakes to Avoid
- Filling a damp bottle: Even a small amount of moisture can create mold.
- Storing freshly harvested seed too soon: Seeds often need additional drying after cleaning.
- Trusting the amber plastic in direct sunlight: Reduced light transmission does not prevent heat damage.
- Using an unidentified bottle: If its medication history is unknown, choose another container.
- Leaving the prescription label intact: This exposes private information and creates dangerous confusion.
- Mixing varieties: Similar-looking seeds can become impossible to separate.
- Keeping planting seed near food: Commercial seed may be treated and should never be mistaken for edible seed.
- Assuming every cap is airtight: Loose, damaged, or poorly seated lids provide unreliable protection.
- Opening cold containers immediately: Condensation may form on refrigerated seeds.
Are Prescription Bottles an Environmentally Friendly Choice?
Reusing an existing container can delay disposal and reduce the need to purchase another organizer. It also turns a durable object into something genuinely useful rather than moving it from one cluttered cabinet to another.
Still, reuse does not erase the bottle’s environmental footprint. Choose only as many containers as the seed collection requires. When a bottle becomes cracked or unusable, inspect its recycling symbol and check local recycling rules. Acceptance varies among communities and facilities.
Conclusion
Making seed containers from prescription bottles is an inexpensive way to protect and organize small seed collections. The project works best when safety and seed biology guide every step: dispose of medication properly, remove private information, choose an appropriate bottle, wash it carefully, dry it completely, and label it beyond all reasonable doubt.
Once filled, keep the bottles cool, dark, and dry. Refrigeration can extend storage life, provided cold containers are allowed to warm before opening. Test older seeds before planting and retire any bottle with a damaged cap, persistent odor, or uncertain history.
The result is a miniature seed library that fits in a drawer, costs almost nothing, and prevents next spring’s tomato crop from becoming an accidental cilantro convention.
Experiences and Lessons From Using Prescription Bottles for Seeds
The most noticeable benefit of prescription-bottle seed storage is not exotic science; it is the disappearance of small daily annoyances. Loose packets stop sliding behind shelves, folded envelopes no longer open unexpectedly, and tiny seeds remain protected when the garden box is moved. A bottle can be shaken, tipped, or dropped without releasing a cloud of lettuce seeds across the floor.
A common first attempt is to write only “tomato” on the cap. That label feels perfectly adequate in August, when the gardener remembers every plant personally. By February, “tomato” raises several questions. Was it the compact cherry variety, the striped heirloom, or the enormous slicer that required structural engineering? The practical lesson is to label containers for the person you will be six months latera person who remembers almost nothing.
Another lesson comes from drying. Seeds that feel dry on the surface may still contain excess moisture, particularly after removal from fleshy fruits. When enclosed too soon, they can develop a musty smell or cling together. Allowing extra drying time before filling the bottle is far easier than trying to rescue moldy seeds later. Patience may not be glamorous, but neither is opening a bottle of furry pepper seeds.
The small size of prescription bottles also changes how seeds are handled. Instead of saving every seed simply because it exists, gardeners tend to keep a reasonable quantity and share the surplus. A single bottle may hold enough tomato or basil seed for several seasons. Saving thousands of seeds for a six-plant backyard plot mostly creates an unusually specific inheritance.
Organizing bottles upright in a shallow box is more effective than piling them in a bag. Labels on the caps remain visible, and older seed can be placed in the front row. Some gardeners assign a colored sticker to each collection year. This simple system makes spring inventory faster and highlights older batches that need a germination test.
Refrigerated storage introduces one habit that becomes important very quickly: waiting before opening. Bringing the entire closed bottle to room temperature helps prevent condensation. A small “WARM BEFORE OPENING” label on the storage box can save seeds from an impatient February planting session.
Germination tests often produce useful surprises. An older bottle of cucumber seed may perform beautifully, while a newer batch of onion seed may germinate poorly. These results demonstrate why age alone cannot predict success. Seed quality and storage conditions matter, and testing ten seeds costs far less than discovering an empty garden row several weeks later.
The system also reveals its limits. Large bean and squash seeds quickly overwhelm small bottles. Child-resistant caps can be inconvenient for anyone with limited hand strength, while snap caps may be easier to open but less secure. Matching the container to both the seed and the gardener is more important than forcing every variety into the same clever project.
Ultimately, prescription-bottle seed storage works because it is simple enough to maintain. It combines sturdy containers, detailed labels, and sensible environmental control without requiring specialized equipment. The bottles do not transform ordinary seeds into immortal botanical treasures, but they do keep a modest collection dry, orderly, and ready for the next growing seasonand that is a very respectable second career for something that once lived beside the toothpaste.